NSA SFDC-4057RC User manual

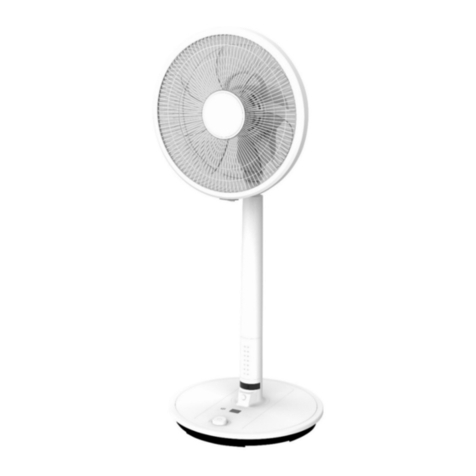
16in / 40cm Eco Pedestal Fan
with 30W DC motor, Illuminated IMC
dis lay & Remote Control
Model: SFDC-4057RC
Instruction manual
5 fan blades
Illuminated IMC Touch dis lay
Remote Control w. 3V battery (CR2032)
24 S eeds
Horizontal Oscillation
0.5 to 15hr Timer (Off)
0.5 to 15hr Pre-set Timer (On)
3 Modes w. 5 s eeds
Height Adjustable Stand
Carry Handle
Please keep safe for future reference
Parts Description
16. Control Panel
1. Front Grille
2. Blade Ca
3. Fan Blade
4. Cli Screw
5. Locking Cli
6. Guard Ring
7. Clam ing Nut
8. Rear Grille
9. Front Motor Cover
10. Motor Shaft
11. Neck
12. Carry Handle
13. Rear Motor Cover
14. Pillar
15. Adjustable Inner Pi e
16. Control Panel
17. Pedestal Front Panel
18. Butterfly Screw for
height adjustment
19. Pedestal Rear Panel
20. Base Plate
21. Remote Control
21
21. Remote Control
2

Introduction
Thank you for urchasing this Electronic DC Pedestal Fan with illuminated IMD (injection
moulded dis lay) Touch Dis lay & Remote Control SFDC-4057RC. This elegant, height
adjustable edestal fan is ideal for any location ~ home or office. Combining design, quality
and erformance with significantly reduced running costs*.
The equi ment bears the CE mark indicating its conformity with the rovision of EC regulations.
Safety Instructions
Please read this instruction manual before using your Electronic DC Pedestal Fan for the first
time and kee safe for future reference.
CAUTION:
Use the fan only as described in this manual.
1. Check the household voltage to ensure it
matches the fan’s rated s ecification
before using.
2. Always use this devise in accordance
with the instructions.
3. Close su ervision is necessary when this
fan is used near children and ets.
4. Do not allow children to lay with the
roduct or roduct ackaging, such as
lastic bags.
5. Re airs may only be carried out by an
authorized re air centre, incorrect
handling and faulty re airs may lead to
danger and invalidate warranty.
6. This fan is not intended for use in wet or
dam locations.
7. Never osition the fan in an area where
it may fall into a bath or other water
container.
8. Do not use this fan if it has any damaged
arts, or it has fallen into water. Return
the roduct to a service centre for
examination and re air.
9. Do not insert any object into the grille
whilst the fan is o erating. It may cause
damage to ersons or ro erty.
10. Always un lug the roduct before
moving, storing, cleaning and after use.
11. Always use both hands to carry this
roduct. Do not lift by the carry handle
alone – lease su ort the fan base.
12. This fan is intended for indoor, domestic&
light commercial use only and is not to
be o erated outside.
13. Do not o erate the fan near an o en
flame, cooking or heating a liance or
hot surface.
14. Always use your fan on a firm, dry, level
surface.
15. Disconnect the unit from the electrical
outlet before cleaning.
16. To disconnect from the ower su ly,
gri the lug and ull from the ower
socket. Never ull by the cord.
17. Arrange the ower cord away from an
area where it may be tri ed over.
18. Never lace the ower cord under a
car et or rug.
19. Do not o erate if the fan grille is
removed or damaged.
20. This a liance is not intended for use by
ersons (including children) with
reduced hysical, sensory or mental
ca abilities, or lack of ex erience and
knowledge, unless they have been given
su ervision or instruction concerning use
of the a liance by a erson res onsible
for their safety. Children should be
su ervised to ensure that they do not
lay with the a liance.
21. Kee the remote control in a safe lace
when not in use.
___________
* when com ared to traditional 16”/40cm edestal fan with AC motor.
Assembly Met od
• Please assemble correctly according to the following sequence. Refer to arts descri tion on age 2.
• Please kee the original ackaging for future storage.
FIG 1
1.
Assemble Base Plate
a. Loosen and remove screws from edestal.
b. Insert the edestal into the base late.
c. Secure the edestal onto the base late with the
screws rovided. Tighten with a Phili s screwdriver.
FIG 2
2.
Assemble rear grille
a. Remove the blade ca by turning clockwise and the
clam ing nut by turning anticlockwise.
b. Install the rear grille by ositioning onto the three ins
on the front motor cover.
c. Lock and secure with the clam ing nut by turning
clockwise.
FIG 3
3.
Assemble fan blade
a. Insert the fan blade onto the motor shaft.
b. Fit the blade ca by turning anticlockwise onto the
motor shaft and fix it lightly, as illustrated.
c. Make sure the fan blade moves freely and does not
catch on the rear grille.
FIG 4
4.
Assemble front grille
a. Align the front and rear guard correctly.
b. Position the to cli on the front grille with the to art
of the rear grille. (see inset image)
c. O en the locking cli at the bottom of the guard ring
and loosen the cli screw.
d. Press the cli under the front grille, close the locking
cli and tighten the cli screw.
FIG 5
5.
How to remove t e front grille (for cleaning)
Reverse instructions on #4 above:
a. First loosen the cli screw and o en locking cli .
b. Twist & se arate the front grille from the guard ring,
then ull downwards to remove it.
c. Lift away the front grill from to cli mentioned in 4b
above.
3 4

Operating Instructions
Tilt adjustment:
Gently tilt the fan head u or down
to the desired angle. NB Only adjust
tilt when the fan is turned off
Heig t adjustment:
Loosen the butterfly screw, adjust the
inner i e to the desired height and
re-tighten butterfly screw
The fan can be o erated either manually by the control anel on the fan unit itself or by the remote control
su lied with the roduct.
ON/OFF
ON/OFF: Once the unit is connected to the ower su ly ress the key to turn on the
fan on either the main control anel or by the remote control.
To switch off the unit ress the OFF key to sto the fan from running.
NB: When the fan is turned on for the first time the s eed will be set at 12. On subsequent
uses the fan will remember the last s eed & mode setting selected.
SPEED: This button controls the s eed setting of the fan from 1 to 24.
Press the SPEED button and then
“⊕”
to increase or
“Θ”
to decrease the s eed setting
until the desired s eed is reached. The blue SPEED icon will flash during this rocess.
NB: Maximum cost & energy savings on lower settings – over 75% savings on medium setting.
To use PRESET timer for delayed start – the unit must be OFF.
Using the buttons on the main control anel or the remote control - ress PRESET/TIMER
“⊕”
to increase or PRESENT/TIMER
“Θ”
to decrease in 0.5hr increments u to 3hrs, then
one hour increments u to 15hr delayed start – dis layed in red at the to of the main
anel
The fan will start when the desired time is reached.
It is also ossible to set desired fan s eed or mode settings while the fan is off.
TIMER: With the fan owered ON, ress the PRESET/TIMER
“⊕”
button on the remote
control or main control anel to increase or PRESET/TIMER or
“Θ”
to decrease to set the
timer to the required length of o eration between 0.5hr and 15hrs.
The fan will o erate and automatically turn off at the selected time.
Use in conjunction with the fan modes – see age 6.
OSC: Press OSC on the remote control or main control anel to select oscillation function
– horizontal swing.
Press the OSC key a second time to sto oscillation function.
Operating Instructions (continued)
MODE: This is the air selection button. Press the button once to o erate the natural breeze
mode. Press again to o erate the slee mode; Press for a third time to o erate auto/AI
(artificial intelligence) mode. Press for a fourth time to turn-off the wind mode function and
return to normal s eed settings.
NATURAL BREEZE MODE: This mode has u to five ty es of air cycles from 1 (soft breeze) to
5 (strong breeze). This simulates natural wind cycles or rhythms and varies according to
the set fan s eed.
Press mode button once, then using the remote control or manual control anel ress
the
“⊕”
to increase or
“Θ”
button
to decrease the breeze strength between 1 and 5.
The blue “Mountain” icon will light on the control anel to indicate Natural Breeze Mode
selected. The selected s eed will be dis layed in red at the to of the control anel .
SLEEP MODE: This mode has five ty es of air cycles from 1 (soft breeze) to 5 (strong breeze).
This simulates natural wind cycles or rhythms and varies according to the set level.
1. At the lowest setting 1, soft wind will o erate at first then the fan will sto and then
return to soft wind; this cycle will continue indefinitely until manually owered off or the
timer duration is reached.
2. At the medium setting 3, medium wind will o erate at first then will ste down to s eed
2, then to soft wind 1, then to a halt. It will return to medium wind and this cycle will
continue indefinitely until manually owered off or the timer duration is reached.
3. At the highest setting 5, a strong breeze will o erate at first then will ste down through
each s eed setting to soft breeze, to halt and will return to strong breeze. This cycle will
carry on continuously until manually owered off or until the timer switches off the fan.
AI (Auto Intelligence) Mode: This setting allows the fan to o erate at the most economical
setting according to the ambient room tem erature using faster s eeds when the
tem erature is high and slower s eeds when the tem erature is cooler.
If AI mode is selected, the unit will turn off automatically when the tem erature goes
below 15ºC. It will also turn on when the ambient room tem erature reaches 15ºC.
The red dis lay shows “AI” & the blue AI icon will be lit.
5 6

Maintenance & Storage
Before cleaning or carrying out routine maintenance on your fan please always ensure t e
product is removed from t e power supply.
♦Clean the fan body and fan blade to avoid colour change or damage.
♦For details on how to remove the front grille for cleaning ur oses see Fig 5 on Page 4.
♦Do not let water get into the motor housing during cleaning.
♦Use a soft dam cloth to clean the fan blade, grilles, edestal and base, dry them com letely before
re-assembly or storage.
Storage
~ after cleaning your fan, lease follow the guidelines below to store your roduct.
♦A ly a few dro s of lubricant on motor shaft to revent corrosion.
♦Store the fan in a dry lace.
♦Wherever ossible we suggest you kee the original ackaging to use for storing the fan.
Accessory: Remote Control
♦Be sure to direct the remote control toward the receiver on the control anel.
♦Use the remote control within 5 metres from the receiver. If the remote control is
not directed towards the receiver; the effectiveness will be reduced.
♦Do not lace any obstacle between the receiver and remote control.
♦Please treat your remote control with care. Knocking or dro ing will reduce its
reliability.
♦
Please store the remote control safety when not in use.
NB. This remote control contains a button battery. If swallowed, it could cause
severe injury or death in just 2 hours. Seek medical attention immediately.
Replacing t e Remote Control Battery
~ 1 c x Lithium 3V (CR2032)
O en the cover of battery
com artment ~ squeeze lock
towards centre to release
Install the battery into the battery
com artment. Take care of the olarity
of the battery, which is indicated inside
the battery com artment.
Close the battery cover.
NB Please dis ose of used batteries
res onsibly.
Troubles ooting
If any problems occur during use, please c eck t e following:
Problem / Solutions
The fan blade does not run when the ower is on:
♦Check if the ower lead is correctly lugged into the mains socket and the ower is on.
♦Check the fuse.
♦Check if the fan grille is deformed or touching the back grille.
♦Check if you have selected PreSet Timer (eg: Countdown timer / delayed start) by mistake.
There is an abnormal sound when starting u :
♦Check if the fan blade is inserted correctly onto the motor shaft and the back of the fan blade is
com letely aligned with the rotor in.
♦Check if there are fine burn marks around the fan blade.
♦Check if the fan grilles are deformed or touching the blade.
Cleaning & Care
♦Un lug the a liance before cleaning.
♦Do not use any chemical-based solutions for cleaning fan surfaces.
♦Slightly moisten a cloth and then wi e off the surfaces of the fan.
♦In order to remove the dust from the rotective fan grille use a vacuum cleaner
u holstery attachment.
♦Ensure fan is com letely dry before storage or reconnecting to electrical su ly.
♦Never immerse the fan or fan motor in water or other liquid.
♦If the fan is not used for long eriods, rotect with a suitable cover after cleaning, then
store in a dry lace.
This a liance com lies with both the low voltage and electromagnetic com atibility
directives. Its construction com lies with current safety standards. We reserve the right to
make technical changes without rior notice.
Recycling & Disposal
The ackaging of your new fan has a recycle mark on it. Please dis ose
of it as recycled a er or by using the “Dual System”.
The symbol on the roduct or on its ackaging indicates that this roduct may not
be treated as general household waste. Instead it should be handed over to the
a licable collection oint for the recycling of electrical and electronic equi ment. By
ensuring this roduct is dis osed of correctly, you will hel revent otential negative
consequences for the environment and human health, which could otherwise be caused
by ina ro riate waste handling of this roduct. For more detailed information about the
recycling of this roduct, lease contact your local council office, your household waste
dis osal service or the store where you urchased the roduct.
UK Guarantee
12 months warranty valid only in res ect of defects found to be due to faulty workmanshi
or material. Proof of urchase is required to validate the guarantee. This guarantee is
invalidated if the damage has been caused by fall, alteration or re air by any unauthorised
ersons or if the roduct has been resold.
This guarantee in no way affects your statutory rights.
Tec nical Data
Model No: SFDC-4057RC (DC fan)
Voltage: 220-240V ~ 50Hz
Power: 30W
Ref: IM/SFDC4057/1701/GU86AA
Dimensions: 1190 - 1330 (H) x 455 (W) x 445 (D) mm
Weight: N.W. 6.9kg
G.W. 9.5kg
Class 1 Product
7 8
© 2017 Newton Stovold Assocs Ltd
GU8 6AA / www.nsauk.com
Table of contents
Other NSA Fan manuals
Popular Fan manuals by other brands

GE
GE BF120, BF150, BF150A user guide

emerio
emerio FN-114204.2 instruction manual

Hitecsa
Hitecsa FCW Series Installation, operation and maintenance manual

Casablanca
Casablanca M8503-01 user manual

Monte Carlo Fan Company
Monte Carlo Fan Company 5HVDC52D Series Owner's guide and installation manual

Fiamma
Fiamma KIT TURBO-VENT F Installation and usage instructions