Swing the search coil slowly,
overlapping each sweep as you move
forward. It is important to sweep the
coil at a consistent speed over the
ground as you search. After identifying
a target, your sweep technique can
help in identifying both the location
and the nature of the target. If you
encounter a weak signal, try moving
the coil in short, rapid sweeps over the
target zone; such a short rapid sweep
may provide a more consistent target
identification.
Most worthwhile objects will respond
with a repeatable tone. If the signal
does not repeat after sweeping the
coil directly over the suspected target
a few times, it is more than likely trash
metal.
Crossing the target zone with multiple
intersecting sweeps at multiple
angles is another way to verify the
repeatability of the signal, and the
potential of the buried target. To use
this method, walk around the target
area in a circle, sweeping the coil
across the target repeatedly, every 30
to 40 degrees of the circle, about ten
different angles as you walk completely
around the target. If a high-tone target
completely disappears from detection
at a given angle, chances are that you
are detecting oxidized ferrous metals,
rather than a silver or copper object.
If the tone changes a different angles,
6 15
QUICK-START DEMONSTRATION
I. Supplies Needed
• A Nail • A Quarter
• A Pull-Tab from a beverage can • A Zinc Penny (dated after 1982)
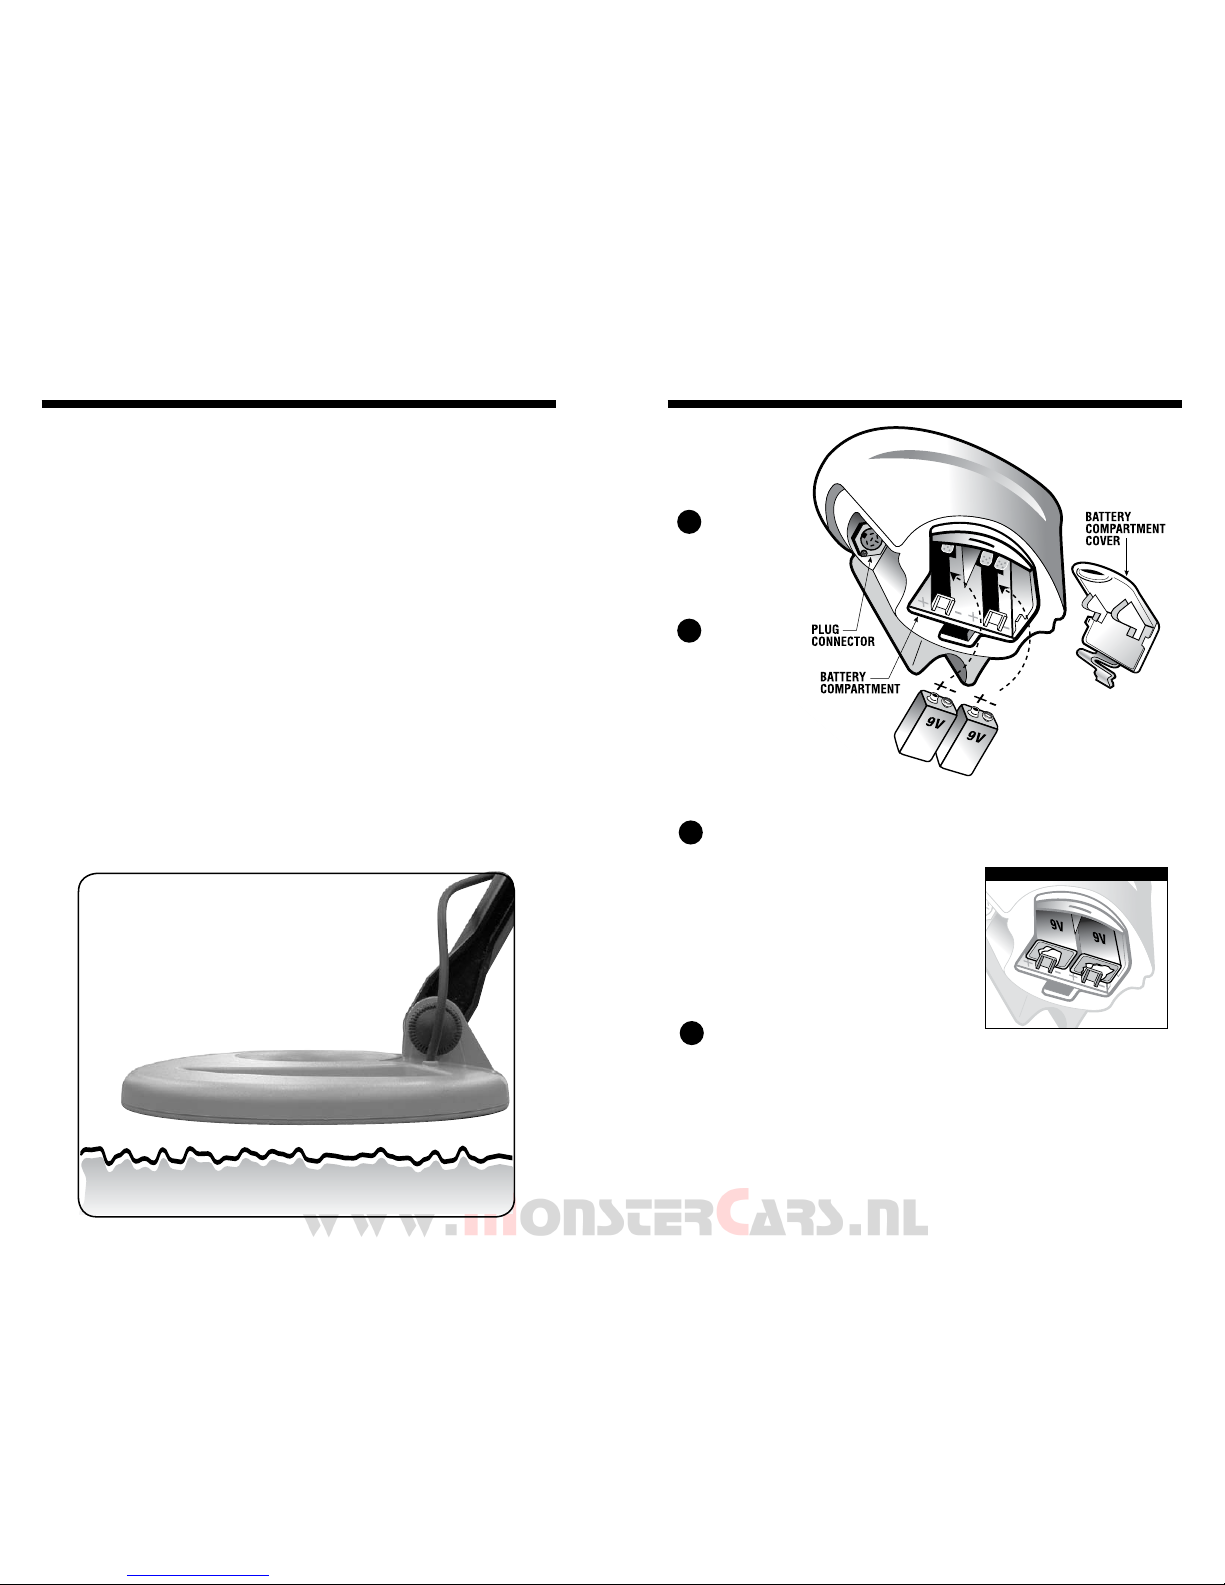
II. Position the Detector
a. Place the detector on a
table, with the search coil
hanging over the edge. (or
better, have a friend hold
the detector, with the coil
off the ground)
b. Keep the search coil away
from walls, floors, and
metal objects.
c. Remove watches, rings and other jewelry or metal objects from hands
and wrists.
d. Turn off appliances or lights that cause electromagnetic interference.
e. Pivot search coil back toward the detector body.
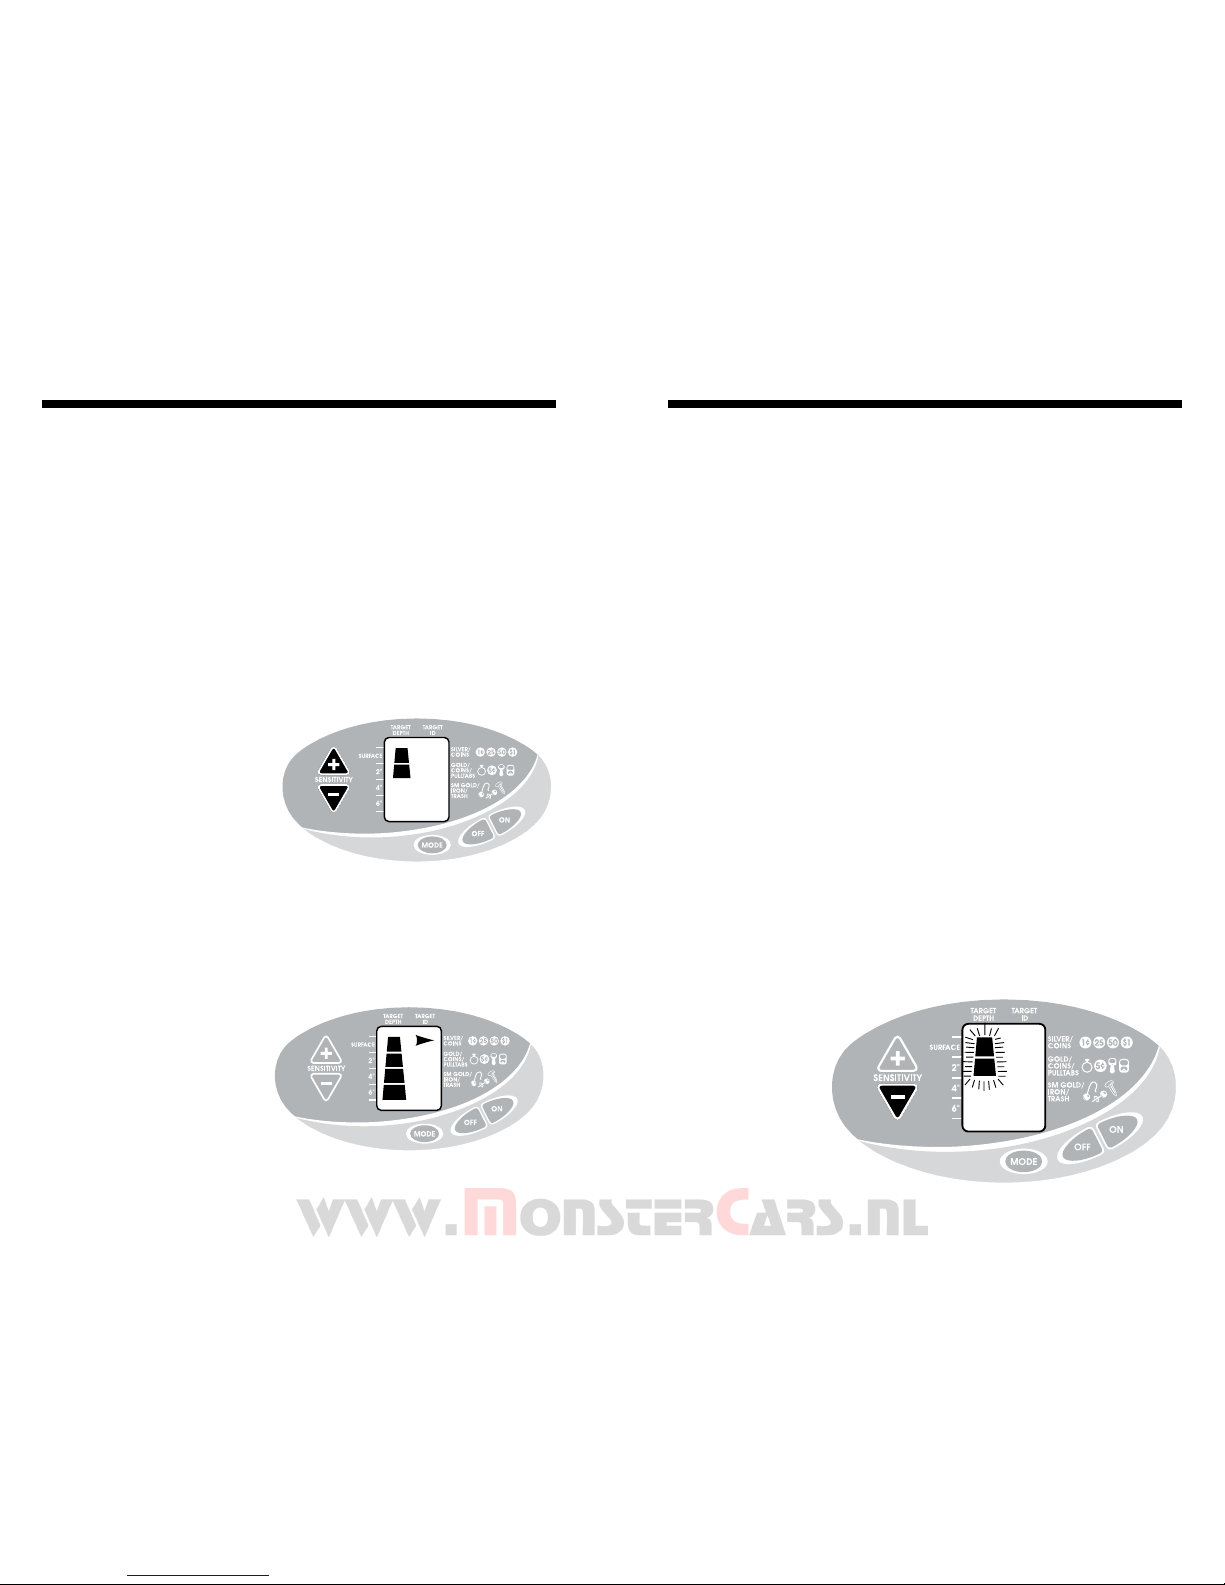
III. Power Up
Press the ON touch pad.
The detector will beep twice and
the full sensitivity setting will be
indicated on the left of the display.
IV. Wave each Object over the Search Coil
a. Notice a different tone for each object.
Low Tone: Nail
Medium Tone: Pull-tab & Zinc Penny
High Tone: Quarter
b. Motion is required. Objects must be in motion over the search coil to
be detected.
V. Press the MODE touch pad
The detector will beep and the
sensitivity setting will flash on
the left side of the display.
Quick-Start Demo continued on next page
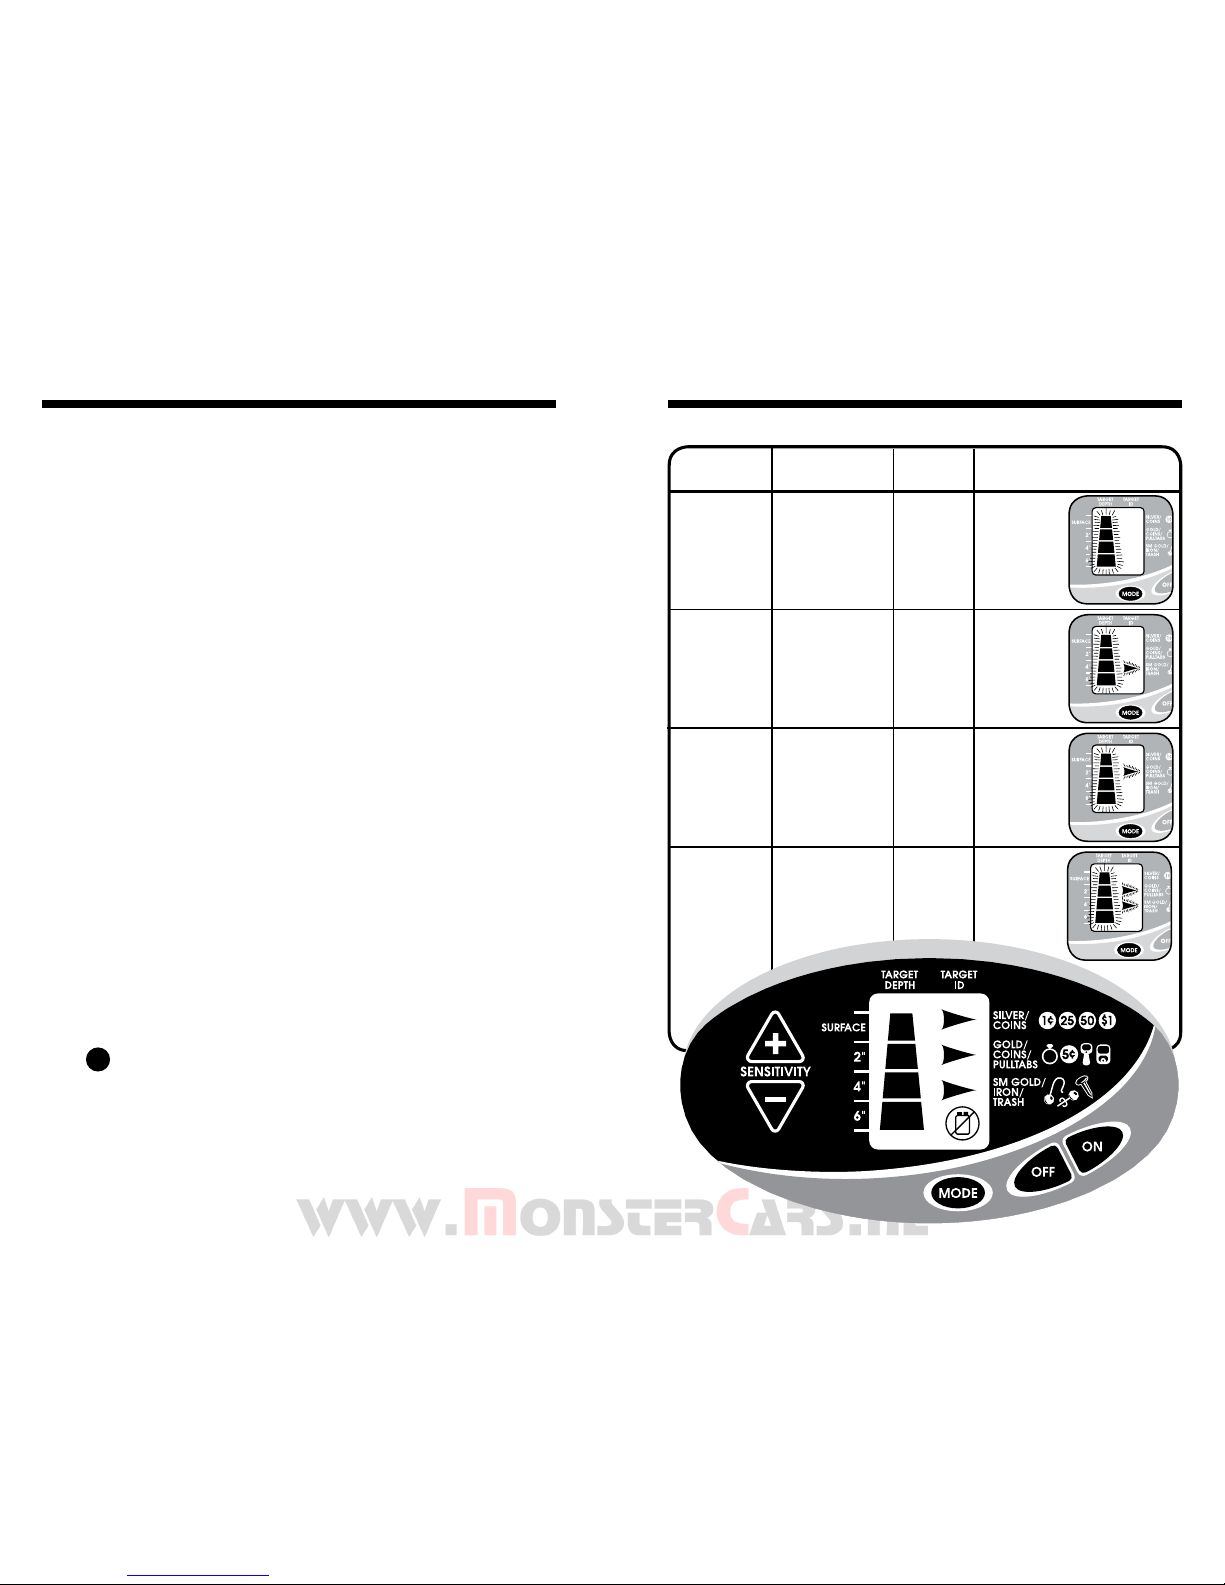
IN THE FIELD TECHNIQUES (continued)
WHAT
READS
LIKE THIS
…MAY
ACTUALLY
BE THIS