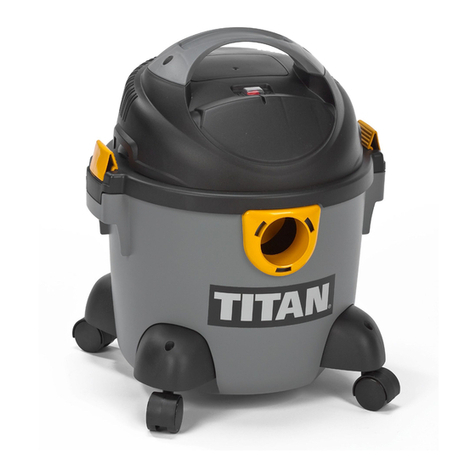
Titan T8000 User manual

User's Manual
DELUXE CANISTER VACUUM
TITAN T8000

-2-
SECTION
Before Using Your New Vacuum Cleaner...............................................................................................
.
2
TITAN Vacuum Cleaner Warranty.............................................................................................................3
Important Safety Instructions.
.............................................................................................................4-5
Parts and Features...............................................................................................................................6-9
Assembly Instructions.........................................................................................................................9-11
Operating Instructions.......................................................................................................................12-21
Performance Features......................................................................................................................22-23
Removing Clogs................................................................................................................................24-32
Motorized Nozzle Care.....................................................................................................................33-44
Troubleshootig..................................................................................................................................45-47
Please read this guide. It will help you assemble and operate your new TITAN vacuum
cleaner in the safest and most effective way.
You will need to register your vacuum by calling us at (844) 202-9924 or visiting us online at
TitanVacs.com. Please have your model number and serial number available to complete
the registration process.
Your vacuum cleaner’s model and serial numbers are located on the label.
Use the space below to record the model number and serial number of your new TITAN
Vacuum cleaner.
Model No.
Serial No.
Date of Purchase
Keep this book and your sales check (receipt) in a safe place for future reference.
BEFORE USING YOUR NEW VACUUM CLEANER
TABLE OF CONTENTS
PAGE

-3-
TITAN VACUUM CLEANER WARRANTY
TITAN LIMITED WARRANTY
FOR ONE YEAR from the date of sale this appliance is warranted against defects in
material or workmanship when it is correctly installed, operated and maintained according
to all supplied instructions.
WITH PROOF OF SALE, a defective appliance will receive free repair or replacement at
option of seller.
This warranty applies for only 90 DAYS from the sale date if this appliance is ever used for
other than private household purposes.
This warranty covers ONLY defects in material and workmanship, and will NOT pay for:
([SHQGDEOHLWHPVWKDWFDQZHDURXWIURPQRUPDOXVHLQFOXGLQJEXWQRWOLPLWHGWR¿OWHUV
and belts.
2. A service technician to clean or maintain this appliance, or to instruct the user in correct
appliance installation, operation and maintenance.
3. Service calls to correct appliance installation not performed by Titan Vacuums authorized
service agents, or to repair problems with house fuses, circuit breakers, house wiring,
and plumbing or gas supply systems resulting from such installation.
4. Damage to or failure of this appliance resulting from installation not performed by Titan
Vacuums authorized service agents, including installation that was not in accordance
with electrical, gas or plumbing codes.
5. Damage to or failure of this appliance, including discoloration or surface rust, if it is not
correctly operated and maintained according to all supplied instructions.
6. Damage to or failure of this appliance, including discoloration or surface rust, resulting
from accident, alteration, abuse, misuse or use for other than its intended purpose.
7. Damage to or failure of this appliance, including discoloration or surface rust, caused by
the use of detergents, cleaners, chemicals or utensils other than those recommended in
all instructions supplied with the product.
'DPDJHWRRUIDLOXUHRISDUWVRUV\VWHPVUHVXOWLQJIURPXQDXWKRUL]HGPRGL¿FDWLRQVPDGH
to this appliance.
9. Service to an appliance if the model and serial plate is missing, altered, or cannot easily
EHGHWHUPLQHGWRKDYHWKHDSSURSULDWHFHUWL¿FDWLRQORJR
Disclaimer of implied warranties; limitation of remedies
Customer’s sole and exclusive remedy under this limited warranty shall be product repair or
replacement as provided herein. Implied warranties, including warranties of merchantability
RU¿WQHVVIRUDSDUWLFXODUSXUSRVHDUHOLPLWHGWRRQH\HDURUWKHVKRUWHVWSHULRGDOORZHGE\
law. Seller shall not be liable for incidental or consequential damages. Some states and
provinces do not allow the exclusion or limitation of incidental or consequential damages,
RUOLPLWDWLRQRQWKHGXUDWLRQRILPSOLHGZDUUDQWLHVRIPHUFKDQWDELOLW\RU¿WQHVVVRWKHVH
exclusions or limitations may not apply to you.
This warranty applies only while this appliance is used in the United States.
7KLVZDUUDQW\JLYHV\RXVSHFL¿FOHJDOULJKWVDQG\RXPD\DOVRKDYHRWKHUULJKWVZKLFKYDU\
from state to state.

-4-
IMPORTANT SAFETY INSTRUCTIONS
Read all instructions in this guide before assembling or using your vacuum cleaner.
<RXUVDIHW\LVLPSRUWDQWWRXV7RUHGXFHWKHULVNRI¿UHHOHFWULFDOVKRFNLQMXU\WRSHUVRQV
or damage when using your vacuum cleaner, follow basic safety precautions including the
following:
1. Use your vacuum cleaner only as described in this guide. Use only with Titan Vacuums
recommended attachments.
2. Disconnect electrical supply before servicing or cleaning out the brush area. Failure to
do so could result in the electrical shock or brush suddenly starting.
3. Do not leave vacuum cleaner when plugged in. Unplug from outlet when not in use and
before performing servicing.
4. To reduce the risk of electrical shock - Do not use outdoors or on wet surfaces.
5. Do not allow to be used as a toy. Close attention is necessary when used by or near
children.
6. Do not use with a damaged cord or plug. If vacuum cleaner is not working as it should,
has been dropped, damaged, left outdoors, or dropped in water, return it to a Titan
Vacuums Service Center.
7. Do not pull or carry by cord, use cord as a handle, close a door on cord, or pull cord
around sharp edges or corners. Do not run vacuum cleaner over cord. Keep cord away
from heated surfaces.
8. Do not unplug by pulling on cord. To unplug, grasp the plug, not the cord.
9. Do not handle plug or vacuum cleaner with wet hands.
'RQRWSXWDQ\REMHFWVLQWRRSHQLQJV
11. Do not use with any opening blocked; keep free of dust, lint, hair, and anything that may
UHGXFHDLUÀRZ
.HHSKDLUORRVHFORWKLQJ¿QJHUVDQGDOOSDUWVRIERG\DZD\IURPRSHQLQJVDQGPRYLQJ
parts.
13. Turn off all controls before unplugging.
14. Use extra care when cleaning on stairs.
'RQRWSXWRQFKDLUVWDEOHVHWF.HHSRQÀRRU
'RQRWXVHYDFXXPFOHDQHUWRSLFNXSÀDPPDEOHRUFRPEXVWLEOHOLTXLGVJDVROLQHFOHDQLQJ
ÀXLGSHUIXPHVHWFRUXVHLQDUHDVZKHUHWKH\PD\EHSUHVHQW7KHIXPHVIURPWKHVH
VXEVWDQFHVFDQFUHDWHD¿UHKD]DUGRUH[SORVLRQ
17. Do not pick up anything that is burning or smoking, such as cigarettes, matches, or hot
ashes.
'RQRWXVHYDFXXPFOHDQHUZLWKRXWGXVWFXSDQGRU¿OWHUVLQSODFH
$OZD\VFOHDQWKHGXVWFXSDIWHUYDFXXPLQJFDUSHWFOHDQHUVRUIUHVKHQHUSRZGHUVDQG¿QH
GXVW7KHVHSURGXFWVFORJWKH¿OWHUVUHGXFHDLUÀRZDQGFDQFDXVHGDPDJHWRWKHYDFXXP
cleaner. Failure to clean the dust cup could cause permanent damage to the vacuum
cleaner.

-5-
'RQRWXVHWKHYDFXXPFOHDQHUWRSLFNXSVKDUSKDUGREMHFWVVPDOOWR\VSLQVSDSHUFOLSV
etc. They may damage the vacuum cleaner.
'RQRWRSHUDWHWKHYDFXXPFOHDQHUZLWKRXWWKHH[KDXVW¿OWHURU¿OWHUGRRULQSODFH7KH
hose contains electrical wires. Do not use when damaged, cut, or punctured. Replace if cut
RUZRUQ'RQRWSLFNXSVKDUSREMHFWV
22. Always turn off and unplug before connecting or disconnecting either hose, wand, pet
pickup tool, or motorized nozzle.
23. Hold plug when rewinding onto cord reel. Do not allow plug to whip when rewinding.
24. You are responsible for making sure that your vacuum cleaner is not used by anyone
unable to operate it properly.
Proper assembly and safe use of your vacuum cleaner is your responsibility. Your vacuum
cleaner is intended for Household use. Read this Use & Care Guide carefully for important
use and safety information. This guide contains safety statements under warning and
caution symbols.

-6-
It is important to know your vacuum cleaner’s parts and features to ensure its proper and
safe use. Review these before using your vacuum cleaner.
Upper Wand
Lower Wand
Motorized Nozzle
PARTS AND FEATURES
Handle & Hose
Assembly
Canister

-7-
REPLACEMENT PARTS
MOTORIZED NOZZLE & WANDS
Item Part No.
Belt 591019102
Wood Agitator 591019104
Exhaust Filter 591002114
Primary Filter 561014107
Upper
Wand Lower
Tool Release
Wand
+HLJKW$GMXVWPHQW
Indicator
Wand Quick
Release
Pedal
Headlight
and Lens
Brushroll
Status
Indicator
Edge Cleaner (Not
Shown)
Furniture
Guard
+HLJKW$GMXVWPHQW
Pedal
Handle
Release
Pedal
Wood
Agitator Belt

-8-
HANDLE & HOSE ASSEMBLY
CANISTER
3-Way On/Off Switch
Off/Floor/Carpet
Electronic
Suction Control
Wand
Release
Brush
Tool
(pre-installed)
Hose Swivel
Carry Handle
Cord Rewind
Button
Hose Port
Primary Filter
(Inside)
Dust Cup
Crevice Tool
Dusting Brush
Handle
Hose
Power Cord
Exhaust Filter Tray
HEPA Media
Exhaust Filter
(Inside)

-9-
Install the lower wand onto the motorized nozzle until the wand locks into place.
To remove: Press the wand quick release pedal and pull up on the wand.
Align the hose latch tab and the notch in canister hood and insert the hose into canister
until it snaps into place.
Please pay special attention to these hazard alert boxes, and follow any
LQVWUXFWLRQVJLYHQ:$51,1*VWDWHPHQWVDOHUW\RXWRVXFKGDQJHUVDV¿UH
HOHFWULFVKRFNEXUQVDQGSHUVRQDOLQMXU\&$87,21VWDWHPHQWVDOHUW\RXWR
VXFKGDQJHUVDVSHUVRQDOLQMXU\DQGRUSURSHUW\GDPDJH
Electrical Shock Hazard
DO NOT plug into electrical supply until assembly is complete. Failure to do so could
UHVXOWLQHOHFWULFDOVKRFNRULQMXU\
WARNING
MOTORIZED NOZZLE
HOSE
ASSEMBLY INSTRUCTIONS
Wand Quick
Release Pedal
Hose Latch Tab
Notch

-10-
1. Insert the upper wand into the lower wand until the lock button snaps in place.
To remove: Press the lock button and pull wands apart.
2. Insert the plug of the cord into the plug holder as shown. DO NOT force. Raised area of
the plug must be towards hand.
3. Secure the cord into the cord holder on the back of the wand.
To remove: Press the hose latch tab inward and pull out on the hose.
WANDS
Lock
Button
Lower
Wand
Cord
Holder
Upper
Wand
Raised
Area
1
2
Hose Latch Tab

-11-
Insert the wand into the handle until the wand locks into place. Make sure the hose is not
twisted.
To remove: Press the wand release button and pull up on the handle.
The dusting brush can be stored on the hose handle by placing on hose handle before the
upper wand.
To store: Disconnect the handle from the wand and canister to prevent stress on hose
during storage. Store the hose in a loosely coiled position so the hose covering is not
stressed.
HANDLE
Wand
Release
Dusting Brush
Upper Wand

-12-
OPERATING INSTRUCTIONS
HOW TO START
1. Pull the power cord out of the canister to desired length. The cord will not rewind until
the cord rewind button is pushed.
NOTE: To reduce the risk of electric shock, this vacuum cleaner has a polarized plug;
RQHEODGHLVZLGHUWKDQWKHRWKHU7KLVSOXJZLOO¿WLQDSRODUL]HGRXWOHWRQO\RQHZD\,IWKH
SOXJGRHVQRW¿WIXOO\LQWKHRXWOHWUHYHUVHWKHSOXJ,ILWVWLOOGRHVQRW¿WFRQWDFWDTXDOL¿HG
electrician to install the proper outlet. Do not change the plug in any way.
0RYLQJSDUWV7RUHGXFHWKHULVNRISHUVRQDOLQMXU\'2
NOT touch the agitator when vacuum cleaner is on.
Contacting the agitator while it is rotating can cut, bruise
RUFDXVHRWKHULQMXULHV$OZD\VWXUQRIIDQGXQSOXJIURP
electrical outlet before servicing. Use caution when
operating near children or pets.
CAUTION
Personal Injury and Product Damage Hazard
'2127SOXJLQLIVZLWFKLVLQ21SRVLWLRQ3HUVRQDOLQMXU\RUSURSHUW\GDPDJHFRXOG
result.
• The cord moves rapidly when rewinding. Keep children away and provide a clear path
ZKHQUHZLQGLQJWKHFRUGWRSUHYHQWSHUVRQDOLQMXU\
• DO NOT use outlets above counters. Damage from cord to items in surrounding area
could occur.
• When any abnormality/failure occurs, stop using the product immediately and
disconnect the power plug.
WARNING

-13-
3OXJWKHSRODUL]HGSRZHUFRUGLQWRD9ROWRXWOHWORFDWHGQHDUWKHÀRRU
To rewind: Turn off and unplug the vacuum cleaner. Hold the plug while rewinding to
SUHYHQWGDPDJHRULQMXU\IURPWKHPRYLQJFRUG3XVKWKHFRUGUHZLQGEXWWRQ
3. Lower the handle from upright position by pressing on the handle release pedal.
6HOHFWDSLOHKHLJKWVHWWLQJE\SUHVVLQJWKHKHLJKWDGMXVWPHQWSHGDORQWKHUHDURIWKH
motorized nozzle. The pile height setting shows on the indicator. See SUGGESTED
PILE HEIGHT SETTINGS (page 16).
Attention: Refer to your carpet manufacturers cleaning recommendations. Some more
delicate carpets may require that they be vacuumed with the nozzle agitator turned off to
prevent carpet damage.
5. Select a position on the 3-way On/Off switch on the handle.
CARPET - turns on both the canister and the motorized nozzle.
Headlight and agitator will power on.
HARDFLOOR - turns on the canister motor only.
Headlight and agitator will not power on.
OFF - Turns the vacuum cleaner off.
Handle
Release
Pedal
CARPET

-14-
VACUUMING TIPS
For best cleaning action, the motorized nozzle should be pushed straight away from you
and pulled straight back. At the end of each pull stroke, the direction of the nozzle should
be changed to point into the next section to be cleaned. This nozzle should be continued
DFURVVWKHFDUSHWRUÀRRUZLWKVORZJOLGLQJPRWLRQV
The electronic suction control allows you to change the power of the vacuum cleaner
suction motor.
High Power increases suction for upholsteries and carpets.
Low Power decreases suction for draperies and light weight rugs.
NOTE: Fast, random strokes do not provide complete cleaning.
SUGGESTED SWEEPING PATTERN
ELECTRONIC SUCTION CONTROL
DO NOT leave the motorized nozzle running in one spot for any length of time. Damage
to carpet may occur.
CAUTION
NOTE:When this switch is in the HARDFLOOR position the nozzle headlight DOES NOT
IXQFWLRQVLQFHQRHOHFWULFLW\ÀRZVWRWKHPRWRUL]HGQR]]OH
High Power
Low Power

-15-
&DUSHWHGVWDLUVQHHGWREHYDFXXPHGUHJXODUO\)RUEHVWFOHDQLQJUHVXOWVDGMXVWWKH
electronic suction control to high power position.
)RUEHVWFOHDQLQJUHVXOWVNHHSWKHDLUÀRZSDVVDJHRSHQ&KHFNHDFKDVVHPEO\DUHDLQ
REMOVING CLOGS (page 24) occasionally for clogs. Turn off and unplug the vacuum
cleaner from outlet before checking.
Product Damage Hazard
Use care if the motorized nozzle and wand is left in the upright position as it may tip
over easily. Property damage can occur if tipped.
Personal Injury and Product Damage Hazard
'2127UXQRYHUSRZHUFRUGZLWKPRWRUL]HGQR]]OH3HUVRQDOLQMXU\RUSURGXFW
damage could result.
• DO NOT pull plug from wall by the power cord. If there is damage to the cord or plug,
SHUVRQDOLQMXU\RUSURSHUW\GDPDJHFRXOGUHVXOW
CAUTION
WARNING
STAIRS
Personal Injury Hazard
8VHFDUHLIFDQLVWHULVSODFHGRQVWDLUV,WPD\IDOOFDXVLQJSHUVRQDOLQMXU\RUSURSHUW\
damage.
Product Damage Hazard
'RQRWSXOORQWKHKRVHWRPRYHWKHFDQLVWHUIURPRQHVWDLUWRWKHQH[W:KHQ¿QLVKHG
cleaning in one area use the handle grip on the canister to move the vacuum cleaner to
a new location for further cleaning.
WARNING
CAUTION
Active brush edge cleaners are on both sides of the
motorized nozzle. Guide either side of the nozzle along
the wall or next to furniture to help remove dirt trapped at
carpet edges.
EDGE CLEANER

-16-
The 360° hose swivel allows the hose to turn without moving the canister. This is helpful for
cleaning in small areas. Check the hose for twisting before pulling the canister.
HOSE SWIVEL
SUGGESTED PILE HEIGHT SETTINGS
ATTACHMENTS
For best deep down cleaning, use the XLO setting. However, you may need to raise the
KHLJKWWRPDNHVRPHMREVHDVLHUVXFKDVVFDWWHUUXJVDQGVRPHGHHSSLOHFDUSHWVDQGWR
prevent the vacuum cleaner from shutting off. Suggested settings are:
HI – Shag, deep pile, or scatter rugs.
MED – Medium to deep pile.
LO – Low to medium pile.
XLO±0RVWFDUSHWVDQGEDUHÀRRUV
DO NOT attach or remove handle or wands while vacuum cleaner is ON. This could
cause sparking and damage the electrical contacts or electronic controls.
CAUTION
NOTE: If the motorized nozzle is attached, turn the
vacuum cleaner off before removing the handle
from the wand.
1. Press the wand release button and pull up on
handle.
ATTACHMENTS ON HANDLE
Wand
Release

-17-
6OLGHDWWDFKPHQWV¿UPO\RQWKHKDQGOHDVQHHGHG6HH$77$&+0(1786(7$%/(SDJH
21).
NOTE: To remove the dusting brush, press the brush release button and slide off.
Brush
Release
Handle
Dusting Brush
Crevice
Tool
Handle
Pet Pickup Tool
Handle
Handle
Bare Floor Brush

-18-
1. To remove the wand from the motorized nozzle, lock the wand in straight-up position.
2. Press the wand quick release pedal with foot and pull the wand straight up and out of
nozzle.
ATTACHMENTS ON WAND
NOTE:7RUHPRYHEDUHÀRRUEUXVKDQGRUSHWSLFNXSWRROSUHVVWKHZDQGUHOHDVHEXWWRQ
and slide off.
Wand
Release Wand
Release
Wand Quick
Release
Pedal

-19-
3. Put attachments on the wand as needed. See ATTACHMENT USE TABLE (page 21).
NOTE: 7RUHPRYHWKHEDUHÀRRUEUXVKDQGRUSHWSLFNXSWRROSUHVVWKHWRROUHOHDVHEXWWRQ
and slide off.
Wand
Bare Floor Brush
Wand
Pet Pickup Tool
Wand
Crevice
Tool
Tool
Release Tool
Release

-20-
5HPRYHWKHFUHYLFHWRROE\SXOOLQJIURPÀDWHQGRIWKHWRRO
To attach the crevice tool to the handle:
1. Place the round end of the crevice tool onto the tab on the handle as shown.
The dusting brush is for use on various surfaces. See ATTACHMENT USE TABLE (page
21).
To remove the brush tool, release by pressing the tab and lifting off the holder.
To attach, insert the tab on holder into the slot on the brush tool and press until the tab
snaps into place.
CREVICE TOOL
DUSTING BRUSH
Tab
Tab
Table of contents
Languages:
Other Titan Vacuum Cleaner manuals

Titan
Titan 16L 1300W User manual

Titan
Titan T1400 User manual

Titan
Titan T9500 User manual

Titan
Titan TTB351VAC Instruction Manual

Titan
Titan 820 Configuration guide

Titan
Titan T4000.2 User manual

Titan
Titan T3200 User manual

Titan
Titan TTB775VAC User manual

Titan
Titan 1230 Configuration guide

Titan
Titan TTB776VAC User manual