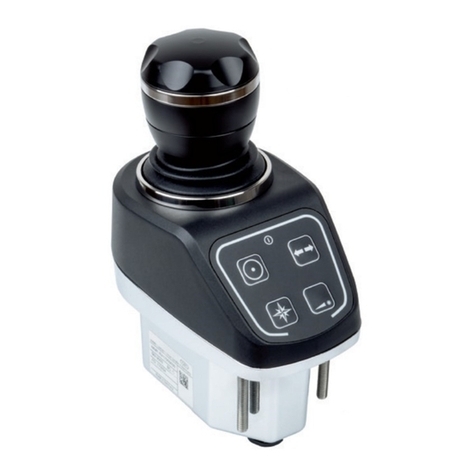
Titanwolf 303979/20191105TW014 User manual

VULTURE Flight Sck
Mod. No.: 303979/20191105TW014
User Manual

2Deutsch
Table of contents
1. Deutsch ............................................................................................................... 3
2. English ............................................................................................................... 10
3. Français ............................................................................................................. 17
4. Italiano .............................................................................................................. 24
5. Español.............................................................................................................. 31
GER: Aktuelle Informaonen, Treiber, Bedienungsanleitungen und Daten-
bläer nden Sie auf www.ganzeinfach.de in unserem Download-Bereich.
ENG: Latest informaon, drivers, user manuals and data sheets can be
found at www.ganzeinfach.de in our download area.
FRA: Vous trouverez les dernières informaons, les pilotes, les noces et
les ches techniques dans l’espace de téléchargement sur notre site www.
ganzeinfach.de.
ITA: Manuale, Istruzioni, driver e ulteriori informazioni in italiano é
possibile scaricarli nel nostro sito: www.ganzeinfach.de nella sezione
“download”.
ESP: En nuestra página web podrá encontrar toda la información actual
de nuestros productos como los controladores, manual de usuario y las
hojas de datos. Diríjase a www.ganzeinfach.de en el ícono de descargas
(Downloads).

3Deutsch
Vielen Dank, dass Sie sich für ein Produkt von TITANWOLF entschieden haben. Da-
mit Sie auch lange Freude mit Ihrem erworbenen Gerät haben werden, lesen Sie
sich bie die nachfolgende Kurzanleitung aufmerksam durch.
1. Lieferumfang
• VULTURE Flight Sck
• Bedienungsanleitung
2. Spezikaonen
• USB-Anschluss
• BVR/NAV/VIS Mode-Schalter (ergibt 21 belegbare Tasten, 7 in je-
dem Modus)
• HOTAS-Funkon (Hands On Throle And Scks)
• Ergonomisch geformt mit Handablage
• Massiver Metallunterbau mit hohem Gewicht und stabiler Stand
• Für den Betrieb sind keine Treiber erforderlich
• Stoummanteltes USB-Kabel
3. Systemanforderungen
• Betriebssystem: Microso® Windows® 10 (32/64bit), Windows®
8.1, Windows® 8 (32/64bit), Windows® 7 (32/64bit)

4Deutsch
Mode-Schalter (4)
4. Produkt-Details
1
2
3
4
5
6
7
8
11
10
9
B6
B7
B8
B5
Tastenbelegung
Mehrfach-Taste (1)

5Deutsch
4.1 Tastenbelegung der verschiedenen Modi
1Mehrfach-Taste (B5, B6, B7, B8)
2Muldirekonale POV (Point of View) Taste
3B4
4Mode-Schalter
5Fingerablage
6 Handablage
7Schubregler
8B3
9B9
10 B1
11 B2
Modus
NAV
(Navigaon)
BVR
(Beyond Visual Range)
(Außerhalb des Sicht-
bereichs)
VIS
(Visibility)
(Sichtbarkeit)
B1 Schuss-Taste 1 (Shoong Buon 1) - fest
B2 Schuss-Taste 2 (Shoong Buon 2) - fest
B3 Buon 3 (Taste 3) Buon 10 (Taste 10) Buon 17 (Taste 17)
B4 Buon 4 (Taste 4) Buon 11 (Taste 11) Buon 18 (Taste 18)
B5 Buon 5 (Taste 5) Buon 12 (Taste 12) Buon 19 (Taste 19)
B6 Buon 6 (Taste 6) Buon 13 (Taste 13) Buon 20 (Taste 20)
B7 Buon 7 (Taste 7) Buon 14 (Taste 14) Buon 21 (Taste 21)
B8 Buon 8 (Taste 8) Buon 15 (Taste 15) Buon 22 (Taste 22)
B9 Buon 9 (Taste 9) Buon 16 (Taste 16) Buon 23 (Taste 23)

6Deutsch
5. Inbetriebnahme
Entnehmen Sie das Gerät aus der Verpackung und enernen Sie jegliches Verpa-
ckungsmaterial.
Verbinden Sie das Produkt mit einem freien USB-Port an Ihrem Computer.
Um den von Ihnen erworbenen Joysck nutzen zu können, ist eine Treiberinstalla-
on notwendig. Die Treiberinstallaon funkoniert dank Plug&Play vollautomasch.
Nach abgeschlossener Installaon ist das Gerät einsatzbereit.
Hinweis: Wir empfehlen Ihnen das Gerät vor der ersten Verwendung zu kalibieren.
Mehr dazu nden Sie im nachfolgenden Kapitel in dieser Bedienungsanleitung.
6. Kalibrieren
Dieses Kapitel erklärt Ihnen, wie Sie den Joysck unter Windows® 10 kalibrieren.
1. Suchen Sie in der Suchleiste von Windows® 10 nach „USB-Gamecontroller
einrichten“.
2. Wenn Plug & Play ordnungsgemäß funkoniert hat, wird Ihr Joysck
abgebildet. Sollte dies nicht der Fall sein, trennen Sie die Verbindung Ihres
Joyscks und Computers und verbinden Sie das Gerät erneut.
3. Markieren Sie den Joysck und klicken Sie auf „Eigenschaen“.

7Deutsch
4. Nun können Sie das Gerät testen. Wählen Sie anschließend den Reiter
„Einstellungen“.
5. In diesem Menü haben Sie die Möglichkeit, das Gerät zu kalibrieren. Klicken
Sie dafür auf „Kalibrieren“. Nun können Sie die Kalibrierung vornehmen.
Folgen Sie dazu den Anweisungen auf Ihrem Bildschirm.
7. Auf Werkseinstellungen zurücksetzen
1. Suchen Sie in der Suchleiste von Windows® 10 nach „USB-Gamecontroller
einrichten“.
2. Wenn Plug & Play ordnungsgemäß funkoniert hat, wird Ihr Joysck
abgebildet. Sollte dies nicht der Fall sein, trennen Sie die Verbindung Ihres
Joyscks und Computers und verbinden Sie das Gerät erneut.
3. Markieren Sie den Joysck und klicken Sie auf „Eigenschaen“.
4. Hier können Sie das Gerät testen. Wählen Sie anschließend den Reiter
„Einstellungen“.
5. In diesem Menü haben Sie die Möglichkeit, das Gerät zurückzusetzen.
Klicken Sie hierfür auf „Auf Standard zurücksetzen“, um das Gerät in die
Werkseinstellungen zurückzusetzen.

8Deutsch
8. Sicherheitshinweise und Haungsausschluss
Versuchen Sie nie das Gerät zu önen, um Reparaturen oder Umbauten vorzuneh-
men. Vermeiden Sie Kontakt zu den Netzspannungen. Schließen Sie das Produkt
nicht kurz. Das Gerät ist nicht wasserdicht, bie verwenden Sie es nur im Trocke-
nen. Schützen Sie es vor hoher Lufeuchgkeit, Wasser und Schnee. Halten Sie
das Gerät von hohen Temperaturen fern.Setzen Sie das Gerät keinen plötzlichen
Temperaturwechseln oder starken Vibraonen aus, da dies die Elektronikteile be-
schädigen könnte.
Prüfen Sie vor der Verwendung das Gerät auf Beschädigungen. Das Gerät sollte
nicht benutzt werden, wenn es einen Stoß abbekommen hat oder in sonsger
Form beschädigt wurde. Beachten Sie bie die naonalen Besmmungen und Be-
schränkungen. Nutzen Sie das Gerät nicht für andere Zwecke als die, die in der
Anleitung beschrieben sind. Dieses Produkt ist kein Spielzeug. Bewahren Sie es
außerhalb der Reichweite von Kindern oder geisg beeinträchgten Personen auf.
Jede Reparatur oder Veränderung am Gerät, die nicht vom ursprünglichen Liefe-
ranten durchgeführt wird, führt zum Erlöschen der Gewährleistungs- bzw. Garan-
eansprüche.
Das Gerät darf nur von Personen benutzt werden, die diese Anleitung gelesen und
verstanden haben. Die Gerätespezikaonen können sich ändern, ohne dass vor-
her gesondert darauf hingewiesen wurde.
9. Entsorgungshinweise
Elektrische und elektronische Geräte dürfen nach der europäischen WEEE Richt-
linie nicht mit dem Hausmüll entsorgt werden. Deren Bestandteile müssen ge-
trennt der Wiederverwertung oder Entsorgung zugeführt werden, weil giige und
gefährliche Bestandteile bei unsachgemäßer Entsorgung die Umwelt nachhalg
schädigen können. Sie sind als Verbraucher nach dem Elektro- und Elektronikgerä-
tegesetz (ElektroG) verpichtet, elektrische und elektronische Geräte am Ende ih-
rer Lebensdauer an den Hersteller, die Verkaufsstelle oder an dafür eingerichtete,
öentliche Sammelstellen kostenlos zurückzugeben. Einzelheiten dazu regelt das
jeweilige Landesrecht.

9Deutsch
Das Symbol auf dem Produkt, der Betriebsanleitung oder/und der Verpackung
weist auf diese Besmmungen hin. Mit dieser Art der Storennung, Verwertung
und Entsorgung von Altgeräten leisten Sie einen wichgen Beitrag zum Schutz un-
serer Umwelt.
WEEE Richtlinie: 2012/19/EU
WEEE Register-Nr: DE 67896761
Hiermit erklärt die Firma WD Plus GmbH, dass sich das Gerät 303979/20191105TW014 in
Übereinsmmung mit den grundlegenden Anforderungen und den übrigen einschlägi-
gen Besmmungen bendet. Eine vollständige Konformitätserklärung erhalten Sie bei:
WD Plus GmbH, Wohlenbergstraße 16, 30179 Hannover

10 English
Thank you for choosing a TITANWOLF product. Please read the following user ma-
nual carefully so as to get the most from the product you have purchased.
1. Scope of delivery
• VULTURE Flight Sck
• User manual
2. Specicaons
• USB port
• BVR / NAV / VIS mode switch (gives 21 programmable keys, 7 in
each mode)
• HOTAS funcon (Hands On Throle And Scks)
• Ergonomically designed with hand rest
• Solid metal base with heavy weight and stable stand
• Drivers are not required for operaon
• Braided USB cable
3. System requirements
• Operang system: Microso® Windows® 10 (32/64bit), Win-
dows® 8.1, Windows® 8 (32/64bit), Windows® 7 (32/64bit)

11English
Mode switch (4)
4. Product details
1
2
3
4
5
6
7
8
11
10
9
B6
B7
B8
B5
Key assignment
Mul-funconal
buon (1)

12 English
4.1 Key assignment of the dierent modes
1Mul-funconal buon (B5, B6, B7, B8)
2Mul-direconal POV (Point of View) buon
3B4
4Mode switch
5 Finger rest
6Hand rest
7Throle
8B3
9B9
10 B1
11 B2
Mode
NAV
(Navigaon)
BVR
(Beyond Visual Range)
(Out of visual range)
VIS
(Visibility)
(Visibility)
B1 Shoong Buon 1 - xed
B2 Shoong Buon 2 - xed
B3 Buon 3 Buon 10 Buon 17
B4 Buon 4 Buon 11 Buon 18
B5 Buon 5 Buon 12 Buon 19
B6 Buon 6 Buon 13 Buon 20
B7 Buon 7 Buon 14 Buon 21
B8 Buon 8 Buon 15 Buon 22
B9 Buon 9 Buon 16 Buon 23

13English
5. Inial use
Take the device out of the package and remove all the packaging material.
Connect the product to a free USB port on your computer.
To use the purchased Joysck, you need to install a driver. The driver installaon is
fully automac via plug & play.
Once the installaon is complete, the device is ready for use.
Note: We recommend you to calibrate the device before using it for the rst me.
For more informaon in this regard, see the following chapter in this user manual.
6. Calibraon
This chapter explains how to calibrate the joysck for Windows® 10.
1. Search for "Seng up the USB game controller" in the search bar of
Windows 10®.
2. If Plug & Play has worked properly, then your joysck is shown. If this is
not the case, disconnect your joysck from the computer and connect the
device again.
3. Select the joysck and click on "Properes".

14 English
4. Now you can test the device. Then select the "Sengs" tab.
5. In this menu, you have the opon to calibrate the device. To do this, click
on "Calibrate". Now you can carry out the calibraon. For this purpose,
follow the instrucons on the screen.
7. Reseng to factory sengs
1. Search for "Seng up the USB game controller" in the search bar of
Windows 10®.
2. If Plug & Play has worked properly, then your joysck is shown. If this is
not the case, disconnect your joysck from the computer and connect the
device again.
3. Select the joysck and click on "Properes".
4. You can test the device here. Then select the "Sengs" tab.
5. In this menu, you have the opon to reset the device. Click on "Reset to
default" to reset the device to factory sengs.

15English
8. Safety instrucons and disclaimer
Never try to open the device to repair or make modicaons. Avoid contact with
the mains voltage. Do not short-circuit the product. The device is not waterproof,
hence please use it only in dry surroundings. Protect it from high humidity, water
and snow. Do not expose the device to high temperatures. Do not expose the de-
vice to sudden changes in temperature or strong vibraons, as this could damage
the electronic components.
Check the device for any damage before using it. The device should not be used if
it was subject to impact or has been damaged in some other manner. Please com-
ply with the local regulaons and restricons. Do not use the device for purposes
other than those described in the user manual. This product is not a toy. Keep it
out of the reach of children or mentally disabled persons. Any repair or modica-
ons to the device, which is not carried out by the original supplier will void any
warranty and guarantee claims.
The device should only be used by those who have read and understood this user
manual. The specicaons of the device may be changed without special prior
noce.
9. Disposal instrucons
In line with the European WEEE direcve, electrical and electronic devices should
not be disposed of along with domesc waste. Their components have to be sepa-
rately sent for recycling or disposal, because improper disposal of toxic and dan-
gerous components may permanently damage the environment. According to the
electrical and electronic equipment act (ElektroG), you are obliged (as a consumer)
to return (free of charge) electrical and electronic devices to the manufacturer, the
point of sale or public collecon points at the end of their service life. The relevant
local laws regulate the details in this regard.
The symbol displayed on the product, in the user manual or/and on the packaging
refers to these regulaons. With this manner of sorng, recycling and disposal of
used devices, you make an important contribuon towards protecng our environ-
ment.

16 English
WEEE direcve: 2012/19/EU
WEEE Register no.: DE 67896761
The company WD Plus GmbH hereby ceres that the device
303979/20191105TW014 complies with the fundamental requirements and all
other relevant spulaons. A complete conformity statement can be obtained from:
WD Plus GmbH, Wohlenbergstraße 16, 30179 Hanover

17Français
Nous vous remercions d'avoir choisi un produit TITANWOLF. Pour que vous puissiez
proter longtemps de votre appareil acheté, veuillez lire aenvement le mode
d'emploi suivant.
1. Contenu de la livraison
• VULTURE Flight Sck
• Mode d’emploi
2. Spécicaons
• Port USB
• Interrupteur mode BVR/NAV/VIS (donne 21 touches libres, 7 dans
chaque mode)
• Foncon HOTAS (Hands On Throle And Scks)
• Forme ergonomique avec repose-main
• Sous-structure métallique massive avec grand poids et support
stable
• Aucun pilote n'est nécessaire pour le fonconnement
• Câble USB avec revêtement texle
3. Conguraons système
• Système d’exploitaon : Microso® Windows® 10 (32/64bit),
Windows® 8.1, Windows® 8 (32/64bit), Windows® 7 (32/64bit)

18 Français
Interrupteur mode (4)
4. Parcularités du produit
1
2
3
4
5
6
7
8
11
10
9
B6
B7
B8
B5
Raccourci clavier
Touche mulple
(1)

19Français
4.1 Conguraon clavier des diérents modes
1Touche mulple (B5, B6, B7, B8)
2Touche POV (Point of View) muldireconnelle
3B4
4 Interrupteur mode
5 Repose-doigt
6Repose-main
7Mécanisme de poussée
8B3
9B9
10 B1
11 B2
Mode
NAV
(Navigaon)
BVR
(Beyond Visual Range)
(Hors du champ de vision)
VIS
(Visibility)
(Visibilité)
B1 Touche r 1 (Shoong Buon 1) - xe
B2 Touche r 2 (Shoong Buon 2) - xe
B3 Buon 3 (touche
3)
Buon 10 (touche 10) Buon 17 (touche 17)
B4 Buon 4 (t. 4) Buon 11 (touche 11) Buon 18 (touche 18)
B5 Buon 5 (t. 5) Buon 12 (touche 12) Buon 19 (touche 19)
B6 Buon 6 (t. 6) Buon 13 (touche 13) Buon 20 (touche 20)
B7 Buon 7 (t. 7) Buon 14 (touche 14) Buon 21 (touche 21)
B8 Buon 8 (t. 8) Buon 15 (touche 15) Buon 22 (touche 22)
B9 Buon 9 (t. 9) Buon 16 (touche 16) Buon 23 (touche 23)

20 Français
5. Mise en service
Sortez l'appareil de l'emballage et rerez tout matériau d'emballage.
Connectez le produit à un port USB libre de votre ordinateur.
Pour pouvoir uliser la manee que vous avez achetée, un pilote doit être installé.
L'installaon du pilote est enèrement automaque grâce à Plug&Play.
Une fois l’installaon terminée, l’appareil est opéraonnel.
Remarque : Nous vous recommandons de calibrer l’appareil avant la première u-
lisaon. Vous trouverez plus d’informaons à ce sujet dans le chapitre suivant de
ce mode d’emploi.
6. Calibrer
Ce chapitre vous explique comment calibrer la manee sous Windows® 10 .
1. Recherchez dans la barre de Windows® 10 « installer USB-Gamecontrol-
ler ».
2. Si Plug & Play a fonconné de façon conforme, votre manee est repré-
sentée. Si ce n’est pas le cas, déconnectez votre manee et votre ordina-
teur et reconnectez l’appareil.
3. Marquez la manee et cliquez sur « Propriétés ».
This manual suits for next models
1
Table of contents
Languages:
Other Titanwolf Video Game Controllers manuals

