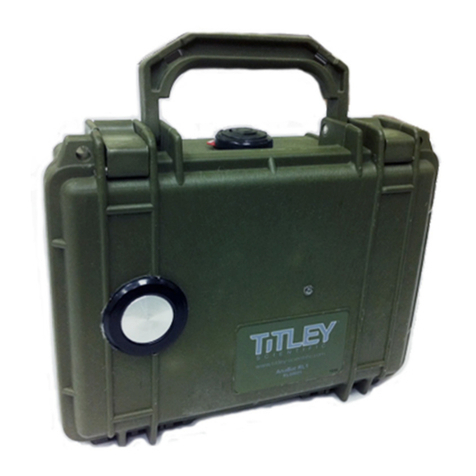
TiTLEY Scientific CHORUS User manual

CHORUS
User Manual
Version 1.0

2
TITLEY SCIENTIFIC CONTACT DETAILS
Head Office (Australia)
United Kingdom / Europe
USA / Central / South America
Unit 4, 253 Leitchs Rd,
16/17 Arkwright Suite,
4306 Bold Venture Dr, Unit A
Brendale QLD 4500,
Coppull Enterprise Centre, Mill
Lane, Coppull, Lancashire,
Columbia, Missouri 65202,
AUSTRALIA
PR75BW, ENGLAND
USA
P +61 (0)7 3053 3403
P +44 (0)781 875 6965
P +1 573 442 8745
info@titley-scientific.com
uk@titley-scientific.com
ask@titley-scientific.com.us
www.titley-scientific.com
General Enquiries info@titley-scientific.com
AUTHORS AND ACKNOWLEDGMENTS
This manual was written by Julie Broken-Brow & Dean Thompson. We greatly appreciate the time,
commentsandassistancegivenbythosepeoplewhowere betatesters fortheChorusandthismanual.
The testing and troubleshooting have improved the new recorder and increased the clarity of the
manual.
DOCUMENT HISTORY
Manual Version
Release Date
Firmware Version
Major Additions and Changes
1.0
9/11/2021
2.0
-

3
CONTENTS
GETTING STARTED....................................................................................................................................................6
FEATURES OF THE CHORUS..............................................................................................................................6
GETTING TO KNOW THE CHORUS ..................................................................................................................6
EXTERNAL FEATURES .....................................................................................................................................7
INTERNAL FEATURES......................................................................................................................................8
DASHBOARD .....................................................................................................................................................8
MICROPHONES......................................................................................................................................................9
POWER REQUIREMENTS.................................................................................................................................. 10
DATA STORAGE REQUIREMENTS................................................................................................................. 12
USB CONNECTION ............................................................................................................................................ 13
USING THE CHORUS ............................................................................................................................................. 13
STEP-BY-STEP GUIDE........................................................................................................................................13
TURNING THE RECORDER ON/OFF & SLEEP ............................................................................................16
UPDATING FIRMWARE.....................................................................................................................................16
RECORDING MODES......................................................................................................................................... 17
Night-Only Recording Mode....................................................................................................................17
Dusk & Dawn Recording Mode............................................................................................................... 17
Day-Only Recording Mode....................................................................................................................... 18
Continuous Recording Mode .................................................................................................................. 18
Schedule Recording Mode.......................................................................................................................18
Selecting a Recording Mode ................................................................................................................... 18
RECORDING SETTINGS .........................................................................................................................................19
SAMPLE RATE & FILE TYPE (ACOUSTIC OR ULTRASONIC RECORDING) ......................................... 19
SELECT THE MICROPHONE ............................................................................................................................20
ACOUSTIC RECORDING SETTINGS...............................................................................................................20
Gain................................................................................................................................................................... 20

4
Maximum File Time..................................................................................................................................... 20
ULTRASONIC RECORDING SETTINGS.......................................................................................................... 21
Activation Mode (Triggered or Constant Recording).....................................................................21
Sensitivity........................................................................................................................................................ 21
Minimum Frequency................................................................................................................................... 22
Maximum Frequency..................................................................................................................................22
Minimum Event ............................................................................................................................................22
Minimum Recording Time........................................................................................................................22
Maximum File Time..................................................................................................................................... 23
10k High Pass Filter .....................................................................................................................................23
GPS SETTINGS ......................................................................................................................................................... 24
TRANSECT MODE .............................................................................................................................................. 24
CHECK LOCATION............................................................................................................................................. 25
OTHER SETTINGS.................................................................................................................................................... 26
FILENAME PREFIX..............................................................................................................................................26
CLOCK & SCHEDULE.........................................................................................................................................26
Time Zone....................................................................................................................................................... 26
Time Format...................................................................................................................................................26
Check Sunset/Sunrise Times....................................................................................................................27
RESET SETTINGS................................................................................................................................................. 27
RECORDER STATUS/INFO.................................................................................................................................... 27
TESTING YOUR CHORUS......................................................................................................................................28
FLASHING STATUS ICONS OR CHECK LED.................................................................................................... 29
PASSIVE DEPLOYMENT CONSIDERATIONS ...................................................................................................32
WEATHERPROOFING........................................................................................................................................ 32
MOUNTING & PLACEMENT ............................................................................................................................33
EQUALIZATION & CALIBRATION ..................................................................................................................33

5
DOWNLOADING DATA ........................................................................................................................................ 35
HOW TO DOWNLOAD FROM AN SD CARD.............................................................................................. 35
FILE NAMES.........................................................................................................................................................35
DIAGNOSTIC LOG FILES..................................................................................................................................36
SOFTWARE...........................................................................................................................................................36
CREATING SCHEDULES.................................................................................................................................... 36
CHECKING SCHEDULES...................................................................................................................................42
METADATA..........................................................................................................................................................43
TROUBLESHOOTING & FAQS ............................................................................................................................. 43
How do I set up the detector for ultrasonic bat recording? .......................................................43
How do I set up the recorder for acoustic (audible sound) recording? ................................. 44
FURTHER INFORMATION ................................................................................................................................ 48

6
GETTING STARTED
FEATURES OF THE CHORUS
The Chorus is an easy-to-use, compact, lightweight and customizable recorder, designed for
passive monitoring. Some of the key features of the Chorus include:
•Easy to use, weatherproof and robust
•Includes one acoustic microphone
•You can add additional microphones to record ultrasonic or stereo acoustic in one
deployment
•Microphones are user-replaceable
•Lasts for up to 40 nights (full spectrum ultrasonic) or 300 hours (acoustic) on 4 AA
batteries
•Built-in GPS
•Stand-alone recorder, no phone apps required for setup
•Built-in temperature sensor
•Automatic schedules for easy deployment, or create your own custom schedule
•Transect mode available
•Analyse recordings with our free software: Anabat Insight
•Headphone output to check microphone performance
GETTING TO KNOW THE CHORUS
The outside of your Chorus case has a lockable latch, multiple mounting points (including a
tripod mount), two microphone sockets, a check LED and lanyard with a magnet. Inside the
Chorus case is the control panel, battery compartment, SD slot, headphone jack and basic
instructions on use.

7
EXTERNAL FEATURES

8
INTERNAL FEATURES
DASHBOARD
The main screen is called the Dashboard. This is where you can see information such as the
status of your Chorus, the date and time, SD card free space, and microphone information.
The four large icons in the middle of the dashboard represent the main aspects of your
detector: the SD card, GPS, microphone(s), and the clock.
You can use the left and right arrow buttons on the front of the Chorus to select one of the
icons, then press Kbutton to see more information and settings.

9
In addition, these icons will flash when there is an issue requiring attention. For example, if
then the SD card icon will flash. Similarly, if you have the
wrong types of microphones connected, the microphone icon will flash.
When an icon is flashing, you can see more information about the issues in the status area at
the bottom of the dashboard. All issues requiring your attention will be shown there. In the
example screenshot below below.
Along the top of the dashboard
one inserted), indicators for low battery and headphones (if plugged in), and the current date,
time, and temperature.
On the left and right sides of the dashboard are VU (Volume Unit) meters that will appear
when microphones are connected to the left and right channels respectively. These bars will
move up and down in response to the loudness of sounds, so you can see your microphones
working. The symbol at the top of the VU meter will indicate what type of microphone is fitted
ultrasonic or acoustic .
In the bottom left/right referring to the soft keys (buttons below
the screen). These change to indicate what pressing the soft keys will do in different menus.
On the dashboard menu the left will eject the SD card (making it safe to remove from the
device) and the right button will show the device information screen.
MICROPHONES
The Chorus comes supplied with one acoustic microphone. You have the choice of adding
another of our low-profile, user-replaceable acoustic or ultrasonic microphones. Both
microphone types can be used with our flexible-gooseneck microphone extender accessory.
The Chorus has two channels, so you can customise your microphone setup to record in mono
acoustic, mono ultrasonic, dual acoustic and ultrasonic (not simultaneously), or stereo
acoustic.

10
Omnidirectional Acoustic Microphone Specifications
•Includes a replaceable water-resistant wind sock
•Built-in low noise preamplifier
•High performance weather resistant electret microphone capsule with excellent
sensitivity and low noise floor (-24dB sensitivity with 80dB signal-to-noise ratio)
•Frequency response of 20Hz 20kHz
Omnidirectional Ultrasonic Microphone Specifications
•Weather resistant (capsule protected by waterproof membrane). Please refer to
Weatherproofing for considerations on using this microphone in rain
•Low noise floor
•Built-in low noise preamplifier
•Improved frequency response when compared to previous generation electret-
based ultrasonic microphones
•Useable frequency response of 10kHz to 140kHz (response rolls-off beyond this
point)
A note on frequency response
All m
at different frequencies. A microphone may be sensitive at 40kHz, then somewhat less
sensitive at 60kHz, then be very sensitive again around 80kHz. Micro
- after a certain frequency.
When w this is the point where the frequency response
has begun to taper off. However, the microphone can still detect higher frequency sounds
(they just need to be louder or closer to the microphone).
POWER REQUIREMENTS
The Chorus is powered by 4 AA batteries. The Low Power Symbol will appear at the
top of the dashboard when the battery voltage is low. The recorder switches itself off
when battery voltage becomes too low. If the battery symbol is or the status message
reads Batteries Low you should change the batteries immediately. All AA batteries must be

11
removed from the battery holder immediately after use otherwise the batteries will slowly
discharge and may leak, damaging the recorder and voiding warranty.
AA batteries can be alkaline, NiMh rechargeable, or lithium (1.5V). Make sure all batteries are
fresh and of the same type. Mixing old & new batteries or different types of batteries can cause
erratic detector behaviour and also cause batteries to leak. Battery life will depend on the
condition and type of batteries being used, as well as ambient temperature, length of your
recording session and amount of bat activity & ambient noise (if using triggered ultrasonic
recording). Four high-quality alkaline AA batteries last up to 300 hours of acoustic recording,
or up to 40 nights of triggered ultrasonic recording (based on 10% bat activity at 25oC and 10
hour nights). However, in practice recording conditions can vary, so be conservative when
using battery life estimates to avoid the loss of sampling time should the batteries run out
before you expect. Please refer to the Weatherproofing section for more details about how
temperature can affect battery life.

12
DATA STORAGE REQUIREMENTS
The amount of storage required for a given deployment time depends on the file type used,
sample rate, and the amount of ultrasonic sound activity. All values in the table below are
approximate per hour of recorded sound. SD card formatting options and trigger settings may
change these estimates.
Sampling Rate
Mono (p/hr)
Stereo (p/hr)
Full Spectrum 500Ksps
3.4GB
-
Full Spectrum 320Ksps
2.2GB
-
Full Spectrum 192K
1.3GB
-
Zero Crossing
0.02GB
-
Acoustic 96Ksps
660MB
1.3GB
Acoustic 48Ksps
330MB
660MB
Acoustic 44.1Ksps
303MB
606MB
Acoustic 32Ksps
220MB
440MB
Acoustic 22.05Ksps
152MB
303MB
Please note: In all modes except Schedule mode, when there is an SD card present, the
Chorus will periodically display the remaining recording time for your SD card in the top-left
of the display, based on the currently chosen sample rate.
A note on triggered ultrasonic recording
During a typical night of triggered ultrasonic full spectrum recording 1 - 3GB of files per night
are recorded. However, if there is a high level of bat activity, wind, or rain the recorder could
easily record several gigabytes of files in a single night. Keep this in mind when choosing SD
card capacity.

13
USB CONNECTION
The Chorus can be used with a micro-USB cable (not supplied) for connection to your
computer. You can use this cable to upgrade the firmware using Anabat Insight (see
Software). Firmware updates can also be performed using the SD card. See Update
Firmware for more information. Note that the USB connection cannot be used to download
recordings from the Chorus.
USING THE CHORUS
The Chorus is designed for fast and easy deployment. Before you start recording you must
first set your current time zone (see Time zone). The clock will be automatically set when the
GPS obtains a signal. We also highly recommend you check for firmware updates (see
UPDATE FIRMWARE).
STEP-BY-STEP GUIDE
1. Connect your chosen microphone/s to the appropriate side (see below): acoustic can
be on side A (latch) or B (hinge); ultrasonic on side B (hinge) only, refer to the image
below. Carefully insert the microphone jack into the microphone socket (with locking
tabs in correct alignment) until it clicks into place. Rotate the microphone clockwise
an eighth of a turn to lock the microphone in place and make a good seal (see over
page for diagram). Do not over-tighten the connector, this will cause damage
to the microphone and recorder. It will only rotate 1/8th of a turn before
hitting the end-stop. Ensure the dust cap is properly fitted to any unused
socket to prevent water ingress. Failing to properly install the microphone
or dust cap will void warranty.

14
2. Insert an SD card with sufficient memory for your recording period and fresh batteries.
Ensure the SD card is unlocked and correctly orientated as per the diagram on the
control panel when inserting. Refer to the Data Storage Requirements and Power
Requirements above for more information on what size SD card and batteries to use.
Align jack and locking tabs
Turn 1/8th turn to stop
B
A
Ultrasonic mic
Acoustic mic
Acoustic mic only
OR

15
3. Turn the recorder on by pressing the K button. Check that the clock is correct. If
it is not you may need to adjust the time zone and/or wait for a GPS fix to re-set the
clock.
4. Choose your recording mode with the Mode button. Refer to Recording Modes for
more information on how each of these modes work.
5. Select your microphone settings, choosing the appropriate sample rate and trigger
settings for your application. Check your microphones are responding by clicking
your fingers in front of the microphone/s: the VU Meter on the side of the screen
(matching the microphone) will move to confirm that an audio signal is detected.
Please Note: When using Schedule Mode, the microphone settings are defined when the
schedule is created using your computer. In this case there is no need to adjust the
microphone settings on the Chorus itself.
6. Wait for the GPS receiver to obtain a location. This normally only takes a couple of
minutes but can take longer if there are trees or dense clouds obstructing the signal.
Once a GPS fix is obtained, the GPS icon on the screen will stop flashing. The GPS fix
will automatically set the clock, record the GPS location and determine the
sunset/sunrise times.
7. If an issue requires your attention, the corresponding status icon will be flashing, as
well as the Check LED on the outside of the unit. Check the Dashboard status
messages for more information regarding the issue (see Flashing Status Icons).
8. Deploy your recorder. Once the Check LED has stopped flashing, you can lock the
lid closed and place the recorder in its final deployment location and secure. Please
refer to Passive Deployment Considerations for more information on choosing a
site and weatherproofing requirements. You can use the magnet to check the recorder
is functional after final deployment (see Testing Your Chorus).
Do not deploy the chorus if the check led is flashing, recording may not occur.
9. Retrieve your recorder. After the deployment is complete, observe the following
precautions when retrieving the recorder:
-If it is wet, dry the unit off before opening it to avoid water entering the unit.
-Before removing the SD card, ensure the unit is fully powered down or press
the on-screen eject button first to avoid data loss or corruption.

16
-Remove the batteries before storing the unit. Batteries left in the recorder will
leak and damage the unit, voiding warranty.
-For more information, refer to Collecting Your Recorder.
TURNING THE RECORDER ON/OFF & SLEEP
Turn the recorder on by pressing the K button.
To turn the recorder off, press and hold the Kbutton for 2 seconds, this will open the
Off/Sleep menu, then continue to hold the Kbutton to shut the recorder down. The
recorder will shut down and no recording will occur. It is now safe to remove the batteries
and SD card.
To send the recorder to sleep, press and hold the Kbutton for 2 seconds, this will open the
Off/Sleep menu, then use the right arrow to select Sleep mode , and press the K
button again. In sleep mode the screen will be off, but the device will still record. To turn the
screen back on, briefly press the Kbutton again. The Chorus will also automatically enter
sleep mode to save power if there has been no user interaction for one minute.
Power off Sleep
UPDATING FIRMWARE
It is important to keep the firmware on the Chorus up to date to ensure trouble-free operation.
The Chorus firmware is updated by using an SD card with the update copied onto it. It is
highly recommended that you subscribe to receive email alerts of new Chorus firmware
updates using this website: http://eepurl.com/czjGxD.
To update firmware:
1. Download the update file from this link https://bit.ly/3DFejkY and copy it to the root
directly on an SD card. Make sure the file is named chorus.adx. You can use the same
SD card to update multiple Chorus recorders.

17
2. Insert the SD card and fresh batteries into your Chorus then turn it on. After a few
moments a message will appear: Update available. Select (left soft key) to start
the update. Do not remove the batteries or power off the recorder while the update is
being installed. The Recording Mode LEDs will cycle to indicate the update is
occurring and the Chorus will restart upon completion. If this message does not
appear, the firmware is already up to date
correctly.
3. You can now delete the chorus.adx file from the SD card or use the card again to
update several Chorus recorders.
Please note the Chorus will not update firmware if a low battery warning is displayed.
RECORDING MODES
You can choose between 5 different recording modes, outlined below. The LEDs on the inside
of the case will indicate which mode is selected, if no LEDs are lit, the recorder is in Inactive
Mode and will not record. Inactive mode is useful while configuring your recorder to avoid
creating unwanted recordings.
Most modes require a GPS fix on the deployment day, as the recorder automatically calculates
the sunset and sunrise times based on the current longitude and latitude.
If the recorder is left on, it will continue to record in the selected mode until the batteries run
out or the SD card becomes full.
Night-Only Recording Mode
The night-only mode is designed for efficient bat survey deployment, but may also be suitable
for other nocturnal animals. This recording mode will turn the recorder on 30 minutes before
sunset and off 30 minutes after sunrise. Night-only mode requires a GPS fix.
Dusk & Dawn Recording Mode
The dusk & dawn mode is designed for peak bird recording times and may be useful for other
crepuscular animals. This recording mode will turn the recorder on 90 minutes before sunset

18
and off 90 minutes after sunset, and on again 90 minutes before sunrise and off 90 minutes
after sunrise. Dusk & Dawn mode requires a GPS fix.
Day-Only Recording Mode
The day-only mode is designed for efficient daytime deployment, suitable for diurnal animals
such as birds. This recording mode will turn the recorder on 90 minutes before sunrise and off
90 minutes after sunset. Day-only mode requires a GPS fix.
Continuous Recording Mode
The continuous recording mode will record continuously (either triggered or constant
activation mode depending on your settings), starting as soon as this mode is selected. No
GPS fix is required for this mode, but the Chorus will still attempt a fix to geotag recordings
and ensuring the clock is accurate.
Schedule Recording Mode
The schedule recording mode allows you to use a custom recording schedule created with
the Scheduler Tool in Anabat Insight (see CREATING SCHEDULES). You can create
schedules based on sunset/sunrise times or on absolute times. You can create multiple tasks
to activate different microphones and sample rates at different times. The schedule is saved
on the SD Card, so keep this in mind when swapping out the SD card. Schedule mode requires
a GPS fix if your schedule is based around sunset and sunrise times.
Selecting a Recording Mode
To select the recording mode, press the Mode button to cycle through the modes until the
desired mode LED is lit.
A note on the GPS functionality
The recorder will automatically attempt to acquire a GPS fix daily. If a satellite fix cannot be
found, the recorder will refer to the last GPS fix made. In this case, the recorder will state Fix
received ago in the GPS Settings. If you are moving your recorder to a new location, make
sure you turn the recorder off and on again at the new location to ensure a correct GPS fix, or
enter the GPS Settings screen to turn the GPS back on.

19
RECORDING SETTINGS
To access the Recording Settings menu, use the left/right arrows to select the microphone
symbol on the dashboard (see below), then press the Kbutton to select. Move to different
settings by pressing the up/down arrow keys. To return to the dashboard, press the right soft
key to accept the settings listed.
SAMPLE RATE & FILE TYPE (ACOUSTIC OR ULTRASONIC RECORDING)
The recommended sample rate will depend on the type of recordings you would like to make,
and which microphone you are using. You can choose between acoustic sample rates of
96, 48, 44.1, 32 or 22.05ksps, and ultrasonic full spectrum sample rates of 500, 320 or
192ksps. Ultrasonic zero crossing sampling is also available.
Please note: The Chorus comes with an acoustic microphone, however to record
ultrasonically, you will need to purchase the Omnidirectional Ultrasonic Microphone.
Different recording options will be available depending on whether you select an ultrasonic
or acoustic sample rate. To change the sample rate, ensure Sample Rate is selected in the
Recording Settings menu, then use the left/right arrow buttons to change the sample rate.
Notes on sample rate and file type
•The chosen sample rate should be at least double the highest frequency sound of
interest. Note that higher sample rates require more storage space on the SD card,
refer to Power and Data Storage.
•For ultrasonic recording, you can choose to record using either a full spectrum sample
rate (WAV files) or zero crossing sampling (ZC files). ZC requires very little memory
compared to WAV, however WAV files contain more acoustic information. A WAV file
can be converted to or viewed in ZC after recording (however the reverse is not
possible). For more information on the difference between WAV and ZC files, refer to
What is the difference between full spectrum and zero crossing? in the FAQs.
•Acoustic recording is always in WAV format.

20
•While recording, the selected file type will be indicated by an icon above the
corresponding microphone VU meter on the dashboard: (ultrasonic WAV),
(acoustic WAV), and/or (ultrasonic ZC).
SELECT THE MICROPHONE
The options available for the microphone change depending on the Sample Rate selected.
Acoustic sample rates let you choose between:
•Monaural recording, using the acoustic microphone connected to side A;
•Monaural recording, using the acoustic microphone connected to side B;
•Stereo recording, using acoustic microphones connected on both sides.
Ultrasonic sample rates only permit monaural recording from the ultrasonic microphone
connected to side B.
ACOUSTIC RECORDING SETTINGS
Gain
Gain changes the amplitude of the recorded microphone signal. You can adjust the gain of
each of the two acoustic microphones independently, in increments of 3dB up to +15dB. Use
the up/down arrow buttons to select Gain and then use the left/ right arrow buttons to
choose the gain that you want, a higher dB represents an increased amplitude.
A higher gain setting will pick up more sounds, but the recording will become distorted when
there are loud noises. Typically, 3dB is the recommended setting.
Handy tip: When using two acoustic microphones, you can set one channel to a low gain
and the other to a high gain to record both loud and quiet sounds with good quality.
Otherwise, make sure the gain settings for side A and B are equal.
Maximum File Time
The maximum file time represents the maximum length of a file and can be up to 1 hour.
When a recording is triggered, the recorder will record files up to the specified length in time
Table of contents
Other TiTLEY Scientific Data Logger manuals
