TKH TKIZ48E12S User manual

www.aasset-security.fr
V.201910.01
User manual
Network speed dome
TKIZ48E12S / TKIZ48E12IS
TKIZ28E30IS / TKIZ28E37IS / TKIZ48E40IS
User Manual - Network Speed Dome - TKIZ48E12S - TKIZ48E12IS - TKIZ28E30IS - TKIZ28E37IS - TKIZ48E40IS
EN
2
About This Document
Purpose
This document describes how to use the web management system,
including network access, network configuration, and troubleshooting.
Intended Audience
This document is intended for:
zTechnical support engineers
zMaintenance engineers
zIP camera operators
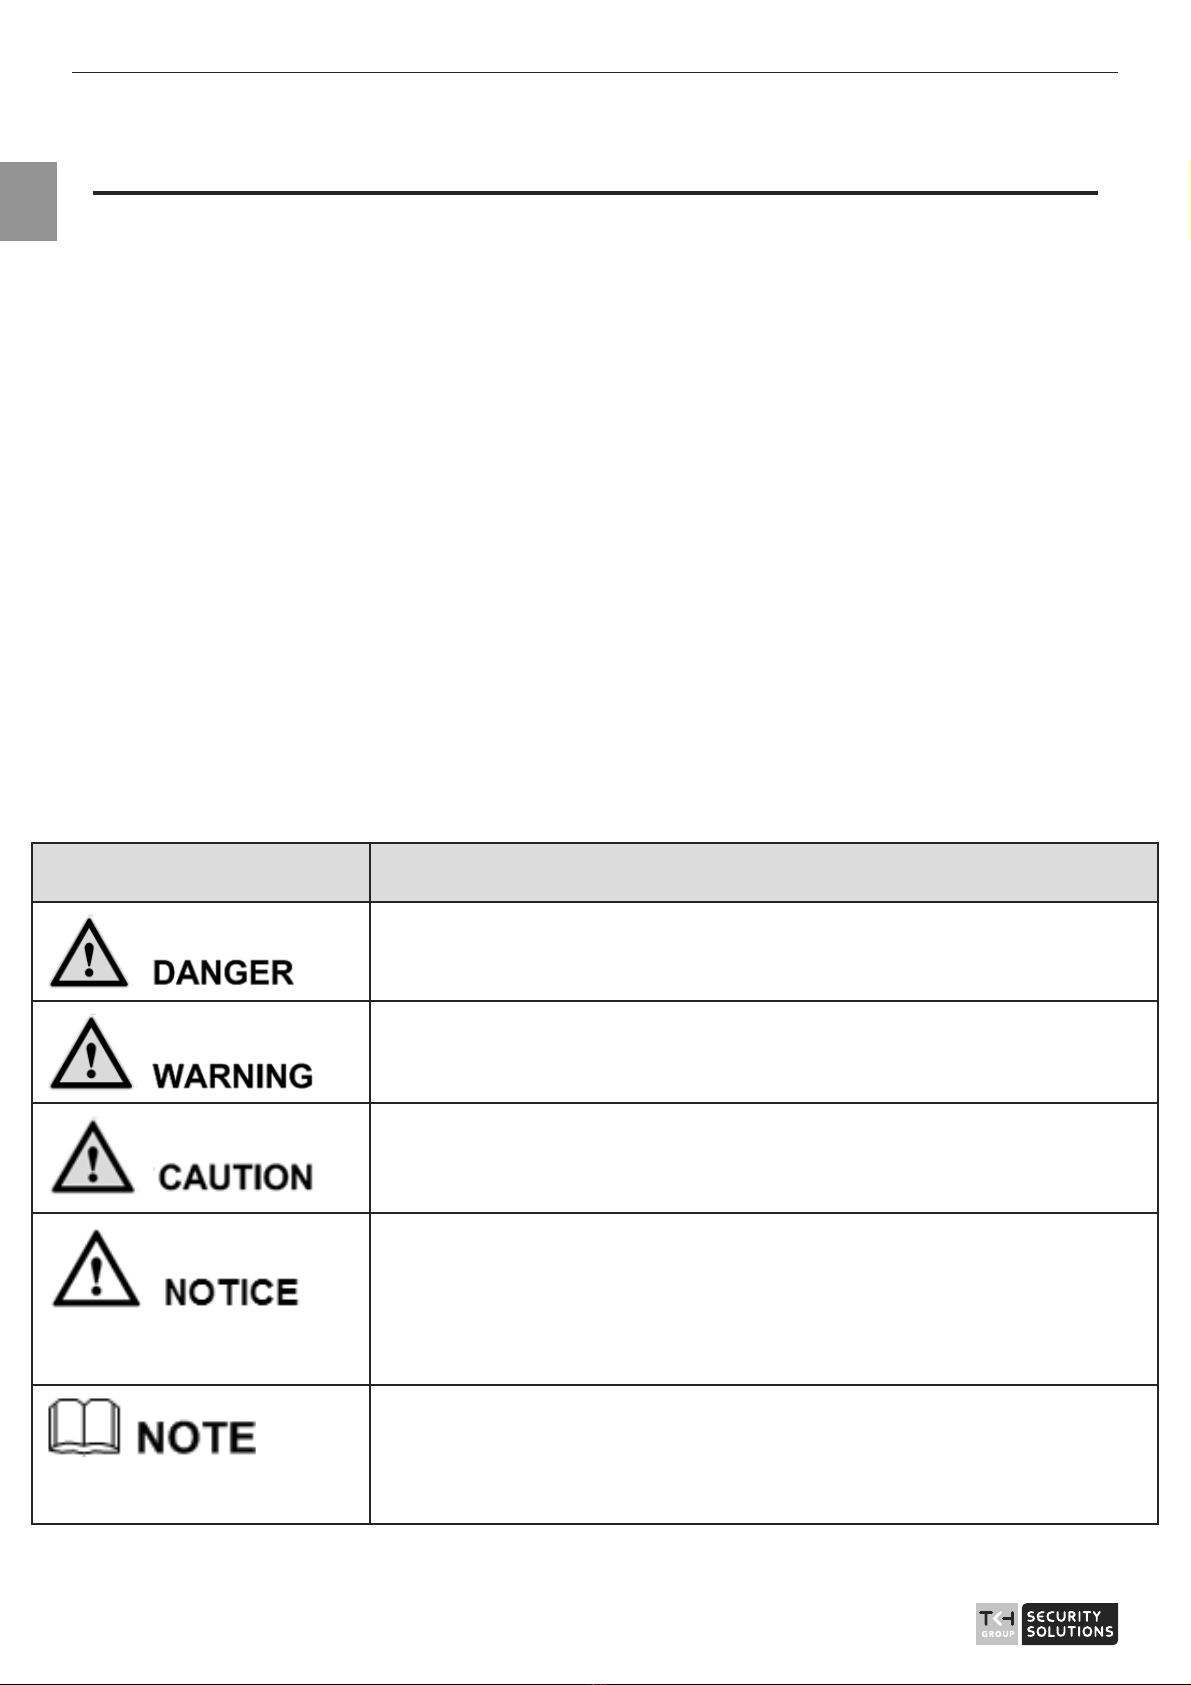
Symbol Conventions
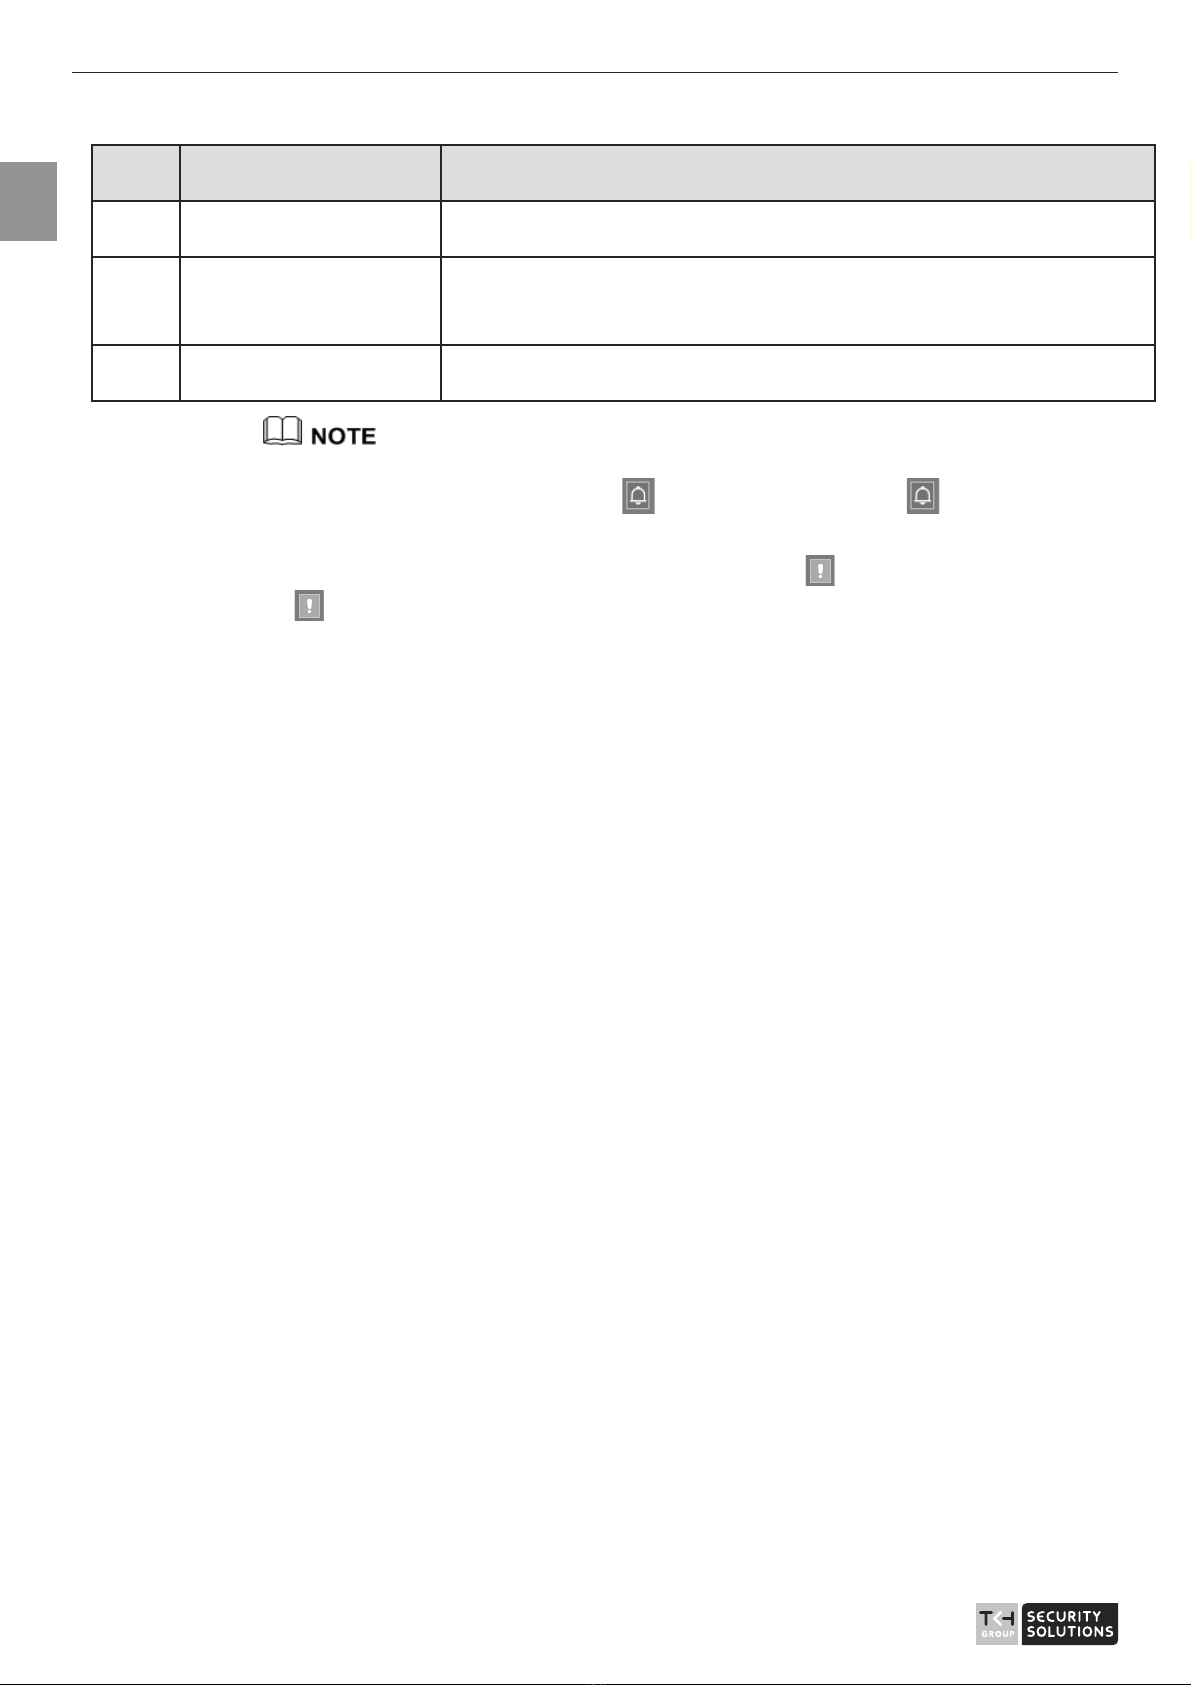
The symbols that may be found in this document are defined as follows.
Symbol Description
Indicates an imminently hazardous situation which, if not avoided, will
result in death or serious injury.
Indicates a potentially hazardous situation which, if not avoided, could
result in death or serious injury.
Indicates a potentially hazardous situation which, if not avoided, may
result in minor or moderate injury.
Indicates a potentially hazardous situation which, if not avoided, could
result in equipment damage, data loss, performance deterioration, or
unanticipated results.
NOTICE is used to address practices not related to personal injury.
Calls attention to important information, best practices and tips.
NOTE is used to address information not related to personal injury,
equipment damage, and environment deterioration.

User Manual - Network Speed Dome - TKIZ48E12S - TKIZ48E12IS - TKIZ28E30IS - TKIZ28E37IS - TKIZ48E40IS
EN
3
Contents
About This Document .........................................................................
Contents..................................................................................................
1 Quick Start ..........................................................................................
1.1 Login and Logout ................................................................................................... 澳
1.2 Change the Password.............................................................................................. 澳
1.3 Main Page Layout................................................................................................... 澳
2 Browse Videos....................................................................................
2.1 Browse Real-Time Videos ...................................................................................... 澳
2.2 Control and Configure the PTZ ............................................................................ 1澳
2.3 Sensor Setting....................................................................................................... 2澳
2.3.1 Access the Sensor Setting Interface................................................................. 2澳
2.3.2 Time Segment.................................................................................................. 2澳
2.3.3 Image Setting................................................................................................... 2澳
2.3.4 Scene Mode ..................................................................................................... 2澳
2.3.5 Exposure.......................................................................................................... 2澳
2.3.6 WB Setting ...................................................................................................... 澳
2.3.7 Daynight .......................................................................................................... 3澳
2.3.8 Noise Reduction .............................................................................................. 3澳
2.3.9 Enhance Image ................................................................................................ 澳
2.3.10 Zoom Focus................................................................................................... 4澳
3 Configure the Device ......................................................................4
3.1 Local Network ...................................................................................................... 4澳
4 Troubleshooting...............................................................................4

User Manual - Network Speed Dome - TKIZ48E12S - TKIZ48E12IS - TKIZ28E30IS - TKIZ28E37IS - TKIZ48E40IS
EN
4
1 Quick Start
1.1 Login and Logout
You must use Internet Explorer 8, and more to access the web
management system; otherwise, some functions may be unavailable.
Login
Step 1 Open Internet Explorer, enter the IP address of the IP camera (default value:
192.168.0.120) in the address box, and press Enter.
The login page is displayed, as shown in Figure 1-1.
Figure 1-1 Login page
Step 2 Enter the user name, and password.
User Manual - Network Speed Dome - TKIZ48E12S - TKIZ48E12IS - TKIZ28E30IS - TKIZ28E37IS - TKIZ48E40IS
EN
5
zThe default user name is admin. The default password is admin.
zPlease change the password to ensure system security at the first login.
zYou can change the system display language on the login page.
Step 3 Click Login to enter the interface.
The main page is displayed.
Logout
To log out of the system, click in the upper right corner of the main
page. The login page is displayed after you log out of the system.
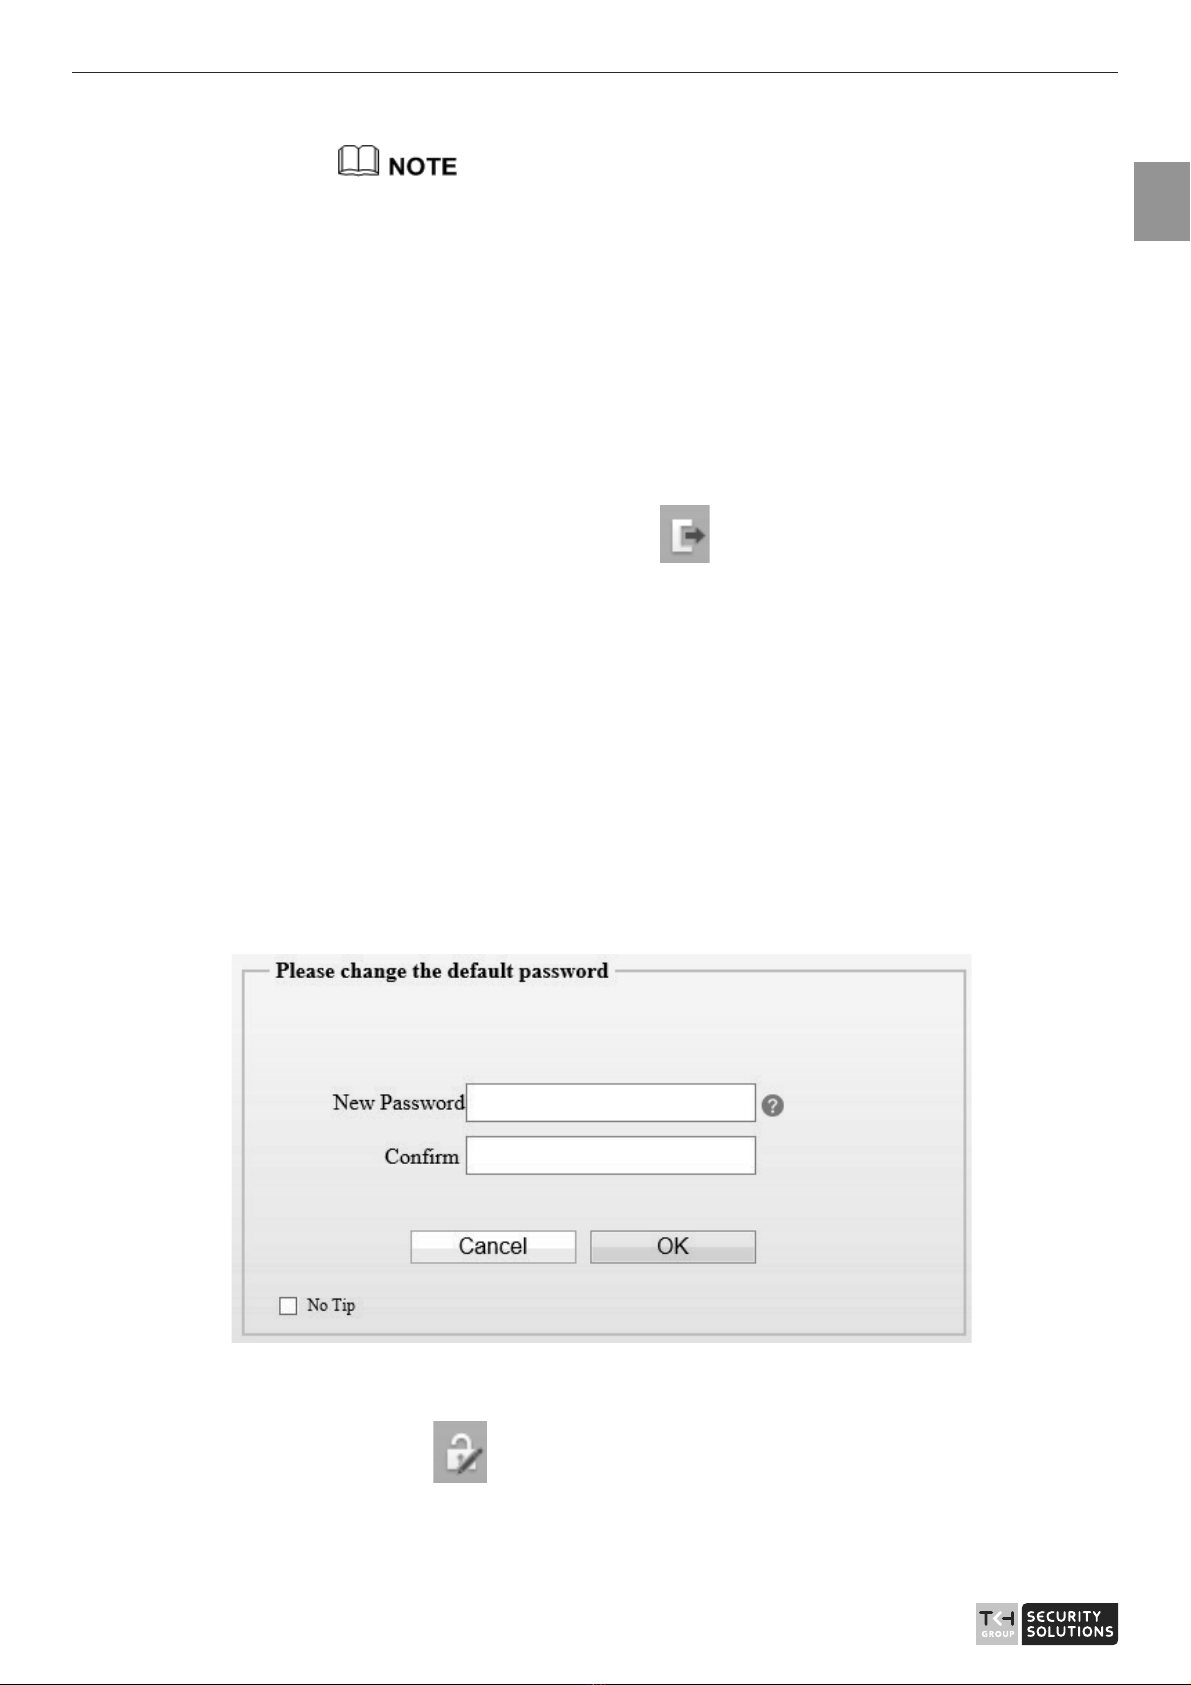
1.2 Change the Password
Description
The change default password page will be displayed as shown in Figure
1-2, when you login the system for the first time.
Figure 1-2 Change the default password page
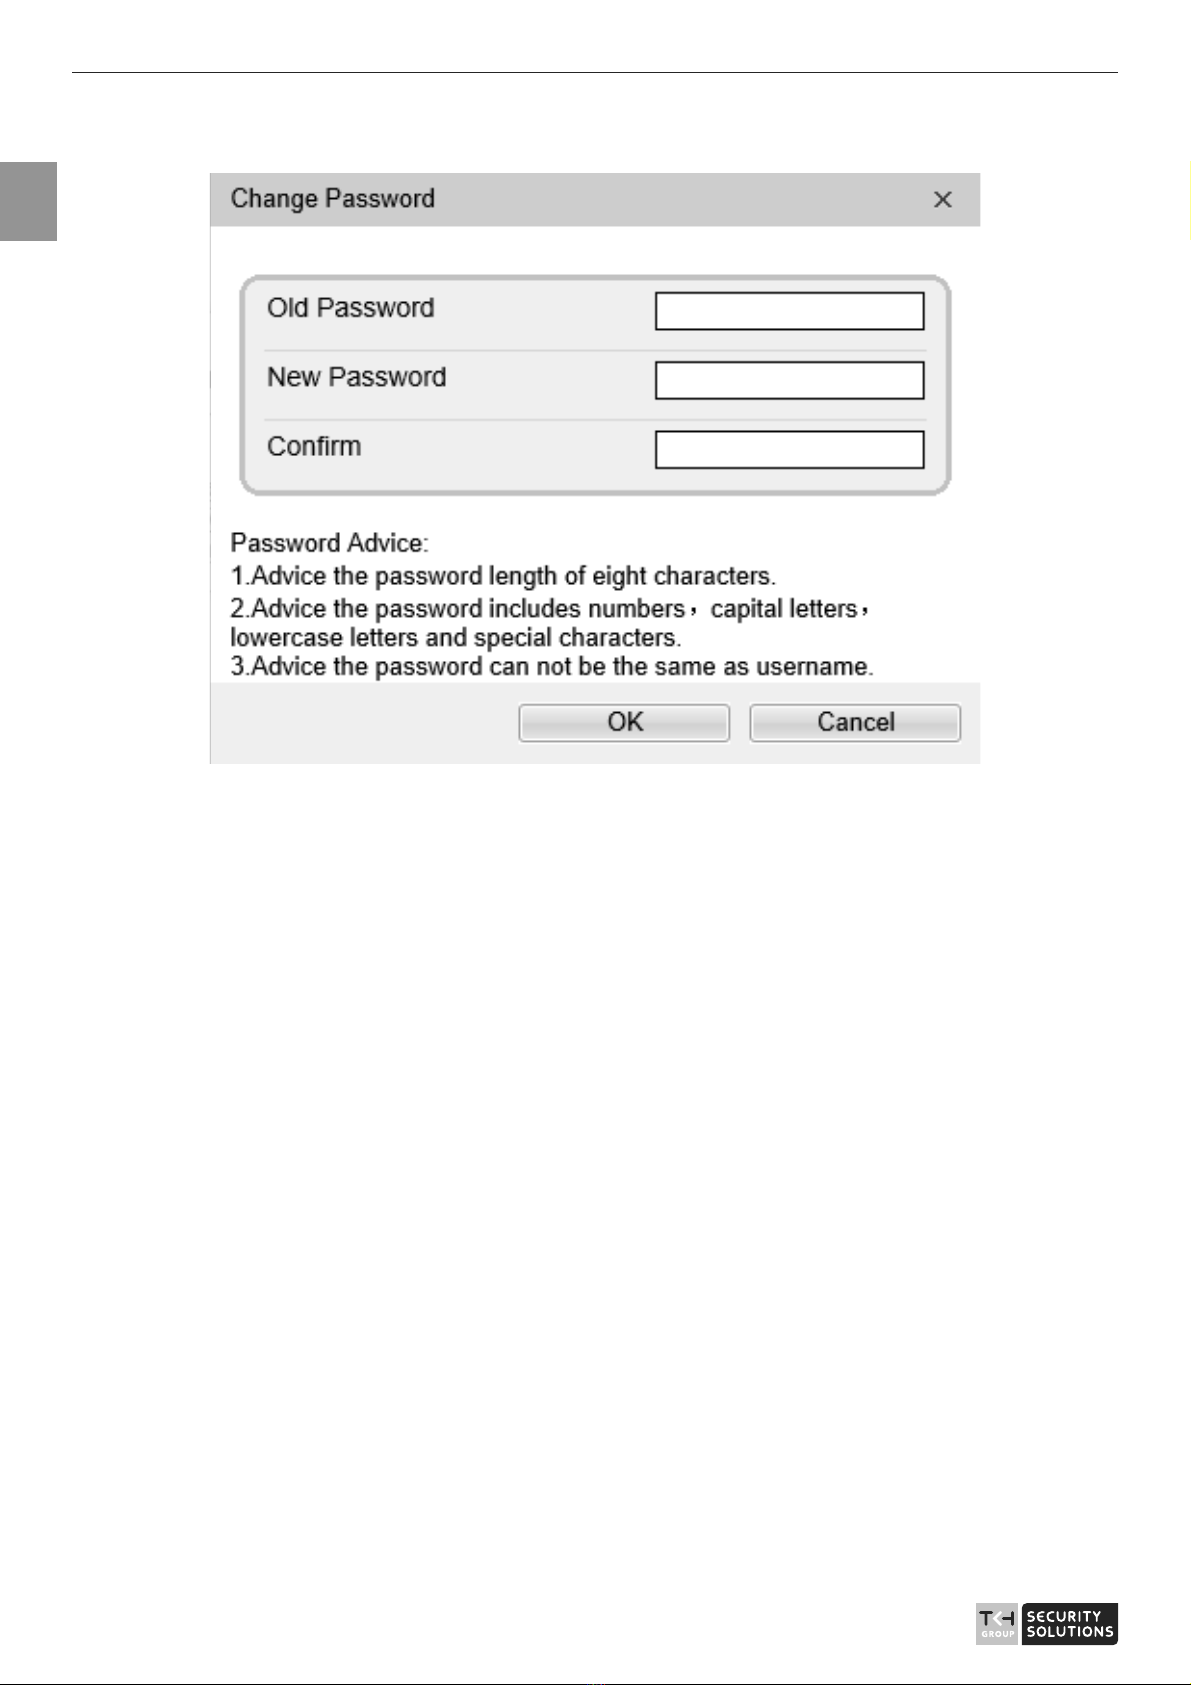
Or click to change the password for login the system, as show in
Figure 1-3.
User Manual - Network Speed Dome - TKIZ48E12S - TKIZ48E12IS - TKIZ28E30IS - TKIZ28E37IS - TKIZ48E40IS
EN
6
Figure 1-3 Modify password dialog box
Procedure
Step 1 Input the old password, new password, and confirmation password.
Step 2 Click OK.
If the message "Change own password success" is displayed, the
password is successfully changed. If the password fails to be changed, the
cause is displayed. (For example, the new password length couldn’t be
less than eight.)
Step 3 Click OK.
The login page is displayed.
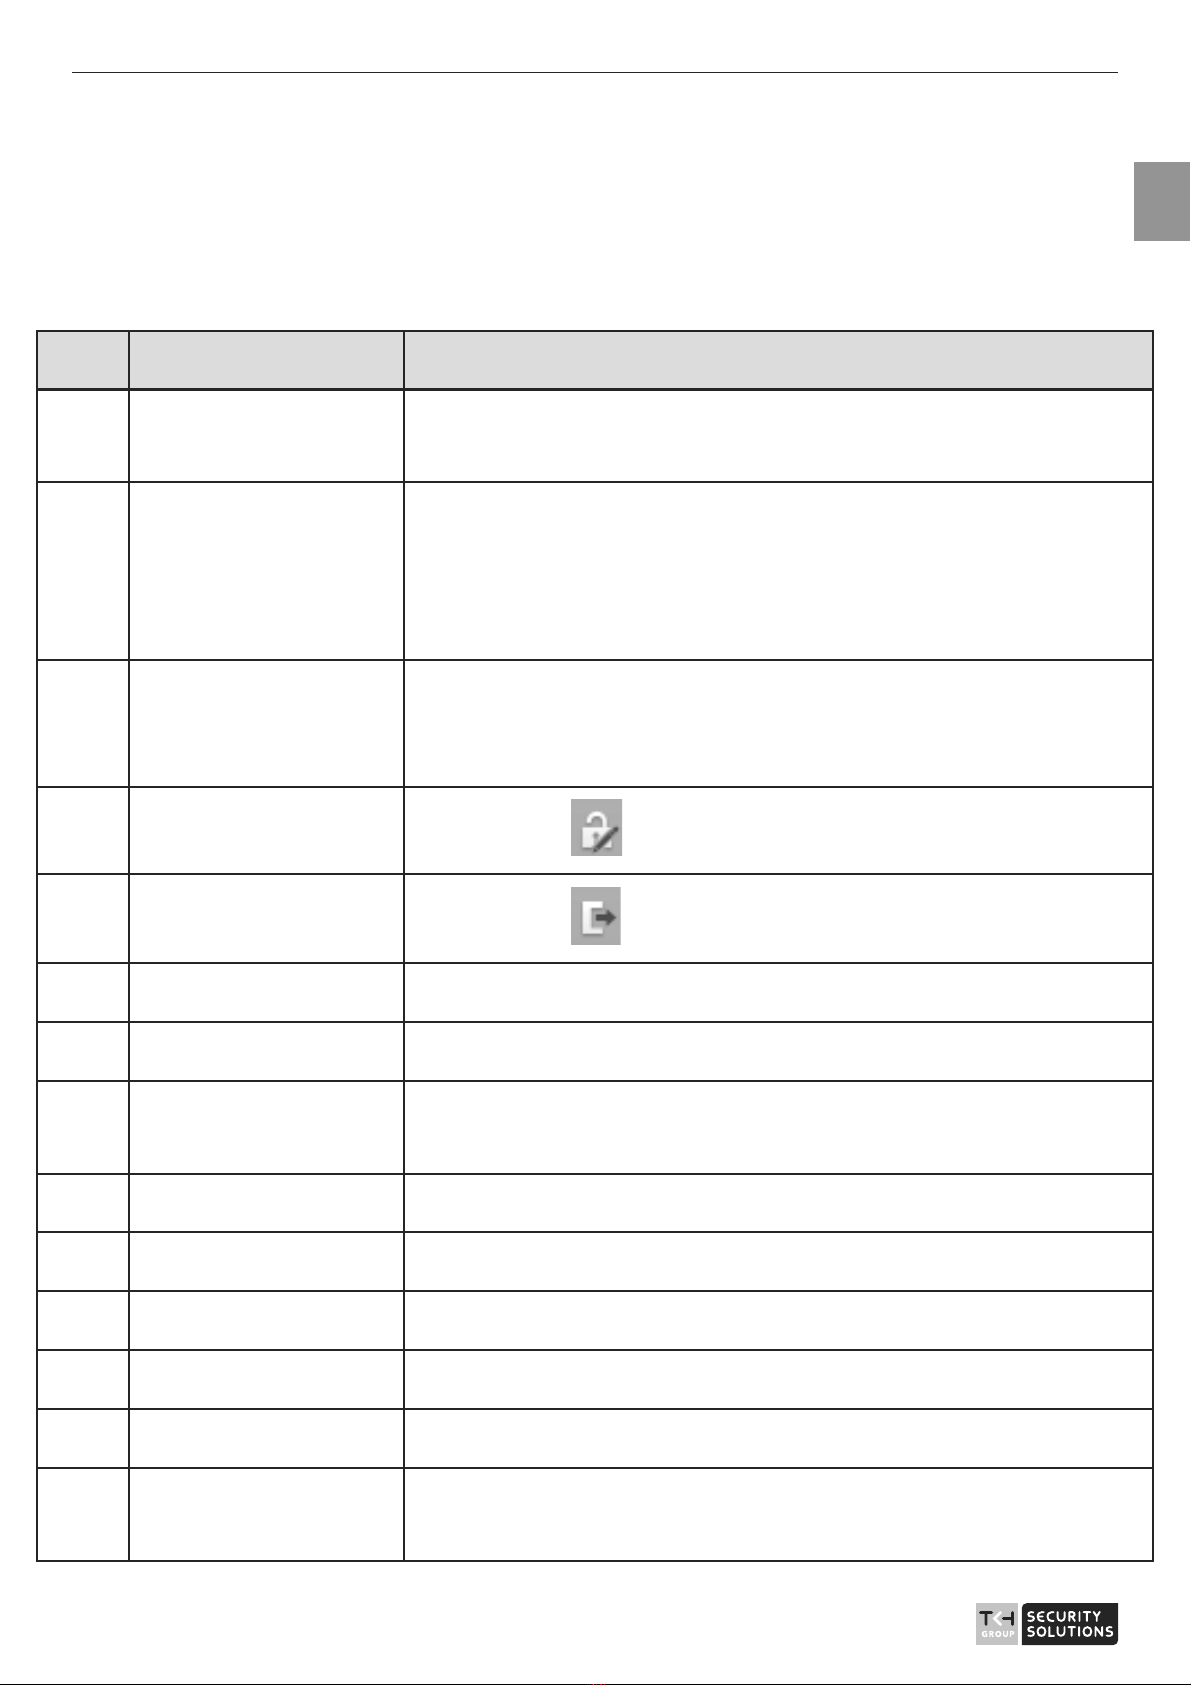
1.3 Main Page Layout
On the main page, you can view real-time videos, receive alarm and fault
notifications, set parameters, change the password, and log out of the
system. Figure 1-4 shows the main page layout. Table 1-1 describes the
elements on the main page.
User Manual - Network Speed Dome - TKIZ48E12S - TKIZ48E12IS - TKIZ28E30IS - TKIZ28E37IS - TKIZ48E40IS
EN
7
Figure 1-4 Main page layout
Table 1-1 Elements on the main page
No. Element Description
1 Real-time video area Real-time videos are played in this area. You can also set sensor
parameters, right click on the real-time video display.
2 Playback You can query the playback videos in this area.
NOTE
Only when the SD card or NAS has videos that you can query the
playback videos.
3 Device configuration
You can choose a menu to set device parameters, including the device
information, audio and video streams, alarm setting, and privacy mask
function.
4 Change password
You can click to change the password.
5 Sign Out
You can click to return to the login page.
6 Stream Choose stream mode from drop-list.
7 PTZ Only used for dome cameras, set parameters.
8 3D Only used for dome cameras, locate the exact location on the live
video screen.
9 Pause/play Pause the live video or play the video.
10 Live/smooth Switch the resolution of live video automatically.
11 Audio Open/close the audio.
12 Microphone Open/close the microphone.
13 Sensor Set the sensor parameters.
14 Snapshot Click the icon to snapshot the video and save the images to the
specified location.
User Manual - Network Speed Dome - TKIZ48E12S - TKIZ48E12IS - TKIZ28E30IS - TKIZ28E37IS - TKIZ48E40IS
EN
8
No. Element Description
15 Local record Record the video and save the file to the specified location.
16 Mode Only used for fisheye camera, click the icon to choose mode to play
video.
17 Intelligent analysis Open/close the intelligent analysis.
1.When the device accepts an alarm signal, the alarm icon will display within 10s in the web
management system. The alarm icon is displayed. You can click to view the
alarm information.
2.When the device encounters an exception, the fault icon is displayed. You can click
to view the information.

User Manual - Network Speed Dome - TKIZ48E12S - TKIZ48E12IS - TKIZ28E30IS - TKIZ28E37IS - TKIZ48E40IS
EN
9
2 Browse Videos
2.1 Browse Real-Time Videos
You can browse real-time videos in the web management system.
Preparation
To ensure that real-time videos can be played properly, you must perform
the following operations when you login to the web management system
for the first time:
Step 1 Open Internet Explorer. Choose Tools > Internet Options > Security >
Trusted sites > Sites.
In the displayed dialog box, click Add, as shown in Figur e 2-1.
Figure 2-1 Adding a trusted site
User Manual - Network Speed Dome - TKIZ48E12S - TKIZ48E12IS - TKIZ28E30IS - TKIZ28E37IS - TKIZ48E40IS
EN
10
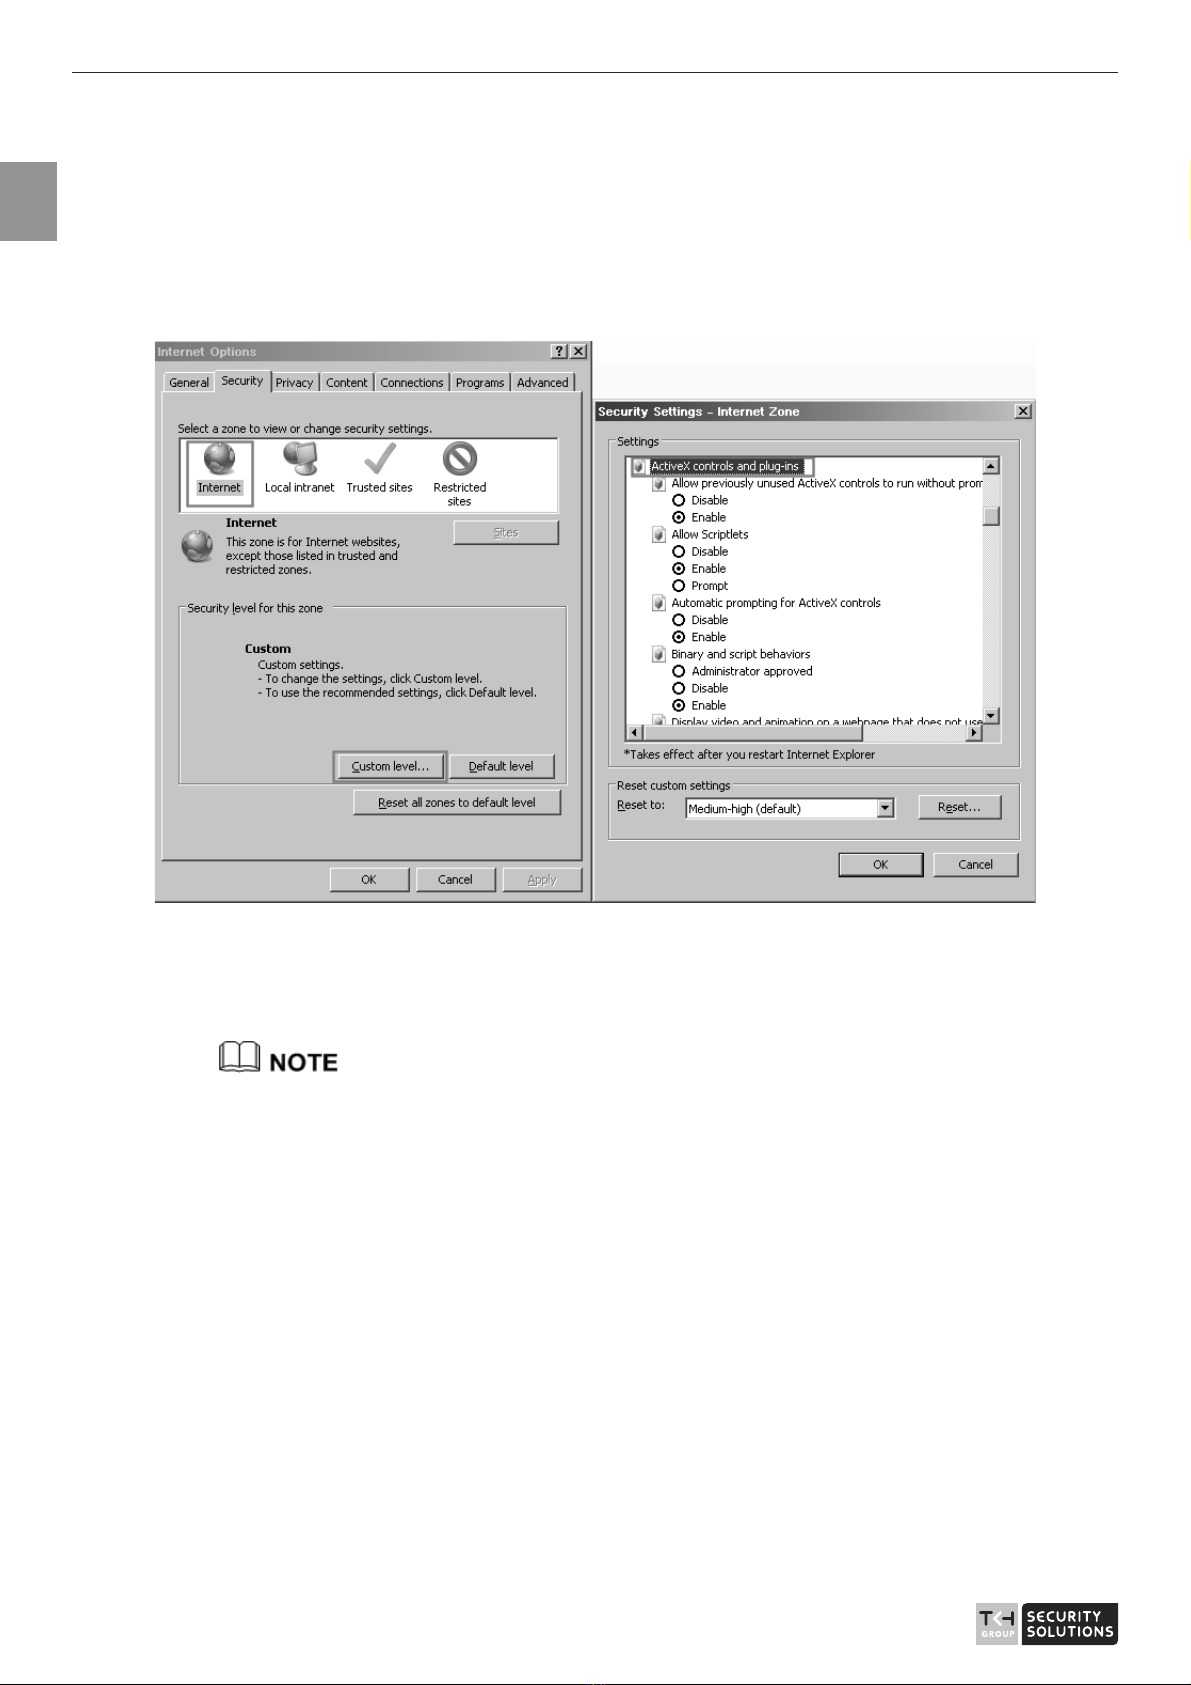
Step 2 In Internet Explorer, choose Tools > Internet Options > Security >
Customer level, and set Download unsigned ActiveX controls and Initialize
and script ActiveX controls not marked as safe for scripting under ActiveX
controls and plug-ins to Enable, as shown in Figure 2-2.
Figure 2-2 Configure ActiveX controls and plug-ins
Step 3 Download and install the player control as prompted.
If the repair tips displayed when installing the control , please ignore the prompt, and
continue the installation, the login page is displayed when the control is loaded.
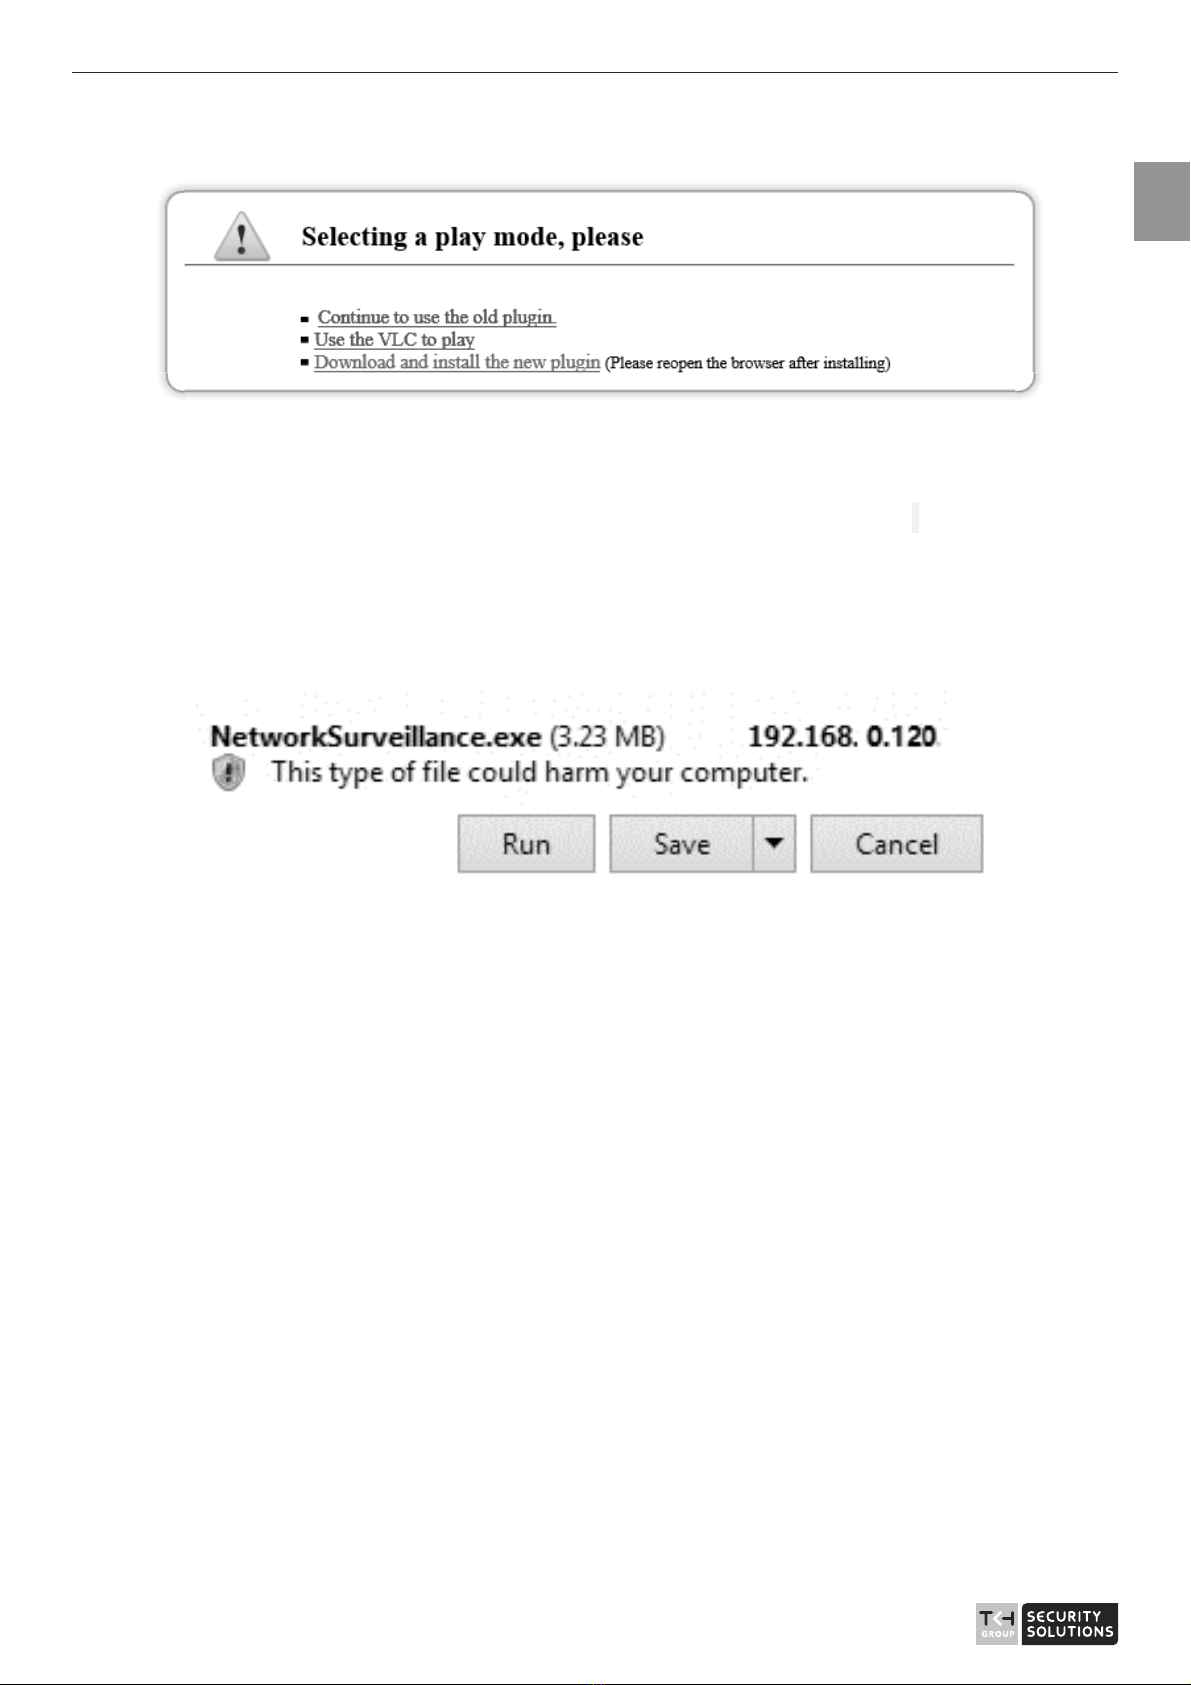
Select the play mode
You can select VLC player to play the video, or select the plugin to play
the video as shown in Figure 2-3 when you login to the web management
system for the first time.
User Manual - Network Speed Dome - TKIZ48E12S - TKIZ48E12IS - TKIZ28E30IS - TKIZ28E37IS - TKIZ48E40IS
EN
11
Figure 2-3 Download the plugin page
If plugin is selected, please install player control at first.
Step 1 Click “ download and install the new plugin”, download the plugin as
shown in Figure 2-4.
Figure 2-4 Run the plugin
Step 2 Click ”Run”, select destination location as shown in Figure 2-5.

User Manual - Network Speed Dome - TKIZ48E12S - TKIZ48E12IS - TKIZ28E30IS - TKIZ28E37IS - TKIZ48E40IS
EN
12
Figure 2-5 Select destination location
Step 3 Click “Next”, ready to install the plugin, as shown in Figure 2-6.

User Manual - Network Speed Dome - TKIZ48E12S - TKIZ48E12IS - TKIZ28E30IS - TKIZ28E37IS - TKIZ48E40IS
EN
13
Figure 2-6 Ready to install
Step 4 Click “Install” to install the plugin, as shown in Figure 2-7.

User Manual - Network Speed Dome - TKIZ48E12S - TKIZ48E12IS - TKIZ28E30IS - TKIZ28E37IS - TKIZ48E40IS
EN
14
Figure 2-7 Installing
Step 5 Click “Finish” , complete to install the plugin, as shown in Figure 2-8.

User Manual - Network Speed Dome - TKIZ48E12S - TKIZ48E12IS - TKIZ28E30IS - TKIZ28E37IS - TKIZ48E40IS
EN
15
Figure 2-8 Complete to install the plugin
Step 6 Reopen the browser after installing.
zIf the repair tips displayed when installing the control , please ignore the prompt, and
continue the installation.
zDuring installing the plugin, the browser should be closed.
Description
To browse real-time videos, click Live Video. The Live Video page is
displayed, as shown in Figure 2-9.

User Manual - Network Speed Dome - TKIZ48E12S - TKIZ48E12IS - TKIZ28E30IS - TKIZ28E37IS - TKIZ48E40IS
EN
16
Figure 2-9 Live Video page
On the Live Video page, you can perform the following operations:
zClick to stop playing a video.
zClick to play a video.
zDouble-click in the video area to enter the full-screen mode, and
double-click again to exit.
zSwitch among preset streams 1, 2, and 3. For details about how to
configure streams
zClick to switch the video to smooth mode.
zClick to snapshot and save the photos.
zClick to enable the local record.
zConfigure the sensor.
You can right-click in the video area. A shortcut menu is displayed and allows you to enter the
full-screen mode, set sensor parameters, zoom in or out, and return to the default view.
To set sensor parameters, click to open the Sensor Setting page. On the Sensor Setting
page, you can adjust the image, mirror, camera mode, focus setting, Iris setting, white balance,
and noise filter as prompted.
123
User Manual - Network Speed Dome - TKIZ48E12S - TKIZ48E12IS - TKIZ28E30IS - TKIZ28E37IS - TKIZ48E40IS
EN
17
2.2 Control and Configure the PTZ
Prerequisite
All PTZ functions are only available to High Speed Network Dome and device connected
to an external PTZ.
Controlling the PTZ
When browsing real-time videos shot by a dome camera or a camera connected to an
external PTZ, you can control the PTZ to view videos shot in different directions.
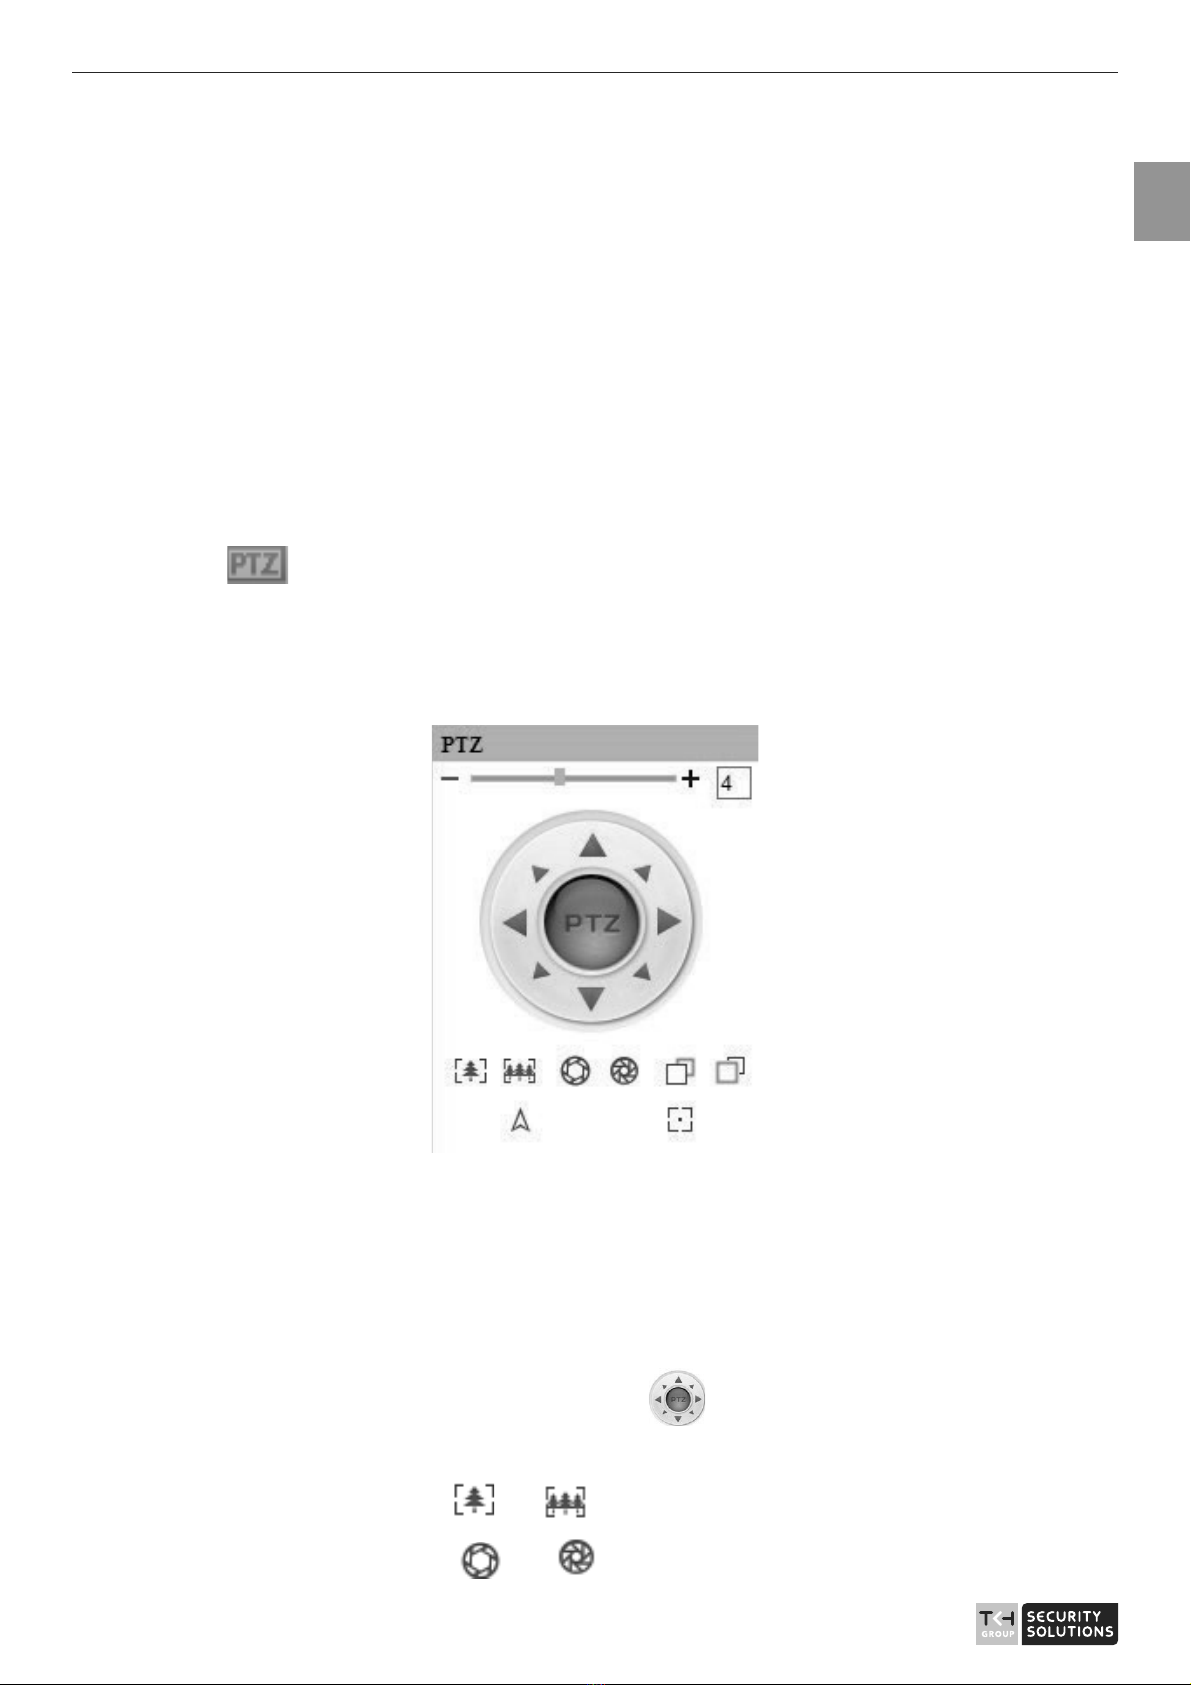
Click below the Live Video page to open the PTZ Control page as shown in
Figure 2-10, you can click the eight arrow keys to move the PTZ in eight directions. You
can also zoom the lens and adjust the focal length.
Figure 2-10 PTZ Control area
In the PTZ control area, you can perform the following operations:
zSlide the slider left or right beyond the PTZ rotation keys, you can
adjust the PTZ rotation speed.
zClick the arrows on the to move the PTZ in eight
directions.
zClick or to adjust the focal length.
zClick or to adjust the aperture.

User Manual - Network Speed Dome - TKIZ48E12S - TKIZ48E12IS - TKIZ28E30IS - TKIZ28E37IS - TKIZ48E40IS
EN
18
zClick or to focus.
zClick to set due north direction.
zClick to enable automatic prime function.
Configure the PTZ
If a camera has the PTZ or is connected to a PTZ, you can configure the PTZ in the PTZ
Configure area, as shown in Figure 2-11.
Figure 2-11 PTZ Configure area
In the PTZ configure area, you can perform the following operations:
zAdd, delete, and invoke preset positions.
zAdd, delete, and invoke tracks.
zAdd, delete, and invoke scans.
zAdd, delete, and invoke tours.
zSet the idle.
zSet the timer.
zSet the extension.
Set Light On/Off and Brush function.
Brush is used to clean the lens. Light On/Off is used to control the
infrared camera shields on and off.

User Manual - Network Speed Dome - TKIZ48E12S - TKIZ48E12IS - TKIZ28E30IS - TKIZ28E37IS - TKIZ48E40IS
EN
19
zBrush is available only to a camera with a brush or a camera shield.
zLight On/Off is available only to specific camera shields.
3D Positioning
Click below the Live Video page to configure the 3D positioning
function.
The 3D positioning function quickly rotates the PTZ and changes the focal
length in specific scenarios. You can also change the focus by drawing
rectangle frames.
The default value of 3D Positioning is ON.
Configure and Invoke Preset Positions
You can configure preset positions and quickly rotate the camera to a preset
position by invoking the preset position.
The procedure is as follows:
Step 1 Configure a preset position.
1. Set the preset ID and name.
2. Click to finish the preset position setting.
Step 2 Invoke a preset position.
Select a preset position from the Preset drop-down list box to invoke
the preset position.
Configure and Invoke Tracks
You can record a track to allow the camera to repeatedly rotate based on
the preset track.
Step 1 Configure a track.
1. Set the track ID and name.
2. Click to set the starting position of the track.

User Manual - Network Speed Dome - TKIZ48E12S - TKIZ48E12IS - TKIZ28E30IS - TKIZ28E37IS - TKIZ48E40IS
EN
20
3. Use arrow keys in the PTZ Control area to set a required a track.
4. Click to finish the track setting.
Step 2 Invoke a track.
Select a track name from the Track drop-down list box to invoke the
track.
A maximum of six tracks can be configured.
Configure and Invoke Scans
You can configure a starting point and end point to allow the camera to
repeatedly rotate from the starting point to end point.
Step 1 Configure a scan.
1. Click Scan.
The Scan Add page is displayed as shown in Figure 2-12.
Figure 2-12 Scan configuration
2. Set the scan ID and name.
3. Click .
4. Use arrow keys in the PTZ Control area to set a start point and an
end point.
This manual suits for next models
4
Table of contents
Other TKH Security Camera manuals

TKH
TKH 1004 Series User manual

TKH
TKH FD2002v2M User manual

TKH
TKH TKID45F2S User manual

TKH
TKH FD1001V1-EI/T User manual

TKH
TKH Siqura FD810V1IR User manual

TKH
TKH trafficptz ultimo User manual

TKH
TKH PD1103Z2-EI User manual

TKH
TKH SiQURA PD1022v2 User manual

TKH
TKH EX PTZ Series User manual

TKH
TKH SIQURA FD002F2-EI User manual


