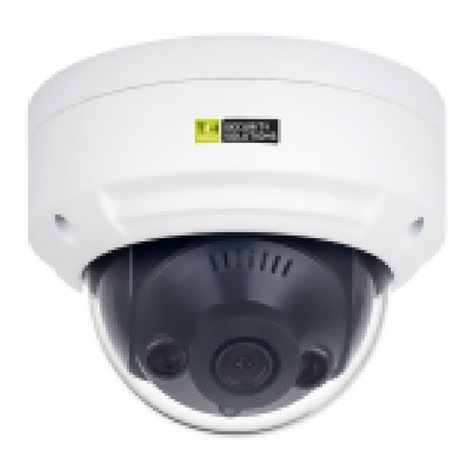
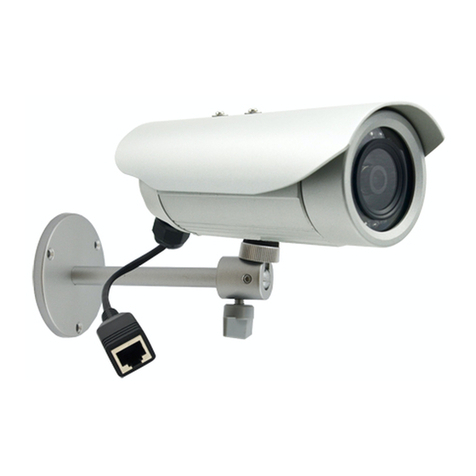
TKH TKIB41M1S User manual

User manual
Network bullet
TKIB41M1S / TKIB42M1S
tkhsecurity.fr
V.201910.01

User Manual - Network Bullet - TKIB41M1S & TKIB42M1S
EN
2
Precautions
Precautions
Fully understand this document before using this device, and strictly observe rules in
this document when using this device. If you install this device in public places,
provide the tip "You have entered the area of electronic surveillance" in an eye-
catching place. Failure to correctly use electrical products may cause fire and severe
injuries. To prevent accidents, carefully read the following context:
Symbols
This document may contain the following symbols whose meanings are described
accordingly.
Symbol Description
It alerts you to fatal dangers which, if not avoided, may
cause deaths or severe injuries.
It alerts you to moderate dangers which, if not avoided,
may cause minor or moderate injuries.
It alerts you to risks. Neglect of these risks may cause
device damage, data loss, device performance
deterioration, or unpredictable results.
It provides a tip that may help you resolve problems or
save time.
It provides additional information.
To prevent electric shocks or other dangers, keep power plugs dry and clean.
z Strictly observe installation requirements when installing the device. The
manufacturer shall not be held responsible for device damage caused by users' non-
conformance to these requirements.

User Manual - Network Bullet - TKIB41M1S & TKIB42M1S
EN
3
z Strictly conform to local electrical safety standards and use power adapters that are
marked with the LPS standard when installing and using this device. Otherwise,
this device may be damaged.
z Use accessories delivered with this device. The voltage must meet input voltage
requirements for this device.
z If this device is installed in places with unsteady voltage, ground this device to
discharge high energy such as electrical surges in order to prevent the power supply
from burning out.
z When this device is in use, ensure that no water or any liquid flows into the device.
If water or liquid unexpectedly flows into the device, immediately power off the
device and disconnect all cables (such as power cables and network cables) from
this device.
z Do not place the camera and unpackaged products at a radiation source with a high
intensity regardless of whether the device is in the normal power-on state, for
example, the sun, laser, and electric arc welder, and place the camera and
unpackaged products against objects with a high heat source, for example, the sun.
Otherwise, the accuracy of the camera will be affected. In addition, the detector in
the camera may be permanently damaged.
z If this device is installed in places where thunder and lightning frequently occur,
ground the device nearby to discharge high energy such as thunder strikes in order
to prevent device damage.
z During the outdoor installation, prevent the morning or evening sunlight incidence
to the lens of the camera. The sun shade must be installed and adjusted according to
the angle of the sunlight illumination.
z Avoid heavy loads, intensive shakes, and soaking to prevent damages during
transportation and storage. The warranty does not cover any device damage that is
caused during secondary packaging and transportation after the original packaging
is taken apart.
z This device is a static sensitivity device. Improper static may damage the camera.
ESD protection measures and reliable grounding must be well prepared for device
installation and uninstallation.
z Protect this device from fall-down and intensive strikes, keep the device away from
magnetic field interference, and do not install the device in places with shaking
surfaces or under shocks.
z Use a soft and dry cloth to clean the device body. In case that the dirt is hard to
remove, use a dry cloth dipped in a small amount of mild detergent and gently wipe
the device, and then dry it again. Pay special attention to the front window of the
camera because this is precision optics. If the front window has water spots, use a
clean and soft cloth to moisten with water and wipe it. If the front window needs
further cleaning, use a soft cloth dampened with isopropyl alcohol or detergent.
Improper cleaning can cause damage to the device.

User Manual - Network Bullet - TKIB41M1S & TKIB42M1S
EN
4
z The lens window of the camera is designed to be applicable to an outdoor
environment. The window is coated with durable coating material, but may require
frequent cleaning. When you found lens image degradation or excessive
accumulation of pollutants, you should clear up the window in a timely manner.
Exercise caution when you use this device in severe sandstorm (such as deserts) or
corrosive environments (such as offshore). Improper use may cause surface coating
off.
z Do not jam the ventilation opening. Follow the installation instructions provided in
this document when installing the device.
z Keep the device away from heat sources such as radiators, electric heaters, or other
heat equipment.
z Keep the device away from moist, dusty, extremely hot or cold places, or places
with strong electric radiation.
z If the device is installed outdoors, take insect- and moisture-proof measures to
avoid circuit board corrosion that can affect monitoring.
z Remove the power plug if the device is idle for a long time.
z Before unpacking, check whether the fragile sticker is damaged. If the fragile
sticker is damaged, contact customer services or sales personnel. The manufacturer
shall not be held responsible for any artificial damage of the fragile sticker.
Special Announcement
All complete products sold by the manufacturer are delivered along with nameplates,
operation instructions, and accessories after strict inspection. The manufacturer shall
not be held responsible for counterfeit products.
This manual may contain misprints, technology information that is not accurate enough,
or product function and operation description that is slightly inconsistent with the
actual product. The manufacturer will update this manual according to product function
enhancement or changes and regularly update the software and hardware described in
this manual. Update information will be added to new versions of this manual without
prior notice.
This manual is only for reference and does not ensure that the information is totally
consistent with the actual product. For consistency, see the actual product.

User Manual - Network Bullet - TKIB41M1S & TKIB42M1S
EN
5
Contents
1 Quick Configuration............................................................................................... 澳
1.1 Login and Logout ........................................................................................................... 澳
1.2 Main Page layout............................................................................................................ 澳
1.3 Change the Password ..................................................................................................... 澳
1.4 Browse Video ................................................................................................................. 澳
1.4.1 Install Plugins................................................................................................... 1澳
1.5 Setting Local Network Parameters ............................................................................... 1澳
2 Parameter Setting................................................................................................... 1澳
2.1 Sensor Setting Interface................................................................................................ 1澳
2.2 Time Segment............................................................................................................... 1澳
2.3 Image Setting ............................................................................................................... 1澳
2.4 Scene Mode.................................................................................................................. 1澳
2.5 Exposure....................................................................................................................... 1澳
2.6 WB Setting ................................................................................................................... 澳
2.7 Daynight....................................................................................................................... 2澳
2.8 Noise Reduction ........................................................................................................... 2澳
2.9 Enhance Image ............................................................................................................. 2澳
3 Configure the Device ............................................................................................ 3澳
3.1 Local Network.............................................................................................................. 3澳
4 Troubleshooting..................................................................................................... 3澳
2. =RRP)RFXV ............................................................................................................. 2澳

User Manual - Network Bullet - TKIB41M1S & TKIB42M1S
EN
6
1 Quick Configuration
1.1 Login and Logout
You must use Internet Explorer 8 or a later version to access the web management
system; otherwise, some functions may be unavailable.
Login system
Step 1 Open the Internet Explorer, enter the IP address of IP camera (default value:
192.168.0.121) in the address box, and press Enter.
The login page is displayed, as shown in Figure 1-1.
Figure 1-1 Login page
Step 2 Input the User and password.
z The default name and password are both admin. Modify the password when you login
the system for first time to ensure system security. After modifying password, you need
to wait at least three minutes then power off to make sure modifying successfully . Or
login the Web again to test the new password.
z You can change the system display language on the login page.
Step 3 Click Login arrow. The main page is displayed.

User Manual - Network Bullet - TKIB41M1S & TKIB42M1S
EN
7
logout
To logout of system, click in the upper right corner of the main page, the login page
is display after you log out of the system.
1.2 Main Page layout
On the main page, you can view real-time video, set parameter, Video parameter, Video
control, and logout of the system. Figure 1-2 is shown the main page layout. Table 1-1
lists the elements on the main page layout.
Figure 1-2 Main page layout
Table 1-1 Elements on the main page
No. Element Description
1 Real-time video
area
Real-time videos are played in this area. You can also set
sensor parameters.
2 Playback You can query the playback videos in this area.
NOTE
Only when the SD card or NAS have videos that user can query
the playback videos.
3 Device
configuration
You can choose a menu to set device parameters,
including the device information, audio and video streams,
alarm setting, and privacy mask function.
123 4
67 89 10111213
5

User Manual - Network Bullet - TKIB41M1S & TKIB42M1S
EN
8
No. Element Description
4 Change
password You can click to change the password.
5 Sign Out
You can click to return to the login page.
6 Stream Three are three streams. Choose one type from drop-down
list.
7 PTZ Only used for dome cameras, set parameters.
8 Pause/Start Close live video or play live video.
9 Live/Smooth Switch image quality.
10 Audio Open/close the audio.
11 Sensor setting Click the icon, it will access to sensor setting.
12 Snapshot Click the icon, it will snapshot.
13 Local record Click the icon, it will record video and save.
14 Intelligent
analysis
Open or close intelligent analysis.
1. When the device generates an alarm, the alarm icon is displayed. You can click
to view the alarm information. When the device accepts an alarm signal, the alarm icon will
display within 10s in the web management system.
2. When the device encounters an exception, the fault icon is displayed. You can click
to view the fault information.
1.3 Change the Password
Description
You can click to change the password for logging to the system.
Procedure
Step 1 Click in the upper right corner of the main page.
The Change Password dialog box is displayed, as shown in Figure 1-3.

User Manual - Network Bullet - TKIB41M1S & TKIB42M1S
EN
9
Figure 1-3 Modify Password dialog box
The change password page will be displayed if you don’t change the default password when
you login the system for the first time. User need to wait at least three minutes after
changing password, and then restart the device. The password incorrect more than 3 times,
please login again after 5 minutes
Step 2 Input the old password, new password, and confirmation password.
Step 3 Click OK.
Step 4
If the message "Change own password success" is displayed, the password is
successfully changed. If the password fails to be changed, the cause is displayed. (For
example, the new password length couldn’t be less than eight.)
Click OK. The login page is displayed.
1.4 Browse Video
User can browse the real-time video in the web management system.
Preparation
To ensure the real-time video can be play properly, you must perform the following
operation when you login to the web for the first time:
Step 1 Open the Internet Explorer. Choose Tools > Internet options > Security > Trusted
sites > Sites.

User Manual - Network Bullet - TKIB41M1S & TKIB42M1S
EN
10
In the display dialog box, click Add, as shown in Figure 1-4.
Figure 1-4 Add the a trusted site
Step 2 In the Internet Explorer, choose Tool > Internet Options > Security > Customer
level, and set Download unsigned ActiveX control and initialize and script ActiveX
controls not marked as safe for scripting under ActiveX controls and plug-ins to Enable,
as shown in Figure 1-5.
Figure 1-5 Configuring ActiveX control and plug-ins
Step 3 Download and install the player control as prompted.

User Manual - Network Bullet - TKIB41M1S & TKIB42M1S
EN
11
The login page is display when the control is loaded.
1.4.1 Install Plugins
You will be prompted with a message “Download and install the new plugin” will show
as in Figure 1-6, when you login to the web management system for the first time.
Figure 1-6 Install plugin
Procedure
Step 1 Click the message, download and install the plugin follow the prompts.
Step 2 During installing, user should close the browser.
Step 3 Reopen the browser after installation.
1.5 Setting Local Network Parameters
Description
Local network parameters include:
zIP protocol
zIP address
zSubnet mask
zDefault gateway
zDynamic Host Configuration Protocol (DHCP)
zPreferred Domain Name System (DNS) server
zAlternate DNS server
zMTU
Procedure
Step 1 Choose Configuration > Device >Local Network.
The Local Network page is displayed, as shown in Figure 1-7.

User Manual - Network Bullet - TKIB41M1S & TKIB42M1S
EN
12
Figure 1-7 Local Network page
Step 2 Set the parameters according to Table 1-2.
Table 1-2 Local network parameters
Parameter Description Setting
IP Protocol IPv 4 is the IP protocol that uses
an address length of 32 bits.
IPv 6 is the IP protocol that uses
an address length of 128 bits.
[Setting method]
Select a value from the
drop-down list box.
[Default value]
IPv4
DHCP The device automatically
obtains the IP address from the
DHCP server.
[Setting method]
Click the option button.
NOTE
To query the current IP
address of the device, you
must query it on the
platform based on the
device name.
DHCP IP IP address that the DHCP server
assigned to the device.
DHCP function is
enabled.
IP Address Device IP address that can be
set as required.
[Setting method]
Enter a value manually.
[Default value]
192.168.0.120

User Manual - Network Bullet - TKIB41M1S & TKIB42M1S
EN
13
Parameter Description Setting
Subnet Mask Subnet mask of the network
adapter.
[Setting method]
Enter a value manually.
[Default value]
255.255.255.0
Default Gateway This parameter must be set if
the client accesses the device
through a gateway.
[Setting method]
Enter a value manually.
[Default value]
192.168.0.1
Preferred DNS
Server
IP address of a DNS server. [Setting method]
Enter a value manually.
[Default value]
192.168.0.1
Alternate DNS
Server
IP address of a domain server.
If the preferred DNS server is
faulty, the device uses the
alternate DNS server to resolve
domain names.
[Setting method]
Enter a value manually.
[Default value]
192.168.0.2
MTU Set the maximum value of
network transmission data
packets.
[Setting method]
Enter a value manually.
NOTE
The MTU value is range
from 800 to 1500, the
default value is 1500,
Please do not change it
arbitrarily.
Step 3 Click OK.
zIf the message "Apply success" is displayed, click OK. The system saves the
settings. The message "Set network pram’s success, Please login system again" is
displayed. Use the new IP address to log in to the web management system.
zIf the message "Invalid IP Address", "Invalid Subnet Mask", "Invalid default
gateway", "Invalid primary DNS", or "Invalid space DNS" is displayed, set the
parameters correctly.
zIf you set only the Subnet Mask, Default Gateway, Preferred DNS Server, and
Alternate DNS Server parameters, you do not need to login to the system again.
zYou can click Reset to set the parameters again if required.

User Manual - Network Bullet - TKIB41M1S & TKIB42M1S
EN
14
2Parameter Setting
2.1 Sensor Setting Interface
Operation Procedure
Step 1 On the Internet Explorer interface or the client software interface, select and right-click
the surveillance image to the set, as shown in Figure 2-1.
Figure 2-1 Sensor Setting
Table 2-1 Right-click setting parameters
Parameter Description Setting
Full screen Click it, the live video will display in full screen [Setting
method]
Click
Sensor Set parameters of sensor, more details please
refer next chapters.
[Setting
method]
Click
Zoom In/
Zoom Out
N/A [Setting
method]
Click
Step 2 Choose Sensor. The Sensor Configuration dialog box is displayed, as shown in
Figure 2-2.
2.2 Time Segment
Figure 2-2 shows the time segment interface.

User Manual - Network Bullet - TKIB41M1S & TKIB42M1S
EN
15
Figure 2-2 Time segment interface
Operation Procedure
Step 1 Click in the lower left corner of Sensor Setting, and choose Debug
Mode.
Step 2 Tick Enable.
Step 3 Set the Start Time
Step 4 Set the End Time
Step 5 Click Save, the message "Save success" is displayed, the system saves the settings.
2.3 Image Setting
Figure 2-3 shows the image setting interface.

User Manual - Network Bullet - TKIB41M1S & TKIB42M1S
EN
16
Figure 2-3 Image interface
Table 2-2 lists the image setting parameters.
Table 2-2 Image setting parameters
Parameter Description Setting
Brightness It indicates the total brightness of an image. As
the value increases, the image becomes brighter.
[Setting
method]
Drag the slider.
[Default value]
50
Contrast It indicates the contrast between the bright part
and the dark part of an image. As the value
increases, the contrast increases.
[Setting
method]
Drag the slider.
[Default value]
50
Saturation It indicates the color saturation of an image. As
the value increases, the image becomes more
colorful.
[Setting
method]
Drag the slider.
[Default value]
50
Sharpness It indicates the sharpness of the image plane and
the sharpness of the image edge. The shaper the
image, the better detail contrast.
[Setting
method]
Drag the slider.
[Default value]
50

User Manual - Network Bullet - TKIB41M1S & TKIB42M1S
EN
17
2.4 Scene Mode
Figure 2-4 shows the scene mode interface.
Figure 2-4 Scene mode interface for IP camera
Table 2-3 describes the Scene mode parameters.
Table 2-3 Scene mode parameters description
Parameter Description Configuration
Method
Scene
It indicates the working mode of a camera..
z Outdoor: It applies to outdoor scenarios.
z Indoor: It applies to indoor scenarios.
[Configuration
method]
Select from the
drop-down list
[Default value]
Outdoor
Mirror It is used to select the pixel location of an image.
z Normal: The image does not flip.
z Horizontal: The image flips to the left and right.
z Vertical: The image flips up and down.
z Horizontal and vertical: The image rotates at 180
degrees.
[Setting method]
Select a value from
the drop-down list.
[Default value]
Normal

User Manual - Network Bullet - TKIB41M1S & TKIB42M1S
EN
18
Parameter Description Configuration
Method
Aisle Mode The image rotates 90 degrees clockwise when aisle mode is
enabled.
[Setting method]
Tick the Freeze
status.
[Default value]
Disable
2.5 Exposure
Figure 2-5 shows the Exposure interface.
Figure 2-5 Exposure interface for IP camera
Table 2-4 describes Exposure parameters.

User Manual - Network Bullet - TKIB41M1S & TKIB42M1S
EN
19
Table 2-4 Exposure parameters description
Parameter Meaning Configuration Method
Exposure Mode
The exposure modes include:
z Auto: The system performs auto exposure
based on the monitoring environment.
z Manual: You can adjust the brightness of an
image by setting the following three items:
Shutter Setting, Iris Setting and Gain
Setting.
z Shutter Priority: You can set Shutter Setting
to fixed values. The iris and gain are
automatically adjusted by the system.
z Iris Priority (for high speed dome): You can
set Iris Setting to fixed values. The shutter and
gain are automatically adjusted by the system.
[Setting method]
Select a value from the
drop-down list.
[Default value]
Auto
Meter area
It is used to select the metering area.
z Whole: During metering, all areas of an image
have an equal weight, that is, all areas are
involved in the metering.
z Center pot: During metering, the central pot of
an image has the highest weight.
z Center Area: During metering, the middle area
(1/2 of the total area) of an image has the
highest weight, and other areas have the lowest
weight.
[Setting method]
Select a value from the
drop-down list.
[Default value]
Whole
Max Shutter
The device automatically adjusts the shutter time
based on the ambient brightness. The shutter time is
less than or equal to the value of this parameter.
[Setting method]
Select a value from the
drop-down list.
[Default value]
1/25
Max Gain
The device automatically adjusts the gain based on
the external light. The gain is less than or equal to
the value of this parameter.
[Setting method]
Drag the slider.
[Default value]
50
Iris˄for IP
camera˅
It is used to control the light admitted to the lens.
The auto iris can be set to either of the following
states:
z Auto
The iris is automatically adjusted to control the
light admitted to the lens.
z Open fully
The iris is fully open.
[Setting method]
Select a value from the
drop-down list.
[Default value]
Auto

User Manual - Network Bullet - TKIB41M1S & TKIB42M1S
EN
20
Parameter Meaning Configuration Method
Iris Speed
It indicates the auto adjustment speed of the iris. As
the value increases, the speed increases. Excessive
speed may cause instability.
This parameter is valid when the auto iris is
enabled.
[Setting method]
Drag the slider.
[Default value]
50
2.6 WB Setting
Figure 2-6 shows the WB Setting interface.
Figure 2-6 WB Setting interface
Table 2-5 describes WB Setting parameters.
This manual suits for next models
1
Table of contents
Other TKH Security Camera manuals

TKH
TKH PD1103Z2-E User manual
TKH
TKH FD2002v2M User manual

TKH
TKH trafficptz ultimo User manual
TKH
TKH SiQURA PD1022v2 User manual
TKH
TKH EX PTZ Series User manual

TKH
TKH 1004 Series User manual
TKH
TKH SIQURA FD002F2-EI User manual
TKH
TKH TKIZ48E12S User manual
TKH
TKH Siqura FD810V1IR User manual
TKH
TKH PD1103Z2-EI User manual
