TLI Elektronik VOLspeed Ebike Tuning User manual

1 Operating Manual VOLspeed Yamaha PW-X/PW-SE/PW-ST/PW-TE V2 Re 0
VOLspeed
Ebike Tuning
Yamaha PW-X / PW-X2 / PW-SE /
PW-ST / PW-TE
V2
Operating Manual
Installation Guide
2 Operating Manual VOLspeed Yamaha PW-X/PW-SE/PW-ST/PW-TE V2 Re 0
Attention!
Read these instructions completely before using the de ice, keep the
instructions and pass them on when handing o er the de ice to other
persons.
Product Features
The de ice offers the following functions after installation in eBikes with PW-X, PW-X2, PW-
SE, PW-ST and PW-TE dri e system:
Speed limit adjustable ia handlebar control buttons
Adjustable dynamic mode with reduced "wall effect"
Correct display of speed and distance
Range calculation taking into account the current dri ing style
Correct total distance after remo al of the tuning module
Wheel circumference adjustable with handlebar control buttons
Suitable for Pedelecs & S-Pedelecs
All settings are made ia the operating unit on the eBike. No smartphone or notebook is
required.
The electronic is cast into the housing and thus safely protected against moisture.
Intended Use
The de ice is only suitable for installation in eBikes with Yamaha PW-X, PW-X2, PW-SE, PW-
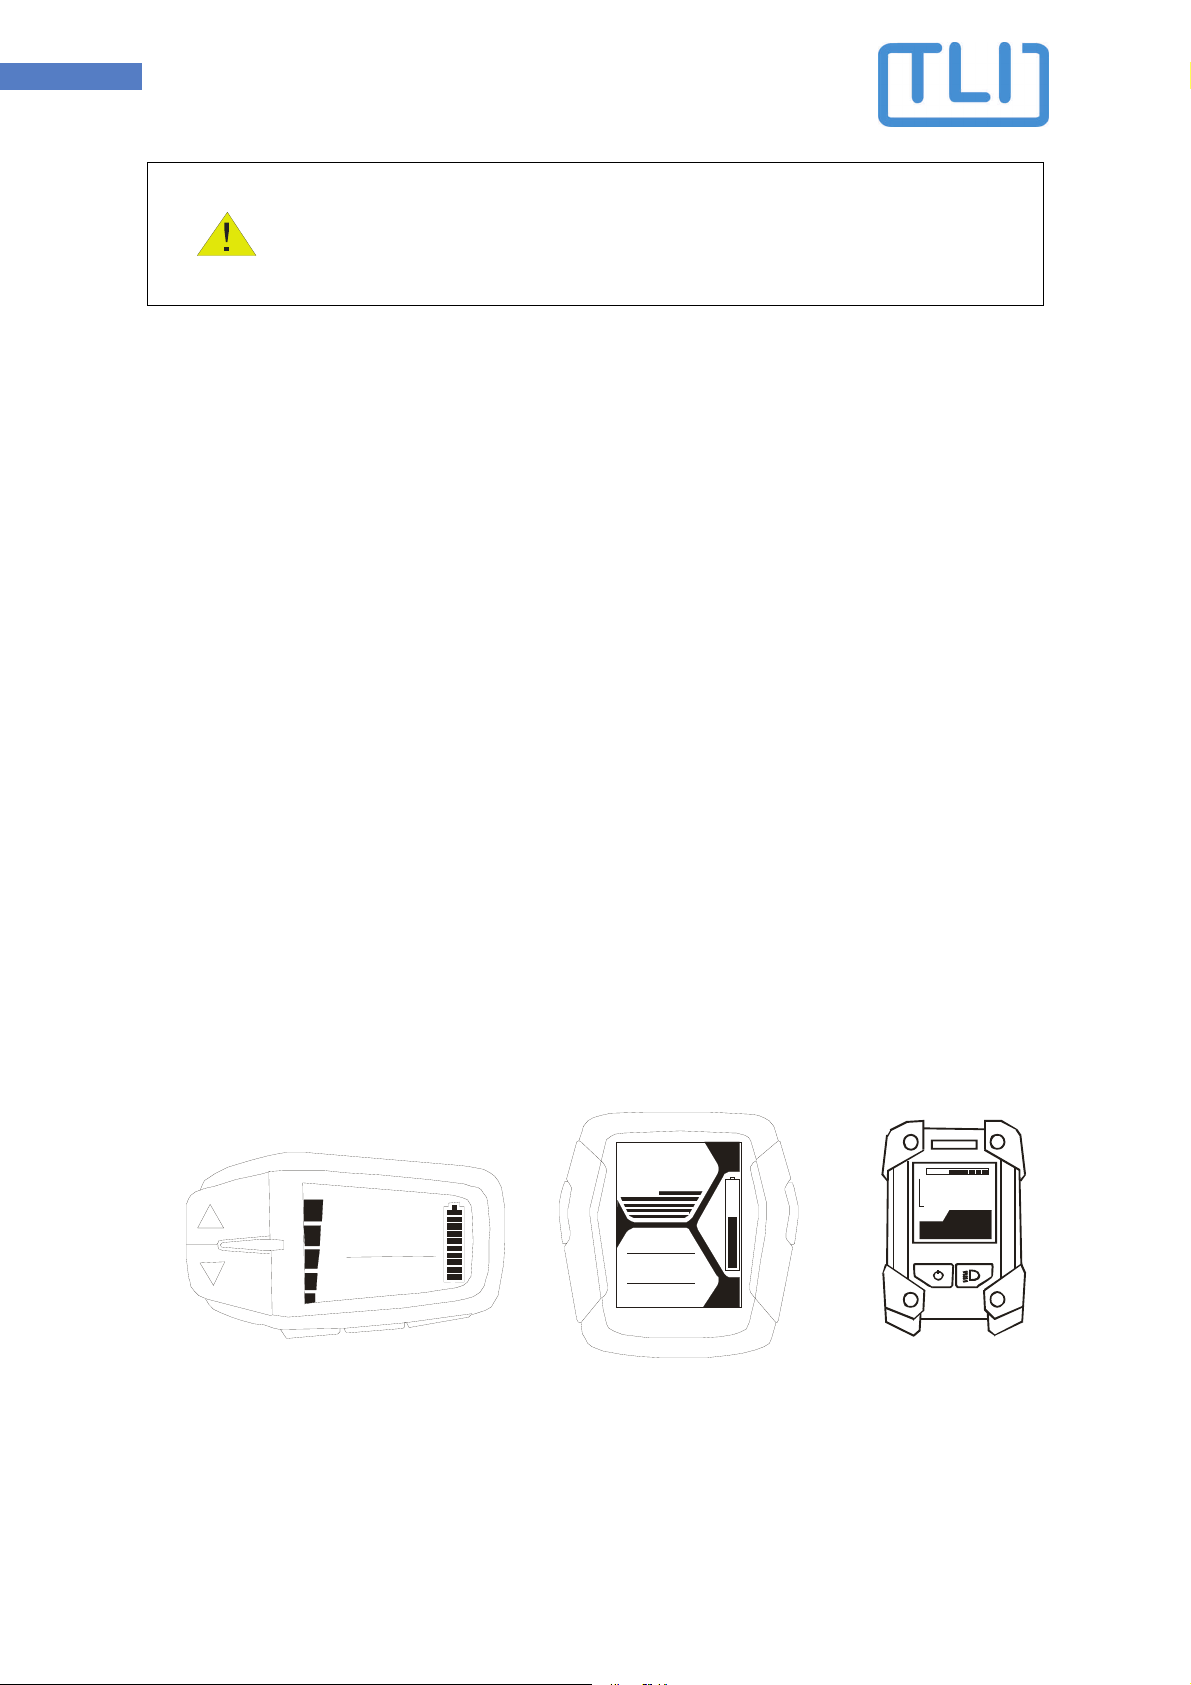
ST or PW-TE dri e systems and displays A, C or X.
22
STD O DO
Km .
581
Km/h
.7
YAMAHA
5s
Display A (Sideswitch) Display C (Multiswitch) Display X
HIGH
STD
ECO
+ECO
OFF
88
88
Km/ h
ODO
STD
Km/h
0.0
54
%
ODO
TRIP
Km
Km
28.3
123

3 Operating Manual VOLspeed Yamaha PW-X/PW-SE/PW-ST/PW-TE V2 Re 0
Legal and Safety Notes / Product Liability
Operation of t e eBike in public traffic is no longer permitted after installation of
t e module. T e use is only allowed on private areas or designated test and race
tracks.
Damage caused in conjunction wit t e operation of t e eBike will no longer be
covered by private liability insurance after installation.
Liability and warranty claims against t e dealer or manufacturer of t e eBike expire
or are constricted.
T e eBike is subject to ig er mec anical stress w en operating at ig er speed for
w ic it is not designed. T is results in additional safety risks.
T e installation and operation of t e module is at your own risk. T e manufacturer
accepts no liability for damage t at is connected wit t e operation of t e device.
Please inform yourself about possible furt er tec nical and legal consequences
before installing t e device.
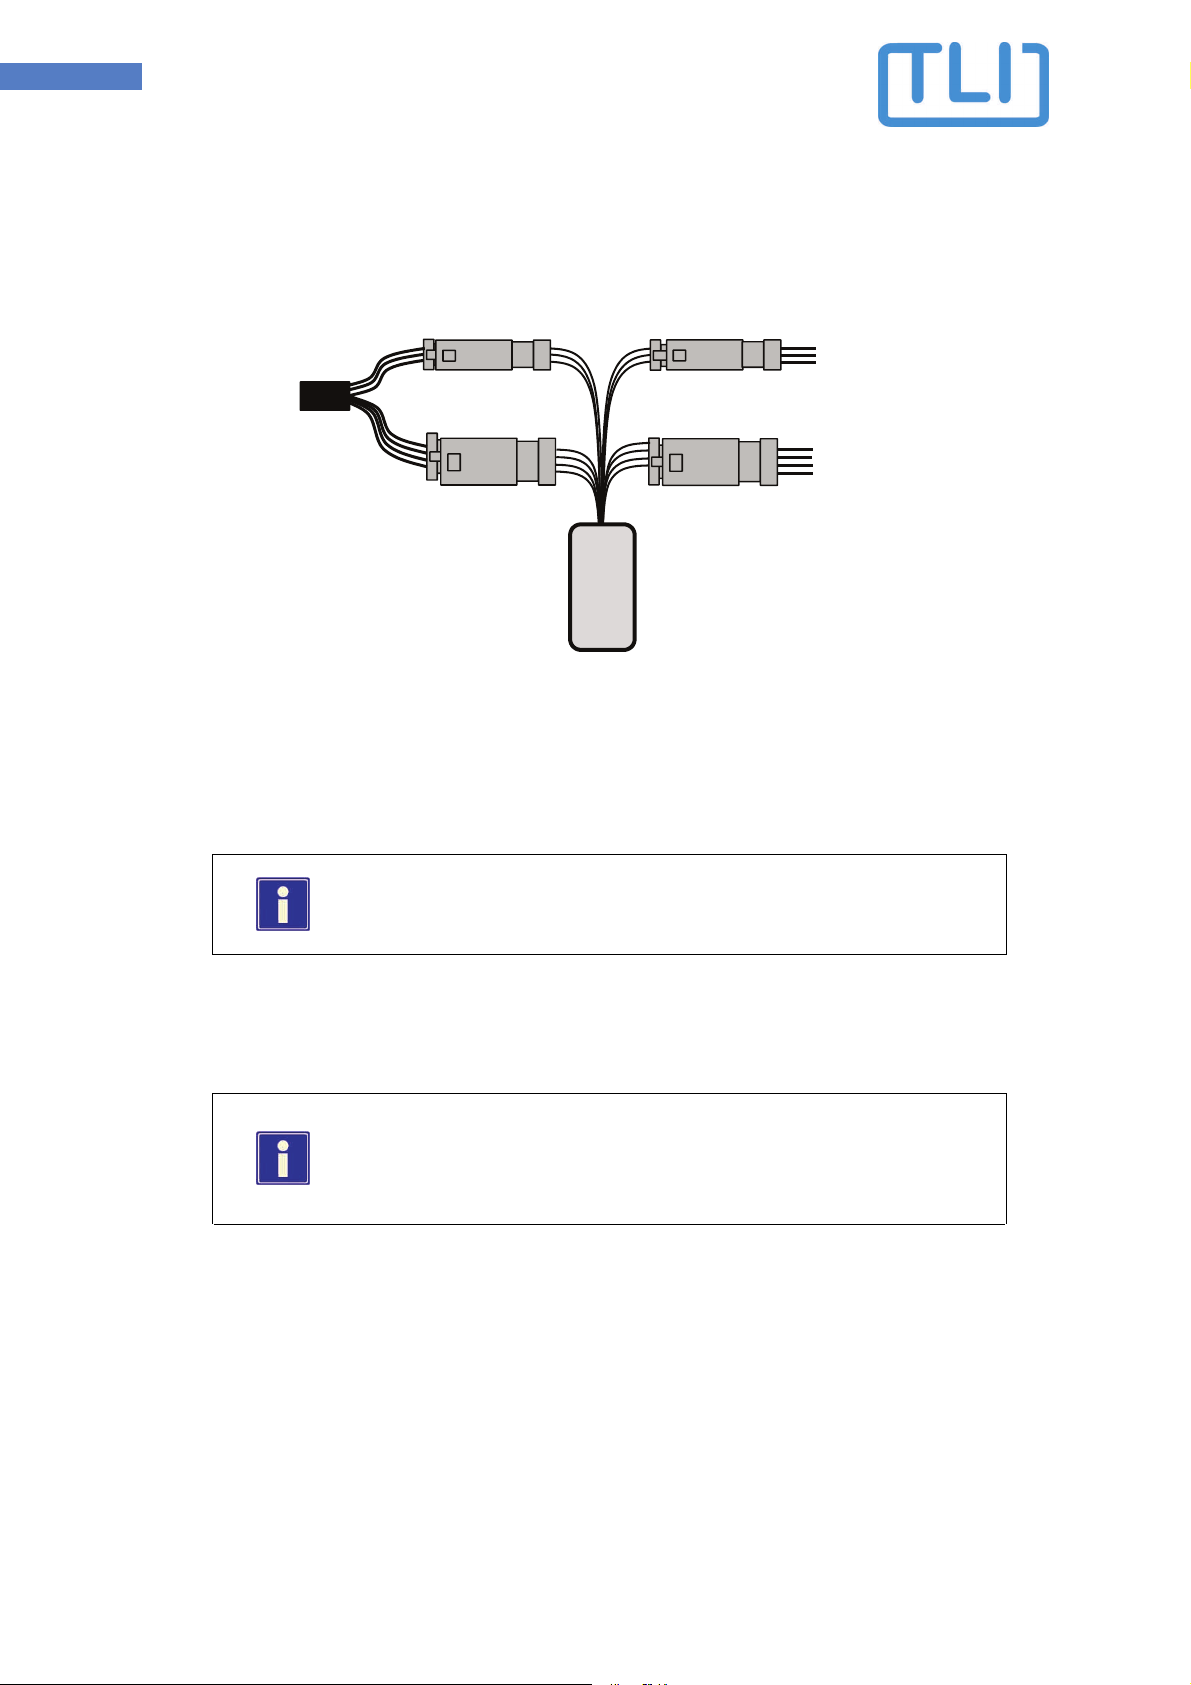
Tec nical Data
Housing dimensions: 37mm x 19mm x 9mm
Cable length: approx. 140mm
Weight: 0,025kg
Power consumption: 0,1W
Supply oltage: 5VDC

4 Operating Manual VOLspeed Yamaha PW-X/PW-SE/PW-ST/PW-TE V2 Re 0
Installation PW-SE (Example: Haibike SDURO FullSeven 6.0)
Required tools:
Allen key 6mm
Allen key 3mm
Torque ratchet with Allen key 6mm
Procedure:
1. Remo e battery
2. Remo e the skid plate by remo ing the 4 screws (1) and (2). The screws behind the
chainring do not need to be remo ed.
3. Loosen the screws (3), (4) and (5) of the motor.
4. Remo e the screws (3) and (4) and fold down the motor.
5. Disconnect the cable to the speed sensor (3-wire) and cable to the LCD (4-wire).
3
4
5
1
2
Speed Sensor
Display
Motor
5 Operating Manual VOLspeed Yamaha PW-X/PW-SE/PW-ST/PW-TE V2 Re 0
6. Plug in the tuning module as shown.
7. Insert the battery and carry out the initialization, see separate point setup.
8. If setup succeeds, remo e the battery again.
9. Place the tuning module in a suitable location and route the cable so that the engine
can be folded up without squeezing the cables.
Due to the large number of different dri e systems, it is not
possible to define a fixed installation location. Often a
placement of the module in the down tube is possible.
10. Fold up the engine and reassemble the screws (3) and (4). Do not squeeze any cables.
In the case of full suspension bikes, make sure that the cable to
the speed sensor at the transition to the rear triangle has
enough room to mo e, otherwise it may break off during
compression.
11. Tighten screws (3), (4) and (5) to 22Nm.
12. Fasten skid plate with screws (1) and (2).
Speed Sensor
Display
Motor

6 Operating Manual VOLspeed Yamaha PW-X/PW-SE/PW-ST/PW-TE V2 Re 0
Installation PW-X (Example: Haibike SDURO FullSeven 10.0)
The fixing screw of the PW-X motor marked with (6) is not
directly accessible. In the following description, therefore, the
chainrings are dismounted. It may also be possible to
disassemble the screw with a 5mm Allen wrench with short leg
or through a recess in the chainring.
Required tools:
Allen key 3, 5 and 6mm
Chainring nut wrench
Torque ratchet with Allen key 4 and 6mm
Threadlocker medium or high strenght
1
2
3
4
5
6

7 Operating Manual VOLspeed Yamaha PW-X/PW-SE/PW-ST/PW-TE V2 Re 0
Procedure:
1. Remo e battery
2. Remo e the skid plate by remo ing the 4 screws (1) and (2).
3. Remo e the chain from the chain ring and let it hang on the front derailleur.
4. Remo e the chainring retaining bolts (4) and remo e the chainrings. If necessary, use
a nut wrench to counter.
5. Place a box or something similar under the dri e unit to be able to put it on after
disassembly. The shelf should be about 20cm under the motor.
6. Remo e the screws (5), (6) and afterwards (3). Hold the motor with one hand while
remo ing the screws.
7. Place the dri e unit on the shelf.
8. Connect the tuning module as described under "Installation PW-SE", points 5 and 6.
9. Insert the battery and carry out the initialization, see separate point setup.
10. If setup succeeds, remo e the battery again.
11. Place the tuning module and as far as possible the connection cable in the front
frame tube.
12. Put the dri e unit back in the holder on the frame. Do not squeeze any cables.
13. Reassemble the screws (3), afterwards (5) and (6).
14. Tighten screws (3) to 22Nm, (5) and (6) to 11Nm.
15. Fasten skid plate with screws (1) and (2).
16. Reassemble the chainrings and insert screws (4) with threadlocker. Tighten to 11Nm.
8 Operating Manual VOLspeed Yamaha PW-X/PW-SE/PW-ST/PW-TE V2 Re 0
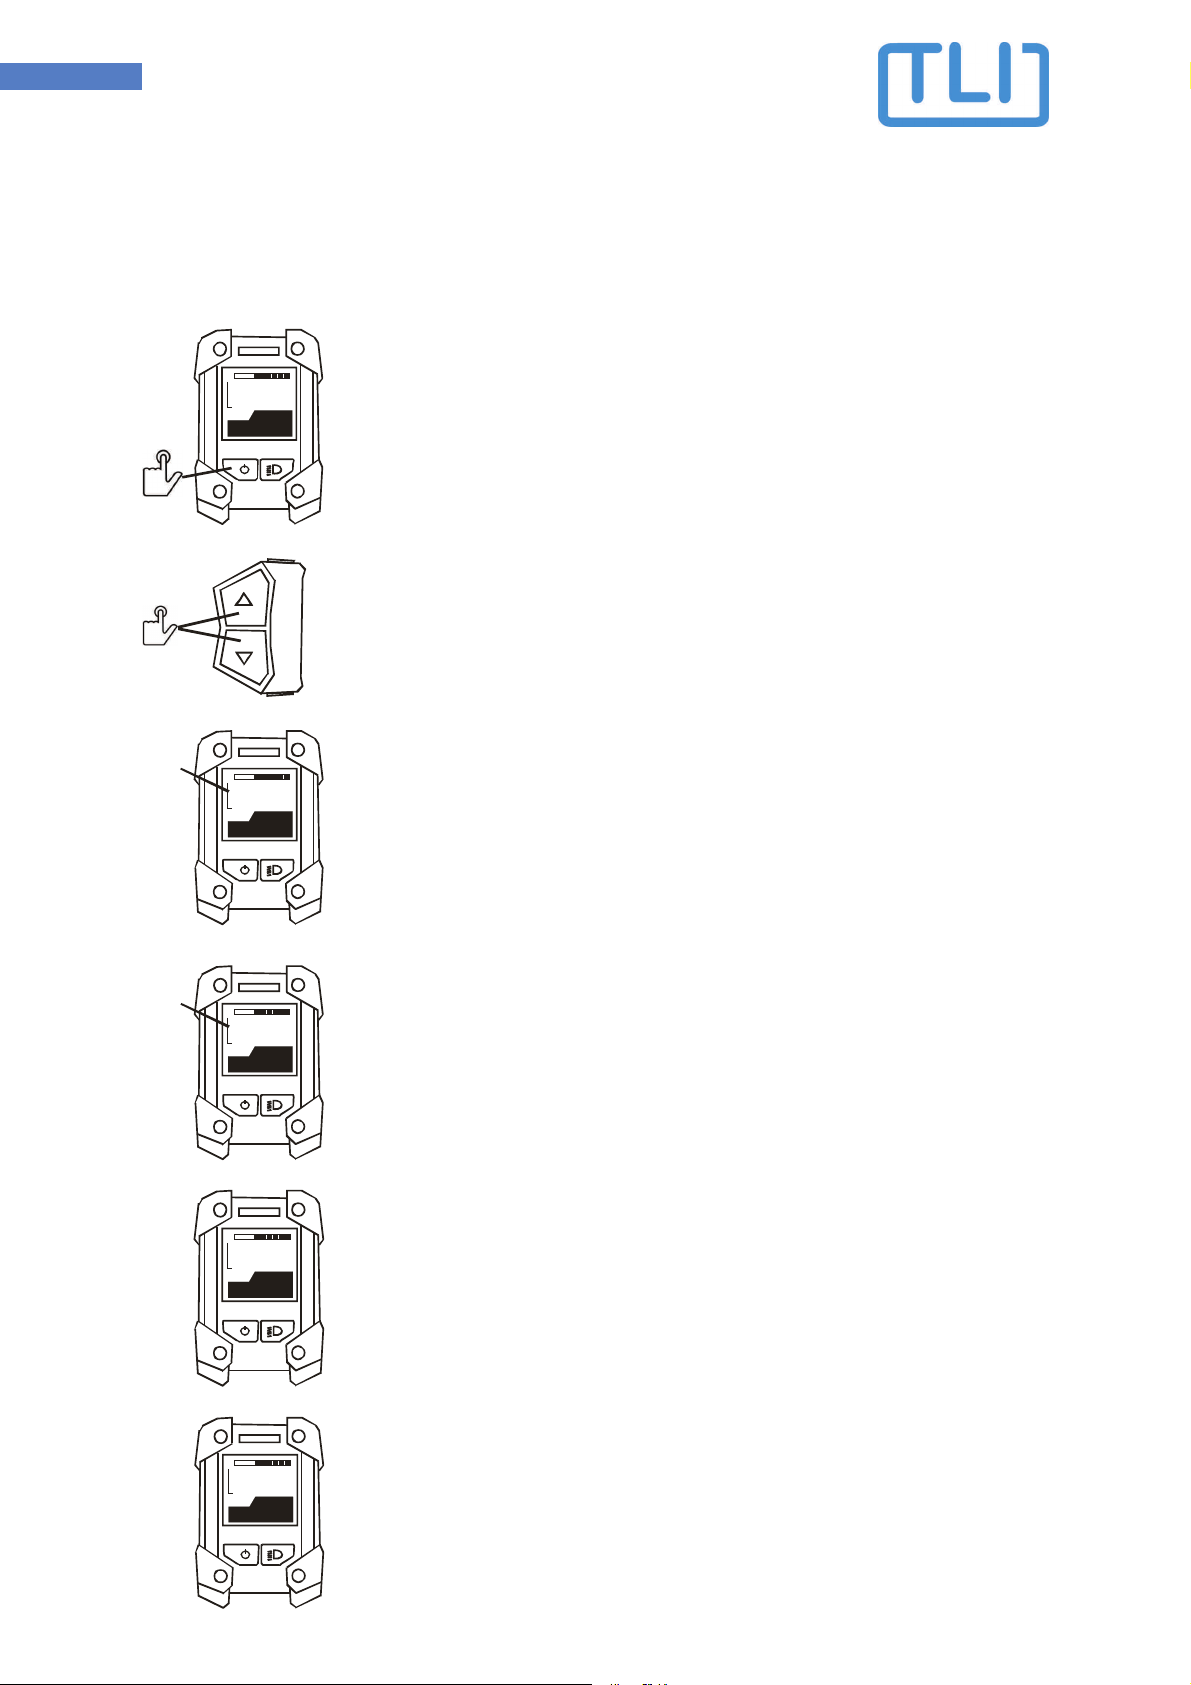
Setup (until model year 2018)
Before the first use of the tuning module or after con ersion to another bike the setup must
always be carried out first. E en in the case of malfunctions, a defined state of the module
can be restored by executing the setup.
0
STD ODO
Km .
581
Km/h
.0
YAMAHA
Turn on the eBike.
3s
3s
Press „arrow up“ and „arrow down“ at the same time for 3 seconds.
11
STD O DO
Km .
581
Km/h
.1
YAMAHA
10s
Speed 11.1 km/h is displayed for 10 seconds.
The wheel circumference stored in the dri e unit is displayed for 5
seconds in centimeters (example 22,5km/h = 225cm). If desired, adjust
with the "arrow up" and "arrow down" buttons.
Selection eBike type / speed ex works. S-Pedelec = 45 km/h, normal
pedelec = 25km/h or 20km/h. If necessary, change within 5 seconds
using the arrow buttons. Possible alues: 20.0, 25.0 and 45.0. Default
alue: 25.0.
As soon as 0.0 km/h is displayed, the setup is finished.
22
STD ODO
Km .
581
Km/h
.5
YAMAHA
5s
25
STD ODO
Km .
581
Km/h
.0
YAMAHA
5s
0
STD ODO
Km .
581
Km/h
.0
YAMAHA
5s

9 Operating Manual VOLspeed Yamaha PW-X/PW-SE/PW-ST/PW-TE V2 Re 0
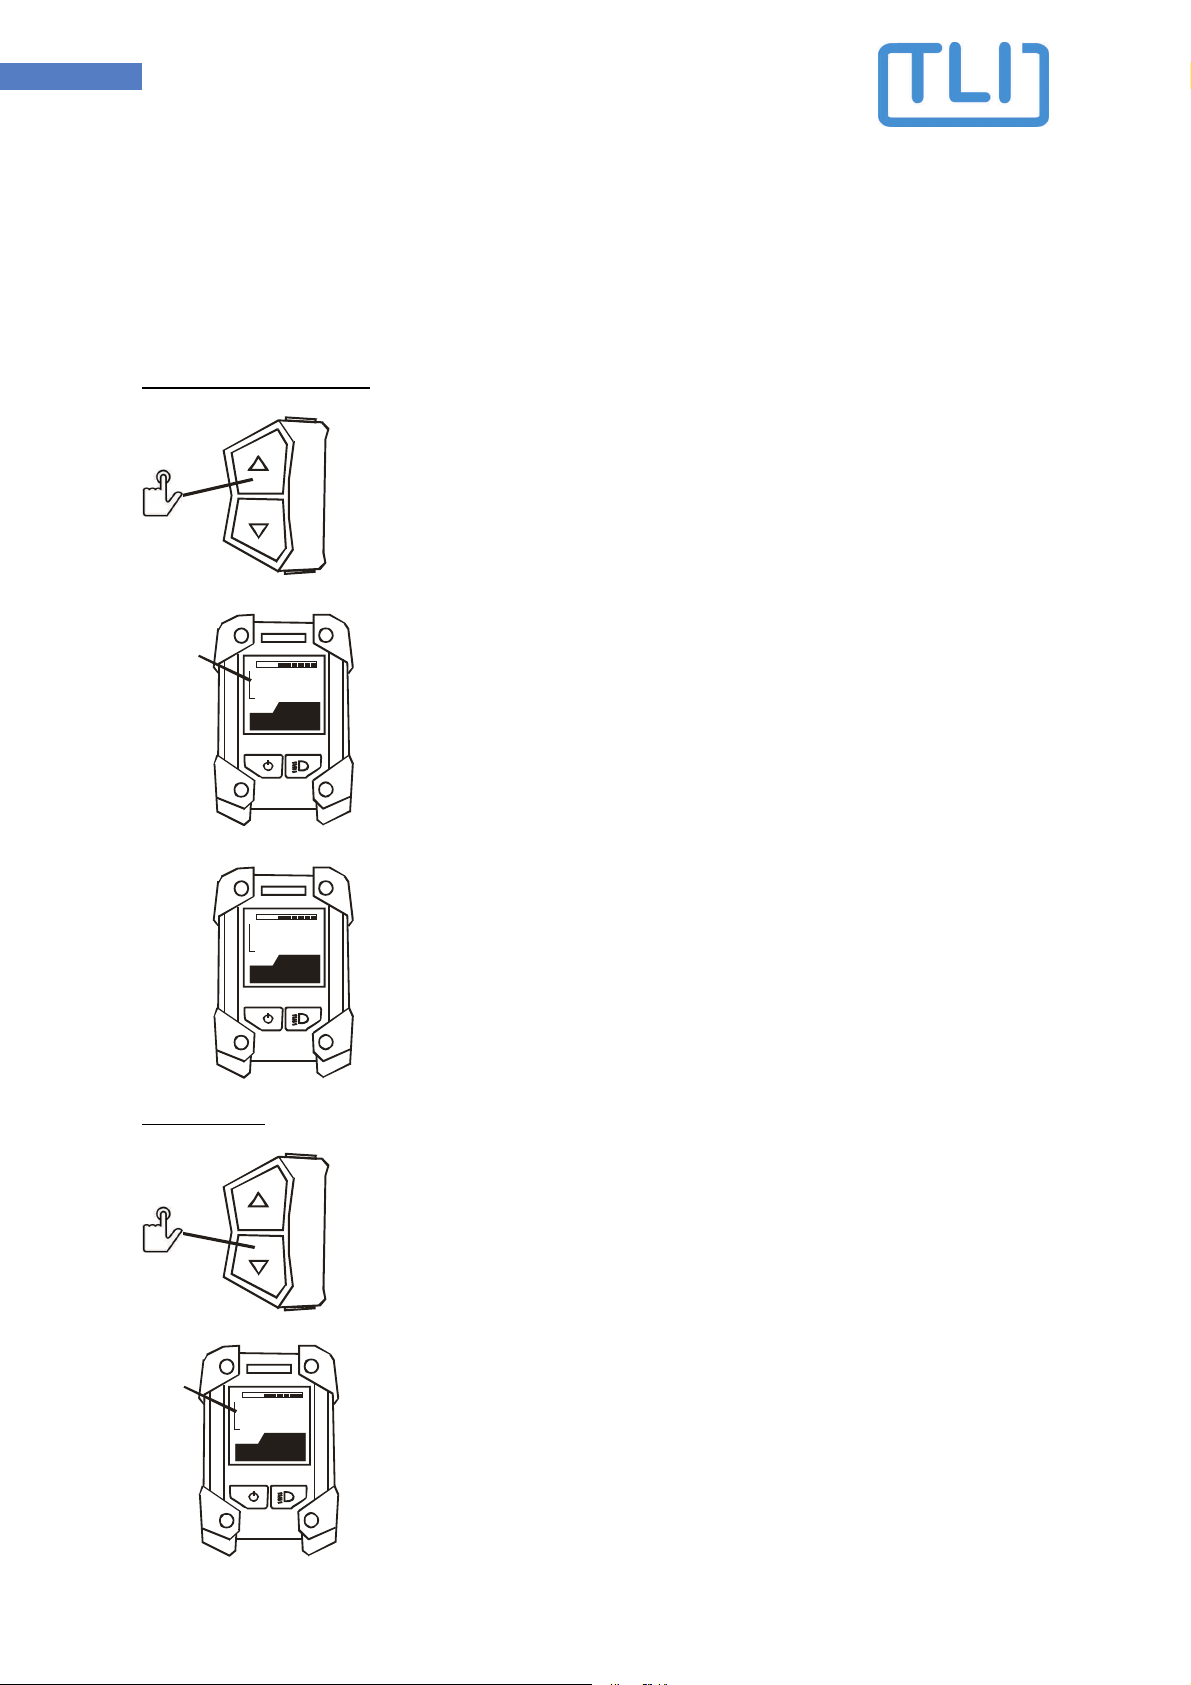
Setup (from model year 2019)
Before the first use of the tuning module or after con ersion to another bike the setup must
always be carried out first. E en in the case of malfunctions, a defined state of the module
can be restored by executing the setup.
Turn on the eBike and switch to ODO or TRIP screen.
Change assistance le el with „arrow up“ and „arrow down“
buttons as shown quickly.
Speed 11.1 km/h is displayed for 10 seconds.
The wheel circumference stored in the dri e unit is
displayed for 5 seconds in centimeters as ODO or TRIP.
If necessary, adapt with „arrow up“ and „arrow down“
buttons as shown.
Selection eBike type / speed ex works. S-Pedelec = 45
km/h, normal pedelec = 25km/h or 20km/h. If necessary,
change within 5 seconds using the arrow buttons as
discribed before. Possible alues: 20.0, 25.0 and 45.0.
As soon as 0.0 km/h is displayed, the setup is finished.
HIGH
STD
ECO
+ECO
OFF
0
588
Km/h
ODO
HIGH HIGH
STD STD STD
ECO ECO
2s
HIGH
STD
ECO
+ECO
OFF
11
111
Km/h
ODO
10s
HIGH
STD
ECO
+ECO
OFF
22
225
Km/h
ODO
5s
HIGH
STD
STD
ECO
2s
HIGH
STD
ECO
+ECO
OFF
0
588
Km/h
ODO
2s
HIGH
STD
ECO
+ECO
OFF
25
25
Km/h
ODO
5s
10 Operating Manual VOLspeed Yamaha PW-X/PW-SE/PW-ST/PW-TE V2 Re 0
Speed Mode (until model year 2018)
When speed mode is acti ated, the speed limit for the motor assistance is increased. The
limit can be set from 25 to 99 km/h.
Turning off the eBike automatically turns off speed mode and must be reacti ated after the
bike is turned on.
Acti ation / adjust limit
2s
3s
Press „arrow up“ for > 2 seconds.
Speed limit is displayed for 5 seconds. If desired, use the "arrow
up" and "arrow down" keys to change. Possible alues: 25 to 99
km/h (S-Pedelec: 45..99km/h) . Default alue: 32 km/h (S-Pedelec:
52km/h).
Display shows the normal dri ing speed again. Speed mode is
acti e.
Deacti ation
2s
3s
Press "down arrow" for > 2 seconds
25
STD ODO
Km .
581
Km/h
.0
YAMAHA
2s
Display shows 25.0km/h for 2 seconds. Speed mode is off.
32
STD ODO
Km .
581
Km/h
.0
YAMAHA
5s
22
STD ODO
Km .
581
Km/h
.7
YAMAHA
5s

11 Operating Manual VOLspeed Yamaha PW-X/PW-SE/PW-ST/PW-TE V2 Re 0
Speed Mode (from model year 2019)
When speed mode is acti ated, the speed limit for the motor assistance is increased. The
limit can be set from 25 to 99 km/h.
Turning off the eBike automatically turns off speed mode and must be reacti ated after the
bike is turned on.
Acti ation / adjust limit
Change assistance le el with „arrow up“ and „arrow
down“ buttons as shown.
Speed limit is displayed for 5 seconds.
Default alue: 32 km/h (S-Pedelec: 52km/h).
If desired, adapt with „arrow up“ and „arrow down“
buttons as shown. The set alue is stored.
Display shows the normal dri ing speed again. Speed
mode is acti e.
Deacti ation
Change assistance le el with „arrow up“ and „arrow
down“ buttons as shown.
Display shows 25 km/h for 2 seconds (S-Pedelec
45km/h). Speed mode is off.
HIGH HIGH
STD STD
2s
HIGH
HIGH
STD
ECO
+ECO
OFF
32
32
Km/h
ODO
5s
HIGH
STD
ECO
+ECO
OFF
28
588
Km/h
ODO
2s
HIGH HIGH
STD STD
2s
HIGH
HIGH
STD
ECO
+ECO
OFF
25
25
Km/h
ODO
2s
HIGH
STD
STD
ECO
2s
12 Operating Manual VOLspeed Yamaha PW-X/PW-SE/PW-ST/PW-TE V2 Re 0
Dynamic Mode (until model year 2018)
Exceeding the speed limit the motor power is reduced by default ery much. A higher pedal
force then results no longer in a higher speed, but in a lower motor assistance. For a more
natural dri ing emotion in the dynamic mode the reduction is spread o er a larger speed
range, the so-called "wall effect" is significantly reduced and it can be dri en with much
more constant pedal force. The dynamic mode can only be acti ated when the speed mode
is acti ated.
While dri ing (> 10km/h), press the pushing assist button for 2 seconds.
50
STD ODO
Km .
581
Km/h
.0
YAMAHA
2s
Dynamic mode off: 50.0 km/h is displayed for 2 seconds.
51
STD ODO
Km .
581
Km/h
.0
YAMAHA
2s
Dynamic mode on: 50.1 km/h is displayed for 2 seconds.
0
20
40
60
80
100
120
80 90 100 110 120 130
Maximum Power [%]
relative Speed [%]
Standard
Dynamic
2s
3s

13 Operating Manual VOLspeed Yamaha PW-X/PW-SE/PW-ST/PW-TE V2 Re 0
Dynamic Mode (from model year 2019)
Exceeding the speed limit the motor power is reduced by default ery much. A higher pedal
force then results no longer in a higher speed, but in a lower motor assistance. For a more
natural dri ing emotion in the dynamic mode the reduction is spread o er a larger speed
range, the so-called "wall effect" is significantly reduced and it can be dri en with much
more constant pedal force. The dynamic mode can only be acti ated when the speed mode
is acti ated.
Change assistance le el with „arrow up“ and „arrow
down“ buttons as shown.
Dynamic mode off: 50 km/h is displayed for 2 seconds.
Dynamic mode on: 50.1 km/h is displayed for 2
seconds.
0
20
40
60
80
100
120
80 90 100 110 120 130
Maximum Power [%]
relative Speed [%]
Standard
Dynamic
HIGH
STD
ECO
+ECO
OFF
51
51
Km/h
ODO
2s
HIGH
STD
ECO
+ECO
OFF
50
50
Km/h
ODO
2s
ECO ECO
+ECO +ECO
2s ECO
14 Operating Manual VOLspeed Yamaha PW-X/PW-SE/PW-ST/PW-TE V2 Re 0
Range Calculation
The speed mode can significantly reduce the range of the eBike. In the original condition of the bike,
the range is calculated only from the current battery charge le el and the selected support le el.
When Speed Mode is acti ated, the current power consumption is additionally included in the range
calculation, which makes the displayed remaining range more accurate.
Speed-Modus off
S T DS T D
HIGH
ECO
Km
36
DIST
Speed Modus on
S T DS T D
HIGH
ECO
Km
31
DIST
Akku km
53% 28.1
52% 29.0
51% 30.1
...

15 Operating Manual VOLspeed Yamaha PW-X/PW-SE/PW-ST/PW-TE V2 Re 0
FAQ
Is t e total mileage correct even after removing t e module?
Yes. The total km measured by the dri e unit are not changed by the tuning. This is ensured by a
continuously working compensation function in the tuning module. Howe er, before remo ing the
module, the bike should remain switched on at standstill with the speed mode switched on until it
shuts off by itself. This will ensure that the compensation function has correctly adjusted the
mileage. Howe er, any wheel circumference adjusted during the setup does not affect the mileage of
the dri e unit and there are de iations after remo ing the module.
T e displayed distance (Odometer, Trip) or t e speed is not correct. W at can I do?
Run the setup again. As a result, the current mileage is taken o er from the dri e unit in the tuning
module and you ha e the opportunity to re-adjust the wheel circumference if necessary.
W y can't t e setup be activated?
The type of acti ation of the setup depends on the model year of the dri e system. For older motors
up to model year 2018, follow the description on page 8, otherwise the description on page 9. The
displays shown are irrele ant for the selection of the procedure!
I adjusted t e w eel circumference during setup. W en I start t e setup again, anot er value is
displayed. W y?
When executing the setup, the original wheel circumference of the motor control is always
displayed. If you want to use a different wheel circumference, you ha e to enter it again each time
you run the setup.

16 Operating Manual VOLspeed Yamaha PW-X/PW-SE/PW-ST/PW-TE V2 Re 0
Tec nical Support
For questions, suggestions or problems please email or phone.
TLI Elektronik GmbH
St.-Martin-Str. 11
86676 Ehekirchen
info@ olspeed.de
phone: +49 (0) 8253 / 9279902
In addition to your request for support inquiries, please include the following information:
Serial number and purchase number of the tuning module (S/N, P/N)
eBike manufacturer, type and year of manufacture
To ensure that you always ha e the de ice data, you can enter it here before installing the
de ice:
Purchase number (P/N): ________________________
Serial number (S/N): _________________________
Disposal
The tuning module should be disposed of in an en ironmentally correct manner.
For EC countries:
Electronic de ices are aluable materials and do not belong in the household
waste.
Dispose of the product at the end of its life in accordance with applicable
legislation.
Other TLI Elektronik Bicycle Accessories manuals


Popular Bicycle Accessories manuals by other brands


Polar Electro
Polar Electro CS400 instruction manual

Rixen & Kaul
Rixen & Kaul KLICKfix DISTANZ SET E quick start guide

Iget
Iget CYCLO C200 quick start guide

HMM Diagnostics
HMM Diagnostics smartLAB bike3 user manual

ERGOTEC
ERGOTEC SEPIA XL Assembly and safety instructions

Extralite
Extralite HyperBoost3 R owner's manual


