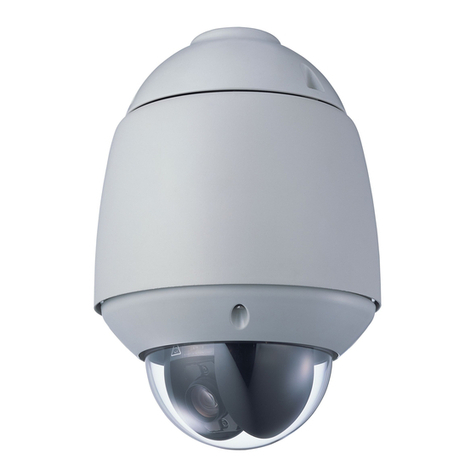
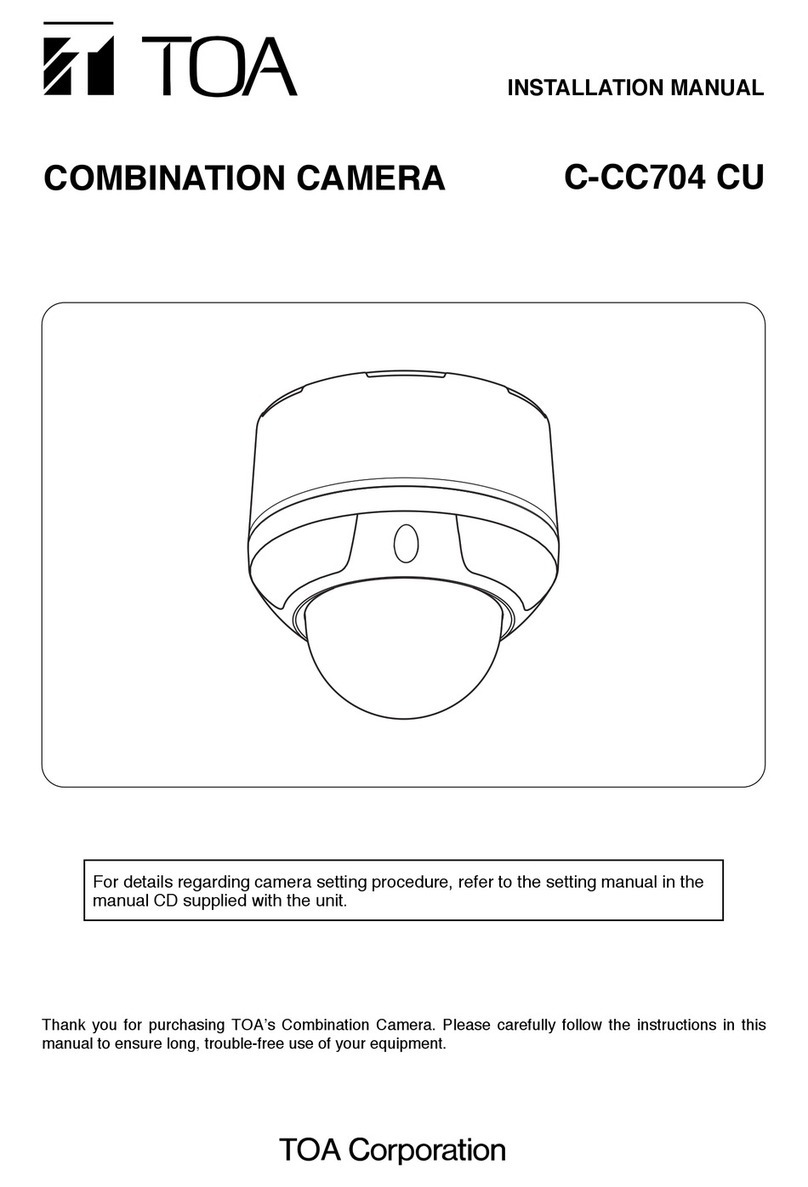
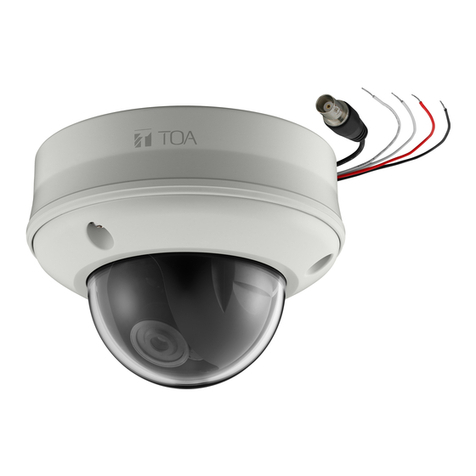
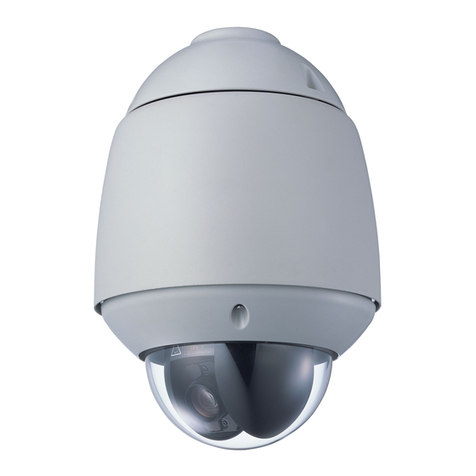
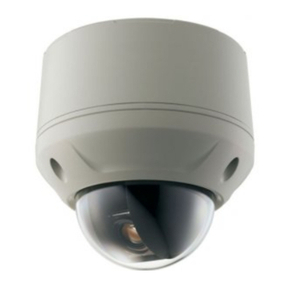
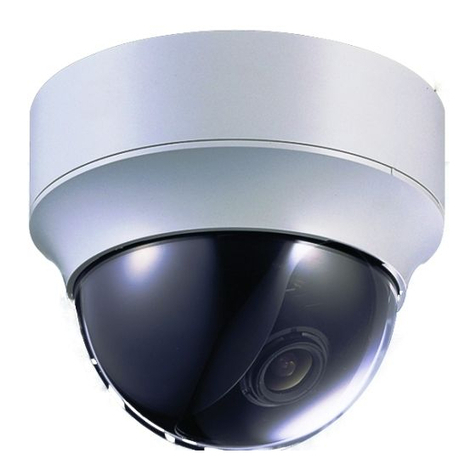
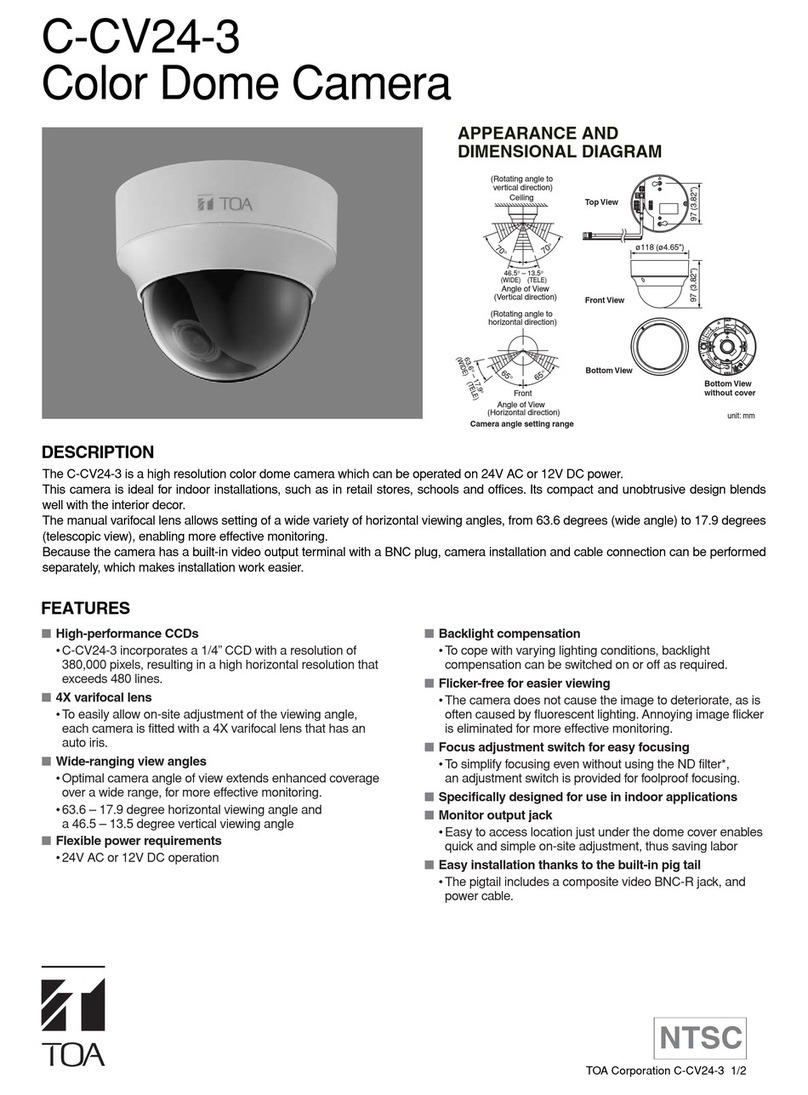
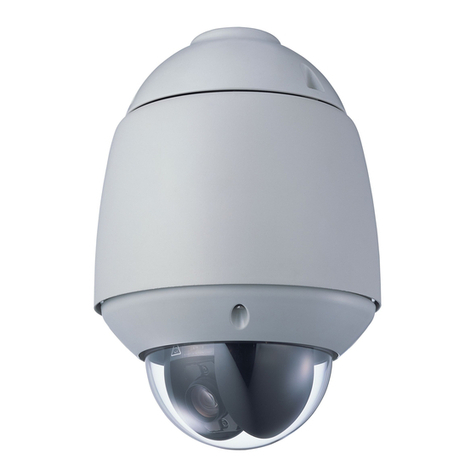
Toa C-CC514 NT User guide

Thank you for your purchasing TOA’s Combination Camera. Please carefully follow the instructions in
this manual to ensure long, trouble-free use of your equipment.
COMBINATION CAMERA
OUTDOOR COMBINATION
CAMERA
C-CC514 NT, C-CC514 PL
C-CC564 NT, C-CC564 PL
C-CC574 NT, C-CC574 PL
C-CC714 NT, C-CC714 PL
C-CC764 NT, C-CC764 PL
C-CC774 NT, C-CC774 PL
SETUP MANUAL

2
TABLE OF CONTENTS
1. SETTING ITEMS GUIDE ................................................................................ 5
2. BEFORE SETTING
2.1. Address Display When Turning Power On ................................. 8
2.2. Keys Used to Settings ................................................................ 8
2.3. Setting Basic Operation ............................................................. 9
3. ENTERING CAMERA MENU SCREEN
3.1. Selecting the Language ............................................................ 10
4. SETTING PRESETS
4.1. Entering Presets Into the Memory ............................................ 11
4.2. Global Preset Memory Correction ............................................ 13
4.3. Preset Memory Reset ............................................................... 14
4.4. Preset Memory All Reset .......................................................... 15
4.5. Automatic Return Setting ......................................................... 15
4.6. Home Setting ............................................................................ 16
4.7. Preset Memory Freeze Setting
(C-CC564, C-CC574, C-CC764 and C-CC774 only) ....................... 16
5. ID (TITLE)SETTINGS
5.1. Setting Display Content ............................................................ 17
5.1.1. Setting display items ............................................................................ 18
5.2. ID Settings ................................................................................ 19
5.2.1. Camera ID setting ................................................................................ 19
5.2.2. Position ID setting ................................................................................ 19
5.2.3. Trace ID setting .................................................................................... 20
5.2.4. Auto Pan ID setting .............................................................................. 20
5.2.5. Tour ID setting ..................................................................................... 20
5.2.6. Home ID setting ................................................................................... 21
5.2.7. Alarm ID setting ................................................................................... 21
5.2.8. Sector ID setting .................................................................................. 21
5.2.9. AUX ID setting ..................................................................................... 23
5.3. Entering Title Characters .......................................................... 24
5.3.1. Understanding the ID Entry screen ...................................................... 24
5.3.2. Character entry basic operation ........................................................... 25
5.3.3. Erasing or correcting characters .......................................................... 25
5.3.4. Entering title using code ....................................................................... 26
5.3.5. ID code table ........................................................................................ 27
5.4. ID Display Position Settings ..................................................... 28
5.4.1. Setting the common title display position and its length ...................... 28
5.4.2. Initializing the common title display position ........................................ 30
5.5. Frame Adjustment Setting ........................................................ 30
5.6. Angle Origin Point (Zero point)Change ................................... 30

3
6. CAMERA CHARACTERISTICS SETTINGS .......................................... 31
6.1. Setting the White Balance ........................................................ 32
6.2. Setting the Backlight Compensation ........................................ 33
6.3. Adjusting the Brightness ........................................................... 34
6.4. Setting the Day and Night
(C-CC564, C-CC574, C-CC764 and C-CC774 only)........................ 34
6.5. Setting the Auto Focus ............................................................. 35
6.6. Setting the AGC ....................................................................... 35
6.7. Setting the Slow Shutter (High Sensitivity)................................... 36
6.8. Setting the Shutter Speed ........................................................ 36
6.9. Setting the Electronic Zoom ..................................................... 37
6.10. Setting the Enhancer Function ............................................... 37
6.11. Setting the Chroma ................................................................. 38
6.12. Changing the Synchronization System .................................. 38
6.13. Electronic Image Stabilization Settings
(C-CC574 and C-CC774 only)................................ 39
6.14. Sensitivity-Up Settings (C-CC574 and C-CC774 only)...................... 39
6.15. Initializing Camera Settings .................................................... 40
7. SETTING AUTOMATIC OPERATIONS ................................................... 40
7.1. Assigning the Function to the Auto Key ................................. 41
7.2. Auto Pan Function Setting ....................................................... 41
7.2.1. Setting Auto Pan option operations ..................................................... 41
7.2.2. Setting the Auto Pan stop duration at an endpoint ............................. 42
7.2.3. Auto Pan speed setting ....................................................................... 42
7.2.4. Setting the direction of Auto Pan rotation ........................................... 42
7.2.5. Setting or deleting the Auto Pan limits ................................................ 43
7.3. Setting the Sequence Function ............................................... 44
7.3.1. Setting the sequential order ................................................................ 44
7.3.2. Setting the interval of sequential playback duration ............................ 44
7.4. Trace Function Setting ........................................................... 45
7.4.1. Storing the Trace operation ................................................................ 45
7.5. Setting the Trace Pause Time 1 and 2 ..................................... 46
7.6. Tour Setting .............................................................................. 47
7.6.1. Tour programming ............................................................................... 47
7.6.2. Inserting operation into Tour program .................................................. 49
7.6.3. Deleting Tour program ......................................................................... 50
8. ALARM SETTINGS
8.1. Input Setting ............................................................................. 51
8.2. Report Setting .......................................................................... 52
8.3. Active Level Setting .................................................................. 53
8.4. Priority Setting .......................................................................... 53
8.5. Operation (Action)Setting ........................................................ 54
8.6. Clock Setting ............................................................................ 55
8.7. Reset Operation (Action)Setting .............................................. 56
8.8. Verifying Alarm Logs (Alarm Data).............................................. 57
4
9. CONTACT OUTPUT SETTINGS
9.1. AUX 1 Setting ........................................................................... 58
9.2. AUX 2 Setting (C-CC564 and C-CC574 only) ...................................... 59
10. TIMER SETTINGS
10.1. Program Settings .................................................................... 60
10.1.1. Erasing Timer program ...................................................................... 62
10.2. Time Display Selection ........................................................... 63
10.3. Date Display Setting ............................................................... 63
10.4. Setting the Timer .................................................................... 64
10.5. Setting the Date ...................................................................... 64
10.6. Setting the Summer Time (Daylight saving time)......................... 65
11. MANUAL SETTINGS
11.1. Resetting Zoom Interlocking ................................................... 66
11.2. Rotation Limit Selection .......................................................... 66
11.3. Rotation Limit Setting ............................................................. 67
11.4. Manual Speed Setting ............................................................ 67
11.5. Setting the Flip Function
(C-CC564,C-CC574, C-CC764 and C-CC774 only)........................ 68
11.6. Resetting Tilt Angle Limits ...................................................... 69
12. MAINTENANCE SETTINGS
12.1. Initializing ................................................................................ 70
12.2. Refresh Function Settings ...................................................... 71
12.3. Password Setting ................................................................... 72
12.4. Motor Power Setting ............................................................... 72
12.5. Return All Settings to Initial Status Set by the Factory ........... 73
12.6. Automatic Correction (Auto Adjust)............................................. 73
12.7. Data Backup ........................................................................... 74
12.8. Motion Detection Settings
(C-CC564,C-CC574, C-CC764 and C-CC774 only)........................ 74
12.8.1. Detection area setting ........................................................................ 75
12.8.2. Action setting ..................................................................................... 76
12.9. Privacy Masking Settings
(C-CC564,C-CC574, C-CC764 and C-CC774 only)........................ 77
12.9.1. Setting the Privacy Masking .............................................................. 77
12.9.2. Clearing the Privacy Masking ............................................................ 79
12.9.3. Changing the masking patterns ......................................................... 79
13. CHANGING THE CAMERA SETTINGS
FOR ARBITRARY POSITIONS
13.1. Entering the Camera Setting Screen
for Individual Camera Positions ........................... 80
13.2. Changing Position Picture Quality
and ID Display Positions ..................................... 81
13.2.1. Changing arbitrary position picture
quality using the scene function .......................................... 81
13.2.2. Changing the ID display position
for arbitrary camera position using the pattern function ...... 81

5
CAMERA MENU
PRESET (p.11)
MEMORY *1(p.11)
READJUST ALL POS (p.13)
DISPLAY (p.17)
ID SETTING (p.19)
WHITE BALANCE *2(p.32)
BACKLIGHT *2(p.33)
BRIGHTNESS *2(p.34)
DAY/ NIGHT *2*3(p.34)
ID SETTING (p.17)
CAMERA SETTING (p.31)
(p.10)
Setting Item
MAIN MENU
To next page
Programs the camera position (camera direction), displays
setting status, and performs reset.
Programs the camera position.
Corrects all preset camera positions.
Sets to display or hides the title.
Sets the title.
Sets ID.
Sets camera properties.
Sets the camera’s white balance.
Sets the backlight compensation.
Adjust the camera’s brightness.
Sets to give operation priority to black & white mode
or slow shutter mode depending on the subject’s
brightness.
Sets Auto-Focus mode.
Sets AGC.
Sets slow shutter.
Sets shutter speed.
Sets a maximum enlargement of electronic zoom.
ENHANCER *2(p.37)
CHROMA *2(p.38)
SYNC (p.38)
Sets contour enhancement.
Switches sync. system and adjusts phase.
Adjusts the chroma.
MEMORY RESET (p.14)Resets preset camera position.
MEMORY ALL RESET (p.15)Resets all preset camera positions.
AUTO RETURN (p.15)The camera returns to the preset position auto-
matically when the preset period of time elapses by
external control.
HOME (p.16)Designates the program the camera automatically
returns to.
PRESET FREEZE *3(p.16)Displays the still image during camera movement
between preset positions.
LOCATION *2 (p.28)Sets title display position and its length.
FRAME ADJUST (p.30)Sets the character display position.
AUTO FOCUS (p.35)
AGC *2(p.35)
SLOW SHUTTER *2(p.36)
SHUTTER SPEED *2(p.36)
E–ZOOM (p.37)
ZERO POINT (p.30)Sets the origin point of the angle display.
1. SETTING ITEMS GUIDE
The camera menu screens are comprised of the following setting item screens.

6
From previous page
AUTO KEY (p.41)
AUTO PAN (p.41)
SEQUENCE (p.44)
TRACE (p.45)
TOUR (p.47)
AUTO MODE (p.40)Sets automatic operation of Auto Pan, Preset sequence, Trace
and Tour.
Assigns automatic function to the Auto key.
Sets the Auto Pan operations.
Sets the preset sequence order.
Stores trace movements.
Sets the operation to be programmed.
ALARM (p.51)Sets alarm operations.
AUX (p.58)Sets contact output.
TIMER (p.60)Sets the timer.
TRACE 1 PAUSE TIME (p.46)Sets the stop duration of trace movements.
TRACE 2 PAUSE TIME (p.46)Sets the stop duration of trace movements.
INPUT (p.51)
REPORT (p.52)
ACTIVE STATE (p.53)
PRIORITY (p.53)
RESET ACTION (p.56)
Sets input number of alarm input.
Sets the terminal that transmits the alarm
information.
Selects whether to activate the alarm input with
make or break contacts.
Sets whether to forcibly execute action or to set
priority order to operation.
Sets camera operation when the alarm conditions
are released.
ACTION (p.54)Sets camera operation when alarm signal is
received.
INTERVAL (p.55)Sets the period of time that alarm conditions are
maintained.
ALARM DATA (p.57)Verify alarm logs.
AUX1 (p.58)Sets contact output.
AUX2 *4(p.59)Sets contact output.
PROGRAM (p.60)
ENTER TIME (p.64)
Sets predetermined operations to be performed at
preset times.
Sets the time.
TIME DISPLAY (p.63)Sets time display to 12-hour or 24-hour display
formats.
DATE DISPLAY (p.63)Sets date display.
ENTER DATE (p.64)Sets the date.
To next page
SUMMER TIME (p.65)Sets the summer time (Daylight saving time).
RESET (CAM SETTING)(p.40)Return each item on the camera setting screen to
the factory default status.
EIS *5(p.39)Electronic Image Stabilization settings.
SENSITIVITY *5(p.39)Sensitivity-Up selection.

7
*1Setting for this item can be entered by the Main Menu screen not by the Camera Menu screen when the
equipments other than the C-RM500 are connected.
*2Can also be changed for individual positions at the Camera setting screen for individual positions.
*3Can be only set for the C-CC564, C-CC574, C-CC764 and C-CC774.
*4Can be only set for the C-CC564 and C-CC574.
*5Can be only set for the C-CC574 and C-CC774.
MANUAL (p.66)Individual settings.
ZOOM SCALABLE P/T (p.66)
MAX P/T SPEED (p.67)
Resets zoom interlocking.
Sets the maximum speed of pan and tilt operation.
P/T LIMIT (p.66)Designate the pan and tilt rotation limits.
P/T LIMIT SETTING (p.67)Sets the pan and tilt rotation limits.
FLIP (p.68)Sets whether to set the tilt rotation range to 90 or
over.
UP LIMIT (p.69)Sets the tilt angle limit.
From previous page
INITIALIZE (p.70)
REFRESH (p.71)
PASSWORD (p.72)
MOTOR POWER (p.72)
DATA BACKUP (p.74)
MAINTENANCE (p.70)Sets functions during maintenance.
LANGUAGE (p.10)Selecting the language.
Corrects deviation of stepping motor.
Corrects deviation of position.
Sets the password required when activating
maintenance menu screen.
Improves deviation of preset position.
Sets data writing and reading.
FACTORY PRESET (p.73)Returns all setting to initial status set by the factory.
AUTO ADJUST (p.73)Automatically corrects deviation of position.
MOTION DETECTION *3(p.74)
PRIVACY MASK *3(p.77)
Sets motion detection.
Sets privacy masking area.
Note
The name of article of the text is displayed as follows;
C-CC514: C-CC514 NT or C-CC514 PL
C-CC564: C-CC564 NT or C-CC564 PL
C-CC574: C-CC574 NT or C-CC574 PL
C-CC714: C-CC714 NT or C-CC714 PL
C-CC764: C-CC764 NT or C-CC764 PL
C-CC774: C-CC774 NT or C-CC774 PL

8
CAMERA ADDRESS
-
NTSC
38400BPS
* * * * *
-
* * * * *
* * *
X X X X X X X O X X X X X X X X X O X X
Camera address screen
P
A B C D
WIPER
ZOOM
TELE
WIDE
FOCUS
FAR
NEAR
LENS SPEED
UP
DOWN
RIGHTLEFT
LOW HIGH
DEF AUX AUTO
E F G H
SELECT
MENU
GROUP
CH
SEQUENCE
F U N C T I O N
A L A R M
RESET HOLD
AF POSITION CONTROLFREEZE FULL
REMOTE CONTROLLER C-RM500
1 2 3
4 5 6
789
C0SET
Joystick Clear key
Focus key
Zoom key Set key
Numerical keypad
Menu start switch
Use the joystick and each key on the C-RM500.
[ C-RM500 Top ]
2. BEFORE SETTING
2.1. Address Display When Turning Power On
When the camera’s power is turned on, the camera performs the initial operation (initializing operation) and
simultaneously the camera address appears on the monitor. After the completion of initial operation and
peripheral device connections, the camera can be controlled and the camera address screen will disappear.
Notes
• In the place of “***”, a camera address such as “001” will be
displayed.
The area on the screen at right will flash.
• The alphabets and numeral appearing in the place of “*****-
*****” of the screen are for maintenance, not the indication
caused by equipment failure.
2.2. Keys Used to Settings
Settings can be performed by the equipment itself to be controlled or from the remote controller connected to
the equipment.

9
2.3. Setting Basic Operation
Menu screen to be displayed and the operation slightly differ depending on the connected equipment,
however there is no difference in basic operation.
More particularly, refer to the instruction manual, operation manual or set up manual enclosed with each
equipment.
Menu key
• Use the Menu Start switch to enter the menu screen or exit the menu screen.
• Press the Menu Start switch to exit the menu screen in any screen status.
Joystick key
• Tilt the joystick upward or downward to move the cursor position on the setting items.
• Tilt the joystick left or right to change the setting contents.
• Used to rotate the camera when performing preset settings or Auto Mode camera settings.
Set key
Press the Set key to determine the setting items or setting contents, moving the cursor or to the next setting,
followed by screen change.
Clear key
• Press the Clear key to return the screen from the current screen (or status) to the last previous screen
(status).
• Used to correct figures entered.
Numerical keypad
Used to enter camera number and camera position number.
Zoom key
Used to perform preset and zoom operation settings.
Focus key
Used to perform preset and focus operation settings.
C-RM500
Menu Screen Display
Menu Screen Exit
Setting contents Change
Setting item selection
Setting item determination
Returning setting screen
Figure clear
Camera number setting
Position setting
Zoom setting
Focus setting
Menu Start switch
Tilt joystick
upward/ downward/ left/ right
Tilt joystick
upward/ downward/ left/ right
Set key
Clear key
Clear key
Numerical Keypad
Zoom key
Focus key
[ Operation Method ]

10
1. Press the Menu key. (When a password is required,
enter it with the numerical keypad.) The menu screen
is displayed on the remote controller’s liquid crystal
display.
2. With the joystick, select “CAMERA MENU” and press
the Set key.
The display is placed in the standby mode for the
entry of a camera number to call up the camera menu.
3. Enter the camera number with the numerical keypad,
and press the Set key. The liquid crystal display
shows the selected camera’s camera menu screen.
4. Select the desired item with the joystick, and perform
the required settings on each setting screen.
Camera menu screen
C A M
E N G L I S H
C A M E R A M E N U
P R E S E T
I D S E T T I N G
C A M E R A S E T T I N G
A U T O M O D E
A L A R M
A U X
T I M E R
M A N U A L
M A I N T E N A N C E
L A N G U A G E
Language selecting screen
C A M
E N G L I S H
C A M E R A M E N U
P R E S E T
I D S E T T I N G
C A M E R A S E T T I N G
A U T O M O D E
A L A R M
A U X
T I M E R
M A N U A L
M A I N T E N A N C E
L A N G U A G E
Menu
O P E R A T I ON M O D E
C A M E R A M E N U ***C H
DOWN
LEFT RIGHT
UP
SET
21
(Example)
3. ENTERING CAMERA MENU SCREEN
3.1. Selecting the Language
The language to be displayed on the screen can be selected among English, German, French and Italian.
(Factory default: English)
1. Select "LANGUAGE" on the Camera Menu screen
with the joystick, then press the Set key.
The arrow moves to “ENGLISH” (factory default).
2. Select "ENGLISH," "DEUTSCH," "FRANÇAIS," or
"ITALIANO" with the joystick, then press the Set key.
The screen switches to the Menu screen of the
selected language.
( )

11
1. Select “PRESET” on the camera menu screen and press the Set key.
The Preset Settings screen is displayed.
2. Select “MEMORY” and press the Set key.
The arrow key moves in the place of “***.”
( )
Preset memory screen
M E M O R Y * * * P O S
*P R E S E T *
---------------------------
1 : O
2 : O
3 : O
4 : O
6 : O
5 : O
7 : O
8 : O
9 : X
1 0 : X
1 1 : X
1 2 : X
1 4 : X
1 3 : X
1 5 : X
1 6 : X
Preset setting screen
M E M O R Y
R E A D J U S T A L L P O S
M E M O R Y R E S E T
M E M O R Y A L L R E S E T
A U T O R E T U R N
H O M E
P R E S E T F R E E Z E
* * * P O S
N O
O F F
1 P O S
O F F
*P R E S E T *
Camera menu screen
C A M
E N G L I S H
C A M E R A M E N U
P R E S E T
I D S E T T I N G
C A M E R A S E T T I N G
A U T O M O D E
A L A R M
A U X
T I M E R
M A N U A L
M A I N T E N A N C E
L A N G U A G E
3. Enter the camera position number with the numerical keypad,
and press the Set key. The place of “***” shows the input
camera number.
Note: Positions between 1 and 255 can be set.
4. SETTING PRESETS
Settings such as camera direction, lens angular field of view, and focus can be preset in advance. Up to 255
positions can be set.
4.1. Entering Presets Into the Memory
Note
Positions cannot be preset in the electronic zoom range (p. 37) or in flip mode (p. 68).
Presetting is possible only for parts other than the electronic zoom or when the Flip function has been
disabled. It is recommended that the Auto-Flip function (p. 68) be temporarily turned off when entering presets
into the memory of the C-CC564, C-CC574, C-CC764 or C-CC774.

12
4. Press the Set key.
The position setting screen (the selected camera image) is
displayed.
Note
“*** – ***” on the first line of the Setting screen indicates the
camera number on the left and the position number on the
right.
5. Operating the joystick, Zoom key, and Focus key, move the
camera to the desired position, then press the Set key.
Preset memory setting screen
S E T T I N G
***
-
* * *
6. Operate the joystick, Zoom key, and Focus key further more to
fine adjust, then press the Set key.
The designated camera position for preset memory is
performed.
Preset memory fine setting screen
F I N E S E T T I N G
* * *
-
* * *

13
4.2. Global Preset Memory Correction
This function simultaneously resets all preset camera panning positions. The deviation of one camera position
is measured, based on which all other positions are globally corrected. When performing this global
correction, use the position on the telescope side whenever possible.
1. Select “PRESET” on the camera menu screen and press the
Set key.
The Preset Settings screen is displayed.
2. Select “READJUST ALL POS” with the joystick and press the
Set key.
3. Enter the camera position number with the numerical keypad,
and press the Set key. The Entered figure is displayed.
4. Press the Set key.
Preset memory correction screen is displayed.
Note
If a number not used for the preset memory setting is entered,
that number is displayed, however the preset memory
correction screen is not displayed. Enter the figures that are
used for the preset memory setting.
5. After adjusting the panning direction with the joystick, press
the Set key.
All preset memory positions can be corrected.
Preset setting screen
M E M O R Y
R E A D J U S T A L L P O S
M E M O R Y R E S E T
M E M O R Y A L L R E S E T
A U T O R E T U R N
H O M E
P R E S E T F R E E Z E
* * * P O S
N O
O F F
1 P O S
O F F
*P R E S E T *

14
R E S E T O K ?
* * *
-
* * *
Preset reset confirmation screen
R E S E T * * * P O S
*P R E S E T *
---------------------------
1 : O
2 : O
3 : O
4 : O
6 : O
5 : O
7 : O
8 : O
9 : X
1 0 : X
1 1 : X
1 2 : X
1 4 : X
1 3 : X
1 5 : X
1 6 : X
1. Select “PRESET” on the camera menu screen and press the
Set key.
The Preset Settings screen is displayed.
2. Select “MEMORY RESET” with the joystick and press the Set
key.
3. Enter the desired number to be erased with the numerical
keypad, and press the Set key. The Entered figure is
displayed.
Note
Position No. 1 cannot be deleted. Entering “1” makes the entry
invalid.
4. Press the Set key.
The number entered is selected and “RESET OK?” appears
below the number.
5. Press the Set key.
The stored position is erased.
Position setting item screen is displayed after setting
completion.
Preset setting screen
M E M O R Y
R E A D J U S T A L L P O S
M E M O R Y R E S E T
M E M O R Y A L L R E S E T
A U T O R E T U R N
H O M E
P R E S E T F R E E Z E
* * * P O S
N O
O F F
1 P O S
O F F
*P R E S E T *
4.3. Preset Memory Reset

15
4.4. Preset Memory All Reset
Deletes all preset position data.
1. Select “PRESET” on the camera menu screen and press the
Set key.
The Preset Settings screen is displayed.
Preset setting screen
M E M O R Y
R E A D J U S T A L L P O S
M E M O R Y R E S E T
M E M O R Y A L L R E S E T
A U T O R E T U R N
H O M E
P R E S E T F R E E Z E
* * * P O S
N O
O F F
1 P O S
O F F
*P R E S E T *
2. Select “MEMORY ALL RESET” with the joystick and press the
Set key.
3. Select “YES” with the joystick and press the Set key.
Deletes all preset position data.
2. Select “AUTO RETURN” with the joystick and press the Set
key.
3. With the joystick, select “OFF,” “5s,” “10s,” “15s,” “20s,” “30s,”
“45s,” “1min,” “3min,” or “5min,” then press the Set key.
The program to which the camera will automatically return or
release (OFF) is then set.
Note
This function operates separately from the automatic return
function of the C-RM500, disabling the automatic return hold
function by way of alarm hold of the C-RM500. If hold function is
required, use the automatic return function of the C-RM500.
M E M O R Y
R E A D J U S T A L L P O S
M E M O R Y R E S E T
M E M O R Y A L L R E S E T
A U T O R E T U R N
H O M E
P R E S E T F R E E Z E
* * * P O S
N O
O F F
1 P O S
O F F
*P R E S E T *
Preset setting screen
4.5. Automatic Return Setting
This function is used to determine operation when the camera is not controlled at all. The camera
automatically reverts to the initially set program when the preset period of time elapses after the controller’s
control has been finished.
1. Select “PRESET” on the camera menu screen and press the
Set key. The Preset Settings screen is displayed.

16
M E M O R Y
R E A D J U S T A L L P O S
M E M O R Y R E S E T
M E M O R Y A L L R E S E T
A U T O R E T U R N
H O M E
P R E S E T F R E E Z E
* * * P O S
N O
O F F
1 P O S
O F F
*P R E S E T *
Preset setting screen
2. Select “HOME” with the joystick and press the Set key.
3. With the joystick, select “1POS,” “2POS,” “254POS,”
“255POS,” “AUTO PAN,” “SEQUENCE,” “TRACE1,”
“TRACE2,” or “TOUR1 – 16,” then press the Set key. The
program to which the camera will automatically return is then
set.
Note: Items that have not been set cannot be selected.
1. Select “PRESET” on the camera menu screen and press the
Set key.
The Preset Settings screen is displayed.
2. Select “PRESET FREEZE” with the joystick and press the Set
key.
3 With the joystick, select “ON,” then press the Set key.
The Preset Memory Freeze is then set.
Designate the program the camera automatically returns to.
1. Select “PRESET” on the camera menu screen and press the
Set key. The Preset Settings screen is displayed.
4.6. Home Setting
4.7. Preset Memory Freeze Setting (C-CC564, C-CC574, C-CC764 and C-CC774 only)
Freezing the screen immediately before replaying preset memory blanks out the view of the camera’s
movement between camera positions. It is recommended that the preset memory freeze function also be used
together when using the privacy masking function (p. 77).
M E M O R Y
R E A D J U S T A L L P O S
M E M O R Y R E S E T
M E M O R Y A L L R E S E T
A U T O R E T U R N
H O M E
P R E S E T F R E E Z E
* * * P O S
N O
O F F
1 P O S
O F F
*P R E S E T *
Preset setting screen

17
5.1. Setting Display Content
Contents or time to be displayed can be set by selecting “DISPLAY” on the ID setting screen.
1. Select “ALL” on the ID display screen with the joystick and
press the Set key.
2. With the joystick, select “OFF,” “ON,” “INDIVIDUAL,” “1s,” “3s,”
“5s,” or “10s,” then press the Set key. The selected item is
then set.
OFF: Nothing is displayed.
ON: Every ID are all displayed.
1S, 3S, 5S, 10S: ID is displayed for a set length of time.
INDIVIDUAL: Performs display settings for each ID.
A L L
A D D R E S S
C A M E R A I D
P O S I T I O N I D
T R A C E I D
A U T O P A N I D
T O U R I D
H O M E I D
N E X T P A G E
O F F
O F F
O F F
O F F
O F F
O F F
O F F
I N D I V I D U A L
*D I S P L A Y *
ID Display screen
When set to “OFF” (factory default).
When “Camera,” “Position,”
and “Home” are turned ON. When “All Display” is set to ON.
*Example shows display position and its length are factory preset value.
C A M E R A I D
P O S I T I O N
H O M E I D 2 * H O M E I D 3 *
H O M E I D 1 *
A D D R * * *
C A M E R A I D
P O S
I
T I O N
H O M E I D 2 * H O M E I D 3 *
T O U R I D * *
M M
/
D D
/
Y Y
* * :* * A M
Z O O S E C T O R I D A L A R M I D *
H O M E I D 1 * A U X I D * * *
* * * /* * *
5. ID (TITLE)SETTINGS
Up to 8 alphanumeric characters can be used. The display position and its length can be freely adjusted.
[ Entering the ID Setting Screen from the Camera Menu Screen ]
First enter the ID setting screen from the camera menu screen to set titles.
1. Select “ID SETTING” on the camera menu screen with the joystick and press the Set key.
The ID Settings screen is displayed.
Camera menu screen
C A M
C A M E R A M E N U
P R E S E T
I D S E T T I N G
C A M E R A S E T T I N G
A U T O M O D E
A L A R M
A U X
T I M E R
M A N U A L
M A I N T E N A N C E
E N G L I S H
L A N G U A G E
ID Setting screen
D I S P L A Y
I D S E T T I N G
L O C A T I O N
F R A M E A D J U S T
Z E R O P O I N T
*I D S E T T I N G *
2. Select the setting item with the joystick and perform each item setting.

18
5.1.1. Setting display items
Display setting “ON” or “OFF” for each ID can be set by selecting “INDIVIDUAL” on the ID display screen.
1. Select the desired ID on the ID display screen with the joystick and press the Set key.
2. Select “ON” or “OFF” with the joystick and press the Set key.
(Setting contents can be displayed on the screen when setting item is set to “ON.”)
Note: The ID setting items that can be displayed are as follows.
Displays the time in accordance with the time (hour, minute) setting (timer setting) format.
(Format: fixed 5 or 7-charactors)
Setting Item Setting Contents
Displays the camera address and camera position No. Title length can be freely adjusted
from 3 to 7 digits. (Camera address: DIP switch 1: for setting, factory-preset: 001)
[ ] Camera address
-
Position number
Address
Displays the Camera Title. *1
Camera
Displays the Position title (1 – 255). *1
Position
Displays the Trace title (1 – 2). *1
Trace
Maximum character length can be set in the range of1 to 8 characters. (factory default : 8 characters)
*1
Displays the Auto-Pan title. *1
Auto-Pan
Displays the Tour title (1 – 16). *1
Tour
Displays the Home Position title (1 – 3). Up to 3 titles can be set.*1
Home
Displays the Alarm title (1 – 8). *1
Alarm
Displays the title for the sectors split in the panning direction.
Setting North permits the direction to be automatically divided into 8 sectors.
(north, north east, east, south east, south, south west, west, and north west) *1
Sector
Displays the AUX contact output title (1 – 2).
AUX
Displays the coordinate. Pan (0 to 359)/ Tilt (5 to -185) fixed 8 characters.
[ ] Pan angle (0 to 359)/ Tilt (5 to 185)
Coordinate
Displays the Electronic Zoom. Fixed 3-charactors.
Lens
Displays the date in accordance with the date setting (timer setting) format.
Fixed 8-charactors.
Date
Time
***
-
***
*** /
-
***

19
5.2.2. Position ID setting
1. Select “POSITION” on the ID setting screen 2 with the joystick
and press the Set key.
2. Enter the desired position number with the numerical keypad,
and press Set key.
The place of “***” shows the input ID number.
Note: Position between 1 and 255 can be set.
3. Press the Set key.
ID setting screen is displayed.
4. Enter the title characters.
(p. 25, Character entry basic operation)
Position ID setting screen
P O S I T I O N * * * P O S
---------------------------
1 : ********
2 : ********
3 : ********
4 : ********
6 : ********
5 : ********
7 : ********
8 : ********
1 0 : ********
1 1 : ********
1 2 : ********
1 4 : ********
1 3 : ********
1 5 : ********
1 6 : ********
*I D S E T T I N G *
9 : ********
5.2.1. Camera ID setting
1. Select “CAMERA” on the ID setting screen 2 with the joystick
and press the Set key.
ID input screen is displayed.
2. Enter the title characters.
(p. 25, Character entry basic operation)
*
CAMERA
*
********
SPACE CL EAR
---
END
ABCDEFGHI J KL MNOPQRSTUVWXYZ
abcdef ghi j kl mnopqr st uvwxyz
0123456789! ?¿/ ( ) <>: . · ,
-
&
*
ÄÖÅÜŞäöåüμàáâãèéëêçì í î ñòóõ
ùúûôï βÈÃÇÆæØøΓДЖИЙКЛПФЦЧШЩ
ЭЮЯбвг джзийклмнптфцчшщъыьэ
юяĄĆ}ŁŃÓŚŹŻąć ł ńËś œź ż i …§
ÑÉÊÀÁÂÙÛÎ Ì Í Ï ÒÕÚƂЗУЪЫЬ
LI II rr
ck tz
Ch ch
5.2. ID Settings
1. Select “ID SETTING” on the ID setting screen with the joystick
and press the Set key.
ID setting screen 2 is displayed.
2. Select the setting item with the joystick to set each ID.
C A M E R A
P O S I T I O N
T R A C E
A U T O P A N
T O U R
H O M E
*I D S E T T I N G *
ID Setting screen 2
A L A R M
S E C T O R
A U X

20
5.2.4. Auto Pan ID setting
1. Select “AUTO PAN” on the ID setting screen 2 with the
joystick and press the Set key. ID setting screen is displayed.
2. Enter the title characters.
(p. 25, Character entry basic operation)
*
AUTO PAN
*
********
SPACE CL EAR
---
END
ABCDEFGHI J KL MNOPQRSTUVWXYZ
abcdef ghi j kl mnopqr st uvwxyz
0123456789! ?¿/ ( ) <>: . · ,
-
&
*
ÄÖÅÜŞäöåüμàáâãèéëêçì í î ñòóõ
ùúûôï βÈÃÇÆæØøΓДЖИЙКЛПФЦЧШЩ
ЭЮЯбвг джзийклмнптфцчшщъыьэ
юяĄĆ}ŁŃÓŚŹŻąć ł ńËś œź ż i …§
ÑÉÊÀÁÂÙÛÎ Ì Í Ï ÒÕÚƂЗУЪЫЬ
LI II rr
ck tz
Ch ch
5.2.3. Trace ID setting
1. Select “TRACE” on the ID setting screen 2 with the joystick
and press the Set key.
2. Select the number on the ID setting screen with the joystick
and press the Set key.
ID setting screen is displayed.
3. Enter the title characters.
(p. 25, Character entry basic operation)
Trace ID setting screen
*I D S E T T I N G *
T R A C E
2 : ********
1 : ********
5.2.5. Tour ID setting
1. Select “TOUR” on the ID setting screen 2 with the joystick and
press the Set key.
2. Select the number on the Tour ID setting screen with the
joystick, and press Set key.
ID setting screen is displayed.
3. Enter the title characters.
(p. 25, Character entry basic operation)
Tour ID setting screen
T O U R
1 : ********
2 : ********
3 : ********
4 : ********
6 : ********
5 : ********
7 : ********
8 : ********
1 0 : ********
1 1 : ********
1 2 : ********
1 4 : ********
1 3 : ********
1 5 : ********
1 6 : ********
*I D S E T T I N G *
9 : ********
Other manuals for C-CC514 NT
1
This manual suits for next models
11
Table of contents
Other Toa Security Camera manuals

Toa
Toa Q-CV24VP-3 User manual

Toa
Toa C-CC764 User manual

Toa
Toa Netcansee N-CC2360 User manual

Toa
Toa Netcansee N-CC2564 User manual

Toa
Toa Netcansee N-CC2564 Guide

Toa
Toa C-CC514 NT User manual

Toa
Toa C-CV202-F3 User manual

Toa
Toa C-CV44-3 NTSC User manual

Toa
Toa C-CH100 User manual

Toa
Toa C-CC774 User manual

Toa
Toa C-CC704 CU User guide

Toa
Toa C-CC514 Installation guide

Toa
Toa C-CC704 CU User manual

Toa
Toa C-CC364 User manual

Toa
Toa Netcansee N-CC2564 User manual

Toa
Toa C-CV24-2 NTSC User manual

Toa
Toa C-CC714 NT User manual

Toa
Toa C-CC364 User manual

Toa
Toa C-CV454D-9 CU User manual

Toa
Toa C-CC364 NT User guide