manuals.online logo
Brands
  1. Home
  2. •
  3. Brands
  4. •
  5. Monacor
  6. •
  7. Security Camera
  8. •
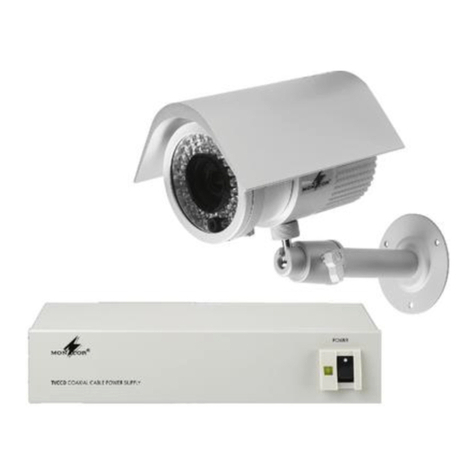
  9. Monacor TVCCD-140SET User manual

Monacor TVCCD-140SET User manual

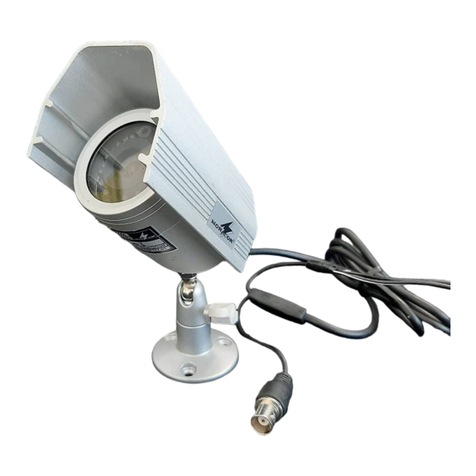
Colour Camera
Please read these operating instructions carefully prior
to the installation and keep them for later reference.
1 Applications
This camera is especially designed for applications in
video surveillance systems (CCTV). It is mounted to
the wall or ceiling and is also suitable for outside instal-
lations due to its weatherproof housing (protective
class IP 65). The camera is equipped with an 6.35 mm
(1/4″) image sensor and a 3.6 mm lens. It has an auto-
matic gain control (AGC), a backlight compensation,
and an automatic electronic shutter.
If the camera detects darkness via its light sensor, it
goes from colour operation to b/w operation and the
12 infrared LEDs are switched on for illuminating the
surveillance zone (range 8 m).
2 Important Notes
The camera corresponds to all required directives of
the EU and is therefore marked with .
GThe camera housing is weatherproof, but not
absolutely watertight. Therefore, do not immerge
the camera into water.
GProtect the camera against extreme temperatures
(admissible ambient temperature range
-
10 °C to
+50 °C).
GFor cleaning the camera do not use any aggressive
detergents or chemicals.
GNo guarantee claims for the camera and no liability
for any resulting personal damage or material dam-
age will be accepted if the camera is used for other
purposes than originally intended, if it is not correctly
installed, or not repaired in an expert way.
3 Operation
Important: The connections (1, 2) and the cable dis-
tributor (3) are not weatherproof. In case of outside
connection they must be protected accordingly.
1) Connect the BNC inline jack (1) via a 75 Ω coaxial
cable to the video input of a monitor. Observe the
correct 75 Ω termination at the monitor or in case of
series connection at the last monitor. With a cable
length of more than 100 m a video amplifier should
be inserted between the camera and the long cable
to compensate level loss caused by the cable.
2) Connect the low voltage inline jack (2) to a regu-
lated 12 V voltage supply unit with a permanent rat-
ing of 400 mA. A low voltage plug with 5.5 mm outer
diameter and 2.1 mm inner diameter is required
(observe the polarity: central contact = +).
3) Switch on the monitor and by aligning the
camera to the surveillance zone define the
optimum place of mounting for it. Tightly
screw the camera via its support at this
place. It is possible to screw the sup-
port into the thread on the upper
CAUTION: Never look directly into the lit
LEDs at close range. Although the in-
frared light is invisible, it may cause eye
damage.
If the camera is to be put out of operation
definitively, take it to a local recycling plant for
a disposal which is not harmful to the environ-
ment.
side or lower side of the camera. After mounting
release the screws (4) at the camera support, move
the camera into the desired position, and retighten
the screws.
4 Specifications
Image sensor: . . . . . . . . . . CCD, 6.35 mm (1/4″)
Video system: . . . . . . . . . . PAL/CCIR
Resolution/pixels: . . . . . . . 420 lines/h. 512 × v. 582
Lens: . . . . . . . . . . . . . . . . . 1 : 2.0/3.6 mm
Minimum illumination: . . . . 0.5 lux (LEDs off)
Video output: . . . . . . . . . . . 1 Vpp/75 Ω, BNC
Power supply: . . . . . . . . . 12 V /400 mA
Dimensions, weight: . . . . . ∅65 mm × 102 mm, 380 g
Subject to technical modification.
Farbkamera
Bitte lesen Sie diese Anleitung vor der Installation
gründlich durch und heben Sie sie für ein späteres
Nachlesen auf.
1 Verwendungsmöglichkeiten
Diese Kamera ist speziell für den Einsatz in Video-
Überwachungsanlagen (CCTV) konzipiert. Sie wird an
der Wand oder Decke montiert und ist in ihrem wetter-
geschützten Gehäuse (Schutzart IP 65) auch für
Außeninstallationen geeignet. Die Kamera ist mit
einem 6,35-mm-Bildsensor (1/4″) und einem 3,6-mm-
Objektiv ausgestattet. Sie verfügt über eine Verstär-
kungsregelung (AGC), eine Gegenlichtkompensation
und einen automatischen elektronischen Verschluss
(Shutter).
Erkennt die Kamera über ihren Lichtsensor Dunkel-
heit, wechselt sie von Farb- auf S/W-Betrieb und die
12 Infrarot-LEDs schalten sich zur Aufhellung des
Überwachungsbereichs ein (Reichweite 8 m).
2 Wichtige Hinweise für den Gebrauch
Die Kamera entspricht allen erforderlichen Richtlinien
der EU und deshalb mit gekennzeichnet.
GDas Kameragehäuse ist wetterfest, jedoch nicht
absolut wasserdicht. Tauchen Sie darum die
Kamera nicht in Wasser ein.
GSchützen Sie die Kamera vor extremen Temperatu-
ren (zulässige Einsatztemperatur
-
10 °C bis +50 °C).
GVerwenden Sie für die Reinigung der Kamera keine
scharfen Reinigungsmittel oder Chemikalien.
GWird die Kamera zweckentfremdet, falsch installiert
oder nicht fachgerecht repariert, kann keine Haftung
für daraus resultierende Sach- oder Personenschä-
den und keine Garantie für die Kamera übernom-
men werden.
3 Inbetriebnahme
Wichtig: Die Anschlüsse (1, 2) und der Kabelverteiler
(3) sind nicht wetterfest. Bei einem Außenanschluss
müssen sie entsprechend geschützt werden.
1) Die BNC-Kupplung (1) über ein 75-Ω-Koaxialkabel
mit dem Videoeingang eines Monitors verbinden.
Dabei auf den korrekten 75-Ω-Abschluss am Moni-
tor bzw. bei einer Serienschaltung am letzten Moni-
tor achten. Bei einer Kabellänge von mehr als
100 m sollte zum Ausgleich von Pegelverlusten
durch das Kabel ein Videoverstärker zwischen die
Kamera und das lange Kabel geschaltet werden.
VORSICHT: Blicken Sie nie aus der
Nähe direkt in die eingeschalteten LEDs.
Obwohl das Infrarotlicht unsichtbar ist,
kann es Augenschäden verursachen.
Soll die Kamera endgültig aus dem Betrieb
genommen werden, übergeben Sie sie zur
umweltgerechten Entsorgung einem örtlichen
Recyclingbetrieb.
2) An die Kleinspannungskupplung (2) ein stabilisier-
tes 12-V-Netzgerät mit einer Dauerbelastbarkeit
von 400 mA anschließen. Es wird ein Kleinspan-
nungsstecker mit 5,5/2,1 mm Außen-/Innendurch-
messer benötigt (Polung beachten: Mittelkon-
takt = +).
3) Den Monitor einschalten und durch Ausrichten der
Kamera auf den Überwachungsbereich die opti-
male Montagestelle feststellen. Die Kamera dort
über den Kamerahalter festschrauben. Dabei kann
der Halter in das Gewinde auf der Oberseite oder
Unterseite der Kamera geschraubt werden. Nach
der Montage die Schrauben (4) am Kamerahalter
lösen, die Kamera in die gewünschte Stellung
bewegen und die Schrauben wieder festziehen.
4 Technische Daten
Bildabtaster: . . . . . . . . . . . 6,35-mm-CCD-Chip (1/4″)
Videosystem: . . . . . . . . . . PAL/CCIR
Auflösung/Bildpunkte: . . . . 420 Linien/h. 512 × v. 582
Objektiv: . . . . . . . . . . . . . . 1 : 2,0/3,6 mm
Mindestbeleuchtung: . . . . . 0,5 Lux (LEDs aus)
Videoausgang: . . . . . . . . . 1 Vss/75 Ω, BNC
Stromversorgung: . . . . . . . 12 V /400 mA
Abmessungen, Gewicht: . . ∅65 mm × 102 mm, 380 g
Änderungen vorbehalten.
TVCCD -140 SET Best.-Nr. 18.6070
®
1
2
Video
12 V
34
MONACOR INTERNATIONAL GmbH & Co. KG • Zum Falsch 36 • 28307 Bremen • Germany
Copyright©by MONACOR INTERNATIONAL. All rights reserved. A-1158.99.02.04.2011
®
D A CH
GB
Telecamera a colori
Vi preghiamo di leggere attentamente le presenti istru-
zioni prima dellʼinstallazione e di conservarle per un
uso futuro.
1 Possibilità dʼimpiego
Questa telecamera è stata realizzata specialmente
per lʼimpiego in impianti di sorveglianza video (CCTV).
Viene montata alla parete o al soffitto e con il suo con-
tenitore protetto contro le intemperie (grado di prote-
zione del contenitore IP 65) è adatta anche per instal-
lazioni allʼesterno. È equipaggiata con un sensore
ottico di 6,35 mm (1/4″) e con un obiettivo di 3,6 mm.
Dispone di regolazione del guadagno (AGC), di com-
pensazione della controluce e di un otturatore elettro-
nico automatico (shutter).
Se per mezzo della sua fotocellula riconosce lʼoscu-
rità, passa dal funzionamento a colori al b/n, e i
12 LED infrarossi si accendono per illuminare la zona
da sorvegliare (portata 8 m).
2 Avvertenze di sicurezza
La telecamera è conforme a tutte le direttive richieste
dellʼUE e pertanto porta la sigla .
GIl contenitore della telecamera è resistente alle
intemperie, ma non a tenuta assoluta dʼacqua. Per-
tanto, non immergere la telecamera nellʼacqua.
GProteggere la telecamera da temperature estreme
(temperatura dʼimpiego ammessa fra
-
10 °C
e
+50 °C).
GPer la pulizia della telecamera non usare detersivi
aggressivi o prodotti chimici.
GNel caso dʼuso improprio, dʼinstallazione sbagliata o
di riparazione non a regola dʼarte dellʼapparecchio,
non si assume nessuna responsabilità per eventuali
danni consequenziali a persone o a cose e non si
assume nessuna garanzia per lʼapparecchio.
3 Messa in funzione
Importante: I contatti (1, 2) e il ripartitore di cavi (3)
non sono protetti contro le intemperie. In caso di colle-
gamento allʼesterno devono essere protetti in modo
adeguato.
1) Collegare la presa BNC (1) con lʼingresso video di
un monitor servendosi di un cavo coassiale di 75 Ω
tenendo conto della corretta terminazione a 75 Ω
sul monitor oppure sullʼultimo monitor in caso di
collegamento in serie. In caso di un cavo lungo
oltre 100 m, per compensare le perdite di livello per
via del cavo, è consigliabile inserire un amplifica-
tore video fra telecamera e il cavo lungo.
2) Collegare la presa per alimentazione DC (2) con
unʼalimentazione stabilizzata di 12 V con
potenza permanente di 400 mA. È richiesto
uno spinotto
coassiale con diametro
esterno/interno di 5,5/2,1 mm
(rispettare la
polarità: contatto centrale = +).
3) Accendere il monitor e orientare la
telecamera sulla zona da sorve-
ATTENZIONE: Non guardare mai da vi-
cino direttamente nei LED accesi. Nono-
stante la luce infrarossa sia invisibile, può
procurare dei danni agli occhi.
Se si desidera eliminare la telecamera defini-
tivamente, consegnarla per lo smaltimento ad
unʼistituzione locale per il riciclaggio.
gliare per individuare il punto migliore per il suo
montaggio. Avvitare su tale punto la telecamera con
lʼaiuto del suo supporto. Il supporto può essere
avvitato nella filettature del lato superiore o inferiore
della telecamera. Dopo il montaggio allentare le viti
(4) sul supporto e portare la telecamera nella posi-
zione desiderata; quindi stringere di nuovo le viti.
4 Dati tecnici
Sensore ottico : . . . . . . . . . chip CCD 6,35 mm (1/4″)
Sistema video: . . . . . . . . . PAL/CCIR
Risoluzione/pixel: . . . . . . . 420 linee/h. 512 × v. 582
Obiettivo: . . . . . . . . . . . . . . 1 : 2,0/3,6 mm
Illuminazione minima: . . . . 0,5 Lux (LED spenti)
Uscita video: . . . . . . . . . . . 1 Vpp/75 Ω, BNC
Alimentazione: . . . . . . . . . 12 V /400 mA
Dimensioni, peso: . . . . . . . ∅65 mm × 102 mm, 380 g
Con riserva di modifiche tecniche.
Caméra couleur
Veuillez lire la présente notice avec attention avant
lʼinstallation de la caméra et conservez-la pour pouvoir
vous y reporter ultérieurement.
1 Possibilités dʼutilisation
Cette caméra compacte est spécialement conçue pour
une utilisation dans des installations de surveillance
vidéo (CCTV). Elle se monte sur un mur ou au plafond
et est également adaptée pour une installation en
extérieur grâce à son boîtier protégé contre les intem-
péries (classe de protection du boîtier IP 65). Elle est
équipée dʼun capteur dʼimage 6,35 (1/4″) et dʼun objec-
tif 3,6 mm et dispose dʼun réglage dʼamplification
(AGC), dʼune compensation du contre-jour et dʼune
obturation électronique automatique (shutter).
Si la caméra détecte la pénombre grâce à son cap-
teur, elle passe du mode couleur au mode noir et
blanc, les 12 LEDs infrarouges sʼallument pour éclai-
rer la zone de surveillance (portée 8 m).
2 Conseils dʼutilisation
La caméra répond à toutes les directives nécessaires
de lʼUnion européenne et porte donc le symbole .
GLe boîtier de la caméra est résistant aux intempéries
mais pas absolument étanche. Ne plongez jamais la
caméra dans lʼeau.
GProtégez la caméra des températures extrêmes
(plage de température de fonctionnement autori-
sée :
-
10 °C bis +50 °C).
GPour nettoyer la caméra, nʼutilisez pas de déter-
gents abrasifs ou de produits chimiques.
GNous déclinons toute responsabilité en cas de dom-
mages corporels ou matériels résultants si la caméra
est utilisée dans un but autre que celui pour lequel
elle a été conçue, si elle nʼest pas correctement ins-
tallée ou nʼest pas réparée par une personne habili-
tée, de même, la garantie deviendrait caduque.
3 Fonctionnement
Important : les branchements (1, 2) et le répartiteur
de câble (3) ne sont pas résistants aux intempéries.
En cas de branchement en extérieur, ils doivent être
protégés en conséquence.
1) Reliez la fiche BNC femelle (1) via un câble coaxial
75 Ω à lʼentrée vidéo dʼun moniteur. Veillez à ce que
la terminaison 75 Ω soit correcte sur le moniteur ou
dans le cas dʼun branchement en série, sur le der-
nier moniteur. Pour une longueur de câble supé-
rieure à 100 m, il convient de brancher entre la
PRECAUTION : ne regardez jamais de
près et directement les LEDs allumées.
Même si la lumière infrarouge est invisi-
ble, elle peut causer des troubles de la
vision.
Lorsque la caméra est définitivement retirée
du service, vous devez la déposer dans une
usine de recyclage de proximité pour contri-
buer à son élimination non polluante.
caméra et le long câble un amplificateur vidéo pour
compenser les pertes de niveau générées par le
câble.
2) Reliez la fiche basse tension (2) à une alimentation
stabilisée 12 V avec une charge permanente de
400 mA. Une fiche basse tension avec diamè-
tre extérieur/intérieur 5,5/2,1 mm est nécessaire
(attention à la polarité : contact médian = +).
3) Allumez le moniteur et réglez le meilleur emplace-
ment de montage pour la caméra en lʼorientant vers
la zone à surveiller. Vissez la caméra via son sup-
port à cet endroit. Le support peut être vissé dans
le filetage sur la face supérieure ou inférieure de la
caméra. Après le montage, desserrez les vis (4) sur
le support, placez la caméra dans la position vou-
lue puis revissez.
4 Caractéristiques techniques
Puce : . . . . . . . . . . . . . . . . CCD 6,35 (1/4″)
Système vidéo : . . . . . . . . PAL/CCIR
Résolution/
nombre de points : . . . . . . 420 lignes/h. 512 × v. 582
Objectif : . . . . . . . . . . . . . . 1 : 2,0/3,6 mm
Luminosité minimale : . . . . 0,5 lux (LEDs éteintes)
Sortie vidéo : . . . . . . . . . . . 1 Vcc/75 Ω, BNC
Alimentation : . . . . . . . . . . 12 V /400 mA
Dimensions, poids : . . . . . . ∅65 mm × 102 mm, 380 g
Tout droit de modification réservé.
TVCCD -140 SET Best.-Nr. 18.6070
®
1
2
Video
12 V
34
MONACOR INTERNATIONAL GmbH & Co. KG • Zum Falsch 36 • 28307 Bremen • Germany
Copyright©by MONACOR INTERNATIONAL. All rights reserved. A-1158.99.02.04.2011
®
I
F B CH
Kolorowa kamera
Przed rozpoczęciem instalacji proszę dokładnie zapo-
znać się z niniejszą instrukcją i zachować ją do wglądu.
1 Zastosowanie
Niniejsza kamera przeznaczona jest do systemów
monitoringu (CCTV). Może być montowana do ściany
lub sufitu, również na zewnątrz, dzięki obudowie
odpornej na warunki atmosferyczne (klasa szczelno-
ści IP 65). Kamera wyposażona jest w 6,35 mm (1/4″)
przetwornik oraz obiektyw 3,6 mm. Ponadto, posiada
funkcje regulacji wzmocnienia (AGC) i kompensacji
tylnego oświetlenia oraz automatyczną migawkę elek-
troniczną.
Przy słabym oświetleniu oraz w ciemności, kamera
przełącza się automatycznie z trybu kolorowego na
tryb czarno-biały oraz włącza oświetlenie podczerwie-
nią z 12 diod (zasięg 8 m).
2 Środki bezpieczeństwa
Kamera spełnia wszystkie wymagania norm UE i dla-
tego została oznaczona symbolem .
GObudowa kamery jest odporna na warunki atmosfe-
ryczne, ale nie jest całkowicie wodoszczelna. Nie
należy umieszczać jej w wodzie.
GUrządzenie należy chronić bardzo wysokimi oraz
bardzo niskimi temperaturami (temperatura otocze-
nia powinna wynosić od
-
10 °C do +50 °C).
GDo czyszczenia nie wolno używać żadnych silnych
środków chemicznych.
GProducent ani dostawca nie ponoszą odpowiedzial-
ności za wynikłe uszkodzenia sprzętu lub obrażenia
użytkownika w przypadku gdy urządzenie było
wykorzystywane w innych celach niż to się przewi-
duje lub jeśli zostało nieodpowiednio zainstalowane,
podłączane, użytkowane lub poddane nieautoryzo-
wanej naprawie.
3 Obsługa
Uwaga: Złącza (1, 2) oraz rozdzielnik kabla (3) nie są
wodoszczelne. W przypadku montażu kamery na
zewnątrz należy je odpowiednio zabezpieczyć.
1) Podłączyć gniazdo nakablowe BNC (1) do wejścia
monitora, za pomocą 75 Ω kabla koncentrycznego.
Do monitora (ostatniego, jeśli jest kilka połączo-
nych) należy podłączyć obciążenie terminujące
75 Ω. Jeżeli długość kabla przekracza 100 m,
pomiędzy kamerą a kablem, należy podłączyć
wzmacniacz sygnału wideo.
2) Podłączyć gniazdo niskonapięciowe (2) do zasila-
cza regulowanego 12 V, umożliwiającego pobór
prądu 400 mA. Wymagany jest wtyk zasilający
5,5/2,1 mm (o polaryzacji: centralny styk = +).
3) Włączyć monitor i ustawić kamerę odpo-
wiednio do monitorowanego obszaru.
Zamontować kamerę w odpowiednim
miejscu, za pomocą uchwytu monta-
UWAGA: Nie należy patrzeć z bliskiej
odległości na diody. Pomimo, iż światło
podczerwone nie jest widoczne, może
uszkodzić wzrok.
Aby nie zaśmiecać środowiska, po całkowi-
tym zakończeniu eksploatacji urządzenia
należy je oddać do punktu recyklingu.
żowego. Kamera posiada dwa gniazda gwinto-
wane do montażu na uchwycie, na górnej i na dol-
nej stronie. Po zamontowaniu, poluzować śruby (4)
na uchwycie, ustawić kamerę w żądanej pozycji i
dokręcić je ponownie.
4 Specyfikacja
Przetwornik: . . . . . . . . . . . CCD, 6,35 mm (1/4″)
System wideo: . . . . . . . . . . PAL/CCIR
Rozdzielczość/piksele: . . . 420 linii/
poz. 512 × pion. 582
Obiektyw: . . . . . . . . . . . . . 1 : 2,0/3,6 mm
Minimalne oświetlenie: . . . 0,5 lux (bez diod)
Wyjście wideo: . . . . . . . . . 1 Vpp/75 Ω, BNC
Zasilanie: . . . . . . . . . . . . . . 12 V /400 mA
Wymiary, waga: . . . . . . . . . ∅65 mm × 102 mm, 380 g
Z zastrzeżeniem możliwości zmian.
Cámara a Color
Lea atentamente estas instrucciones de funciona-
miento antes de la instalación y guárdelas para poste-
riores usos.
1 Aplicaciones
Esta cámara está diseñada para aplicaciones en sis-
temas de vigilancia vídeo (CCTV). Se monta en pared
o techo y está adecuada para instalaciones en exte-
riores gracias a su carcasa impermeabilizada (protec-
ción IP 65). La cámara está equipada con un sensor
de imagen de 6,35 mm (1/4″) y una lente de 3,6 mm.
Tiene un control de ganancia (AGC), compensación
de contraluz y obturador electrónico automático.
Si la cámara detecta oscuridad mediante su sensor
de luz, pasa de funcionamiento en color a funciona-
miento B/N y los 12 LEDs IR se conectan para ilumi-
nar la zona de vigilancia (distancia: 8 m).
2 Notas Importantes
El aparato cumple con todas las directivas requeridas
por la UE y por lo tanto está marcado con el símbolo .
GLa carcasa es impermeable pero no es completa-
mente resistente al agua. Por lo tanto, no sumerja la
cámara en el agua.
GProteja la cámara de temperaturas extremas (tem-
peratura ambiente admisible:
-
10 ºC a +50 ºC).
GPara limpiar la cámara no utilice ningún producto
químico o detergente agresivo.
GNo podrá reclamarse garantía o responsabilidad
alguna por cualquier daño personal o material resul-
tante si la cámara se utiliza para otros fines diferen-
tes a los originalmente concebidos, si no se instala
o se conecta correctamente o no se repara por
expertos.
3 Funcionamiento
Importante: Las conexiones (1, 2) y el distribuidor de
cable (3) no son impermeables. En caso de conexión
exterior, tienen que protegerse adecuadamente.
1) Conecte la entrada BNC (1) mediante un cable
coaxial de 75 Ω a la entrada de vídeo de un moni-
tor. Preste atención a la correcta terminación de
75 Ω en el monitor o en caso de conexión en serie,
en el último monitor. Con un cableado de más de
100 m, tendría que insertarse un amplificador de
vídeo entre la cámara y el cable para compensar la
pérdida de nivel provocada por el cable.
PRECAUCIÓN: No mire nunca directa-
mente a la luz LED desde cerca. Aunque
la luz IR es invisible, puede provocar
daños oculares.
Si va a poner la cámara fuera de servicio defini-
tivamente, llévelo a la planta de reciclaje de la
zona para que su eliminación no sea perjudicial
para el medio ambiente.
2) Conecte la entrada de bajo voltaje (2) a un alimen-
tador regulado de 12 V con un nivel permanente de
400 mA. Se necesita una toma de bajo voltaje con
5,5 mm de diámetro exterior y 2,1 mm de diámetro
interior (preste atención a la polaridad correcta:
contacto central = +).
3) Conecte el monitor y dirigiendo la cámara a la zona
de vigilancia, elija el mejor lugar para su montaje.
Fije con fuerza la cámara mediante su soporte en
ese lugar. Se puede atornillar el soporte en la rosca
de la parte superior o de la parte inferior de la
cámara. Después del montaje, afloje los tornillos
(4) del soporte de la cámara, mueva la cámara
hacia la posición deseada y apriete de nuevo los
tornillos.
5 Especificaciones
Sensor de imagen: . . . . . . Chip CCD, 6,35 mm
(1/4″)
Sistema de vídeo: . . . . . . . PAL/CCIR
Resolución/píxeles: . . . . . . 420 líneas/h. 512 × v. 582
Lente: . . . . . . . . . . . . . . . . 1 : 2,0/3,6 mm
Iluminación mínima: . . . . . 0,5 lux (LEDs apagados)
Salida de vídeo: . . . . . . . . 1 Vpp/75 Ω, BNC
Alimentación: . . . . . . . . . . 12 V /400 mA
Dimensiones, peso: . . . . . ∅65 mm × 102 mm, 380 g
Sujeto a modificaciones técnicas.
TVCCD -140 SET Best.-Nr. 18.6070
®
1
2
Video
12 V
34
MONACOR INTERNATIONAL GmbH & Co. KG • Zum Falsch 36 • 28307 Bremen • Germany
Copyright©by MONACOR INTERNATIONAL. All rights reserved. A-1158.99.02.04.2011
®
E
PL

This manual suits for next models

2

Other Monacor Security Camera manuals

Monacor HDCAM-5090 User manual

Monacor

Monacor HDCAM-5090 User manual

Monacor INC-4036BF User manual

Monacor

Monacor INC-4036BF User manual

Monacor VIEWEX-370 User manual

Monacor

Monacor VIEWEX-370 User manual

Monacor HDCAM-620 User manual

Monacor

Monacor HDCAM-620 User manual

Monacor IOC-2812BV User manual

Monacor

Monacor IOC-2812BV User manual

Monacor TVCCD-623 User manual

Monacor

Monacor TVCCD-623 User manual

Monacor TVCCD-375COL User manual

Monacor

Monacor TVCCD-375COL User manual

Monacor HDCAM-5090IR User manual

Monacor

Monacor HDCAM-5090IR User manual

Monacor TVCCD-32MCOL User manual

Monacor

Monacor TVCCD-32MCOL User manual

Monacor AXC-3557PTZ HYBRID User manual

Monacor

Monacor AXC-3557PTZ HYBRID User manual

Monacor AV-3010CCD User manual

Monacor

Monacor AV-3010CCD User manual

Monacor INC-150WIFI User manual

Monacor

Monacor INC-150WIFI User manual

Monacor TVCCD-130S User manual

Monacor

Monacor TVCCD-130S User manual

Monacor TVCCD-120R User manual

Monacor

Monacor TVCCD-120R User manual

Monacor HDCAM-650 User manual

Monacor

Monacor HDCAM-650 User manual

Monacor AV-3033CCD User manual

Monacor

Monacor AV-3033CCD User manual

Monacor TVCCD-700COL User manual

Monacor

Monacor TVCCD-700COL User manual

Monacor HDCAM-630 User manual

Monacor

Monacor HDCAM-630 User manual

Monacor TVCCD-130A User manual

Monacor

Monacor TVCCD-130A User manual

Monacor TVCCD-436HCOL User manual

Monacor

Monacor TVCCD-436HCOL User manual

Monacor TVCCD-280 User manual

Monacor

Monacor TVCCD-280 User manual

Monacor INC-2036BF User manual

Monacor

Monacor INC-2036BF User manual

Monacor AVC-400 User manual

Monacor

Monacor AVC-400 User manual

Monacor TVCCD-162S User manual

Monacor

Monacor TVCCD-162S User manual

Popular Security Camera manuals by other brands

Bosch FLEXIDOME IP starlight 7000 VR installation manual

Bosch

Bosch FLEXIDOME IP starlight 7000 VR installation manual

Sygonix SY-4548736 operating instructions

Sygonix

Sygonix SY-4548736 operating instructions

Lilin PIH - 7000 Installion / operation manual

Lilin

Lilin PIH - 7000 Installion / operation manual

Axis P8535 installation guide

Axis

Axis P8535 installation guide

FLIR MPX ME363 quick start guide

FLIR

FLIR MPX ME363 quick start guide

ProVisual PTZ2007-X18 user manual

ProVisual

ProVisual PTZ2007-X18 user manual

Clover ZEC470 Specifications

Clover

Clover ZEC470 Specifications

Neostar NRHD-D331IR manual

Neostar

Neostar NRHD-D331IR manual

Clover HDC500 Specifications

Clover

Clover HDC500 Specifications

Idis DC-D3233HRX manual

Idis

Idis DC-D3233HRX manual

Ezviz CS-C1C manual

Ezviz

Ezviz CS-C1C manual

EverFocus EZ655p user manual

EverFocus

EverFocus EZ655p user manual

ERA HOMECAM IP116 Plus user manual

ERA

ERA HOMECAM IP116 Plus user manual

Fortinet FortiCam FD55-CA quick start guide

Fortinet

Fortinet FortiCam FD55-CA quick start guide

American Dynamics ADC660 Specifications

American Dynamics

American Dynamics ADC660 Specifications

Twilight T-Pro High Resolution LPR quick start guide

Twilight

Twilight T-Pro High Resolution LPR quick start guide

iBeam OnSite Fixed Series installation instructions

iBeam

iBeam OnSite Fixed Series installation instructions

Dahua IPC-HUM8231-L3 quick start guide

Dahua

Dahua IPC-HUM8231-L3 quick start guide

manuals.online logo
manuals.online logoBrands
  • About & Mission
  • Contact us
  • Privacy Policy
  • Terms and Conditions

Copyright 2025 Manuals.Online. All Rights Reserved.