Tobbi TH17A0355 Guide

TH17A0355 TH17B0356 TH17E0357 TH17Y0354
BABY RIDE ON CAR
INSTALL & ASSEMBLY MANUAL
●Motor Car Design
●Pedal Operated, Move Forward
Adult Install Only
Please follow the final product, the drawing or picture
on this manual is for reference only.
Warning!
Contains the small components, does not suit
3 year old of and following child uses
Executive standard: EN71 and EN62115 ;
GB6675-2003 and GB19865-2005
●
The picture in this manual is to show the product operation and structure, please
follow the real product only if any difference between picture and product happens.
There must be chance not to inform you on time to improve the product result from
appearance or structure, please be understood.
Please read this manual carefully before play the product, it tells you the
right way for operation and install to avoid any possible hurt to your kids.
Please keep this manual and put it in a place where is easy to get.
15
20
( :15A)
695 320 450
(6V4AH)
Specification
Item Specification
Age 37 – 72 month
Max Weight
Dimension
Speed
One motor Fuse
Motor One Motor Drive
Play Time 1-2 hours / recharger time 8-12hours
3-4KM/H one motor
Charger Out Put DC6V500MA
Batteries and fuse
All the data above is for customer selection,
please follow the real product finally.

2
1
34
5
6
7
8
9
10
11
12
14
15
13
Part name
CH8819
BABY RIDE ON CAR
INSTALL& ASSEMBLY MANUAL
●Motor Car Design
●Pedal Operated, Move Forward
Adult Install Only
Please follow the final product, the drawing or picture
on this manual is for reference only.
22
2
Serial
No.
1
2
3
4
5
6
7
8
9
Component
Name
Quantity Serial
No.
Component
Name
Quantity Serial
No.
Component
Name
Quantity
Body
Rear Axle
Non-drive
Wheel
13
14
15
10
11
12
1
Rear Wheel
Hub
Front
Defend
Front Axle
Break
Front Wheel
Front Fork
Driving Wheel
Front Shield
Handle
Seat
Charger
Manual

1
Install & Operation
1. Install Wheel(PIC 1)
Install the front wheel as picture show
Front Axle
washer
Nut
2
1.
2.
3.
4.
5.
6.
1
2
3
2
Wheel cover
Pin
washer
gear box
non-gear box
Install Rear Wheel(PIC 2)
put the washer on the right of rear axle, then put through the axle into the body,
put on the gear box
Put on the drive wheel (The tooth matches the gear box), then put the washer and
left wheel on left side of axle
Put on the washer at both side for each piece, then put through the pin into the hole
on axle, fix the pin by tool
Match the slot on wheel and the hook on wheel cover, then click it.
Drive Wheel

4
3
3. Install Front Wheel ASSM (PIC 3)
Put on the front wheel ASSM as picture show
4. Install the handlebar components(PIC 4):
Install & Operation
Put the handlebars of connecting cables
and body of good,
Handlebar fitting the
screw hole and screw hole of fork pipe
component,
Insert the screw screw the
nut screw hole。
【Installed in the direction shown by
the arrow】

Troubleshooting Guide_______________
Problem Possible Cause Remedy
Vehicle dose
not run
1. Battery low on power
2. Thermal fuse has
tripped
3.Battery connector or
wires are loose
4Battery is dead
5. Electrical system is
damaged
6. Motor is damaged
1. Recharge battery.
2. Wait a few minutes
before use.
3. Check that the
battery connectors are
firmly plugged into each
other.
4. Replace battery.
5. Send the vechel to 6.
Consumer Relations
Center
Battery will not
recharge
1. Battery connector is
loose
2. Charger not plugged in
3. Charger is not working
1. Check that battery
connectors are firmly
plugged into each other.
2. Check that battery
charger is plugged into a
working wall outlet.
Vehicle does
not runvery long
1. Battery is under char
ged
2. Battery is old
1. Recharge the battery
2.Replace battery
Battery bubbles
or gurgles when
charging
1. This is normal and not a
cause for concern
1. Normal when charging
Loud noises
coming from
gear box
1. Gear box is damaged 1. Go to customer service
center
Vehicle shakes
when marching
1. Poor contact of wires
or connectors
2. “Dead Spot” on motor
1. Reconnect the lossen
parts.
2. Go to customer service
center
Vehicle can’t
stop
1. Electronic parts
problem
1. Go to customer
service center

Warnings_______________________________________________
For the users safty, please pay attention to below warnings:
1. Product shoud be assambled by an adult
2. Keep small parts away from children to avoid injuries.
3. The product must be used under the guidance of an adult, who shouldn’t
get away during the process of using.
4. Battery should be only charged by and adult. Charge the battery before use.
5. Keep plasctic bags and other package materials away from children to
avoid injuries.
6. Do inspecition periodly on product and charger. Make sure there be no
damages on cables, plug or other parts. Once damages detected, the product
can’t be used till the problems be fixed.
7. The charger is not toy.
8. Normally it’s not allowed to assamble and disassamble the battery. It shoud
be disassambled with special tools. Make sure that the position of possitive
and negative terminals are correctly.
Important: All the pictures, functions and introduction data here in the manual are
for reference only, please do take the physical product as the standard!
WARNING
must with the protection device, can’t use as traffic tools.
this toy without braking device.

Warnings
_______________________________________________
1. Before using the product for the first time, the battery needs to be charged
for a full 18 hours ! Otherwise it will cause perminant damage of the battery
that couldn’t be fixed.
2. Don’t use the product in dangerour places such as public road, street,
ditch or slope.
3. Don’t use the product on smooth surfaces such as marbles, ect.
4. This product can be used only by one child. Maximum load should not
exceed 20kg.
5. It’s not allowed to tamper or modify the electric circuit of the vehicle or it’s
attachment.
6. The motor stops when there is obstancles before the vehicle. Please remove
the obstancle before continue the ride.
7. Don’t use this product in the water. Don’t apply water or any other liquids on
the vehicle.
8. Don’t use it indoor. It may damage the furniture or cause injury to children.
9. Disconnect the battery when it will remail unused for a long period.
10. The vehicle shoud not be used under the rain, nor touch the water in any
other methord. Keep the vehicle away from fire to protect the cables.
Precautions for charging
1. Before using the product for the first time, the battery needs to be charged
for a full 18 hours ! Otherwise it will cause perminant damage of the battery
that couldn’t be fixed.
2. Plug the charger into the wall outlet after it being well connected with the
wall outlet.
3. It’s necessary charge the battery on thim once used 1 hour. Normally the
charging time is 8-12 hours.
4. Charging should not exceed 20 hours.
5. It’s normal that the battery or charger get warmer(less than 60C) during the
charging.
6. This vehicle shoud be charged only with the special charger and battery of
the same equivalent type as recommended, in order to prevent damage to
the circuit.
7. Don’t try to charge the non-chargeable batteries. Take out the battery used
from the toy.
8.Do not mix old and new batteries.
9.Do not short-circuit the terninals of the battery .
10. Always charge the battery by an adult.
11. Do not insert wire into the connectors.
12. If you have not usde the vehicle in quite some time, please fully charge the
battery and charge at least once every month.
13. Do not connect the vehicle to batteries bigger than recommended.
14. Do not use the vehicle when charging.
_______________________________________________
2
1
3
Instruction for use
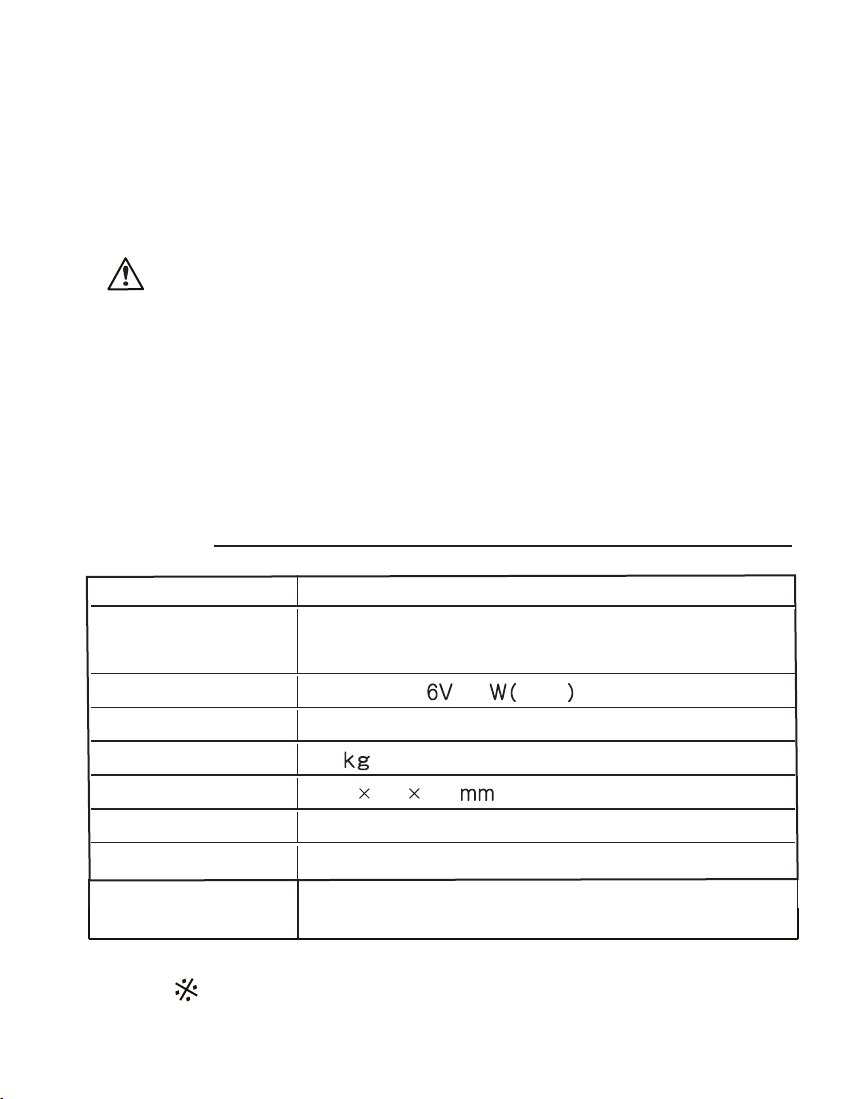
1. Battery recharger (PIC 1)
Please recharger the battery when the battery is
exhaust. The recharger socket is at the side of
body, which is just near gas cap (Note: The car
doesn’t work when it was in recharger. Recharger
should be done by adult). Take out the battery when
recharger,( This function is selectable, not standard)
Good
BAD
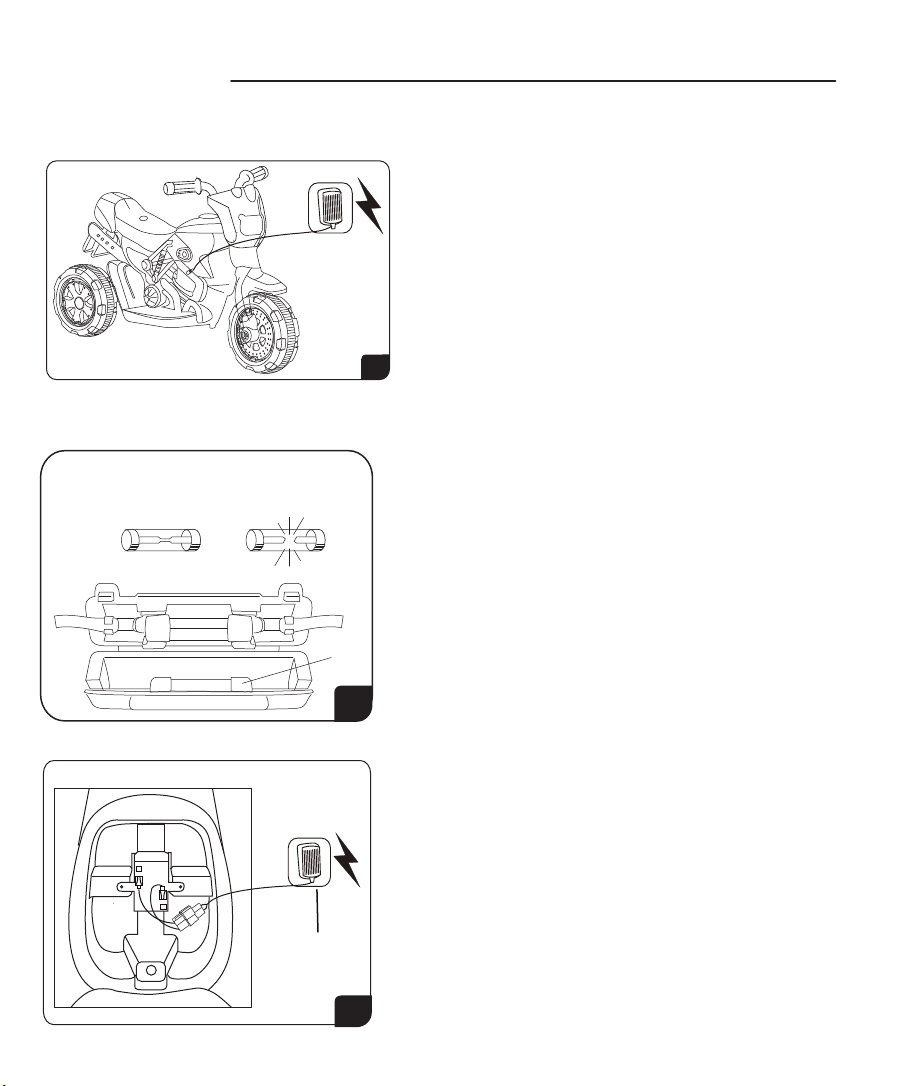
2. Replace fuse(PIC 2)
If fuse replace needed, please take out the fuse
firstly (Fuse is in the transparent fuse house under
the seat), open the fuse house, replace new one, close
the fuse house Note:
1. fuse data 15A
3. Open the seat, connect the positive / negative
on battery with wire accordingly
4
Instruction for use
foot pedal
5
4
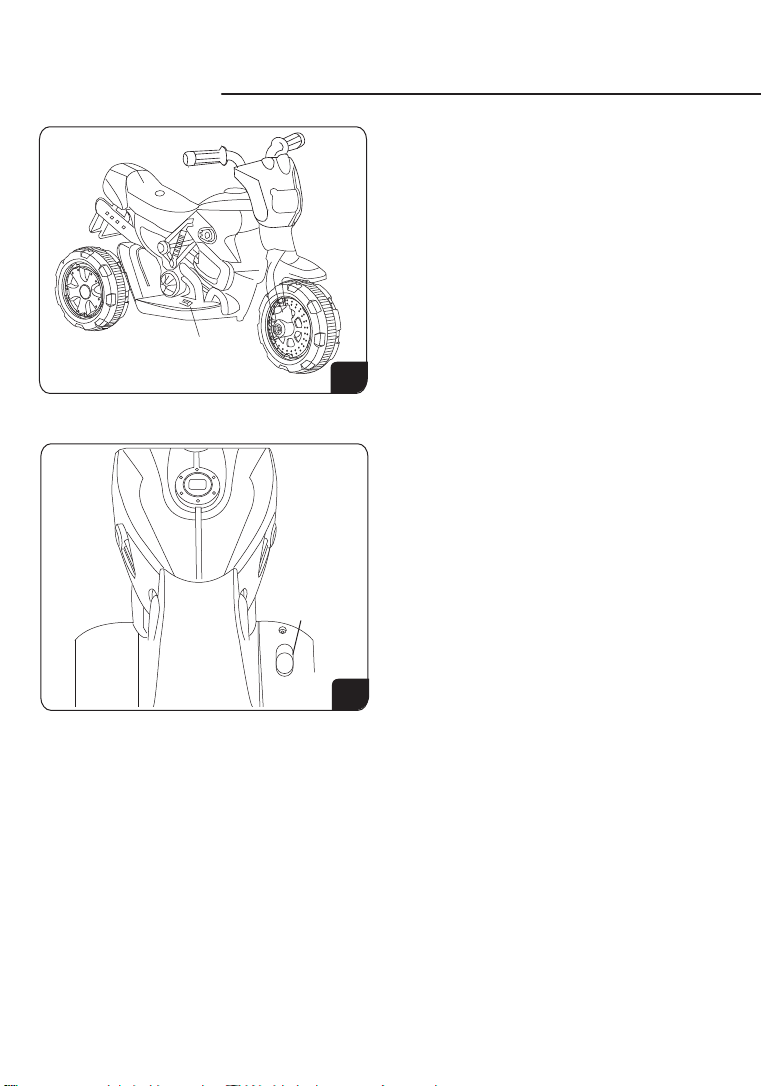
4.Foot switch control, when the
motor rotation, bright shine
【Switch on the power supply,
car lights shine, this is optional】
foot pedal
5.
operate pedalswitch, the car move forward,
release pedal switch, car stop;
This manual suits for next models
3
Other Tobbi Motorized Toy Car manuals

Tobbi
Tobbi TH17R0528 User manual

Tobbi
Tobbi TH17S0547 User manual

Tobbi
Tobbi Mercedes Benz GLC TH17L0632 User manual

Tobbi
Tobbi TH17W0622 User manual

Tobbi
Tobbi TH17P0491 User manual

Tobbi
Tobbi TH17W0712 User manual

Tobbi
Tobbi TH17W0370 User manual

Tobbi
Tobbi TH17W0442 User manual

Tobbi
Tobbi TH17B0500 User manual

Tobbi
Tobbi SX2219 User manual
Popular Motorized Toy Car manuals by other brands

Horizon Hobby
Horizon Hobby LOSI 72 CHEVY C10 V100 RTR owner's manual

Carrera RC
Carrera RC RC Power FoldNRoll Racer Assembly and operating instructions

Jamara
Jamara Ferrari 458 Italia 2,4GHz instructions

Jamara
Jamara Derago XP1 Instruction

Cen
Cen GSR 5.0 manual

Carson
Carson 1:20 MB Arocs Cement Mixer 100% RTR instruction manual


