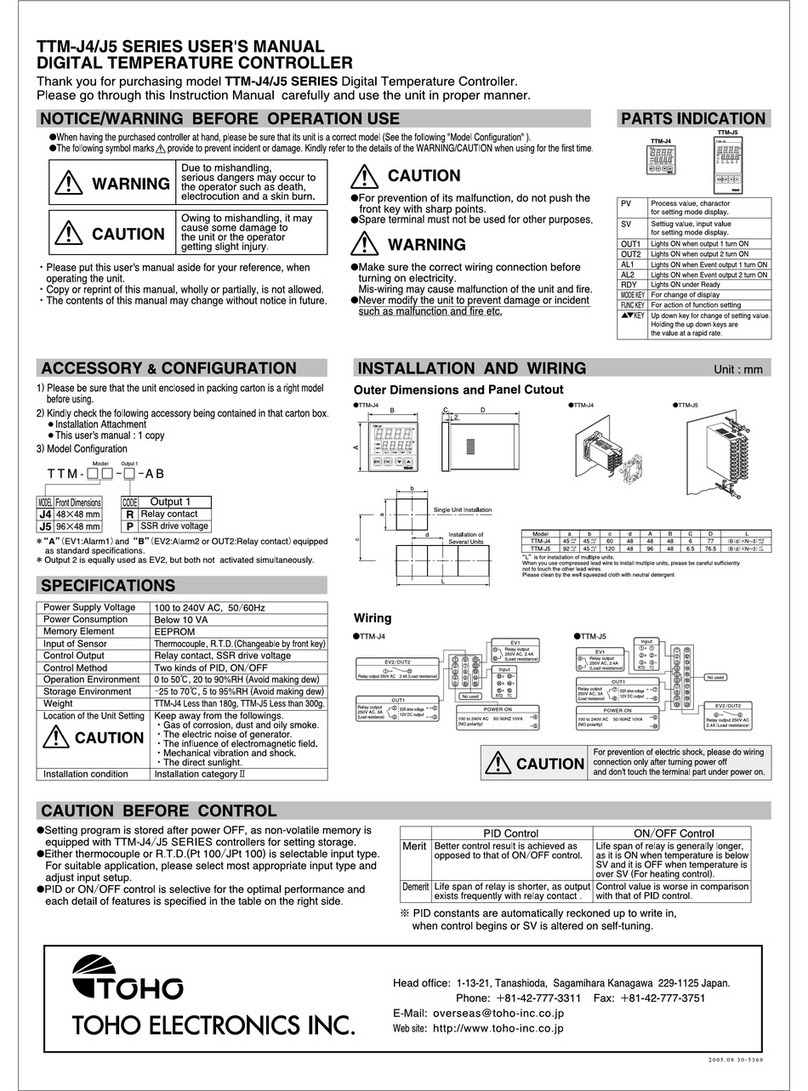
Toho Electronics TTM-00BT Series User manual

?
?
?
TTM-00BT series
INSTRUCTION MANUAL
TOHO ELECTRONICS INC.
©All Rights Reserved
●Definition of warning symbol
※Definition of physical damage is damage to house, property and
animal so on.
●Definition of symbol
Ifmake miss handling, in case of possible to get
damage or physical damage.
●Prohibition of disassemble
Possible to get electronic shock by disassemble
of product.
●General
Notice of prohibition on non specific.
●General
Notice of warning, caution and danger on non
specific.
●Name and Function
1) SW1:Unit number converter switch・・・00〜0F(16 count)
2) SW2:Communication converter switch・・・Communication speed setting
3) CN1:Control output connector・・・NPN open corrector output 8points
4) CN2:Alarm output connector・・・NPN open corrector output 11points
5) CN3:CT input connector・・・CT input 8points
6) TB1:Thermocouple or R.T.D temperature input terminal
7) TB2:Power voltage terminal (power voltage: DC24V+10%-15%)
8) TB3:RS-232C or RS-485 of terminal for communication
9) TB4:Event input terminal (input voltage range: DC12〜24V±10%)
10) LED1:Communication(+)・RD lamp(green)
●About communication initial setting This product is required t
o set initial setting of [ Communication speed setting ] and [ Unit number setting ].
1) [Communication speed setting]・・・・・Setting by dip-switch (SW2).
12Communication speed
OFF OFF
4800bps Use dip-switch 1&2
ON OFF
9600bps (3&4 :Always OFF)
OFF ON 19200bps Combination will follow
ON ON 38400bps *Default=[1:ON, 2:OFF(9600bps)]
2) [Unit number setting]・・・Setting by rotary switch. Unit number set by 16 count (0〜F)
※
*Remark: Operate setting of [Communication speed sett
ing] & [Unit number setting] definitely without power on.
Refer to the following manual together with this instruction manual before
operating this product.
・Model TTM-00BT Users manual (No. 44-4739)
■Contents of Package
The following are provided together in the same package.
・Model TTM-00BT : 1unit
・Instruction Manual : 1pce
Do not allow metal fragments or lead wire
scraps to fall inside of this product.
These may cause electric shock, fire or
malfunction.
Never disassemble, repai
r or modify the
product.
Doing so may cause electric shock, fire or
malfunction.
Use the product within the rated load.
Not doing so may cause damage or
burning.
Use the product within the rated supply
voltage.
Not doing so may cause damage or
burning.
Be sure to tighten the terminal screw
and
the connectors rock securely.
Not doing so may cause damage or
malfunction.
Correctly set the setting on this product
matched
to the control target. If the
setting are not
compatible with the
control target, the product
might operate
in an unexpected manner, resulting in
damage to the product or an accident.
Tighten any terminal screw to torque
(about 0.5
N/m). If screw is not tighten
enough, this may cause fire or
malfunction.
To maintain safety in the event of a
product malfunction, we recommend
taking safety measures, for example,
installing an excessive temperature rise
prevention alarm on a separate line. If
malfunction prevents control, this may
result in a major accident.
●
Caution Symbol
11) LED2:Communication(-)・SD lamp(red)
12) LED3:Power lamp(green)
13) LED4〜11:Alarm output lamp(red)
14) LED12:Heater Break alarm output lamp(red)
15) LED13:Heater Short alarm output lamp(red)
16) LED14:Internal Error output lamp(red)
17) LED15〜22:Control output lamp(orange)
Safety Precautions
CAUTION
CAUTION
NOTICE
Thank you for purchasing this TOHO product. Please read this
instruction manualand thoroughly familiarize yourself with the
functions and characteristics of the product before use.
Please retain this manual for future reference.
Use most updated manual from nearest TOHO representative.
Furthermore, please keep this instruction with you anytime
while your operation and make sure that this instruction must be
delivered to end users.
MULTIPOINT
TEMPERATURE
CONTROLLER Be sure to observe these precautions to ensure safe use
1) Make sure that the rated voltage is attained within two seconds of turning the power ON.
2) To ensure correct temperature measurement, allow at least 30 minutes for the Unit to
warm up.
3) When use of self turning, turn on temperature controller and load at same time or turn
on load first.
4) Do not wire the terminals which are not used.
5) Be sure to wire properly with correct polarity of terminals.
6) Do not touch the mounted parts or the rear surface of PCBs. To hold this
product, please hold ceiling, pole or edge.
7) In the time of installation, do not touch sharp edgessuch as electrical leads.
8) Connection of wiring
a) Crimp terminal: specified size (M3, width 6.9mm or below)
b) End soldered wire: use AWG 22 to 16(Length of exposed wire: 5 to 7mm)
9) A switch or circuit breaker should be placed close to theunit and should be indicated
properly.
10) To reduce induction noise, separate the high-voltage or large current power lines
from other lines, and avoid parallel or connect wiring with the power lines when
you
are wiring to the terminal. We recommend the use of separating pipes, ducts,
or shield lines.
11) Separate this product from machines generating powerful high frequency
electromagnetic waves or surge, such as high frequency welding machines or
high-frequency sewing machines.
12) When wiring signal lines of input/output with over 30m lines inside, put surge
control circuit for preventing surge.
When locating outside, set a surge control circuit
regardless of the length of lines.
13) Do not place at the following locations.
a) Location with large electromagnetic effects
b) Location with sulfide gas or corrosive gas
c) Location with dust or oil smoke d) Location with direct sunlight
e) Location with water splash f) Location with a risk of icing.
g)Location with high voltage cable, welding machine and origin of generating
electric noise.
h)Location with machinesusing high pressured igniter.
i)Location with excessive high humidity and where there is arisk of condensation
j)Location with mechanical vibration and shocks
k) Location with condensation as the result of severe changes in temperature.
l) Location with directly subject to heat radiated from heating equipment.
14) Location with temperature and humidity should be applicable with rated level, if
necessary please force to cool down.
15) To allow heat dissipation, be sure not to obstruct the area around the product or
ventilation ducts.
All manuals and user guides at all-guides.com
all-guides.com

●Wiring of Terminal
TB1 to TB4:: Terminal table For wiring, use M3 round terminal, Y terminal & welding wire
1) Temperature input(TB1: terminal table):
Thermocouple input ※refer to mark on the terminal table for terminal number
R.T.D input
‑
+
A1
B1
CH1
‑
+
A2
B2
CH2
‑
+
A3
B3
CH3
‑
+
A4
B4
CH4
‑
+
A5
B5
CH5
‑
+
A6
B6
CH6
‑
+
A7
B7
CH7
‑
+
A8
B8
CH8
A1
B1
A
B
B
C1
A2
B2
A
B
B
C2
A3
B3
A
B
B
C3
A4
B4
A
B
B
C4
A5
B5
A
B
B
C5
A6
B6
A
B
B
C6
A7
B7
A
B
B
C7
A8
B8
CH1
CH2
CH3
CH4
CH5
CH6
CH7
CH8
A
B
B
C8
・When extend cable, use appropriate compensation lead wire
for thermocouple ・Use wire material with wire resistance value below 5Ω/per
wire for connecting RTD with main body.
2) Event input (TB4:terminal table) 3)Communication(TB3:terminal table) 4)Power(TB2:terminal table)
DC24V
1
2
−+
IN
1
2
3
Master system
RS‑232C RXD
TXD
SG
RS
CS
DR
ER
RXD
TXD
SG
1
2
3
Master system
RS‑485 A(+)
B(‑) SG
A(+)
B(‑) SG
RS‑232C
RS‑485
DC24V
1
2
−
+
CN1 to CN3:XG4A-1634(OMRON)(Figures describe connector on the board)
5) Alarm output (CN2:Connector) 6) Control output (CN1: connector)
COM2
ALM8
ALM7
ALM6
ALM5
L
L
L
L
1
3
5
7
9
11
13
15
2
4
6
8
10
12
14
16
COM5
COM4
DC24V
ALM1
HBERR
HS
COM1
ALM4
ALM3
ALM2
L
L
L
L
L
L
L
DC24V
COM3
DC24V
DC24V
DC24V
COM5
COM4
COM3
COM2
COM1
1
3
5
7
9
11
13
15
2
4
6
8
10
12
14
16
COM8
COM7
CH1
O.C1
CH6
O.C6
CH8
O.C8
CH7
O.C7
CH5
O.C5
CH4
O.C4
CH3
O.C3
CH2
O.C2
COM6
DC24V
L
L
L
DC24V
DC24V
L
DC24V
DC24V
L
L
L
DC24V
DC24V
L
DC24V
ALM 1 to 8:Alarm output 1 to 8 HB:Heater Break Alarm output
HS: Heater Short Alarm output ERR: Internal Error output O.C1 to 8:Control output 1 to 8
COM1 to 8: Common
7) CT input (CN3: connector) PRECAUTIONS IN USING THE PRODUCT
When the product is used under the circumstances or environment below,ensure
adherence to limitations of the ratings and functions. Also, take countermeasures
for safety precautions such as fail-safe installations.
• Use under circumstances or environment which are not described in the
instruction manual.
• Use for nuclear power control, railway, aircraft, vehicle, incinerator, medical
equipment, entertainment equipment, safety device etc...
• Use for applications where death or serious property damage is possible and
extensive safety precautions are required.
CT5
CT4
CT3
CT2
CT1
1
3
5
7
9
11
13
15
2
4
6
8
10
12
14
16
CT8
CT7
CT1
CT6CT8
CT7
CT5
CT4
CT3
CT2
CT6
CT
CT
CT
CT
CT
CT
CT
CT
TOHO ELECTRONICS INC.
■Head Office 1-13-21 Tanashioda, Sagamihara-shi, Kanagawa 229-1125 Japan
Tel: +81-42-777-3311, Fax: +81-42-777-3751
■Tokyo Office The 3rd Wako Bldg, 7-17-6 Nishi-Shinjuku, Shinjuku-ku, Tokyo
160-0023, Japan
Tel: +81-3-3363-1331, Fax: +81-3-3363-3335
■Osaka Office Yachiyo Bldg East Wing 7F, 2-Kita 1-21 Tenjinbashi, Kita-ku,
Osaka-shi, Osaka 530-0041, Japan
Tel: +81-6-6353-9205, Fax: +81-6-6353-9273
30−3910−E
●Name and function of each parts
1) Product figure
●Installation
1) Dimension
2) Installation method:
・Install 9parts(φ3.5)by screw(M3).
・Place horizontal or vertical with input terminal facing below.
・Install board with over 8mm upper by using spacer.
・For plural installation, keep 50mm distance from the other.
All manuals and user guides at all-guides.com
Other Toho Electronics Temperature Controllers manuals
