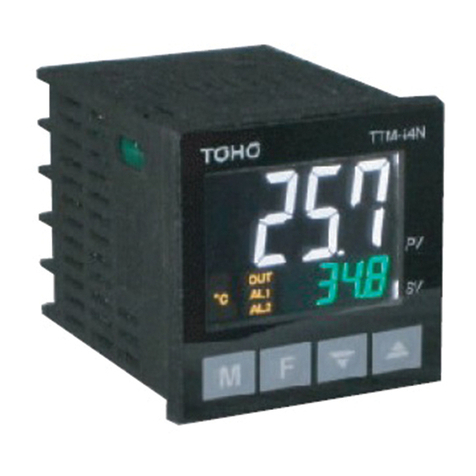
TOHO TTM-210 Series User manual

Digital Controller
TTM-210 series
User’s Manual
TOHO ELECTRONICS INC.

4D-3637-A i
User’s manual for digital controller TTM-210 series
Introduction
Thank you for purchasing Toho Electronics’ TTM-210 series.
Before using the products, thoroughly read this manual for a better understanding of them.
Ensure to store this manual and use it whenever needed.
Precautions on the use of the products
Ensure to read this manual before using the equipment.
Take care to understand the following for the safe use of the equipment.
Ensure this manual to be in hands of a person using the equipment.
★Precautions on safety
Alarms are defined and categorized into either one of four groups in this manual, depending on degrees of
importance or risk in terms of the safe use of the equipment or prevention of accident or damage on the
equipment. For each alarm, symbol is assigned as shown below.
★Alarm symbols
Danger
Improper handling of the
equipment may cause fatality or
serious injury for an impending
reality.
Caution
Improper handling of the
equipment may cause injury or
physical damage on it.
Warning
Improper handling of the
equipment may cause fatality or
serious injury.
Reminder
Care should be taken for
ensuring safety.
An alarm categorized in the group of Caution may still yield to serious result, depending on circumstances.
Any symbol for the four groups intends to raise user’s attention for important description. Carefully observe
it.
★Other symbols
General caution, warning or
prohibition without
particularity
Instruction on ground
connection for the
equipment with safety
grounding terminals
Hazard of pinched fingers
on a particular portion of the
equipment
Possible injury caused by
touching a particular portion
of the equipment under
specific conditions
Unspecific behaviors of
general users
Hazard of injury due to high
temperature under specific
conditions
Hazard of an electric shock
under specific conditions
Hazard of injury such as an
electric shock due to
disassembling or
modification of the
equipment
Hazard of burst under
particular conditions
Supplementary explanation
Designation of reference for
explanation
Care for use or operation
Note

4D-3637-A ii
Warnings
Improper wiring to the equipment may cause a failure, such as fire. Upon completion of wiring,
ensure to verify the proper wiring before turning on electricity.
Do not turn on electricity until all wiring is complete. Do not touch portions of high voltages such as
power supply terminals, as an electric shock may be resultant.
Install appropriate protective circuits externally if a failure or abnormality of the equipment may
seriously affect related systems.
Do not use the equipment out of the specified range, as it may fail or catch fire.
Do not under any circumstance to modify or disassemble the equipment, as a failure may be caused,
resulting fire or an electric shock.
Do not use the equipment in ambience of flammable or explosive gases.
Cautions
Do not use the vacant terminals for wiring.
Do not use a pointed object to operate keys.
Do not turn on the power supply until wiring is fully complete in order to prevent an electric shock,
failure or malfunctioning. For replacing a component connected on the equipment, ensure to turn off
the power supply. For turning back on the power supply, do so after all wiring is complete.
Ensure not to trap heat in the space surrounding the equipment in order to provide sufficient heat
release.
Do not put a metal piece or similar inside the equipment. Afire, an electric shock or failure may be
caused.
The equipment is designed for instrumentation. For its use in environments of high voltages or
intense noises, take appropriate measures on the side of user’s equipment.
The equipment is designed for controlling physical values, such as temperatures, on general industrial
facilities. Do not use it for subjects of control that may seriously affect human life.
Turn off the power supply before cleaning the equipment, and wipe it with a soft dry cloth. Do not use
thinners, as they may cause deformation or discoloration of the equipment.
The equipment may cause radio disturbances in domestic settings. User is required to take
appropriate measure.
Ensure to tighten terminal screws at specified torque. Insufficient tightening the screws may cause
an electric shock or fire.
Ensure to observe precautions listed in this manual for the use of the equipment.
Reprinting or duplicating this manual is prohibited.
This manual may be revised without prior notice.
Precaution regarding Export Trade Control Ordinance
Investigation on client or application by an appropriate party is required so that the equipment is not used for
mass destruction weapons and such (military application, military facilities, etc.).

4D-3637-A iii
Notation convention in this manual
★Summary notation
Abbreviations in alphabetical characters are used for the diagrams and text in this manual. Some major
examples are as follows.
Abbreviation
Term
PV
Present value
SV
Setting value
AT
Auto-tuning
ENT
Determined
MV1
Primary operating amount
MV2
Secondary operating amount
CT
Current transformer
AI
Remote SV input
★Notation of characters
For parameters and settings, numeric and alphabetic characters are inscribed as follows. (For initial setting, a
character is comprised of eleven segments.)
0
1
2
3
4
5
6
7
8
9
Minus
Period
Slash
A
B
C
D
E
F
G
H
I
J
K
L
M
N
O
P
Q
R
S
T(t)
U
V
W
X
Y
Z
n
v

4D-3637-A iv
Contents
1. Overview
Outline of TTM-210 series is described, in terms of features, model configuration (codes), names of
components and functions. Thoroughly read this chapter prior to the first use.
1.1 Feature..................................................................................................................................................... 1-2
1.2 Checking the product............................................................................................................................... 1-3
1.3 Model table.............................................................................................................................................. 1-3
1.4 Names of parts and components.............................................................................................................. 1-4
1.5 Input/output function and essential functions.......................................................................................... 1-7
1.6 Basic flow of setting...............................................................................................................................1-11
2. Installation
How to install TTM-210 series and precautions on the installation are described.
Read this chapter prior to the installation.
2.1 Precautions on installation....................................................................................................................... 2-2
2.2 How to install or remove the equipment.................................................................................................. 2-3
2.3 Outside dimensions and panel cutting dimensions.................................................................................. 2-4
3. Wiring
Wiring of TTM-210 series is described.
Read this chapter prior to the wiring.
3.1 Precautions on wiring.............................................................................................................................. 3-2
3.2 Terminal arrangement.............................................................................................................................. 3-3
3.3 Wiring to each terminal ........................................................................................................................... 3-7
3-4 Examples of wiring................................................................................................................................ 3-15
4. Basic functions
Basic operation (setting method) of TTM-210 series is described.
4.1 Flow of setting mode............................................................................................................................... 4-2
4.2 Basic operation........................................................................................................................................ 4-4
4.2.1 Switchover of parameters (flow as a whole).................................................................................. 4-4
4.2.2 Description of setting item selection screen................................................................................. 4-19
4.2.3 Setting of input types ................................................................................................................... 4-20
4.2.4 Setting of key functions ............................................................................................................... 4-21
4.2.5 How to set the SV limiter setting ................................................................................................. 4-22
4.2.6 How to set control types............................................................................................................... 4-23
4.2.7 How to set outputs........................................................................................................................ 4-25
4.2.8 How to set priority screens........................................................................................................... 4-26
4.2.9 Switchover to the blind setting mode........................................................................................... 4-27
4.2.10 Switchover to the ON/OFF control.............................................................................................. 4-29
5. Operation
Operation, often-used setting items, how to set each function and description of the function of TTM-210
series are described.
5.1 Precautions on operating the equipment.................................................................................................. 5-2
5.2 Operating monitor display....................................................................................................................... 5-3
5.2.1 Operating amount monitor: SET 04 (control setting mode)........................................................... 5-3
5.2.2 Timer remaining time monitor: Run mode..................................................................................... 5-3
5.2.3 Temperature measurement monitor: Run mode............................................................................. 5-3
5.2.4 CT monitor: SET 12 (CT setting mode)......................................................................................... 5-3

4D-3637-A v
5.3 How to set run settings............................................................................................................................. 5-4
5.3.1 Target value (SV) setting................................................................................................................ 5-4
5.3.2 ON/OFF control setting.................................................................................................................. 5-7
5.3.3 PID control setting......................................................................................................................... 5-9
5.3.4 Heating/cooling PID control setting............................................................................................. 5-13
5.3.5 Indicator setting............................................................................................................................ 5-15
5.3.6 Excessive ascent prevention unit (alarm unit) setting.................................................................. 5-17
5.3.7 Event setting................................................................................................................................. 5-18
5.3.8 How to set MD/READY.............................................................................................................. 5-20
5.4 How to set each function and description of function ........................................................................... 5-22
5.4.1 Auto-tuning (AT) function ........................................................................................................... 5-22
5.4.2 Self-tuning function ..................................................................................................................... 5-25
5.4.3 Mode/manual function................................................................................................................. 5-27
5.4.4 Bank function............................................................................................................................... 5-28
5.4.5 Timer function.............................................................................................................................. 5-31
5.4.6 Loop abnormality function........................................................................................................... 5-38
5.4.7 Current transformer (CT) abnormality function........................................................................... 5-40
5.4.8 Position proportional control........................................................................................................ 5-45
5.4.9 Concurrent temperature ascent function ...................................................................................... 5-46
5.5 Explanation of the program run function............................................................................................... 5-47
5.5.1 Operation flow of the program run .............................................................................................. 5-48
5.5.2 SET 21 program function setting ................................................................................................. 5-49
5.5.3 SET 21 program function setting screen...................................................................................... 5-52
5.5.4 SET 22 program setting ............................................................................................................... 5-53
5.5.5 SET 22 program setting screen .................................................................................................... 5-55
5.5.6 Explanation of the screen display and operation of a program run.............................................. 5-56
5.5.7 Complementary explanation of the program run ......................................................................... 5-61
5.6 Explanation of the bank automatic switching function.......................................................................... 5-70
5.6.1 Bank automatic switching setting ................................................................................................ 5-71
5.6.2 SET 23 bank automatic switching function setting mode setting screen..................................... 5-73
5.6.3 Complementary explanation of the bank automatic switching function...................................... 5-74
6. Parameters
Various parameters of TTM-210 series are described in terms of their functions.
Read this chapter prior to their settings.
6.1 Input 1 type setting .................................................................................................................................. 6-2
6.2 Remote SV input type setting.................................................................................................................. 6-8
6.3 Function key function setting ................................................................................................................ 6-12
6.4 Control function setting......................................................................................................................... 6-14
6.5 Output (from OUT 1 to OUT 7) type setting......................................................................................... 6-49
6.6 Current transformer (CT) setting........................................................................................................... 6-57
6.7 DI setting ............................................................................................................................................... 6-59
6.8 Timer function setting............................................................................................................................ 6-62
6.9 Communication function setting............................................................................................................ 6-65
6.10 Initial setting.......................................................................................................................................... 6-67
6.11 Priority screen setting............................................................................................................................ 6-71
6.12 Bank function setting............................................................................................................................. 6-72
6.13 Program function setting........................................................................................................................ 6-73
6.14 Program setting...................................................................................................................................... 6-77
6.15 Bank automatic switching function setting............................................................................................ 6-80
7. Appendix
Product specification, errors (troubles) and parameter setting table of TTM-210 series are described.
7.1 Product specifications.............................................................................................................................. 7-2
7.2 Accessories.............................................................................................................................................. 7-9
7.3 Error (abnormality) display ................................................................................................................... 7-10
7.4 Troubleshooting......................................................................................................................................7-11
7.5 Setting list.............................................................................................................................................. 7-13

4D-3637-A 1-1
1. Overview
Features of products, confirmation of products, and model coding and the name of each component or part are
described in this chapter.
1.1 Feature.................................................................................................................................................... 1-2
1.2 Checking the product ............................................................................................................................. 1-3
1.3 Model table............................................................................................................................................. 1-3
1.4 Names of parts and components............................................................................................................. 1-4
1.5 Input/output function and essential functions ........................................................................................ 1-7
1.6 Basic flow of setting..............................................................................................................................1-11

4D-3637-A 1-2
1.1 Feature
★Improved controllability due to new PID algorithm
(1) Time required to stabilize after start of control has been reduced (compared to Toho’s other models).
(2) Jumpless control function is supported, where post-disturbance overshoots are suppressed.
(3) Selection can be made from three types of PIDs.
(PID auto-tuning with the overshoot suppression function is set as factory default.)
★Full multi-input
Thermocouples (13 types), resistance temperature detector (2 types), voltage (5 types) and current (one
type) are achieved as input specifications on a single unit. Their changes are possible through setting
changes of parameters. (“K thermocouple” is set as factory default)
★Compact-sized with dimension of 59.7 mm (TTM-214) or 65 mm (other than TTM-214) in depth
★Sampling cycle of 200 ms
★Loader communication function
Best suited for setting various parameters
Dedicated cable: Option (with charge) (See page 7-9 for specifications.)
Dedicated software: Option (free-of-charge)
★Blind function and priority screen for a simplified operation
Blind function:Among multiple parameters, only those needed can be displayed.
Priority screen: By transferring the necessary parameter screen to the operating mode screen, indication as
well as the setting would be possible without calling the parameter screens. (max. 20 screens)
★The valve position proportional control is made possible without feedback resistance.
★Bank function
Each process value (such as SV, PID constants) which varies in each process can be set at every bank,
enabling the setting changes according to the content of the process. (max. 8 points)
★Simple timer function
Control of “start or stop of control after predetermined time has elapsed” can be done on a single unit.
The independent use of timer is also allowed. (Independent 3 points)
★Protective structure In compliance with IP66 or equivalent (TTM-214 only)
★Applicable to various instrumentation systems, using manual control
★Password function
★Modification to the settings at factory default is possible.
★Ramp function enables the setting of gradient.
★Soft-start function
During PID control, a limit can be applied to an operation volume for a predetermined period of time
when the power switched.
★Delay timer function
During ON/OFF control, the control output (primary/secondary) can be done with a predetermined lag
time.
★Program run function
A max. of 8-step program operation is possible.
★Bank auto-switchover run function
A bank auto-switchover run is possible by using 8 banks at most.

4D-3637-A 1-3
1.2 Checking the product
Prior to the use, check the following.
★Checking the model
The model number is printed on the box and side of the product. Check that the numbers thereon
matches with the model that had been ordered.
★Appearance
Check that no scratch or damage is present on the case, front panel or terminal block.
★Check that accessories are included in the box. (See below for the list of the accessories.)
Mounting tool, brief operation manual and rubber packing (attached to the main frame)
1.3 Model table
TTM−21−−−
①②③ ④⑤⑥⑦⑧⑨ ⑩
Symbol
Item
Description
Remarks
①
Size
4
48 x 48
5
96 x 48
7
72 x 72
9
96 x 96
②
Output 1
N
None
J
Voltage 0 - 5 VDC
R
Relay
F
Voltage 1 - 5 VDC
P
SSR drive voltage
G
Voltage 0 - 10 VDC
A
Open collector
I
Current 4 - 20 mADC
K
Voltage 0 - 1 VDC
H
Voltage 0 - 10 mVDC
③
Output 2
N
None
J
Voltage 0 - 5 VDC
R
Relay
F
Voltage 1 - 5 VDC
P
SSR drive voltage
G
Voltage 0 - 10 VDC
A
Open collector
I
Current 4 - 20 mADC
K
Voltage 0 - 1 VDC
H
Voltage 0 - 10 mVDC
④
Outputs 3
and 4
A
Open collector
Common
R
Relay contact
Common
⑤
Outputs 5
and 6
A
Open collector
Not available for 214. *1
R
Relay contact
Not available for 214. *1
⑥
Output 7
A
Open collector
Not available for 214. *3
R
Relay contact (common independent)
Not available for 214. *3
⑦
AI input
Y
Remote SV input: Only voltage and current
Not available for 214.
⑧
Option
Case of TTM-214,217
ST
CT 1,2input
*2
SV
CT 1 input, Event 2 input
*2
UV
Event 1,2 input
STW
CT 1,2input, Event 3 input
Not available for 214.*2,*3
SVW
CT 1 input, Event 2,3 input
Not available for 214.*2,*3
UVW
Event 1,2,3 input
Not available for 214. *3
Case of TTM-215,219
ST
CT 1,2input
*2
SV
CT 1 input, Event 2 input
*2
UV
Event 1,2 input
SVW
CT 1 input, Event 2,3,4 input
*2
UVW
Event 1,2,3,4 input
STUV
CT 1,2 input, Event 1,2 input
*2
STUVW
CT 1,2 input, Event 1,2,3,4 input
*2
⑨
M
Communication (RS-485)
⑩
24 V power
supply
Free power supply
L
24 VAC / 24 VDC
*1 Output6 is not selectable for 217
*2 CT is not selectable, if there are only analogue output.
*3 Either W (only event3) or output7 should be selected for 217.
When the option from ④is not added, the model code is omitted. Example. TTM-215-Q-RN-M

4D-3637-A 1-4
OUT1 OUT2 OUT3 OUT4 RDY COM DI1 DI2 TMR
TIME
゚F
゚C
TIME
゚F
゚C
DI1 DI2 DI3 DI4 RDY COM TMR
OUT1 OUT2 OUT3 OUT4 OUT5 OUT6 OUT7
1.4 Names of parts and components
■Front panel
★TTM-214 * The loader port is located in the bottom wall for TTM-214.
★TTM-215
PV display
SV display
Up key
Down key
Function key
Mode key
Bank display
Unit of
temperature and
timer display
Operation display
Loader port
(Located on the bottom wall)
PV display
SV display
Function key (1 to 5)
Up key
Down key
Mode key
Operation display
Unit of
temperature and
timer display
Bank display
Loader port

4D-3637-A 1-5
OUT1
OUT2
OUT3
OUT4
OUT5
OUT6
OUT7
TIME
゚F
゚C
RDY
COM
TMR
DI1
DI2
DI3
DI1 DI2 DI3 DI4 RDY COM TMR
OUT1 OUT2 OUT3 OUT4 OUT5 OUT6 OUT7
TIME
゚F
゚C
★TTM-217
★TTM-219
Down key
Up key
Function key
(1 to 5)
SV display
PV display
Bank display
Operation display
Unit of
temperature and
timer display
Mode key
Loader port
Bank display
PV display
SV display
Function key
(1 to 5)
Up key
Down key
Mode key
Loader port
Unit of
temperature and
timer display
Operation display

4D-3637-A 1-6
■What the displays indicate
★PV display Measurement value (present value) display, each character display and timer setting
time display
★SV display Setting value (target value) display, output operating amount display, display of
setting value of each character, timer remaining time display and MVI (operating
amount) display
★Unit of temperature The unit of temperature is displayed when setting data is for temperature. The
display is determined depending on setting for “unit of temperature” in the symbol
“C” or “F”.
Timer display Lights up when timer is set.
★Bank display The bank selected is displayed.
★Behaviors of the displays
OUT 1 Output 1 monitor display. Turns on when output is ON.
OUT 2 Output 2 monitor display. Turns on when output is ON.
OUT 3 Output 3 monitor display. Turns on when output is ON.
OUT 4 Output 4 monitor display. Turns on when output is ON.
OUT 5 Output 5 monitor display. Turns on when output is ON.
OUT 6 Output 6 monitor display. Turns on when output is ON.
OUT 7 Output 7 monitor display. Turns on when output is ON.
DI 1 DI 1 monitor display. Turns on when DI 1 is operating.
DI 2 DI 2 monitor display. Turns on when DI 2 is operating.
DI 3 DI 3 monitor display. Turns on when DI 3 is operating.
DI 4 DI 4 monitor display. Turns on when DI 4 is operating.
RDY RDY monitor display. Lights up or blinks when operation is in “READY
(operation halted).”
COM Communication monitor display. Blinks on and off when the communication
function is operating (in communication).
TMR Timer monitor display. Lights up when the timer function is operating.
■Key operations
★FUNC Function key. Used when a set function is to be executed.
★MODE Mode key. Used when the screen is to be switched over.
Pressing it for 2 seconds changes the screen to the parameter screen.
Pressing it for 2 seconds changes the screen to the operating mode screen.
★[△] Up key. Used for increasing setting values.
Used for changing over the input setting mode.
Holding it pressed accelerates the increase speed.
★[▽] Down key. Used for reducing setting values.
Used for changing over the input setting mode.
Holding it pressed accelerates the reduction speed.
■Others
★Loader port Dedicated cables are connected for loader communication.

4D-3637-A 1-7
1.5 Input/output function and essential functions
Input and output functions are described. See corresponding pages for setting each function.
Measurement value (PV) input
CT input (2 points: optional)
DI input (4 points: optional)
AI input (1 point: optional)
Output 1
Outputs 2 to 7 (optional)
Communication output (optional)
TOHO communication
MODBUS communication
Control
section
Assignment of outputs
Outputs
1 and 2
Primary output
Outputs
3 to 7
Primary output
Secondary output
Secondary output
Event output
Event output
RUN output
RUN output
RDY output
RDY output
Timer 1 output
Timer 1 output
Timer 1 ON delay output
Timer 1 ON delay output
Timer 1 OFF delay output
Timer 1 OFF delay output
Timer 1 ON+OFF delay output
Timer 1 ON+OFF delay output
Timer 2 output
Timer 2 output
Timer 2 ON delay output
Timer 2 ON delay output
Timer 2 OFF delay output
Timer 2 OFF delay output
Timer 2 ON+OFF delay output
Timer 2 ON+OFF delay output
Timer 3 output
Timer 3 output
Timer 3 ON delay output
Timer 3 ON delay output
Timer 3 OFF delay output
Timer 3 OFF delay output
Timer 3 ON+OFF delay output
Timer 3 ON+OFF delay output
Transmission output
End output (during program run) *1
End output (during program run)
*1: Selectable only for a program run.

4D-3637-A 1-8
■Input section
* The following types of inputs can be selected in the input section: measurement value input (1 point),
CT input (2 points), DI input (4 points) andAI input (1 point).
Selectable points depend on models. See the model selection table.
★Measurement value input
* The input of the controlled objects is selectable with a single unit using parameter setting.
Temperature input
Thermocouple
K, J, T, E, R, S, B, N, U and L
WRe 5-26, PR40-20 and PLII
Resistance temperature
detector
Pt 100 and JPt 100
Analog input
Voltage
0 - 1 VDC, 0 - 5 VDC, 1 - 5 VDC
0 - 10 VDC, 0 - 10 mVDC
Current
4 - 20 mADC
*The K thermocouple is set as factory default.
★CT input (optional)
* Heater disconnection failure is detected by CT (current detector) when the heater disconnection alarm
is effective.
* Max. 2 points are selectable (to be designated at order placement).
For models TTM-214 and 217, a single point for the CT input is provided when a single point for the
DI input is selected.
* Usable CT is “CTL-6-P-N-(S).” (For product specification, see page 7-9.)
* CT input is not selectable for analog output.
★DI input (optional)
* The following functions can be executed with DI (digital) input.
The DI Input is an external no-voltage contact signals.
* List of functions due to DI
Close
Active
Bank switchover
Bank switchover
MD
READY
AUTO
MANUAL
Reverse operation
Forward operation
AT stop
AT start
Timer stop
Timer start
Constant Operation mode
Program mode
−
Step forward *1
−
Pause *1
Interlock
−
*1: Selectable only for a program run.
Close: Contact signal OFF
Active: Contact signal ON
* Max. 4 points are selectable (to be designated at order placement).
Up to 2 points are selectable for TTM-214.
DI 3 and DI 4 inputs are not selectable when input 7 is selected for TTM-217.
DI 2 input is to be selected when CT 1 input is selected for TTM-214 and 217.
★AI input (optional)
* Voltage and current inputs only. (Voltages of 0 - 10 mV are excluded.)

4D-3637-A 1-9
■Output section
* The number of outputs is 7 at most, which can be assigned individually for control output, event
output, RUN/RDY output, timer output and transmission output.
(Assignment of outputs is to be designated at order placement.)
★Output (OUT) 1 and output (OUT) 2
* Target connection of output can be set.
Primary output, secondary output, event output, RUN output, RDY output, timer 1 output, timer 2
output, timer 3 output, transmission output and end output
★Output (OUT) 3, output (OUT) 4, output (OUT) 5, output (OUT) 6 and output (OUT) 7
* Target connection of output can be set.
Primary output, secondary output, event output, RUN output, RDY output, timer 1 output, timer 2
output, timer 3 output and end output
* Some specifications are not selectable, depending on the model. Check them on the model table.
★Selection of output types
* Outputs 1 and 2
Relay contact
250 VAC, 3 A(resistance loads) and 1a contact
Voltage for SSR drive
0 - 12 VDC (load resistance: 600 or greater)
Open collector
24 VDC, 100 mA (load current)
Voltage
0 - 5 VDC, 1 - 5 VDC and 0 - 10 VDC
(resistance loads: 1 kor greater)
0 - 1 VDC and 0 - 10 mVDC (load resistance: 500 kor greater)
Current
4 - 20 mADC (load resistance: 600 or less)
* Outputs 3, 4, 5, 6 and 7
Relay contact
250 VAC, 1 A(resistance loads) and 1a contact
Open collector
24 VDC, 100 mA (load current)
* Transmission output function selection
PV (measurement value) output
SV (setting value) output
MV 1 (primary operating amount) output
MV 2 (secondary operating amount) output
Control SV (setting value) output
Forward and reverse operations can be switched over for all the outputs above.
★Selectable outputs for each model
Output 1
Output 2
Output 3
Output 4
Output 5
Output 6
Output 7
TTM-214
TTM-215
TTM-217
TTM-219
* TTM-214: Outputs 3 and 4 are for common shared.
* TTM-217: Outputs 3 and 4 are for common shared.
When DI 3 is selected, output 7 will not be selectable.
* TTM-215 and 219: Outputs 3 and 4 are for common shared.

4D-3637-A 1-10
★Assignment of outputs
Each output can freely be assigned to output types.
Type of output
Output 1
Output 2
Output 3
Output 4
Output 5
Output 6
Output 7
Primary output (heating)
Secondary output (cooling)
Transmission output
Event output
Timer output
End output *1
○: Output assignment possible
×: Output assignment not possible
* At factory shipment, the output 1 is assigned to the primary output, and the outputs 2 to 7 to the secondary outputs.
*1: Selectable only for a program run.
★Details on output assignment targets
Each output can individually be assigned to the following item.
Output assignment targets
Primary output
Secondary output
Event output
RUN output
RDY output
Timer 1 output
Timer 1 ON delay output
Timer 1 OFF delay output
Timer 1 ON+OFF delay output
Timer 2 output
Timer 2 ON delay output
Timer 2 OFF delay output
Timer 2 ON+OFF delay output
Timer 3 output
Timer 3 ON delay output
Timer 3 OFF delay output
Timer 3 ON+OFF delay output
Transmission output
End output *1
*1: Selectable only for a program run.
■Communication function
★Communication
* This function is for communication with a host computer. (The communication function option is
required.)
* Communication protocol TOHO protocol
MODBUS protocol (RTU mode)
MODBUS protocol (ASCII mode)
* Interface RS-485
* For detailed specifications, see pages 6-65 and 66.
★Loader communication
* This communication function is for setting all data of TTM-210 series in a lump.
* In order to use the loader communication, the dedicated software for the communication must be
installed on the personal computer (PC) being used.
* To connect TTM-210 series to your PC, TOHO’s dedicated connection cable “TTM-LOADER” (sold
separately) is required.
(For the product specifications, see page 7-9.)
* When normal communication (or communication in option) is used (or active), the loader
communication cannot be used.

4D-3637-A 1-11
1.6 Basic flow of setting
Power-on
The mode changes to either “constant value run mode”or “program run mode”when four seconds are
elapsed after the power is turned-on.
Initial screen
4 sec
* Constant run value mode is established with the SET 21 operating type setting (C/P =0).
In addition, the SET 21 and 22 parameters are not displayed.
* With SET 23 bAF =1, the auto bank switchover function is selectable.
With bAF =0, the SET 23 parameters are not displayed.
Constant value run mode
* All setting item selection screens can move to the
constant value run mode screen.
MODE key for 2 seconds
The screen SET 01 appears when the run mode
screen moves to each setting item selection screen.
Each setting item selection screen
SET 01 - SET 23
* Using the ▲/▼key, the setting item selection
screens SET 01 to SET 23 are displayed in
sequence.
(In case of no function registered, the
corresponding screen is not displayed.)
(For bank auto-switchover, see page 6-80.)
Blind setting
screen
Parameter setting
screen in each
SET
* Each parameter setting
screen is displayed in
sequence when the MODE
key is pressed on the
parameter setting screen,
which is displayed when the
MODE key is pressed in each
setting item selection screen
(SET**). Holding the MODE
key pressed for at least 2
seconds moves each
parameter setting screen back
to the run mode screen.
Program run mode
* Program run mode is established
with the SET 21 operating type
setting (C/P =0).
* With SET 23 bAF =1,
the auto bank
switchover function
is selectable.
With bAF =0, the
SET 23 parameters
are not displayed.
MODE key for 2 seconds
Each setting item selection
screen SET 01 - SET 23
* Using the ▲/▼key, the setting item selection
screens SET 01 to SET 23 open in sequence.
(In case of no function registered, the
corresponding screen is not displayed.)
(For program run, see page 6-73.)
(For bank auto-switchover, see page 6-80.)
Blind setting
screen
Parameter setting
screen in each
SET
* All setting item selection screens can move
to the run mode screen.
* Each parameter setting screen
is displayed in sequence when
the MODE key is pressed on the
parameter setting screen, which
is displayed when the MODE
key is pressed in each setting
item selection screen (SET**).
Holding the MODE key pressed
for at least 2 seconds moves
each parameter setting screen
back to the run mode screen.
* A shortcut to SET 22 can be
made if FU* =d is set for the
SET 3 function key function
setting.
(For details, see pages 6-12 and
13.)
* The screen moves back to the run mode screen in case of no key operation in each setting item
selection screen or parameter setting screen in each SET for about 2 minutes.
* For how to set the blind setting, see pages 4-27 and 28, the section 4-2-9 “Basic operation.”

4D-3637-A 2-1
2. Installation
Precautions on installation, installation method and outside dimensions are described in this chapter.
2.1 Precautions on installation ..................................................................................................................... 2-2
2.2 How to install or remove the equipment................................................................................................ 2-3
2.3 Outside dimensions and panel cutting dimensions................................................................................. 2-4

4D-3637-A 2-2
2.1 Precautions on installation
Warning
Ensure to turn the power supply off before beginning removal or reinstallation of the equipment in order to prevent
an electric shock or equipment failure.
★Ambient temperature and humidity (the equipment to be used in the specified range as listed below)
(1) Temperature range: 0 to 50 °C
(2) Humidity range: 20 to 85% RH (no dew condensation allowed)
(3) Installation gradient: Base plane ± 10 degrees
★Do not install the equipment in the following places.
(1) Where temperature abruptly changes to generate dew
(2) Where corrosive or flammable gases are generated
(3) Where water, oil, steam or chemicals are received
(4) Where vibration or noise is directly applied
(5) Where dusty or salty ambience, or many iron scraps is present
(6) Where direct sunlight is received
(7) Where circuits may negatively be affected by static electricity, noise or magnetism
(8) Where direct warm or cool air is received from an air-conditioner
★Precautions on installation
(1) Provide sufficient space for ventilation so that the ambient temperature does not rise to 50 °C or
higher. In case that the temperature of 50 °C or higher is suspected, use a fan or air-conditioner to
cool the ambience.
Take care that no cold air flows directly on the equipment.
(2) Do not install the equipment on a device that may generate large heat, such as heater and
transformer.
(3) Install the equipment away as much distant as possible from high-voltage devices, power lines or
power equipment.
(4) Do not block off the ventilation opening on the equipment. Ensure a sufficient gap between
stacked units of equipment.

4D-3637-A 2-3
2.2 How to install or remove the equipment
★Installation on a panel
(1) Make an opening on the panel.
(2) Insert the equipment into the opening.
(3) Install the mounting attachment from behind the panel. Ensure that the equipment is securely
fixed.
* Conduct wiring after the equipment is installed.
* Turn on the power after the wiring.
TTM-214 TTM-215/217/219
★Removal from the panel
(1) Turn off the power.
(2) Disconnect the wiring.
(3) Insert a flat-head screw driver into the clearance formed between gabs on the equipment and
attachment. Turn the screw driver clockwise or counterclockwise to dislocate the gabs to remove
the attachment from the equipment.
(4) Remove the equipment from the panel.
* Ensure to conduct removal work after turning off the power.
TTM-214 TTM-215/217/219
Table of contents
Other TOHO Controllers manuals
Popular Controllers manuals by other brands
DaSeDa Electronics
DaSeDa Electronics HM-75A manual
RefPlus
RefPlus Guardian+ RC-F Programming manual

Delta Tau
Delta Tau PMAC Reference manual
Spectron
Spectron Spectrocem FE 121 user manual
CHAFFOTEAUX
CHAFFOTEAUX 3318597 Assembly and operation instructions
ADVATEK LIGHTING
ADVATEK LIGHTING PixLite 4 Mk2 ECO user manual
