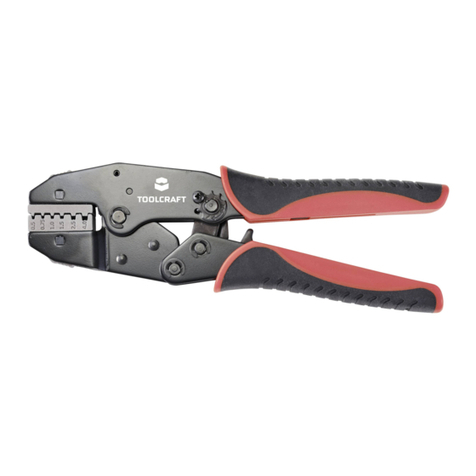
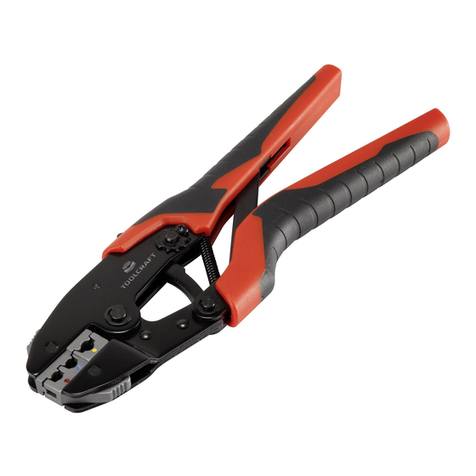
TOOLCRAFT 2368331 User manual

Sicherheitshinweise
Lesen Sie sich die Bedienungsanleitung sorgfältig durch und beachten
Sie insbesondere die Sicherheitshinweise. Sollten Sie die in dieser
Bedienungsanleitung aufgeführten Sicherheitshinweise und Informationen
für einen ordnungsgemäßen Gebrauch nicht beachten, übernehmen wir
keine Haftungfür daraus resultierende Personen- oder Sachschäden. Darüber
hinaus erlischt in solchen Fällen die Gewährleistung/Garantie.
a) Allgemein
• Das Produkt ist kein Spielzeug. Halten Sie es von Kindern und Haustieren fern.
• Lassen Sie das Verpackungsmaterial nicht achtlos liegen. Dieses könnte
andernfalls für Kinder zu einem gefährlichen Spielzeug werden.
• Schützen Sie das Produkt vor extremen Temperaturen, direkter
Sonneneinstrahlung, starken Erschütterungen, hoher Feuchtigkeit, Nässe,
brennbaren Gasen, Dämpfen und Lösungsmitteln.
• Setzen Sie das Produkt keiner mechanischen Beanspruchung aus.
• Sollte kein sicherer Betrieb mehr möglich sein, nehmen Sie das Produkt außer
Betrieb und schützen Sie es vor unbeabsichtigter Verwendung. Der sichere
Betrieb ist nicht mehr gewährleistet, wenn das Produkt
- sichtbare Schäden aufweist,
- nicht mehr ordnungsgemäß funktioniert,
- über einen längeren Zeitraum unter ungünstigen Umgebungsbedingungen
gelagert wurde oder
- erheblichen Transportbelastungen ausgesetzt wurde.
• Gehen Sie stets vorsichtig mit dem Produkt um. Stöße, Schläge oder sogar das
Herunterfallen aus geringer Höhe können das Produkt beschädigen.
• Wenden Sie sich an eine sachkundige Person, sollten Sie Zweifel in Bezug auf
die Arbeitsweise, die Sicherheit oder den Anschluss des Geräts haben.
• Lassen Sie Wartungs-, Änderungs- und Reparaturarbeiten ausschließlich von
einer Fachkraft bzw. einer zugelassenen Fachwerkstatt ausführen.
• Sollten Sie noch Fragen haben, die in dieser Bedienungsanleitung nicht
beantwortet wurden, wenden Sie sich an unseren technischen Kundendienst
oder anderes Fachpersonal.
b) Bedienung
• Aus Sicherheitsgründen ist das eigenmächtige Umbauen und/oder Verändern
des Produktes nicht gestattet.
• Dieses Produkt ist kein Spielzeug, es gehört nicht in Kinderhände.
• Kontrollieren Sie das Produkt vor der Inbetriebnahme auf Beschädigungen. Wenn
Sie Beschädigungen feststellen, so darf das Produkt nicht betrieben werden.
• Beachten Sie beim Einsatz des Produkts die in Ihrem Land geltenden Sicherheits-
und Unfallverhütungsvorschriften.
• Verwenden Sie keine Hebelverlängerung (zur Verstärkung der Quetschwirkung
der Crimpzange), da dies das Produkt beschädigen und zu Verletzungen führen
kann.
• DieCrimpzangedarfnurzumVerpressenvondazugeeignetenQuetschverbindern
verwendet werden, jedoch nicht zum Lösen von Schrauben, Muttern oder Bolzen.
• Verwenden Sie die Crimpzange niemals als Schlagwerkzeug, da dies das
Produkt beschädigen kann.
• Schützen Sie die Crimpzange und die Einsätze während des Gebrauchs und der
Lagerung vor Feuchtigkeit, Staub/Schmutz, Öl und Chemikalien. Lassen Sie die
Crimpzange nicht fallen, da dies das Produkt beschädigen kann.
• VerwendenSiefür einen angemessenenSchutzdie mitgelieferteAufbewahrungs-/
Transporttasche.
• In Schulen, Bildungseinrichtungen und Hobby-/Selbsthilfe-Werkstätten muss die
Verwendung des Produkts von geschultem Personal überwacht werden.
• Lassen Sie das Verpackungsmaterial nicht achtlos liegen, es könnte für Kinder
zu einem gefährlichen Spielzeug werden.
• Sollten Sie sich über die korrekte Bedienung nicht im Klaren sein oder sollten
sich Fragen ergeben, die nicht im Laufe der Bedienungsanleitung abgeklärt
werden, so setzen Sie sich bitte mit unserem technischem Support oder einem
anderen Fachmann in Verbindung.
Bedienungsanleitung
339-Tlg. Crimpzangen-set
Best.-Nr. 2368331
Bestimmungsgemäße Verwendung
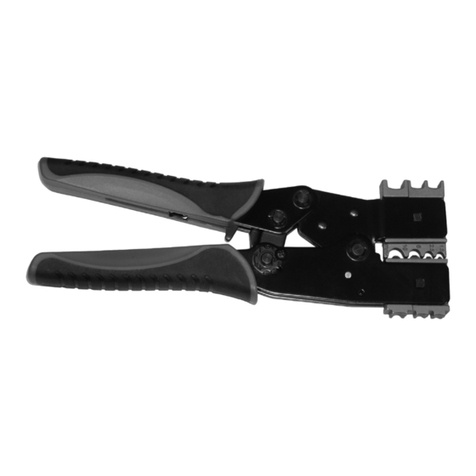
Die Crimpzange ist zum Verpressen von dazu geeigneten Quetschverbindern
vorgesehen. Durch die mitgelieferten wechselbaren Einsätze ergeben sich verschiedene
Anwendungsmöglichkeiten.
Aus Sicherheits- und Zulassungsgründen dürfen Sie das Produkt nicht umbauen und/oder
verändern. Falls Sie das Produkt für andere als die genannten Zwecke verwenden, könnte
das Produkt beschädigt werden. Darüber hinaus kann eine unsachgemäße Verwendung zu
Gefahren führen. Lesen Sie sich die Bedienungsanleitung sorgfältig durch und bewahren Sie
sie sicher auf. Reichen Sie das Produkt nur zusammen mit der Bedienungsanleitung an Dritte
weiter.
Dieses Produkt erfüllt die gesetzlichen nationalen und europäischen Anforderungen. Alle
enthaltenen Firmennamen und Produktbezeichnungen sind Warenzeichen der jeweiligen
Inhaber. Alle Rechte vorbehalten.
Lieferumfang
• Schnellwechsel-Ratschen-Crimpzange 1 Stk.
• Backe für (1,5) Superseal-Klemme (HJ12-H2) 1 Satz
• Backe für (1,5) Superseal-Klemme (HJ12-H3) 1 Satz
• Φ1,0 Drahtplombe für (1,5) Superseal (für Draht-Außendurchmesser: 1,2 bis 1,8 mm)
50 Stk.
• Φ1,4 Drahtplombe für (1,5) Superseal (für Draht-Außendurchmesser: 1,6 bis 2,4 mm)
50 Stk.
• Stiftleiste für (1,5) Superseal [0,3 bis 0,5 mm2] 50 Stk.
• Buchsenklemme für (1,5) Superseal [0,3 bis 0,5 mm2] 50 Stk.
• Stiftleiste für (1,5) Superseal [0,85 bis 1,25 mm2] 50 Stk.
• Buchsenklemme für (1,5) Superseal [0,85 bis 1,25 mm2] 50 Stk.
• 1-poliges Steckergehäuse für (1,5) Superseal 4 Stk.
• 1-poliges Buchsengehäuse für (1,5) Superseal 4 Stk.
• 2-poliges Steckergehäuse für (1,5) Superseal 4 Stk.
• 2-poliges Buchsengehäuse für (1,5) Superseal 4 Stk.
• 3-poliges Steckergehäuse für (1,5) Superseal 3 Stk.
• 3-poliges Buchsengehäuse für (1,5) Superseal 3 Stk.
• 4-poliges Steckergehäuse für (1,5) Superseal 3 Stk.
• 4-poliges Buchsengehäuse für (1,5) Superseal 3 Stk.
• 5-poliges Steckergehäuse für (1,5) Superseal 2 Stk.
• 5-poliges Buchsengehäuse für (1,5) Superseal 2 Stk.
• 6-poliges Steckergehäuse für (1,5) Superseal 2 Stk.
• 6-poliges Buchsengehäuse für (1,5) Superseal 2 Stk.
• Bedienungsanleitung
Aktuelle Bedienungsanleitungen
Laden Sie aktuelle Bedienungsanleitungen über den Link www.conrad.com/
downloads herunter oder scannen Sie den abgebildeten QR-Code. Befolgen
Sie die Anweisungen auf der Webseite.
Symbol-Erklärung
Das Symbol mit dem Ausrufezeichen im Dreieck weist auf wichtige Informationen in
dieser Bedienungsanleitung hin. Lesen Sie diese Informationen immer aufmerksam.
Das Pfeilsymbol weist auf besondere Informationen und Empfehlungen zur
Bedienung hin.

Bedienelemente und Komponenten
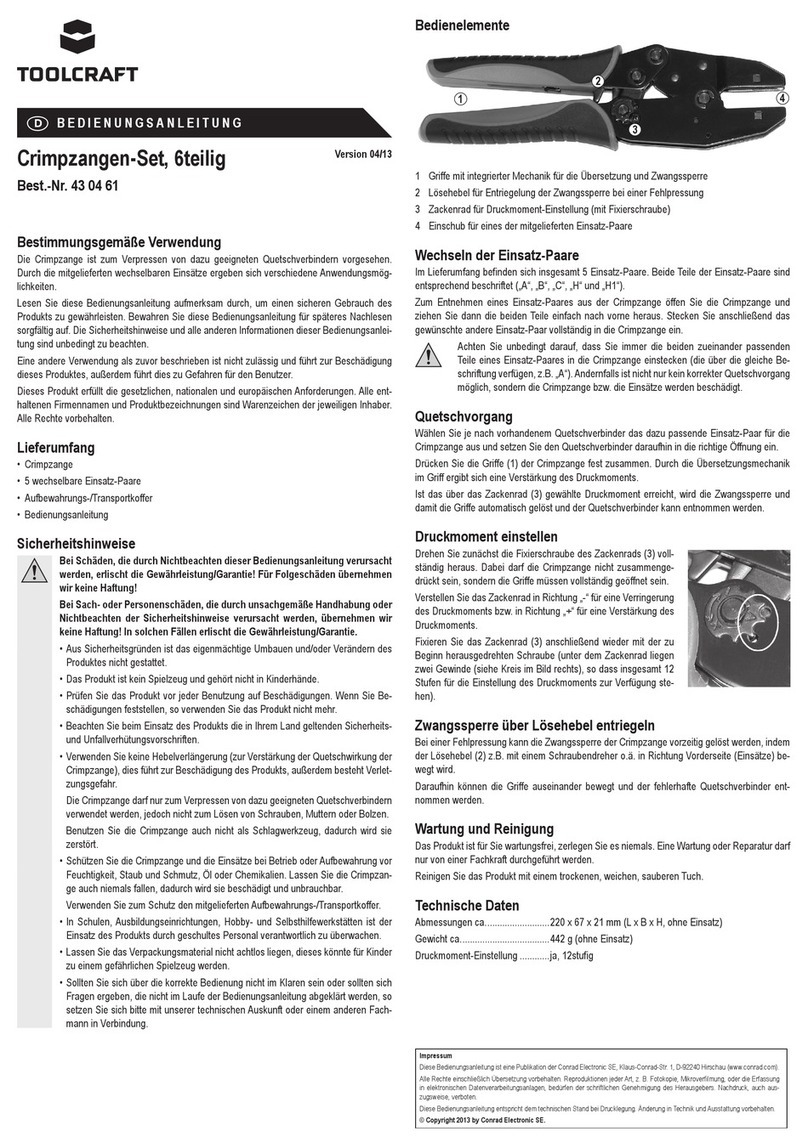
34 2 1
1 Griffe mit integrierter Mechanik für die
Übersetzung und Zwangssperre
2 Lösehebel für Entriegelung der
Zwangssperre bei Fehlpressung
3 Zahnrad für Drehmoment-Einstellung
(mit Fixierschraube)
4 Einschub für eines der mitgelieferten
Einsatz-Paare
Bedienung
a) Wechseln der Einsatz-Paare
• Zum Entnehmen eines Einsatz-Paares aus der Crimpzange öffen Sie die Crimpzange und
ziehen Sie dann die beiden Teile des Einsatz-Paars nach vorne heraus. Stecken Sie das
gewünschte andere Einsatz-Paar vollständig in die Crimpzange ein, bis es einrastet.
• Achten Sie darauf, dass Sie immer die beiden zusammenpassenden Teile eines
Einsatzpaares in die Crimpzange einsetzen, da sonst der Quetschvorgang beeinträchtigt
werden kann und Sie Gefahr laufen, die Crimpzange oder die Einsätze zu beschädigen.
b) Quetschvorgang
• Wählen Sie je nach vorhandenem Quetschverbinder das dazu passende Einsatz-Paar für
die Crimpzange aus und setzen Sie den Quetschverbinder daraufhin in die richtige Öffnung
ein.
• DrückenSiedieGriffe(1)derCrimpzangefestzusammen.DurchdieÜbersetzungsmechanik
im Griff ergibt sich eine Erhöhung des Drehmoments.
• Ist das über das Zahnrad (3) gewählte Drehmoment erreicht, wird die Crimpung
eingepresst und die Griffe werden automatisch entriegelt. Der Quetschverbinder kann dann
entfernt werden.
c) Druckmoment einstellen
• Drehen Sie die Fixierschraube des Zahnrads (3) vollständig heraus.
• Die Crimpzange darf nicht zusammengedrückt und die Griffe müssen vollständig geöffnet
sein.
• Verstellen Sie das Zahnrad in Richtung „-“ für eine Verringerung des Drehmoments bzw. in
Richtung „+“ für eine Erhöhung des Drehmoments.
• Fixieren Sie das Zahnrad (3) mit der zu Beginn herausgedrehten Schraube (unter dem
Zahnrad benden sich zwei Gewinde (siehe Kreis im Bild rechts), sodass insgesamt
12 Stufen für die Einstellung des Drehmoments zur Verfügung stehen).
d) Zwangssperre über Lösehebel entriegeln
• Bei einer Fehlpressung lässt sich die Zwangssperre der Crimpzange lösen, indem der
Lösehebel (2) in Richtung Vorderseite (Einsätze) geschoben wird.
• Die Griffe können dann auseinandergezogen werden, sodass Sie den defekten
Quetschverbinder entfernen können.
Pege und Reinigung
• Verwenden Sie keine aggressiven Reinigungsmittel, Alkohol oder andere chemische
Lösungsmittel, da diese zu Schäden am Gehäuse und zu Fehlfunktionen des Produkts
führen können.
• Verwenden Sie zum Reinigen des Produkts ein trockenes, faserfreies Tuch.
Dies ist eine Publikation der Conrad Electronic SE, Klaus-Conrad-Str. 1, D-92240 Hirschau (www.conrad.com). Alle Rech-
te einschließlich Übersetzung vorbehalten. Reproduktionen jeder Art, z. B. Fotokopie, Mikroverlmung oder die Erfassung
in elektronischen Datenverarbeitungsanlagen bedürfen der schriftlichen Genehmigung des Herausgebers. Nachdruck,
auch auszugsweise, verboten. Die Publikation entspricht dem technischen Stand bei Drucklegung.
Copyright 2021 by Conrad Electronic SE. *2368331_v3_1221_02_DS_m_2L_(1)
Technische Daten
Abmessungen (L x B x H)............. 220 x 67 x 21 mm (ohne Einsatz)
Gewicht......................................... 442 g (ohne Einsatz)
Einstellung des Drehmoments...... Einstellbar (12 Einstellmöglichkeiten)

• If it is no longer possible to operate the product safely, take it out of operation and
protect it from any accidental use. Safe operation can no longer be guaranteed
if the product:
- is visibly damaged,
- is no longer working properly,
- has been stored for extended periods in poor ambient conditions or
- has been subjected to any serious transport-related stress.
• Please handle the product carefully. Jolts, impacts, or a fall, even from a low
height, can cause damage to the product.
• Consult an expert when in doubt about the operation, safety, or connection of
the appliance.
• Maintenance, modications, and repairs must only be completed by a technician
or an authorised repair centre.
• If you have questions that remain unanswered by these operating instructions,
contact our technical support service or other technical personnel.
b) Operation
• For safety reasons, any unauthorised conversion and/or modication of the
product is not permitted.
• This product is not a toy and should be kept out of the reach of children.
• Check the product for signs of damage before use. If you notice any damage, do
not use the product.
• When using the product, observe the safety and accident prevention regulations
applicable in your country.
• Do not use any lever extension (to reinforce the crimping effect of the crimp
pliers), as this will damage the product and may cause an injury.
• The crimp pliers may be used only for crimping suitable crimp-type connectors
and must not be used to unscrew nuts, screws or bolts.
• Never use the crimp pliers as a striking tool, as this may damage the product.
• Protect the crimp pliers and the inserts from humidity, dust/dirt, oil and chemicals
during use and storage. Do not drop the crimp pliers, as this may damage the
product.
• To ensure adequate protection, use the storage/transport case provided.
• In schools, educational centres and hobby/DIY workshops, the use of the product
must be supervised by trained employees.
• Do not leave the packaging material lying around carelessly, as it may become
a dangerous plaything for children.
• If you are in doubt about how to use the product, or if you have any questions not
covered by these operating instructions, please contact our technical support or
any other appropriate specialist.
Operating elements
34 2 1
1 Handles with integrated mechanism for
the transmission and automatic lock.
2 Release lever to release the automatic
lock after incorrect crimping.
3 Toothed wheel to adjust the torque (with
locking screw).
4 Slot for one of the insert pairs provided.
Operation
a) Replacing the insert pairs
• To remove an insert pair from the crimp pliers, open the crimp pliers and then pull the two
parts of the insert pair forward and out. Fully insert the other desired insert pair into the
crimp pliers until it clicks into place.
• Ensure that you always insert the two matching parts of an insert pair into the crimp pliers,
otherwise crimping may be impaired and you run the risk of damaging the crimp pliers or
the inserts.
b) Crimping process
• Depending on the available crimp-type connector, select the suitable insert pair for the
crimp pliers and insert the crimp-type connector into the correct opening.
• Press the handles (1) of the crimp pliers rmly together. The transmission mechanism in the
handle causes an increase in torque.
• If the torque selected via the toothed wheel (3) is attained, the crimp is forced into place and
the handles are automatically released. The crimp-type connector can then be removed.
Operating Instructions
Crimping tool kit, 339 pieces
Item No. 2368331
Intended use
These crimp pliers are intended for the crimping of crimp-type connectors that are suitable
for this purpose. The replaceable inserts included provide different options for the use and
application of the product.
For safety and approval purposes, you must not rebuild and/or modify this product. If you use
the product for purposes other than those described, the product may be damaged. In addition,
improper use can result in hazards. Read the instructions carefully and store them in a safe
place. Make this product available to third parties only together with its operating instructions.
This product complies with the statutory national and European requirements. All company
names and product names are trademarks of their respective owners. All rights reserved.
Delivery content
• Quick Change Ratchet Crimper 1 PCE
• Jaw for (1.5) Superseal Terminal (HJ12-H2) 1 Set
• Jaw for (1.5) Superseal Terminal (HJ12-H3) 1 Set
• Φ1.0 Wire Seal for (1.5) Superseal (For Wire O.D.: 1.2~1.8 mm) 50 PCE
• Φ1.4 Wire Seal for (1.5) Superseal (For Wire O.D.: 1.6~2.4 mm) 50 PCE
• Male Terminal for (1.5) Superseal [0.3~0.5 mm2] 50 PCE
• Female Terminal for (1.5) Superseal [0.3~0.5 mm2] 50 PCE
• Male Terminal for (1.5) Superseal [0.85~1.25 mm2] 50 PCE
• Female Terminal for (1.5) Superseal [0.85~1.25 mm2] 50 PCE
• 1 Pole Male Housing for (1.5) Superseal 4 PCE
• 1 Pole Female Housing for (1.5) Superseal 4 PCE
• 2 Pole Male Housing for (1.5) Superseal 4 PCE
• 2 Pole Female Housing for (1.5) Superseal 4 PCE
• 3 Pole Male Housing for (1.5) Superseal 3 PCE
• 3 Pole Female Housing for (1.5) Superseal 3 PCE
• 4 Pole Male Housing for (1.5) Superseal 3 PCE
• 4 Pole Female Housing for (1.5) Superseal 3 PCE
• 5 Pole Male Housing for (1.5) Superseal 2 PCE
• 5 Pole Female Housing for (1.5) Superseal 2 PCE
• 6 Pole Male Housing for (1.5) Superseal 2 PCE
• 6 Pole Female Housing for (1.5) Superseal 2 PCE
• Operating instructions
Up-to-date operating instructions
Download the latest operating instructions at www.conrad.com/downloads or
scan the QR code shown. Follow the instructions on the website.
Explanation of symbols
The symbol with the exclamation mark in the triangle is used to indicate important
information in these operating instructions. Always read this information carefully.
The arrow symbol indicates special information and advice on operation.
Safety instructions
Read the operating instructions carefully and especially observe the safety
information. If you do not follow the safety instructions and information
on proper handling in this manual, we assume no liability for any resulting
personal injury or damage to property. Such cases will invalidate the warranty/
guarantee.
a) General information
• The device is not a toy. Keep it out of the reach of children and pets.
• Do not leave the packaging material lying around carelessly. This may become
dangerous playing material for children.
• Protect the appliance from extreme temperatures, direct sunlight, strong jolts,
high humidity, moisture, ammable gases, steam, and solvents.
• Do not place the product under any mechanical stress.

c) Adjusting the torque
• Unscrew the locking screw on the toothed wheel (3) completely.
• The crimp pliers must not be pressed together and the handles must be fully open.
• Move the toothed wheel in the “-” direction to decrease the torque or in the “+” direction to
increase the torque.
• Secure the toothed wheel (3) with the screw that you unscrewed at the beginning (under
the toothed wheel there are three threads (as circled in the image below) to enable the
adjustment of the torque in a total of 12 stages).
d) Releasing the automatic lock via the release level
• In the event of incorrect crimping, the automatic lock of the crimp pliers can be released by
pushing the release lever (2) toward the front (inserts).
• The handles can then be moved apart so that you can remove the faulty crimp-type
connector.
Care and cleaning
• Do not use any aggressive cleaning agents, rubbing alcohol, or other chemical solutions as
they can cause damage to the housing and functioning of the product.
• Clean the product with a dry, bre-free cloth.
Technical data
Dimensions (L x W x H)................ 220 x 67 x 21 mm (without insert)
Weight .......................................... 442 g (without insert)
Torque settings ............................. Adjustable (12 levels of adjustment)
This is a publication by Conrad Electronic SE, Klaus-Conrad-Str. 1, D-92240 Hirschau (www.conrad.com). All rights in-
cluding translation reserved. Reproduction by any method, e.g. photocopy, microlming, or the capture in electronic data
processing systems require the prior written approval by the editor. Reprinting, also in part, is prohibited. This publication
represent the technical status at the time of printing.
Copyright 2021 by Conrad Electronic SE. *2368331_v3_1221_02_DS_m_2L_(1)
Table of contents
Languages:
Other TOOLCRAFT Crimping Tools manuals
Popular Crimping Tools manuals by other brands

Tyco Electronics
Tyco Electronics 69156-1 instruction sheet

TE Connectivity
TE Connectivity ERGOCRIMP 4-1579001-1 instruction sheet

TE Connectivity
TE Connectivity 58075-1 instruction sheet

Textron
Textron Greenlee GATOR EK1240KLX Operation manual

BEL
BEL Stewart 2940252-01 operating instructions

Textron
Textron Klauke K 16 instruction manual