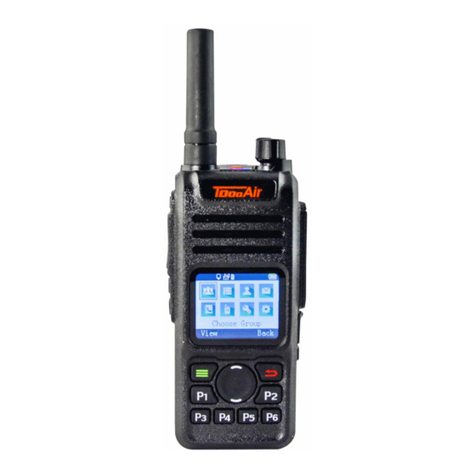
ToooAir TA-680 User manual

WIDE AREA IP 2WAY RADIO
MODEL: TA-680

Contents
Basic Settings
................................................................................ 1
Settings
.......................................................................................... 2
......................................................................... 2
PTToC Settings
.............................................................................. 3
.............................................................................. 4
................................................................................ 7
Warranty
....................................................................................... 8
Important Notice
.........................................................................10
READ ALL INSTRUCTIONS carefully and completely before operating your radio and retain this manual
for future reference.
NEVER connect the radio to a power source other than the supplied battery and charge via supplied
charger.
DO NOT place your radio in front of a vehicle airbag.
DO NOT attempt to modify your radio in any way.
DO NOT allow children to operate the radio unsupervised.
ALWAYS charge your radio at normal room temperature.
ALWAYS switch off your radio where notices restrict the use of two-way radio or mobile telephones.
ALWAYS keep the antenna more than 25 mm from any part of the head or body when transmitting.
NOTE People with pacemakers are recommended to maintain at least 20cm separation between the
radio and their pacemaker.
Specifications
Analog Settings
Advanced Settings

FRONT
1. Antenna 1 (UHF)
2. Antenna 2 (Cellular)
3. Speaker
4. Indicator Lamp
•When first powered on: LED will
flash blue while radio powers up and
logs into account
•Once logged into the network, blue
flash will slow to once every 5
seconds (It can take up to 20
seconds to acquire a network)
•LED will turn red when the PTT is
pushed and radio transmits
•LED will turn blue during receive
•LED will turn red when radio is
switched off until it is logged off the
network
•When the radio is switched off and a
charger connected via micro USB
port, the LED will turn red while
charging
5. Power Switch and Volume Control
6. Microphone
7. LCD Indicator
8. Menu/Select Key;
Displays the menu or selects menu
function
LEFT
9. Back Key;
Back to the previous menu or Cancel
to stop the current operation
10. Up/Down Key;
Up key, short press –chosen item in
the menu or list moves up one line
Down key, short press –chosen item
in the menu or list moves down one
line
11. Call key
Broadcast to selected number
12. Exit
Exit to the home screen
13. Numeric keypad
14. Squelch (Analog)-SOS Key (Network)
Short press to toggle squelch
open/closed
Press for 3 seconds to send a
broadcast SOS (A red SOS will show
on the top status bar)
Press for 3 seconds to cancel
broadcast SOS.
15. PTT (Push-to-Talk) Switch
16. Switch Mode Key
Press to change between PoC and
UHF
Keypad lock
Hold for 3 seconds to lock/unlock
keypad

RIGHT
17. Speaker Jack
18. Microphone Jack
19. Micro USB charger jack
Radio can be charged via a standard
USB micro cable
BACK
20. SIM Card Slot

1
Power On
1. Turn on volume switch clockwise to
power on, anti-clockwise for off
2. LCD will display blue login screen
3. LCD will display logging in (This can
take up to 20 seconds), UHF
information, the signal strength,
network type, Text Message, GPS,
time and battery capacity
4. Once logged in LCD will display
system platform information
Power Off
Turn the volume switch anticlockwise to power
off. The LED will illuminate red and the LCD will
display “Power Off” during the shutting down
process. This takes about 5 seconds.
Switch Modes
The radio can switch between two modes,
Network and UHF mode. To switch modes press
“Switch mode key” Ref. 16. Located on the left
side of the radio.
Transmitting
Press the PTT and the LED will illuminate red
indicating the radio is in transmit mode. When
in the network mode, the LCD green status bar
will indicate “my turn to talk”.
Receiving
When the LED is illuminated blue. It indicates
the radio is receiving a transmission. When in
network mode the green status bar will indicate
the broadcasters name or ident.
Screen Display
The TA-680 has a simultaneous dual screen of
both modes; Network and UHF. The upper half
is the Network mode with the green status bar.
The lower half is the UHF mode with the blue
status bar. The MAIN icon shows the current
active selected mode.
UHF status bar
The radio has a blue status bar midway down
the home display screen, this status bar notes
key information regarding settings of the
current channel that is selected.
The symbols that may be present in the
status bar are as follows:
•Received signal strength
•S Power save mode
•H High transmission power (4W)
•L Low transmissions power (2W)
•CTS Continuous Tone-Coded
Squelch System (CTCSS) enabled
•DCS Digital Coded Squelch enabled
•D Duplex mode
•N Narrow band (12.5kHz)
•W Wide band (25kHz)
•B Busy channel lock out
•★Scan group
A quick press of the # key is used to toggle
between frequency display and channel
number.
Note; In CB mode the radio must be in
channel mode to transmit.
Basic Settings

2
SOS (Network feature only)
The radio can have the SOS feature
disabled/enabled. To access SOS settings.
1. Press ‘MENU’ key
2. Short press ⮝once, for “Settings”,
press ‘MENU’ key to select
3. Press ‘MENU’ key to select “SOS
Mode”
4. Short press ⮝or ⮟, to choose
desired setting press ‘MENU’ key to
save selection
5. Press ‘BACK’ key twice to return to
home screen or press ‘EXIT’ key
Time Zone
The time the radio displays can be adjusted to
suit your time zone. To access time zone
settings.
1. Press ‘MENU’ key
2. Short press ⮝once, for “Settings”,
press ‘MENU’ key to select
3. Short press ⮟once, for “Time
Zone”, press ‘MENU’ key to select
4. Short press ⮝or ⮟, to choose
desired setting press ‘MENU’ key to
save selection
5. Press ‘BACK’ key twice to return to
home screen or press ‘EXIT’ key
Note; Time is acquired from the GPS and
radio must first be used outside to establish a
GPS fix.
Keypad Lock
You can set automatic lock or manual lock, for
the keypad of the radio
1. Press the ‘MENU’ key
2. Short press ⮝, for “Setting”, press
‘MENU’ key to select
3. Short press ⮝three times, for
“Autolock” press ‘MENU’ key to
select
4. Short press ⮝or ⮟, to change the
option On/Off press ‘MENU’ key to
save selection
5. Press ‘BACK’ key twice to return to
home screen or press ‘EXIT’ key
When automatic lock is on, all keys other than
the PTT and Squelch/SOS key will automatically
lock after 10 seconds
Long press of the ‘Switch mode’ key on left side
of the radio will temporarily unlock keys.
Keypad beep setting
This function can be set in “Setting” menu.
It can be set to:
On: beep sound emitted when a key press is
operated
Off: No sound emitted with key press
MODE Selection
The radio has three different modes;
Dual mode
Analog only
IP only (Network)
To access mode selection.
1. Press ‘MENU’ key
2. Short press ⮟three times, for
“Advanced Settings”, press
‘MENU’ key to select
3. Press ‘MENU’ key to select “Working
Mode”
4. Short press ⮝or ⮟, to choose
desired setting press ‘MENU’ key to
save selection
5. Press ‘BACK’ key twice to return to
home screen or press ‘EXIT’ key
Note; while in certain modes some settings
may not be accessible.
RX. Priority
The radio can give priority to receiving a
broadcaster’s signal. The priority can be set to
Network, Analog, Dual or Sequential. In
sequential mode the radio will switch to the last
received transmissions.
1. Press ‘MENU’ key
2. Press ⮟three times, to choose
“Advanced Setting” press ‘MENU’
key to select
AdvancedSettings
Settings

3
3. Press ⮟three times, to choose “RX.
Priority” press ‘MENU’ key to select
4. Short press ⮝or ⮟, to choose
desired setting press ‘MENU’ key to
save
5. Press ‘BACK’ key twice to return to
home screen or press ‘EXIT’ key
TX. Selection
The radio can automatically switch between
modes based on last received signal. The
priority can be set to manual or auto, in auto
the radio will transmit on the last received
mode (Network or UHF).
1. Press ‘MENU’ key
2. Short press ⮟three times, to choose
“Advanced Setting” press ‘MENU’ ley
to select
3. Short press ⮟twice, to choose “TX.
Selection” press ‘MENU’ key to
select
4. Short press ⮝or ⮟, to choose
desired setting press ‘MENU’ key to
save selection
5. Press ‘BACK’ key twice to return to
home screen or press ‘EXIT’ key
Sound Quality
The TA680 has 2 voice codecs 4K and 8K to
access the voice codec settings.
1. Press MENU key
2. Short press ⮟3 times, press
MENU key to enter ADV
Settings
3. Short press ⮝3 times, press
MENU key to enter Sound
Quality
4. Short press ⮝or ⮟to select HQ
Mode (8k codec), press MENU key to save
selection.
Group Switching
1. Press the ‘MENU’ key and then press
‘MENU’ key again to view/select
“Choose Group”. Short press ⮝or
⮟, to choose desired group
2. Press the ‘MENU’ key to (Add) select
desired group
3. The LCD display will now indicate the
selected group for TX. and RX.
Note; above feature is Programming dependent
Individual Call
There are multiple ways to create a temporary
group and call individual users. One of the ways
is via a friends list or via the user list of a group.
Friends List method
1. Press ‘MENU’ key
2. Short press ⮟, for “Friend List”
press ‘MENU’ key to select
3. Short press ⮝or ⮟, to choose
desired user then press ‘MENU’ key
to select
4. Press PTT to initiate communication
Note; you can only select users that are “on air”
indicated by a blue color icon.
User List method
1. Press ‘MENU’ key
2. Short press ⮟twice, for “User List”
press ‘MENU’ key to select
3. Short press ⮝or ⮟, to choose
desired user press ‘MENU’ key to
select
4. Press PTT to initiate communication
5. If the PTT is not pushed within 120
seconds, the radios will revert to the
default group, if you change groups
the temporary individual/group call
will terminate and revert radios to
default groups.
Note; you can only select users that are “on air”
indicated by a blue color icon.
PTToC Settings

4
Text Message
The radio can receive text messages. On
receiving of a text message an icon (Envelope)
will display in the top blue status line of the
LCD.
1. Press ‘MENU” key
2. Short press ⮟five times, for
“Dispatcher MSG” press ‘MENU’ key
to select
3. Short press ⮝or ⮟, to choose
desired text message press ‘MENU’
key to select/read message
4. Press the ‘BACK’ key to return to
message list or press ‘EXIT’ key to
return to home screen
5. Unread messages are identified by a
closed envelope icon next to the
message
Messages are limited to 20 characters. The
radio will store the last 5 messages
Duplex Mode - CB
The radio can be placed into duplex mode on
channels 1 to 8 and 41 to 48
While on channels 1 to 8 or 41 to 48
Press and hold the # key on the keypad for 4
seconds until you will see a “D”appear on the
blue status bar. This notes the current channel
is in duplex mode and will transmit/receive 30
channels higher.
To stop duplex mode, select desired channel,
press and hold the # key on the keypad for 4
seconds until you will see the “D”disappear on
the blue status bar. This notes the current
channel is not in duplex mode and will
transmit/receive on the current channel. The
display will show the receive frequency.
Roger Beep function
This function can be set in “Analog Setting”
menu
On: A beep tone is emitted when the PTT is
pressed or released indicating start or end of
transmission
Off: No beep tone is emitted during PTT
operation
Squelch
The radio audio can open at varying levels of
received signal strength.
1. Press ‘MENU’ key
2. Short press ⮟four times, for
“Analog Setting” press ‘MENU’ key
to select
3. Short press ⮝seven times, for “SQL”
press ‘MENU’ key to select
4. Short press ⮝or ⮟, to select
desired level, press ‘MENU’ key to
save selection
5. Press ‘BACK’ key twice to return to
home screen or press ‘EXIT’ key
BCLO
Busy Channel Lock Out is used to stop the use
of the PTT if the radio is receiving a UHF
transmission.
1. Press ‘MENU’ key
2. Short press ⮟four times, for
“Analog setting” , press ‘MENU’ key
to select
3. Short press ⮟six times, for “BCLO”,
press ‘MENU’ key to select
4. Short press ⮝or ⮟, to choose
desired selection, press ‘MENU’ key
to save selection
5. Press ‘BACK’ key twice to return to
home screen or press ‘EXIT’ key
Analog Settings

5
Scan
The radio can scan through selected channels
looking for transmission on the channel, the
scan will scan through channels inside the scan
group. A star displayed in the blue status bar,
notes if the current channel is in the scan group.
To scan through the scan group press
and hold the * key on the keypad for 2 seconds.
Pressing the * key again will stop the scan and
revert to original channel scan was commenced
from.
If the radio stops on a busy channel, pushing
the PTT will stop the radio from scanning. To
add/remove channels to scan group find a
channel that is not in the scan group, noted by
the star in the blue status bar.
1. Press ‘MENU’ key
2. Short press ⮟four times, for
“Analog Setting”, press ‘MENU’ key
to select
3. Short press ⮝three times, for
“Scan. Add”, press ‘MENU’ key to
select
4. Short press ⮝or ⮟, to change
Add/Delete, press ‘MENU’ key to
save desired selection
5. Press ‘BACK’ key twice to return to
home screen or press ‘EXIT’ key
When you add the channel to the scan group a
star will now be displayed in the blue status bar.
This indicates current channel is in the scan
group.
CTCSS
To activate Continuous Tone-Coded Squelch
System, select desired channel.
1. Press ‘MENU’ key
2. Short press ⮟four times, for
“Analog setting” , press ‘MENU’ key
to select
3. Short press ⮟three times, for “RX.
CDC”, or Short press ⮟four times,
for “TX. CDC”, press ‘MENU’ key to
select
4. Press the * key to select a CTCSS
tone, DCS tone or “off”
5. Short press ⮝or ⮟, to choose
desired tone then press ‘MENU’ key
to save
If you want to change between Analog and
Digital or Off
1. Press and hold the * key on the
keypad, choose desired selection,
press ‘MENU’ key to save selection
2. Press ‘BACK’ key twice to return to
home screen or press ‘EXIT’ key
The same procedure is used to select TX CTCSS
or Digital coded tones.
Store Channel for Receive only
You can store any channel from 400MHz to
480MHz as a receive only channel in memory
locations 121 to 199. These can also be added
to the scan group.

6
UHF CB CHANNELS & FREQUENCIES
Legend CH No. Remark
81 - 120 Commercial Pre-Programmable
121 - 199 User Programmable RX. Only
CH No. Frequency (MHz) CH No. Frequency (MHz)
41. DRX
476.4375
42. DRX
476.4625
43. DRX
476.4875
44. DRX
476.5125
45. DRX
476.5375
46. DRX
476.5625
47. DRX
476.5875
48. DRX
476.6125
49
476.6375
50
476.6625
51
476.6875
52
476.7125
53
476.7375
54
476.7625
55
476.7875
56
476.8125
57
476.8375
58
476.8625
59
476.8875
60
476.9125
61. X
476.9375
62. X
476.9625
63. X
476.9875
64
477.0125
65
477.0375
66
477.0625
67
477.0875
68
477.1125
69
477.1375
70
477.1625
71. DTX
477.1875
72. DTX
477.2125
73. DTX
477.2375
74. DTX
477.2625
75. DTX
477.2875
76. DTX
477.3125
77. DTX
477.3375
78. DTX
477.3625
79
477.3875
80
477.4125
1. DRX
476.425
2. DRX
476.450
3. DRX
476.475
4. DRX
476.500
5. E, DRX
476.525
6. DRX
476.550
7. DRX
476.575
8. DRX
476.600
9
476.625
10
476.650
11
476.675
12
476.700
13
476.725
14
476.750
15
476.775
16
476.800
17
476.825
18
476.850
19
476.875
20
476.900
21
476.925
22. RX
476.950
23. RX
476.975
24
477.000
25
477.025
26
477.050
27
477.075
28
477.100
29
477.125
30
477.150
31. DTX
477.175
32. DTX
477.200
33. DTX
477.225
34. DTX
477.250
35. E, DTX
477.275
36. DTX
477.300
37. DTX
477.325
38. DTX
477.350
39
477.375
40
477.400
Duplex Mode Receive
Duplex Mode Transmit
DRX
DTX
Emergency use only
E
Receive Only
RX
Inaccessible
X

7
Specifications

8
This warranty against defects is given by Tooo
Air Pty. Ltd. ABN 58 615 252 536
1. Consumer Guarantees
1.1. Our goods come with guarantees
that cannot be excluded under the
Australian consumer law. You are
entitled to a replacement or refund
for a major failure and for
compensation for any other
reasonably foreseeable loss or
damage. You are also entitled to
have the goods repaired or
replaced if the goods fail to be of
acceptable quality and the failure
does not amount to a major failure.
1.2. To the extent we are able, we
exclude all other conditions,
warranties and obligations that
would otherwise be implied.
2. Warranty Against Defects
2.1. This warranty is in addition to and
does not limit, exclude or restrict
your rights under the Competition
and Consumer Act 2010 (Australia)
or any other mandatory protection
laws that may apply.
2.2. We warrant our goods to be free
from defects in materials and
workmanship for the warranty
period of 12 months from the date
of original sale. Subject too our
obligations under clause 1.2, we
will at our option, repair or replace
goods which we are satisfied are
defective. We warrant any
replacement parts for the
remainder of the period of
warranty for the goods into which
they are incorporated.
Product Type Warranty
2.3. To the extent permitted by law, our
sole liability for breach of a
condition, warranty or other
obligation implied by law is limited
(a) In the case of goods we supply,
to any one of the following as
we decide:
(i) The replacement of the
goods or the supply of
equivalent goods;
(ii) The repair of the goods;
(iii) The cost of repairing the
goods or of acquiring
equivalent goods;
(b) In the case of services we
supply, to any one of the
following as we decide:
(i) The supplying of the
services again;
(ii) The cost of having the
services supplied again
2.4. For repairs outside the warranty
period, we warrant out repairs to
be free from defects in materials
and workmanship for three months
from the date of the original repair.
We agree to re-repair or replace (at
our option) any materials or
workmanship which we are
satisfied are defective.
2.5. We warrant that we will perform
services with reasonable care and
skill, we agree to investigate any
complaint regarding our services
made in good faith. If we are
satisfied that the complaint is
justified, and as our sole liability to
you under this warranty (to the
extent permitted by law), we agree
to supply those services again at no
extra charge to you.
Warranty

9
2.6. To make a warranty claim you must
before the end of the applicable
warranty period, return the goods
you allege are defective, provide
written details of the defect, and
give us an original or copy of the
sales invoice or some other
evidence showing details of the
transaction.
2.7. Send your claim to:
Tooo Air Pty. Ltd.
Suite 1103,
1 Newland Street
Bondi Junction NSW 2022
Tel: (02) 9157 0540
Email: info@toooair.com.au
Warranty Cover
This warranty will not apply in relation to:
(a) Goods modified or altered in any way;
(b) Repairs performed other than by our
authorised representative;
(c) Defects or damage resulting from misuse,
accident, impact or neglect;
(d) Goods improperly installed or used in a
manner contrary to the relevant
instruction manual; or
(e) Goods where the serial number has been
removed or made illegal
3. Warranty Period
The warranty on the ToooAir TA-680 Wide Area
IP 2 Way Radio is 12 months and the Battery is
4 months. No repair or replacement during the
warranty period will renew or extend the
warranty period past the period from the
original date of purchase.

10
ACMA Standard
The use of the Citizen Band radio service is licensed in Australia by the ACMA Radio communications
(Citizens Band Radio Stations) Class Licence and in New Zealand by the Ministry of Economic Development
(MED) General User Radio Licence (GURL) for Citizens Band Radio, and operation is subject to conditions
contained in those licences.
In Australia there are numerous repeater sites that input/receive channels for long distance
communication between sites. The repeaters work by taking input on channels 31 to 38 and 71 to 78, and
re-broadcast the signal on channels 1 to 8 and 41 to 48, to extend the range of the communication. While
operating in Australia certain transmissions must meet the ACMA standard they are as follows:
•CB transmitter shall not be operated on UHF emergency channels 5 and 35.
•No voice transmission is permitted on data (telemetry/telecommand) channels 22 and 23.
•Before transmitting on a channel always listen in on the channel selected to ensure it is not
already being used before transmitting.
•Avoid operation on locally used repeater input channels 31 to 38 and channels 71 to 78 or
locally used repeater receiving channels 1 to 8 and channels 41 to 48, unless long-distance
communication via the repeater facility is specifically required.
•Transmissions on channels 61 to 63 are inhibited and are reserved for future allocation.
The TA-680 meets the ACMA standard and will inhibit voice operation on channels 22 and 23 and inhibit all
operations on channels 61 to 63.
In the event that additional telemetry/telecommand channels are approved by the ACMA, these channels
shall be added to those currently listed where voice transmission is inhibited.
The TA-680 operates on narrowband (2.5 kHz deviation) 12.5 kHz channel spacing. This can lead to
potential operational issues with older equipment still operating on wideband (5.0 kHz deviation) 25 kHz
channel spacing. The original 40 channels were designed for wideband channel spacing and with the new
technology narrowband channel spacing has halved the channel spacing which is how we now have 80
channels. Older equipment still operating on wideband will only operate on original 40 channels and could
potentially interfere with narrowband 41 to 80 channels which sit inside the original 40 channel band. Due
to the deviation differences between the two channel spacings narrowband and wideband there will be
volume differences of the communication between the old equipment and the new equipment. A list of
currently authorized channels can be obtained from the ACMA website in Australia and the MED website in
New Zealand.
Important Notice
Table of contents
Other ToooAir Two-way Radio manuals

ToooAir
ToooAir TA-388 User manual

ToooAir
ToooAir TA-300 User manual

ToooAir
ToooAir TA-991 User manual

ToooAir
ToooAir TA-450 User manual

ToooAir
ToooAir TA-430 User manual

ToooAir
ToooAir TA-682 User manual

ToooAir
ToooAir TA-M10 User manual

ToooAir
ToooAir TA-995 User manual

ToooAir
ToooAir TA-308 User manual

ToooAir
ToooAir TA-990 User manual