ISOCAN APOLLO FYM QUICK START GUIDE
UK803110.DOCX : ISSUE 1.1 : 9.8.16 RDS PT NO. S/DC500-10-803 2
Product Setup
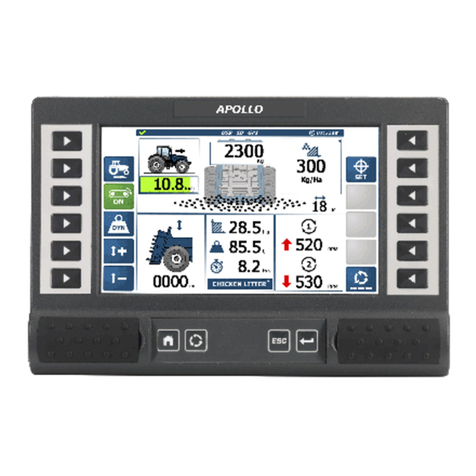
The system can store 10 different products with customizable names. Press or to select a product.
Press to edit a product name. You can also set the default application rate for the selected product and density. Enter a value
for the ‘T’ factor that approximates to the product density (kg/m3). By doing so, the calibration factor at the start of dynamic
calibration will then be able to self-correct in a shorter time.
Add Weight / Tare Calibration
The main screen displays the current weight remaining in the hopper, and is based on the actual weight measurement from loadcells.
The hopper contents display will automatically refresh with the current weight as product is loaded. The weight can be tared either
when the hopper is empty, or if it contains a known weight.
Dynamic (‘DYN’) Calibration
The system will normally be operated in Dynamic (‘DYN’) calibration mode. The weight of the product is constantly measured by the
loadcells . As dynamic calibration is constantly self-correcting, the operator should only have to select the product, ‘T’ factor and
working width. All other factors are adjusted in the background to ensure the correct rate is applied.
Static Calibration
The calibration factor is calculated by doing a “Static Test” routine. This factor remains the same throughout subsequent spreading
until either manually adjusted, or another static test is done. Static calibration assumes that the product density will be consistent,
therefore results may not be as accurate as with dynamic calibration.
Simply follow the screen prompts.
1. While stationary, press ‘OK’ to start the test.
2. The weight in the hopper is measured. The system then calculates the distance that must be driven, based on application rate and
spread width set, until the hopper weight decreases to a pre-set threshold.
3. Start spreading until prompted to stop.
4. Press ‘OK’ to measure the weight and calculate the new cal factor, which is then displayed.
5. Press ‘OK’ to confirm, and the ‘ESC’ to return to the Main menu.
