Topcon Positioning Group NORAC UC5 User manual

Topcon X25, X30, X35
Display Kit
Installation Manual
54VT-TC-X30

Copyright 2019 by NORAC Systems International Inc.
Reorder P/N: 54VT-TC-X30-INST Rev G (Topcon X25, X30, X35 Display Kit)
NOTICE: NORAC Systems International Inc. reserves the right to improve products and their specifications without notice and
without the requirement to update products sold previously. Every effort has been made to ensure the accuracy of the information
contained in this manual. The technical information in this manual was reviewed at the time of approval for publication.

1
Contents
1INTRODUCTION ...................................................................................................... 2
1.1List of Parts..........................................................................................................................................................................2
2INSTALLATION ........................................................................................................ 3
2.1CANbus Interface for Topcon Systems without an Apollo ......................................................................................3
2.2CANbus Interface for Topcon Systems with an Apollo.............................................................................................4
2.3Switch Box Installation ......................................................................................................................................................5
3CABLE DRAWINGS.................................................................................................. 6
3.1Item C25: 50250 – Switchbox ........................................................................................................................................6
3.2Item C26: 43240-47 – Cable UC5 Interface Switch Box - 50250...........................................................................7
3.3Item C40: 1015764-01 – Cable Topcon X25, X30 Cab Interface..........................................................................8
3.4Item C41: 1015765-01 – Cable Topcon CM-40 Interface........................................................................................9
4APPENDIX A: ALTERNATE CONFIGURATION ............................................. 10

2
1Introduction
The Topcon X30 Display Kit Manual is intended to be used in conjunction with the UC5 Spray
Height Control Installation Manual. This manual provides instructions to interface the UC5
Control Module to the Topcon X25, X30, and X35 displays. For installation of the rest of the
UC5 Spray Height Control System please refer to the sprayer specific manual provided with the
kit.
1.1 List of Parts
Item Part Number Name Quantity
C25 50250 SWITCHBOX 1
C26 43240-47 CABLE UC5 INTERFACE SWITCH BOX - 50250 1
C40 1015764-01 CABLE TOPCON X25, X30 CAB INTERFACE 1
C41 1015765-01 CABLE TOPCON CM-40 INTERFACE 1
M01
UC5-BC-MANUAL-OPERATOR
MANUAL UC5 OPERATORS 1
M04 54VT-TC-X30-INST MANUAL UC5 DISPLAY KIT TOPCON X25, X30, X35 1
M05 UC5-USER-REF-GUIDE MANUAL UC5 USER REFERENCE GUIDE 1

3
2Installation
2.1 CANbus Interface for Topcon Systems without an Apollo
1. Securely mount the control module (E01) in the cab of the sprayer.
2. Connect the ISO CAN LOOP connector on cable C40 to the CAN1/ISOBUS connector on
harness AGA4700 (Figure 1 - Green Box).
3. Connect the POWER connector on cable C40 to the SWITCHED POWER connector on
harness AGA4700 (Figure 1 - Red Box).
4. Connect the 6-pin Deutsch plug (NORAC ECU) on cable C40 to the end of the control
module with only one Deutsch connector (Figure 1 - Blue Box).
Figure 1: CANbus Interface for Topcon Systems without an Apollo

4
2.2 CANbus Interface for Topcon Systems with an Apollo
1. Securely mount the control module (E01) near the Topcon Apollo ECU.
2. Connect the SWITCHBOX connector on cable C41 to the SWITCHBOX connector on
harness 1009865-01 or harness 1009864-01 (Figure 2 - Green Boxes).
3. Connect the POWER connector (receptacle) on cable C41 to the SECTION VALVE
POWER connector on harness 1009865-01 or harness 1009864-01 (Figure 2 – Red Boxes).
4. Connect the POWER connector (plug) on cable C41 to the POWER connector on harness
1010282-01 (Figure 2 – Black Boxes).
5. Connect the Deutsch plug on cable C41 to the end of the control module with only one
Deutsch connector (Figure 2 - Blue Box).

5
2.3 Switch Box Installation
1. Disconnect cable C20 (Thru 2 connector) from the input module (E03). Remove the wedge
from the face of the 12-pin Deutsch plug. The wedge is removed by inserting a small flat
implement underneath the wedge and lifting it up.
2. Insert the Roll CW pin from C26 into position 3 of the 12-pin plug on C20. Insert the Roll
CCW pin from C26 into position 4 of the 12-pin plug on C20. Insert the wedge back into
the plug. Connect C20 to the Thru 2 connector on the input module.
3. Connect the 12-pin Deutsch plug on C26 to the OEM 3 connector on the input module.
Route the other end of the cable to the cab.
4. Attach the switch box (C25) inside the cab and connect it to cable C26.
* Some sprayer types may not use all the switch functions.
* Refer to “Appendix A” for sprayers with European style slant control.
Figure 2: Switch Box Installation

6
3Cable Drawings
3.1 Item C25: 50250 – Switchbox

7
3.2 Item C26: 43240-47 – Cable UC5 Interface Switch Box - 50250

8
3.3 Item C40: 1015764-01 – Cable Topcon X25, X30 Cab Interface

9
3.4 Item C41: 1015765-01 – Cable Topcon CM-40 Interface

10
4Appendix A: Alternate Configuration
If your sprayer has European style slant control, you will need to reconfigure the switch box as
shown below. This is only required for sprayer types which are driving the slant output from
the Input Module. Reconfigure the pins on cable C26 as follows:
Connector Pin Location Connector Pin Location
Power White Grey End (C26) 1 Grey End (C26) 1
Ground Black Grey End (C26) 12 Grey End (C26) 12
Remote Auto Brown Grey End (C26) 11 Grey End (C26) 11
Remote Manual Blue Grey End (C26) 10 Grey Side (C20) 4
Main Up Purple Grey End (C26) 9 Grey End (C26) 9
Main Down Yellow Grey End (C26) 8 Grey End (C26) 8
Roll CW Red Grey Side (C20) 3 Grey End (C26) 6
Roll CCW Orange Grey Side (C20) 4 Grey End (C26) 10
European Style Slant Configuration
Wire Color
Function
(Cable C26)
Normal Configuration

TOPCON Agriculture Canada
3702 Kinnear Place
Saskatoon, SK S7P 0A6
TOPCON Agriculture Americas
W5527 Hwy 106
Fort Atkinson, WI 53538
TOPCON Precision Agriculture Europe
Avenida de la industria,
35, Tres Cantos, España
Spain
Support
Phone: 888 979 9509
Web: www.norac.ca
Other manuals for NORAC UC5
1
This manual suits for next models
3
Table of contents
Other Topcon Positioning Group Control System manuals
Popular Control System manuals by other brands

TJERNLUND
TJERNLUND UCRT installation instructions

Gecko
Gecko Aeware Swim spa solution Tech book
TSI Instruments
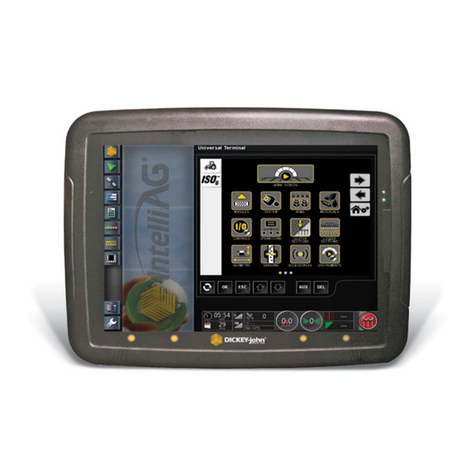
TSI Instruments DICKEY-john INTELLIAG ISO6 Operator's manual

Minitech
Minitech Mini-Mill Series user guide

LEGRAND
LEGRAND Pass & Seymour Harmony De-Hummer installation instructions
Gecko
Gecko in.yj-2 Quick start card
