Topper WOW RO 50 Instruction Manual

23880 Madison Street, Torrance, CA 90505 - (310) 375-5000 - www.wowwater.com
Rev G - 8/17/20
Powered by
Scan with QR Reader App
Visit our website: www.wowwater.com
INSTALLATION & USER MANUAL
for WOW RO™ Systems
MODEL: WOW RO 50
Part #: 20-209-001 / 20-210-001 with Leak Detection Base
20-810-001 Leak Detection Base
20-215-001: WOW RO 180 Conversion Kit
Place Data Label Here

2
The WOW RO System operates by removing contaminants from water at the molecular level. By
using your household water pressure to squeeze your water against a special membrane, water
molecules are separated from impuries. Rejected dissolved solids are automacally rinsed down
the drain leaving only high-quality, delicious water for you to use.
1. The WOW RO System will replenish approximately 1.5 gallons (5.7 L) in 35–90 minutes, de-
pending on your incoming water pressure, quality, and temperature. This appliance is designed
with a self-regulang, atmospheric producon, and a ush feature that limits the reject water
to approximately 2 gallons (7.6 L) for every gallon (liter) of treated water. Your appliance will
perform beer and last longer with heavy use. We encourage you to water house plants, pro-
vide water for pets, cook, mix drinks, ll baeries, etc., with treated water. Cauon: The work-
ing capacity of this appliance depends on the pressure, temperature and TDS load of the wa-
ter supply. This appliance is not guaranteed to work properly with water pressure less than 20
psi (1.4 bar) and water temperature below 40°F (4°C), or above 100° (37.8C), and TDS over
1,400 ppm.
Introduction to The WOW RO System
General Information
2. The storage tank will store 1.5 gallons (5.7 L) of water.
3. The WOW RO System can be connected to a variety of appliances, including your automac ice
maker, cold water dispenser in the refrigerator door, coee maker, water cooler, and other
commercial applicaons.
4. The WOW RO System is designed to be connected to cold water only.
Cauon: Never run hot water through your appliance.
5. The ow of water through your treated water faucet will not be as strong as your sink faucet.
6. The WOW RO System is made of safe, non-toxic, health and environment-friendly materials.
BPA Free.
Warning: Do not allow your appliance to freeze.
Figure 1: Installation Diagram

3
Figure 1: Installaon Diagram

4
Introducon to The WOW RO System .......................................................................................2
General Informaon...................................................................................................................2
The Many Uses of RO Water......................................................................................................5,6
Secon 1-Installaon & Start-up Procedures...........................................................................7
Avoid Common Mistakes............................................................................................................8
Pre-installaon Checklist............................................................................................................9
Installaon Tool List ...................................................................................................................9
Installaon Kit Contents.............................................................................................................10,11
Part Inspecon ...........................................................................................................................12
Proper Placement of Filters........................................................................................................12
Installing the Filter Cartridges....................................................................................................13
Connecng the System...............................................................................................................14
Start-up Procedure.....................................................................................................................15
Secon 2-Connecng Leak Detecon System to WOW RO System, 810, 180, 210................16-18
Aaching the Leak Detecon System ........................................................................................17
Starng the WOW RO 50 with the Leak Detecon System .......................................................17
Final Inspecon...........................................................................................................................18
Secon 2-Connecng Addional Appliances to WOW RO System .........................................19
Connecng to Mulple Appliances ............................................................................................20
Refrigerator/Ice-maker/Coee-maker/Cooler setup ................................................................21-26
Secon 3– When More Water is Needed .................................................................................27
Adding Extra Storage Tanks........................................................................................................28
Modular Expandability ...............................................................................................................29
Secon 4-Plumbing the Sink......................................................................................................30
Install the Drain Saddle Assembly..............................................................................................31
Prepare the Sink for RO Faucet Installaon...............................................................................32
Install the Primary Shut-O Valve..............................................................................................33
Secon 5-Maintenance..............................................................................................................34
Changing Filters ..........................................................................................................................35
Recommended Filter Replacement............................................................................................36
WOW RO System Appliance.......................................................................................................37
Sanizing Water-on-Water ........................................................................................................38
Recommended Literature & Videos...........................................................................................39
Secon 6-Troubleshoong ........................................................................................................40
Troubleshoong Tables..............................................................................................................41,42
Owner Informaon.....................................................................................................................43
2 Year Limited Warranty ............................................................................................................44
Customer Service Notes.............................................................................................................45,47
NSF/ANSI 58 Cercaon—Performance Data Sheet...............................................................48
Contents

5
INTERNAL BODY CLEANSING: Water is vital to every process in the body. It also cleanses the body of toxins that aect
our well being, provided it is suciently pure. Beverages like juice, soda, etc., cannot perform this funcon. Try 6 - 8
glasses of WOW WATER each day for a month and see if you don’t experience a noceable change in some aspect of
your health and wellbeing. WOW WATER is the foundaon of every excellent cleansing program recommended by your
health advisor.
COOKING: Ordinary tap water contains chemical addives, mineral salts, and organic impuries , that interfere with the
natural avor of vegetables, soups, and nearly anything cooked in or with water. We even recommend cooking food
like spaghe or steaming vegetables in WOW WATER – something boled water users nd much too costly. One of
the unexpected benets you’ll discover is that your WOW WATER puts an end to the annoying scale build-up on your
pots and pans.
JUICES AND MIXES: “Just add water,” the label says. Your WOW WATER system allows you to add water without the
impuries and bad taste. Juice concentrates, parcularly, will taste beer than ever. Why? Because you’ll be replacing
the same pure water removed from the fresh juice during processing which allows the full avor to develop.
COFFEE, TEA, AND OTHER BEVERAGES: Most beverages are over 95 percent water and turn out to be no beer than
the water from which they are made. Mineral salts and organic tastes and odors interfere with the chemistry of coee
and especially tea making. Your WOW WATER allows the full essence of your brews to come through.
ICE CUBES: If your ice is cloudy or melts too quickly, you won’t believe the dierence your WOW WATER makes! It’s the
mineral salts in water that make ice cloudy and so. With WOW WATER, you can expect clearer, harder ice that melts
slowly, won’t spoil the avor of beverages, and leaves no annoying residue in your mixed drinks.
LOW SODIUM DIETS: Your WOW WATER system produces water that is perfect for most low sodium (salt restricted)
diets. Excess processed table salt (sodium chloride) intake has been linked to hyper-tension and weight gain for some
individuals. For those who have a water soener, this too, adds sodium to the water but with a WOW WATER system,
drinking water sodium levels will be praccally eliminated.
WEIGHT LOSS DIETS: Excess mineral salts in tap water and soened water can result in an increase in body uids and
therefore weight. Your WOW WATER compliments any weight loss program by minimizing this factor. If you’ve been
consuming tap water, try this: Drink at least six glasses of your WOW WATER throughout the day for one month –
without changing anything else in your diet. See if you aren’t delighted by the number of pounds you’ll shed!
RINSING HAIR: For the absolute soest, shiniest hair, there is nothing like a nal rinse with your WOW WATER . It has
none of the dulling chemicals or mineral salts that are le behind by city water when your hair dries. Furthermore, the
pH of WOW WATER is ideal for maintaining opmum hair and skin. Just wash and rinse your hair as usual. Then, pour a
container (one quart or liter will do) of your WOW WATER over the hair (you might want to warm it a bit on the stove
or microwave). Gently towel dry and appreciate the wonderful results.
PLANTS: There’s a lot of misunderstanding about the best water to give your house plants. Many people think that the
mineral salts in water are important for the growth of their plants. This is generally untrue. Nature intended plant life
to have rain water which is void of mineral salts. Plant nutrients are supplied by elements and bacteria in the soil. All of
your greenery, including cut owers, will thrive beer and longer on your WOW WATER . Poed plants won’t have to
be ushed out regularly to get rid of mineral salt build-up when your WOW WATER is used. Try it; the dierence can
be dramac.
The Many Uses of RO Water

6
STEAM IRONS: Your WOW WATER is far superior to tap water for use in steam irons. Mineral salts from tap water build
up around the heang elements and waste expensive electricity as well as clog steam vents. Your WOW WATER reduc-
es mineral salt build-up and will substanally extend the life of your steam iron.
HUMIDIFIERS: Humidiers evaporate water into the air leaving whatever was in the water behind. The dirt, rust, and
mineral salts deposited in the humidier mechanism can cause it to become inecient, energy wasng, and nally self-
destruct. You will soon observe what a great asset WOW WATER can be to your humidier maintenance.
PREPARING CLEANING PRODUCTS: Many house-holds economize and “Go Green” by mixing their own cleaning solu-
ons from concentrates -whether for cleaning counters, oors, or windows. Dirt and mineral salts in tap water actually
interfere with the eecveness of cleaners, in addion to leaving a dulling residue of spots and streaks behind. If you
really want to make your products “new and improved” try mixing them with your WOW WATER . The results are very
noceable.
AQUARIUMS: Fish love pure water too! Whether you have fresh water sh or use fresh water to prepare saltwater
aquariums, it’s best to start with water having as few impuries as possible. The WOW WATER system not only eec-
vely removes excess mineral salts, but eliminates both free and combined chlorine (chloramines) which are highly tox-
ic to most sh. For fresh water aquariums, the WOW WATER should be added as make-up water at rst so sh become
gradually acclimated to the change of chemistry. Always consult with your aquarium specialist for his recommendaon
when using WOW WATER to replace large volumes of aquarium water.
AUTOMOBILE BATTERIES: Even though some baery manufacturers claim that it’s okay to use tap water, all car baer-
ies will last far longer on your WOW WATER . With the mineral salts virtually eliminated, your WOW WATER will not
interfere with the chemistry of your car baery and its lifeme will be maximized.
AUTOMOBILE WINDSHIELD WASHER: How many people do you know who would put boled water in their car’s wind-
shield washer? You should put your WOW WATER in your washer and see what a dierence it makes! The overspray
from your washers won’t leave such a mess of spots and streaks. This really becomes a favorite to those who try it.
SPOTLESS WINDOW WASHING: You can expect some impressive results using WOW WATER for window washing. Clean
the window with a cleaning soluon as usual. A large so brush is eecve and fast. Hose the windows down with tap
water. Then as a nal rinse, spray your WOW WATER over the windows with a plasc garden sprayer and allow them to
dry. There will be no spots and no streaks le behind by dirt or mineral salts. Beer yet, a lot of labor is saved from not
having to squeegee or towel dry the windows. This is how the real pros do it.
SPOT-FREE RINSING OF GLASSES AND CRYSTAL: If you’ve ever broken your favorite crystal wine glass drying it with a
towel, then you’ll really appreciate this. Aer washing as usual, rinse the glassware by dipping it in a large open contain-
er of WOW WATER and allow to air dry. The results will dazzle you.
SPOT-FREE CAR RINSE: Okay, this you may say is pushing it! But those who take the me to try this will be thoroughly
amazed and never go back to their old way of washing a car at home. First, save up at least ve gallons of your WOW
WATER in several plasc containers. Then, aer you have thoroughly washed and rinsed your car with tap water as
usual, do not wipe down or dry o the car. Instead, immediately pour the WOW WATER (or spray with a plasc garden
sprayer) over every inch of the car. The more, the beer. Then you can let your car air dry even in the direct sunlight. It
will dry spot free and shiny – all without having to wipe it o and risk scratching the nish. It’s almost a miracle and
worth the eort. Your car will even retain its ne nish longer.
The Many Uses of RO Water—Cont.

7
Secon 1
Installaon & Start-up Procedures

8
AVOID COMMON MISTAKES !
Review the most common missed steps made BEFORE starng. This will ensure an easy and
successful installaon.
1. Prepare and install all service components such as RO faucet, drain saddle, and pri-
mary shut-o valve before installing the WOW RO System (Pages 28-30).
2. Fully pre-ll lter cartridges according to (Step 3, Page 13) to remove all air before
aaching to system.
3. When installing pre-lled lters to system, you MUST make sure they are properly
aached and engaged to the stop tabs per Step 3 (Figure 3b, Page 13) instrucons.
Filters are labeled PRE, POST and RO. Ensure each lter matches posion on RO sys-
tem manifold. (Figure 3b, and 3c, Page 13).
4. Refrigerator/Icemakers and any other appliances beyond the primary faucet: You
must install a ball valve (isolaon valve) isolang any added appliance beyond the
primary faucet. (See Figure 5, Page 17). Valve must be in the closed or o posion
during the Start-Up Procedure. (See Step 5, Page 15).
5. Before beginning Start-up Procedures (Step 5, Page 15) make sure all tube connecons
match the Figure 1 diagram on Page 3.
6. Make sure system is ONLY connected to a cold water supply (Step 1, Page 9).
7. If your connecons to and from the WOW RO System have a leak (even one drop), the
system will not work. Repair leak (see Troubleshoong if necessary, Page 37) and re-
peat Start-up Procedures (Step 5, Page 15).
8. To avoid air-gap overowing onto counter, air-gap return line must never have loops or
sags in tubing.
9. If you are not using the WOW RO installaon kit, it is crical that installers use correct
color coded tubing (See installaon kit contents, Page 10).
10. If replacing an exisng RO system, make sure you replace all old tubing with new color
coded tubing.
Installation Steps and Start-Up Procedures

9
Installation Steps and Start-Up Procedures
Warning: Installaon of this appliance must conform with state and local plumbing codes,
laws, regulaons, and the instrucons provided with this appliance. Failure to install as in-
structed will void the product warranty.
Pre-Installaon Checklist
• Look under the sink to idenfy where the system will rest.
• To idenfy hot from cold, turn on hot water at the sink unl hot water is owing. Touch
pipes below and mark cold from hot.
• Idenfy desired locaon for the new faucet and mark sink for drilled hole, unless hole is
pre-exisng.
• Review tool kit supplies needed (Table 1).
• Open box and conrm 3 lter cartridges (PRE, POST & RO), 1 RO system (tank & manifold)
and installaon kit (if purchased *).
* If installaon kit is not purchased, you will need:
3— 4’ x 1/4” tubing
1— 3/8” Drain saddle (sized for air-gap or non air-gap)
1— 3/8” tubing if air-gap is desired
1— Primary Shut-O Valve
1— 1/4” WOW RO Emergency Shut-O Valve
1— Faucet with appropriate connector to 1/4” tubing
Step 1
Recommended Tool List Professional Installers “Must Have” Tool List
Relton drill 1-1/4” assembly (HST-20)
(porcelain sinks)
2 pressure gauges adapted to 1/4” tube
Greenlee 1/2” to 1-1/4” punch
(stainless steel sinks)
Conducvity or TDS meter
1” to 1-1/4” Carbide drill bit or hole saw Tubing cuer or sharp knife
7/16” open-end wrench
1/2” open-end wrench
9/16” open-end wrench
5/8” open-end wrench
Medium-sized (#2) Phillips screwdriver
Table 1:
Recommended Tool List
NOTICE:
Installaon of this system must include
air gap in drain pathway, regardless of
applicaon or faucet type

10
Installation Kit Contents
A
B
CD
E
F
G
H
I
G
Oponal: Air Gap Faucet or Non Air Gap Faucet

11
A. Non air-gap faucet
B. Air-gap faucet
C. Non air-gap faucet hardware
D. Air-gap faucet hardware
E. Drain saddle—(1/4”)
F. Drain saddle—(3/8”)
G. 1/4” WOW RO Emergency Shut-O Valve
H. Primary Shut-O Valve
I. Tubing for install connecons:
•Black 3/8” - Air-gap return line to 3/8”drain saddle
•Black 1/4” - Air-gap drain feed to faucet/D port to non air-gap drain
saddle
•Red 1/4”
•Blue 1/4”
Installation Kit Legend
The installaon hardware kit is not included with the WOW RO System. However, Topper
Mfg. does oer a Universal Hardware Kit without a faucet in addion to Installaon Kits
with air or non-air gap faucet.
Installaon Kit w/ Air-gap faucet (20-340-001)
Installaon Kit w/ Non-air-gap faucet (20-345-001)
Universal Installaon Kit w/ No Faucet (20-365-001)

12
Installation Steps and Start-Up Procedures
Inspect System Parts from Box
Cartridge Inspecon:
•Remove red cap on pre-lter and post-lter.
•Conrm that external large O-Ring is in place.
•Conrm that 2 smaller O-Rings are in place (located in center).
•Remove red cap on RO-membrane.
•Conrm that large external O-Ring is in place.
•Conrm that medium O-Ring is in place.
•Conrm that 2 small O-Rings are in place (located in center).
•If any O-Rings are missing, please call our service center: (866) 790-8911 ext: 4
Step 2
Proper Placement of Filters
Figure 2:

13
Install Filtration & RO Membrane Cartridges
1. Remove the red cap from top of the filter & RO membrane cartridges.
2. With a black permanent marker, write the date on each filter to track replacement time. Pre
and post filters last up to a year. RO cartridge may last longer (see Page 33).
3. Pre-fill all the cartridges with bottled water or tap water unl they overow from the top. Wait
3 minutes and top o as cartridges soak up water. Repeat unl all cartridges are completely
saturated and no air is present at the top.
4. Attach post-filter in the labeled POST position, RO membrane in the labeled RO position and
the pre-filter in the labeled PRE position, with a twisng counter clockwise upward moon unl
you feel and hear stop tabs touch and colored dots are aligned (see Figure 3).
Installation Steps and Start-Up Procedures
Step 3
Figure 3a:
Warning: Check to see if the cartridges are fully engaged. Visually confirm colored dots are lined up and
white cartridge stop tabs are flush with black manifold stop tabs prior and after pressurization of system.
Figure 3b:
Figure 3c:
POST RO PRE POST RO PRE

14
Connect the System
WOW RO System port idencaon markings molded into the top of
the manifold: (See Figure 4).
• F: Feed (¼” red)
• D: Drain (¼” black)
• FA1: Faucet/Accessory 1 (⅜” blue)
• FA2: Faucet/Accessory 2 (¼” blue)
• PW: Used for tesng or addional storage.
• SQ: Used for tesng or addional storage.
• RF: Do not touch (pre-connected).
NOTE: Ports that are not used require the appropriate sized plug.
(Included).
A. With the WOW RO System in place, remove any port plugs as necessary (push in the white col-
let to release) and make the following connecons:
B. Feed F connecon: Take the 1/4” red tubing and snip o a 6” length. Take the long end of re-
maining tubing and aach it to the Primary Shut-O Valve (cold water supply). Aach other end
to the WOW RO System Emergency Shut-O Valve (in installaon kit). With the 6” tubing,
aach one end to the WOW RO System Emergency Shut-O Valve and the other end to the gray
“F” port (See Figure 1, Page 3: Installaon Diagram).
C. Drain D connecon:
i. Air-Gap Faucet
Route the free end of the 1/4” black tubing aached to the RO faucet air-gap to the connec-
on marked “D”. Air-gap faucet, (See Figure 12, Page 29).
ii. Non Air-Gap Faucet *
Route the drain line connecon (saddle clamp or other) to the connecon marked “D”, us-
ing the 1/4” black tubing.
* Check local plumbing codes for compliance when using non air-gap faucets.
D. RO Faucet connecon:
FA1 (3/8”) or FA2 (1/4”) If there are no addional appliances (i.e. refrigerator/icemaker, coee
maker, cooler, etc.) to install then you have the choice of using either port for the RO faucet.
i. If the RO faucet is more than ten feet in distance from the WOW RO System, then the 3/8”
FA1 port is preferred.
ii. Use the 1/4” FA2 port for the RO faucet and the 3/8” FA1 port for refrigerators/icemakers
etc.
Note: For connecng a REFRIGERATOR/ ICEMAKER, you MUST add a ball valve (isolaon valve) to properly iniate
the start-up. See Secon 2, Pages 16-23.
Installation Steps and Start-Up Procedures
Step 4
Figure 4:
System Connecons

15
Start-up Procedure
Before the WOW RO System is operaonal, it must be properly primed by removing all air from
the system.
Starng the WOW RO System:
A. Make sure the RO faucet and refrigerator ball valve (isolaon valve) is CLOSED.
B. Turn the Primary Shut-O Valve and Emergency Shut-O Valve on. Noce the sound of water
lling the system.
C. Within 3-4 minutes, the waste line from the system will open with a noceable exhaust of air
and water.
D. Aer waing another minute, open the RO faucet. Noce air/water exhausng from faucet
port. Wait for a steady stream of water and then CLOSE the faucet. (Refrigerator isolaon
valve sll closed).
E. Within 2 minutes, the waste port will open again with a shot of air/water exhausng. This can
be witnessed by by-passing the drain saddle and direcng the ow of the “D” line into a buck-
et. If the waste line stops within 2 to 3 minutes, repeat Step D & E, unl the ow from drain is
steady. If not, check for leaks on FA Line. You should noce a solid ow from the “D” Line.
Place the tube back into Drain Saddle. System should ll to a full status within 45 to 90
minutes. (See Note 1).
F. The system should be full, indicated by no audible or visible drain ow. Open the RO faucet
and empty the system to a trickle. (Refrigerator isolaon valve sll in closed posion).
G. Turn o the RO faucet and let the water make-up process rell the tank.
H. Repeat this process (Steps F & G) three (3) mes to completely prep and ush the lter car-
tridges and ensure the operaon of the system is stabilized. The refrigerator/icemaker ball
valve (isolaon valve) must be closed during this process and can only be opened when system
is full for the nal me. Next, you must follow procedures for bleeding lines, (Page 18).
I. System is now fully operaonal! If the system does not work, refer to Troubleshoong Guide,
(Page 37).
J. To insure the highest quality water, it is recommended to drain the system once a week.
Note 1: If your connecons along any FA lines have a leak (even one drop), the system will not work. Repair the
leak and repeat Start-up Procedure. Note 2: See Pages 16-23 if adding any appliances. Note 3: Unlike tradional
air charged RO systems, the WOW RO System will always have water in the tank, empty or full.
Step 5
Installation Steps and Start-Up Procedures

16
Section 2
Installing & servicing the 810 leak detection base
/180 conversion kit to WOW RO 50/210 System
Prepare the WOWRO 50 by removing the tubing from the grey regulator underneath the mani-
fold. Push in the collet ush and pull the elbow ng out from the regulator, disengaging tubing.
Remove elbow ng from the opposite end at the RF Port (Tip: remove ng by pushing the
collet ush, then pull ng). Remove elbows from tubing. Use one for the RF Port from leak de-
tector.
Adding a Leak Detection System to a WOWRO 50
Step 1
Warning:
All WOW RO systems with leak detection bases are sensitive to moisture. Leaks
from other appliances underneath the kitchen sink (eg: plumbing, garbage
disposal, Hot tanks, etc.) or spray from servicing other appliances may cause
premature triggering of the shut-off valve, shutting down the RO system.
Customers should be informed of this, so they could cover the system before
any work being done.

17
Place the WOWRO 50 System upside down to locate the 3 tank base fastener holes. Place leak
base onto the tank base and align with the fasteners holes. Using the phillips head screws sup-
plied. Aach all of the screws to their stop point. DO NOT OVER-TIGHTEN ! Do same for 180 kit.
Attaching Leak Detection System 50
Turn system right side up. The 180 tray comes pre-plumbed. For the short tray, plumbing needs
to be assembled. Aached one end of the short tube to the regulator. Push in to a complete stop
(double check). Aach the other end of the short tube to the “IN” port of the leak detector.
Aach one end of the long tube to the RF Port. Aach the other end of the long tube to the
“OUT” port of the leak detector. Push in to a complete stop (double check).
This completes the Leak Tray addon.
OFF
Starting the WOWRO 50 with the Leak Detection
Go to the Installaon Manual and follow direcons on pages 13, 14, 15.
NOTE:
Your system now has an added shut-o switch. To start the system, all feed valves need to be
in the on posion, including the Leak Switch.
ON
Step 2
Step 3

18
Final Inspection—Important
Aer going to the Installaon Manual and following direcons on pages 13, 14, 15.
Start your system and ensure that your installaon is completely (leak free) and making water,
make sure to completely wipe down the system and make sure the system is dry, prior to installing
leak pads, to ensure leak pads do not swell, shung system o.
Install Leak Pads
Aer determining system is dry and operaonal, install leak pads by ipping the leak switch in the
OFF posion and placing the pad in it’s posion. Now ip leak switch in the ON posion.
NOTE:
Be sure to remove the leak pad from it’s plasc wrapping.
If any moisture is present, the leak pad will soak it up and trigger the switch and shut o the
system.
Filter Change Page 32 in User Manual
Remove leak pad before servicing system with lter changes.
A. First ip leak switch in the ‘OFF’ posion.
B. Use any needle to be pressed into the pad to easily remove the pad.
C. Make your service changes and restart machine following the user manual , page 15-A, B, C, D
and E. Be sure to lower the leak detector lever turning system on.
D. Once system is in working order, making sure system pool is completely dry. Li lever of leak
switch and place leak pad back into detector and closed switch to the ‘ON’ posion.
Step 4
Step 5
Step 6
Troubleshooting
PROBLEM REASON SOLUTION
System won’t make water Leak switch has been triggered to the
‘OFF’ posion.
Remove swollen leak pad, switch to the ‘ON’
posion and invesgate for a leak and repair.
Aer repair, replace leak pad and restart.
NOTE:
It is possible that leaks from other appliances or other water sources may be received into the leak sys-
tem pool, triggering the system in the ‘OFF’ posion.
Customer should invesgate then make the appropriate calls.

19
Secon 3
Connecng Addional Appliances to
WOW RO System
When connecng addional appliances to the WOW RO System, you must install a ball valve
(isolaon valve) isolang any added appliance beyond the primary faucet. (See Figure 5, Page
17). Valve must be in the closed or o posion during the Start-Up Procedure. (See Step 5,
Page 15).
There are many reasons why addional storage is required. If the system is installed in houses
with larger families, cooking needs alone may warrant more storage. In addion, devices with
larger storage capacies like coolers, will require greater draw down needs. Draw down refers
to amount of water that is released when opening up the faucet and emptying the tank from
start to nish (single pull). A standard WOW RO System holds 1½ gallons. The WOW RO System
has been designed in a modular format to add addional storage tanks as needed. (See Sizing
Chart, Page 17).

20
The WOW RO System is uniquely designed to connect to one or more appliances (Figure 5), includ-
ing refrigerator icemakers and door dispensers, coolers (both gravity fed and pressurized), under-
the-counter hot & cold vented systems, commercial steamers (restaurants), commercial and coee
makers, and other appliances that benet from RO water. This secon addresses “Do’s and Don’ts”
of connecng to one or more appliances. It also addresses how to determine storage and expan-
sion needs depending on how many appliances are hooked up.
General MUST Do’s for connecng ANY addional appliances:
A. It’s a must that the lter and water lines to any and all add-
ed outlets be clear of air. Note: System will not work with
air in the lines.
B. Close the isolaon valves to all addional outlets.
C. Charge the system to its full status (refer to Start-up,
Page 15).
D. Follow the instrucons provided from Pages 16-23.
Determining Your Expansion and Storage Needs:
A standard WOW RO System holds 1½ gallons. The WOW RO System has been designed in a mod-
ular format to add addional storage tanks as needed.
Review the chart below for each device connected. Add all addional tanks needed from right
hand column to determine the complete storage needs.
* Check device manual for actual reservoir capacity.
Connecng to Mulple Appliances
Device Average Reservoir in
Gallons *
Esmated Addional Tanks
Needed
Refrigerator / Icemaker 0 gallons None
Commercial Coee Maker 1 gallon 0-1
Depending on draw down
needs at peak periods (See
Page 16 for draw down deni-
on). Count glass/cups per
hour to determine if greater
than 1 gallon.
Gravity Cooler Up to 3 gallons 1
Pressurized Cooler Up to 3 gallons 1
Vented Hot Box 2/3 of a gallon or 84 oz. 0
This manual suits for next models
4
Table of contents
Popular Water Filtration System manuals by other brands
Aqua Nova
Aqua Nova NPUV 1500 Use manual

PureEffect
PureEffect Compact installation instructions

Steinbach
Steinbach Speedclean Comfort 50 ORIGINAL OWNER'S MANUAL

Parkside
Parkside PFT 20 A1 Translation of the original instructions
Watts
Watts LYNC UV-H Installation, operation & maintenance manual
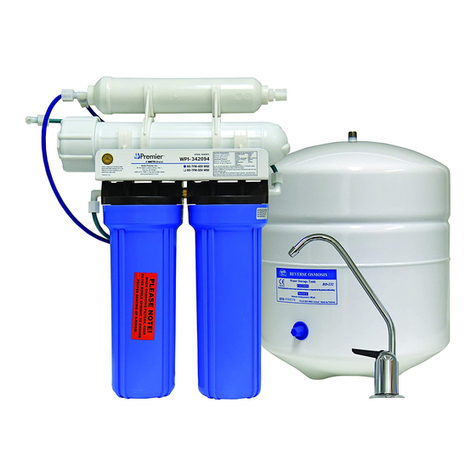
Watts Premier
Watts Premier RO-TFM-4SV Installation, operation and maintenance manual


