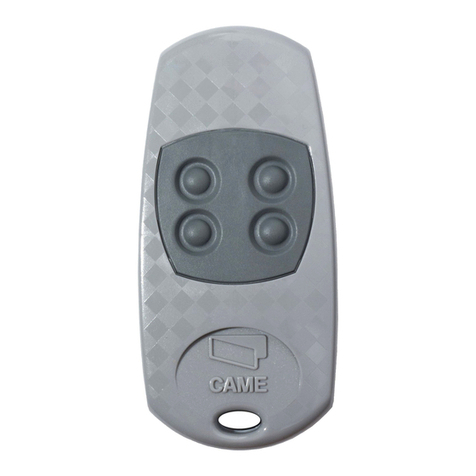
Tormatic Digicode 433 Premium Manual

____ ____
click
____ ____
3 Sec.
3 Sec.Sec.
2 x 3V/CR2032
(Li/MnO2)
STOP
12 sec
____ ____
WN 918013-37-6-50 05/22
~
*** Example
Digicode 433 Premium
Digicode 433 Professional
Digicode 868 Premium
Digicode 868 Professional
DE Batteriewechsel
EN Changing the battery
FR Changement des piles
NL Vervangen van de accu
ES Cambio de la pila
IT Cambio della batteria
PL wymiana baterii
PT Substituição das pilhas
CS Výměna baterie
EL Αλλαγή μπαταριών
HU Elemcsere
HR Zamjena baterijal
SL Zamenjava baterij
DA Batteriskift
NO batteriskifte
SV Batteribyte
FI Patterinvaihtol
LT Baterijų keitimas
RU замена батареи
TR Pil değiştirme
DE Einlernen Startfunktion / Zusatzfunktion
EN Teach-in start function / additional function
FR Apprentissage Fonction Démarrage / Fonction
complémentaire
NL Aanleren van de startfunctie / extra functie
ES Memorización de la función de arranque/función adicional
IT Apprendimento funzione di avviamento / funzione
supplementare
PL kodowanie funkcji start / funkcja dodatkowa
PT Memorização função de arranque / função adicional
CS Zadat startovací funkci / dodatečnou funkci
EL Εκμάθηση λειτουργία εκκίνησης / πρόσθετη λειτουργία
HU Indítási funkció / kiegészítő funkció betanítás
HR Inicijalno programiranje startne funkcije/dodatne funkcije
SL Učenje vklopa / dodatnih funkcij
DA Indlæring startfunktion / ekstra funktion
NO innlæring startfunksjon / tilleggsfunksjon
SV Lära in startfunktion / tillsatsfunktion
FI Käynnistystoiminnon / lisätoiminnon opettaminen
LT Įjungimo ir papildomos funkcijos programavimas
RU обучение функция запуска / дополнительная функция
TR Başlatma Fonksiyonunu / ilave Fonksiyon Hakkinda

Montage- und Bedienungsanleitung
Bestimmungsgemäßer Gebrauch
Der Handsender ist ausschließlich zur Bedienung
von Torsteuerungen und –antrieben sowie
weiterem Zubehör von TORMATIC®-Produkten
geeignet. Veränderungen am Produkt dürfen nur
mit ausdrücklicher Genehmigung durch den
Hersteller vorgenommen werden.
Sicherheitshinweise
Schützen Sie das Produkt vor permanenter
direkter Sonneneinstrahlung. Kinder dürfen nicht
mit dem Produkt spielen. Tauchen Sie das Produkt
nicht unter Wasser. Lassen Sie keine Flüssigkei-
ten in das Produktinnere eindringen.
Entsorgung
Das Produkt darf nicht im Hausmüll entsorgt
werden. Zur kostenfreien Rückgabe stehen in Ihrer
Nähe Sammelstellen für Elektro- und Elektronik-
Altgeräte zur Verfügung. Die Batterie muss vor der
Entsorgung aus dem Produkt genommen werden.
1. Montage
Unterteil mit 2 Schrauben befestigen.
2. Batteriewechsel
3. Passiercode anlegen
Gewünschten Passiercode zwischen 2 - 6 Ziffern
festlegen und notieren 3a (z. B. Herr Müller 3228),
eingeben 3b und anschließend Schlüsseltaste für
3 Sek. gedrückt halten bis die LED erlischt 3c.
Sie können bis zu 10 unterschiedliche
Passiercodes eingeben bzw. bis zu 10 Tore öffnen.
4. Empfangsgerät einrichten - Kanal zuweisen
- Einmal Taste am Empfangsgerät betätigen, auf
der Anzeige erscheint die Ziffer 1 4a.
- Sobald die Anzeige blinkt, geben Sie den Pas-
siercode und drücken anschließend die Schlüs-
seltaste (siehe Bild 5). Sobald der Code einge-
lesen ist, blinkt die rote Punktanzeige 5 mal 4b.
Beispiel: Jetzt kann Herr Müller mit dem Passier-
code 3228 das Garagentor 1 öffnen.
5. Passiercode Öffnen bzw. Schließen des
Tores
Passiercode eingeben (z. B. Herr Müller 3228) und
die Schlüsseltaste drücken. Beim Absenden des
Funkcodes leuchtet die LED.
Innerhalb der nächsten 12 Sekunden haben Sie
die Möglichkeit durch eine beliebige Taste einen
Funkcode zum Stoppen des Tores
(Panikfunktion) abzusenden.
6. Löschen aller eingegebenen Passiercodes
Schlüsseltaste kurz betätigen, den sechs-stelligen
Resetcode eingeben und die Schlüsseltaste erneut
kurz betätigen.
Den Resetcode bitte von Bild 6 entnehmen.
Klingeltaste
Bei Betätigung der Klingeltaste wird direkt der zu-
gehörige Funkkanal ausgesendet.
Diese Taste kann zum Steuern von Zusatzgeräten
z. B. Lichtschalter oder Klingel verwendet werden.
Dazu Empfänger wie in Bild 4 einrichten und Kanal
zuweisen.
Panikfunktion
Die Panikfunktion kann aus- oder
wiedereingeschaltet werden indem Nummerntaste
1 und 3 für 3 Sekunden zusammen betätigt
werden bis die LED erlischt.
Codeschutz
Nach 5 falsche eingegebenen Passiercodes wird
für eine Wartezeit von 30 Sekunden keine Taste
angenommen.
Diese Montage-, Bedienungs- und Wartungsanleitung ist während der gesamten Nutzungsdauer aufzubewahren!
Retain these installation, operating and maintenance instructions for the full duration of the operator's service life!
Prière de conserver cette notice de pose, d'emploi et d'entretien pendant toute la durée d'utilisation!
Fitting and Operating Instructions
Intended use
The hand-held transmitter is only suitable for
operating door controls and door drives as well as
other accessories of TORMATIC® products. Never
make any modifications or changes to the product
that have not been expressly approved by the
manufacturer.
Safety information
Protect the product from permanent direct sunlight.
Children shall not play with the prod-uct. Do not
immerse the product in water. Make sure that no
liquids penetrate the inside of the product.
Disposal
The product must not be disposed of with the
household waste. You will find collection points for
free return of waste electrical and electronic
equipment in your vicinity. The battery must be
removed from the product before disposal.
1. Fitting
Fasten bottom part in place using 2 screws.
2. Changing the battery
3. Establishing the pass code
Establish a pass code between 2 - 6 digits 3a and
note it down (e. g. Mr Smith 3228), key in 3b and
then keep the key button pressed for 3 seconds
until the LED goes out 3c.
You can input up to 10 different pass codes Resp.
open up to 10 doors/gates
.4. Setting up the receiver unit and allocating a
channel
- Press button on receiver unit once, digit 1 is
displayed 4a.
- As soon as the display flashes, enter the pass
code and then press the key button (see figure
5).As soon as the code has been read in, the
red point display flashes five times 4b.
Example: now Mr Smith can open garage door 1
using the pass code 3228.
5. Pass code for opening or closing the door
Key in the pass code (e. g. Mr Smith 3228) and
press the key button. When the radio code is
transmitted, the LED glows.
Within the next 12 seconds you have the possibility
via any chosen button of transmitting a radio code
to stop the door.
6. Deleting all keyed-in pass codes
Press the key button briefly, enter the six-digit reset
code and press the key button briefly again.
Please take the reset code from Fig. 6.
Bell button
On pressing the bell button the corresponding
radio channel is directly transmitted.
This button can be used to control additional
devices, e. g. light switch or bell. To do so, set up
receiver as shown in fig. 4 and allocate the
channel.
Panic function
The panic function can be switched off or on by
pressing the keys 1 and 3 at the same time for 3
seconds.
Encoding protection:
By pressing 5 wrong pass-codes, there will be an
interruption for 30 seconds when no button will
work.
Notice de pose et d'utilisation
Utilisation conforme
L'émetteur portatif est uniquement destiné à piloter
des commandes et des moteurs de porte ou autres
accessoires de produits TORMATIC®. Toute modi-
fication du produit est interdite sans autorisation
expresse du fabricant.
Consignes de sécurité
Protégez le produit contre une exposition
permanente aux rayons directs du soleil. Les
enfants ne doivent pas jouer avec le produit. Ne
plongez pas le produit dans l'eau. Ne laissez pas
de liquides pénétrer à l'intérieur du produit.
Élimination
Le produit ne doit pas être éliminé avec les
ordures ménagères. Des points de collecte gratuits
pour les appareils électriques ou électroniques
usagés sont à votre disposition à proximité de
chez vous. Retirez la pile avant d'éliminer le
produit.
1. Montage
Fixer la partie inférieure à l'aide de 2 vis.
2. Remplacement de la pile
3. Définir un code d'accès
Choisir un code d'accès de 2 à 6 chiffres et le
noter 3a (p. Ex. 3228 pour M. Dupont), le saisir 3b
puis maintenir enfoncée pendant 3 s la touche
représentant une clé jusqu'à ce que la diode
s'éteigne 3c.
Vous pouvez saisir jusqu'à 10 codes d'accès
différent et ouvrir jusqu'à 10 portes de garage.
4. Paramétrer le récepteur Assigner un canal
- Appuyer une fois sur la touche du récepteur, le
chiffre 1 apparaît à l'affichage 4a.
- Entrez votre code d'accès dès que l'afficheur
clignote, puis appuyez sur la touche avec la clé
(voir fig. 5). Dès que le code a été lu, le point
rouge à l'affichage clignote 5 fois 4b.
Exemple: M. Dupont peut maintenant ouvrir la
porte de garage 1 à l'aide du code d'accès 3228.
5. Ouvrir ou fermer la porte à l'aide du code
d'accès
Saisir le code d'accès (p.ex. 3228 pour M. Dupont)
et appuyer sur la touche avec la clé. La diode
s'allume lors de la transmission du code radio.
Dans les 12 secondes qui suivent, vous avez la
possibilité d'envoyer un code radio pour arrêter la
porte en appuyant sur une touche quelconque.
6. Effacer tous les codes d'accès saisis
Actionner brièvement la touche à clé, saisir le code
de réinitialisation à six chiffres puis actionner à
nouveau brièvement la touche à clé. Le code de
réinitialisation se trouve dans la figure 6.
Touche cloche
Le canal radio adéquat est directement émis au
moment de la pression sur la touche représentant
une cloche.
Cette touche peut être utilisée pour commander
des appareils supplémentaires, par ex. des
interrupteurs de lumière ou un carillon. Pour ce
faire, paramétrer le récepteur comme indiquer sur
les fig. 4 et lui assigner un canal.
Fonction anti-panique
La fonction anti-panique peut être désactivée
ou activée par la pression simultanée pendant
3 secondes des touches numériques 1 et 3
jusqu'à ce que la diode s'éteigne.
Protection du code
Si un code d'accès erroné est saisi 5 fois,
aucune touche n'a de fonction pendant 30
secondes.
Technische Änderungen vorbehalten! Subject to changes! Sous réserve de modifications!
FR
DE EN
À DÉPOSER À DÉPOSER
EN MAGASIN EN DÉCHÈTERIE
OU
FR
Cet appareil, ses
piles et cordons
se recyclent
Points de collecte sur www.quefairedemesdechets.fr
Privilégiez la réparation ou le don de votre appareil !
FR

Estas instrucciones de montaje, manejo y mantenimiento se deben guardar durante toda la vida útil!
Bewaar deze handleiding voor de montage, bediening en het onderhoud zolang u de ontvanger gebruikt!
Tento návod k montáži, obsluze a údržbě zařízení je nutné uchovávat tak, aby byl k dispozici po celou dobu používání zařízení!
Instrucciones de montaje y manejo
Uso previsto
El mando está concebido exclusivamente para
manejar los accionamientos y controles de portón,
así como otros accesorios de los productos
TORMATIC®. Solo se podrán realizar modifi
caciones en el producto con la aprobación expresa
del fabricante.
Indicaciones de seguridad
Proteja el producto de la radiación solar directa
constante. Los niños no pueden jugar con el
producto. No sumerja el producto en agua. Evite que
penetren líquidos al interior del producto.
Eliminación
El producto no se debe desechar en la basura
doméstica. En su entorno hay puntos de recolección
de residuos de equipos eléctricos y electrónicos
disponibles para una devolución gratuita. Antes de
desechar el producto, se debe extraer la pila.
1. Montaje
Fijar la parte inferior con 2 tornillos.
2. Cambio de la pila
3. Establecer el código de paso
Fijar el código de paso deseado de entre 2 - 6 cifras
y anotarlo 3a (p. ej. señor García 3228), introducirlo
3b y seguidamente mantener presionado el pulsador
de la llave durante 3 segundos, hasta que se apague
el LED 3c.
Puede introducir hasta 10 códigos de paso diferentes
o abrir hasta 10 puertas.
4. Ajustar el receptor asignar canal
- Accionar una vez el pulsador en el receptor;
aparece la cifra 1 en el indicador 4a.
- Tan pronto como parpadee el indicador,
introduzca el código de paso y pulse finalmente
el pulsador de la llave (ver figura 5). Tan pronto
como haya sido leído el código, parpadeará 5
veces el punto indicador rojo, 4b.
Ejemplo: el señor García puede abrir ahora la puerta
del garaje 1 con el código de paso 3228.
5. Código de paso para Abrir o Cerrar la puerta
Introducir el código de paso (p. ej. Señor García
3228) y presionar el pulsador de la llave. Al emitir el
código de radio brilla el LED.
Dentro de los próximos 12 segundos y por medio de
cualquier tecla, tiene usted la posibilidad de enviar un
código por radio para parar la puerta.
6. Borrar todos los códigos de paso introducidos
Accionar brevemente el pulsador con llave, introducir
el código de reset de seis dígitos y accionar de nuevo
brevemente el pulsador con llave. El código de reset
aparece en la figura 6.
Pulsador del timbre
Cuando se acciona el pulsador del timbre se emite
directamente el canal de radio correspondiente.
Este pulsador se puede emplear para controlar
aparatos adicionales, p. ej. interruptor de luz o
timbre. Para ello ajustar el receptor como en la figura
4 y asignar el canal.
Función de pánico
Para desactivar o volver a activar la función de
pánico, mantener pulsadas a la vez las teclas
numéricas 1 y 3 durante 3 segundos, hasta que se
apague el LED.
Protección del código
Si se introduce cinco veces un código de paso
incorrecto durante un tiempo de espera de 30
segundos no se aceptará ninguna tecla.
Návod k montáži a obsluze
Použití v souladu s určením
Ruční vysílač je určen pouze k obsluze ovládání vrat
a pohonů vrat, jakož i dalšího příslušenství výrobků
TORMATIC®. Změny produktu mohou být provedeny
pouze s výslovným povolením od výrobce.
Bezpečnostní pokyny
Chraňte produkt před trvalým přímým slunečním
zářením. Produkt nesmí být používán dětmi na hraní.
Neponořujte produkt nikdy do vody. Nedovolte, aby
do vnitřku produktu pronikly kapaliny.
Likvidace
Produkt se nesmí vyhazovat do domovního odpadu.
Pro účely bezplatného vrácení jsou vám ve vaší
blízkosti k dispozici sběrná místa pro staré elektrické
nebo elektronické přístroje. Před likvidací produktu je
nutné z něj nejdříve vyjmout baterii.
1. Montáž
Připevněte spodní díl pomocí 2 šroubů.
2. Výměna baterie
3. Založení přístupového kódu
Vytvořte si požadovaný přístupový kód o délce 2 - 6
číslic a poznamenejte si ho 3a (např. pan Müller
3228), zadejte jej 3b a nakonec podržte stisknuté
tlačítko s klíčem podobu 3 sekundy, až LED dioda
zhasne 3c.
Můžete zadat až 10 různých přístupových kódů, popř.
otevřít až 10 vrat.
4. Nastavení přijímače – přiřazení kanálu
- Stiskněte jedenkrát tlačítko na přijímači, na
displeji se zobrazí číslo 1 4a.
- Jakmile displej bliká, zadejte přístupový kód
a stiskněte tlačítko s klíčem (viz obrázek 5).
Jakmile je kód načten, zabliká pětkrát
červená tečka na displeji 4b.
Příklad: Nyní může pan Müller otevřít garážová vrata
1 s přístupovým kódem 3228.
5. Přístupový kód pro otevření, popř. zavření vrat
Zadejte přístupový kód (např. pan Müller 3228) a
stiskněte tlačítko. Při odesílání rádiového kódu svítí
LED dioda.
Během následujících 12 sekund budete mít možnost
odeslat rádiový kód pro zastavení dveří (funkce
Panika), a to pomocí libovolného tlačítka.
6. Vymazání všech zadaných přístupových kódů
Krátce stiskněte tlačítko s klíčem, zadejte šestimístný
resetovací kód a znovu krátce stiskněte tlačítko s
klíčem. Resetovací kód naleznete na obrázku 6 .
Tlačítko zvonku
Po stisknutí tlačítka zvonku se přidružený rádiový
kanál vysílá přímo. Toto tlačítko lze použít k ovládání
přídavných zařízení, jako je např. spínač světla nebo
zvonku. K tomuto účelu nasměrujte přijímač tak, jak
je zobrazeno na obrázku 4 a přiřaďte kanál.
Funkce Panika
Funkci Panika lze vypnout nebo znovu zapnout
současným stisknutím číselných tlačítek 1 a 3 po
dobu 3 sekund, dokud LED dioda nezhasne.
Ochrana kódu
Po zadání 5 chybných přístupových kódů nebude po
dobu 30 sekund žádný přijat signál z žádného
tlačítka.
Handleiding voor de montage en bediening
Bedoeld gebruik
De handzender is uitsluitend geschikt voor het
bedienen van deurbesturingen en -aandrijvingen,
evenals andere accessoires van TORMATIC®-pro-
ducten. Wijzigingen aan het product mogen
uitsluitend met nadrukkelijke toestemming van de
fabrikant worden uitgevoerd.
Veiligheidsaanwijzingen
Bescherm het product tegen direct zonlicht. Kinderen
mogen niet met het product spelen. Het product niet
onderdompelen in water. Zorg dat geen vloeistoff en
binnendringen in het apparaat.
Recycling
Het product mag niet worden weggegooid bij het
huishoudelijk afval. Voor het gratis inleveren zijn in
uw omgeving inzamelpunten voor gebruikte
elektronische of elektrische apparaten beschikbaar.
De batterij moet vóór het recyclen uit het apparaat
worden verwijderd.
1. Montage
Bevestig het onderstel met behulp van 2 schroeven.
2. Vervangen van de batterij
3. Vastleggen van de doorlaatcode
Leg de gewenste doorlaatcode tussen 2 en 6 cijfers
vast en noteer deze 3a (bijv. dhr. Mulder: 3228), voer
de code in 3b en houd vervolgens de sleuteltoets 3
seconden lang ingedrukt, tot de LED uitgaat 3c.
U kunt maximaal 10 verschillende doorlaatcodes
invoeren resp. maximaal 10 poorten openen.
4. Instellen van de ontvanger en toekennen van
een kanaal
- Druk 1 x op de toets op de ontvanger; in de
display verschijnt het cijfer 1 4a.
- Zodra het display begint te knipperen moet u de
doorlaatcode invoeren en vervolgens de
sleuteltoets drukken (zie afb. 5). Zodra de code is
ingelezen zal de rode LED 5 keer knipperen 4b.
Voorbeeld: Mulder kan nu met doorlaatcode 3228
garagepoort 1 openen.
5. Doorlaatcode voor openen en sluiten van de
poort
Voer de doorlaatcode in (bijvoorbeeld dhr. Mulder
3228) en druk op de sleuteltoets. Zodra de radiocode
uitgezonden wordt gaat de LED branden.
Na maximaal 12 seconden kunt u dan door een
willekeurige toets in te drukken een code doorgeven
om de beweging van de poort te stoppen.
6. Wissen van alle ingevoerde doorlaatcodes
Sleuteltoets even indrukken, de uit zes cijfers
bestaande resetcode invoeren en de sleuteltoets
opnieuw even indrukken. Voor de resetcode
verwijzen wij naar afbeelding 6.
Bel-toets
Wanneer op de bel-toets wordt gedrukt wordt het
signaal van het bijbehorende radiokanaal direct
uitgezonden.
Deze toets kan worden gebruikt om extra apparatuur,
bijv. een lichtschakelaar of bel, te besturen. Voor dit
doel dient een ontvanger te worden ingesteld zoals in
afbeelding 4 wordt aangegeven en dient een kanaal
te worden toegekend.
Paniek-functie
De paniek-functie kan uit- of weer ingeschakeld
worden door de cijfertoetsen 1 en 3 tegelijkertijd 3
seconden ingedrukt te houden totdat de LED wordt
gedoofd.
Codebeveiliging
Na 5 foutief ingevoerde doorlaatcodes kan
gedurende een wachttijd van 30 seconden geen
enkele toets geactiveerd worden.
Reservado el derecho a modificaciones! Technické změny vyhrazeny!Wijzigingen voorbehouden.!
NLES CS

7
AES 128 BIT
Classic KeeLoq
AES 128 BIT
ca. 8 sec.
DE EU-Konformitätserklärung
Hiermit erklärt TORMATIC, dass der Funkanlagentyp der
Richtlinie 2014/53/EU entspricht. Der vollständige Text der EU-
Konformitätserklärung ist unter der folgenden Internetadresse
verfügbar: www.tormatic.de/nc/downloads.html
EN EU Declaration of Conformity
TORMATIC hereby declares that the type of radio equipment
conforms to Directive 2014/53/EU. Please refer to the Internet for
the full text of the EU Declaration of Conformity:
www.tormatic.de/nc/downloads.html
FR Déclaration de conformité UE
Par la présente, TORMATIC déclare que le type d'installation
radioélectrique se conforme à la directive 2014/53/UE.
Le texte complet de la déclaration de conformité UE est
disponible à l'adresse internet suivante :
www.tormatic.de/nc/downloads.html
NL EU-conformiteitsverklaring
Hiermee verklaart TORMATIC dat het radioapparaat type de
richtlijn 2014/53/EU vervult. De volledige tekst van de EU-
conformiteitsverklaring is op de volgende website beschikbaar:
www.tormatic.de/nc/downloads.html
ES Declaración de conformidad UE
Por la presente TORMATIC declara que el tipo de sistema de
radio cumpla con la directiva 2014/53/EU. Una copia de la
declaración de conformidad UE, está disponible en la siguiente
dirección de Internet: www.tormatic.de/nc/downloads.html
IT Dichiarazione di conformità UE
TORMATIC dichiara con la presente che il tipo di apparecchiatura
radio è conforme alla direttiva 2014/53/UE. Il testo integrale della
dichiarazione di conformità UE è disponibile al seguente indirizzo
Internet: www.tormatic.de/nc/downloads.html
PL Deklaracji zgodności CE
TORMATIC niniejszym poświadcza, że typ urządzenia radiowego
odpowiada wytycznym 2014/53/UE. Kompletny tekst deklaracji
zgodności CE dostępny jest pod poniższym adresem
internetowym: www.tormatic.de/nc/downloads.html
PT Declaração de conformidade CE
TORMATIC declara com isto, que o tipo de o equipamento de
rádio está conforme com a directiva 2014/53/EU. O texto
completo da declaração de conformidade CE poderá ser
consultado no endereço: www.tormatic.de/nc/downloads.html
CS EU prohlášení o shodě
Tímto TORMATIC prohlašuje, že typ rádiového zařízení
vyhovuje směrnici 2014/53/EU. Úplné znění EU prohlášení o
shodě je dostupné na následující internetové adrese:
www.tormatic.de/nc/downloads.html
EL ΕΕ δήλωση συμμόρφωσης
Με την παρούσα δηλώνει η εταιρεία TORMATIC ότι ο τύπος της
ραδιοεγκατάστασης ανταποκρίνεται στις διατάξεις της Οδηγίας
2014/53/ΕΕ. Το πλήρες κείμενο της Δήλωσης Συμμόρφωση Ε.Ε.
θα το βρείτε στην ακόλουθη διεύθυνση διαδικτύου:
www.tormatic.de/nc/downloads.html
HU EK megfelelőségi nyilatkoztat
A TORMATIC cég kijelenti, hogy ez a típusú rádióállomás
megfelel a 2014/53/EU irányelvben foglaltaknak. Az EU
megfelelőségi nyilatkozat teljes szövege az alábbi internetcímen
található: www.tormatic.de/nc/downloads.html
HR Izjava o usuglašenosti sa normama Evropske unije
TORMATIC ovime izjavljuje, da tip radio uređaja odgovara
smjernici 2014/53/EU. Potpuni tekst EU-izjave suglasnosti stoji
na raspolaganju na sljedećoj internetskoj adresi:
www.tormatic.de/nc/downloads.html
SL EU-Izjava o skladnosti
TORMATIC s tem izjavlja, da tip radijske naprave ustreza
smernici 2014/53/EU. Celotno besedilo izjave o skladnosti EU je
na voljo na sledečem spletnem naslovu:
www.tormatic.de/nc/downloads.html
DA EU-overensstemmelseserklæring
Hermed erklærer TORMATIC, at denne radioudstyrstype er i
overensstemmelse med direktivet 2014/53/EU. EU-
overensstemmelseserklæringens fulde tekst kan findes på
følgende internet-adresse: www.tormatic.de/nc/downloads.html
NO EU-konformitetserklæring
Hermed forklarer TORMATIC, at funkanleggets type tilsvarer
direktivene 2014/53/EU. Den fullstendige teksten av EF-
konformitetserklaringen fines på den følgende internettadressen:
www.tormatic.de/nc/downloads.html
SV EU-Konformitetsförklaring
Härmed försäkrar TORMATIC, att radioutrustningen motsvarar
direktiv 2014/53/EU. Den fullständiga texten i EU-
konformitetsförklaring finns tillgänglig under följande
internetadress: www.tormatic.de/nc/downloads.html
FI EU-vaatimustenmukaisuusvakuutus
Täten TORMATIC todistaa, että radiolaitetyyppi
vastaa direktiiviä 2014/53/EY. EU-
yhdenmukaisuustodistuksen täydellinen teksti
löytyy seuraavasta Internet-osoitteesta:
www.tormatic.de/nc/downloads.html
LT Europos Sąjungos atitikties deklaracija
Šiuo TORMATIK pareiškia, kad šis radijo įrangos
tipas atitinka direktyvos 2014/53/ES reikalavimus.
Pilnas EB - atitikties deklaracijos tekstas yra
pteiktas šiuo interneto adresu:
www.tormatic.de/nc/downloads.html
RU Свидетельство о соответствии ЕС
Настоящим TORMATIC заявляет, что тип
радиоприбора соответствует директиве
2014/53/EU. Полный текст Заявления о
соответствии требованиям ЕС выложен по
следующему адресу в Интернет:
www.tormatic.de/nc/downloads.html
TR AB uygunluk belgesinin
İş bununla TORMATIC, telsiz cihaz tipinin
2014/53/AB Direktifi koşullarını yerine getirdiğini
beyan eder. AB uygunluk belgesinin tam metnini
aşağıdaki internet adresinde bulabilirsiniz:
www.tormatic.de/nc/downloads.html
EN Declaration of Conformity according to
Radio Equipment Regulations 2017
Hereby, TORMATIC declares that the radio
equipment type complies with the Radio
Equipment Regulations 2017. The full text of the
declaration of conformity can be found at:
www.tormatic.de/nc/downloads.html
TORMATIC®
Eisenhüttenweg 6
D-44145 Dortmund
www.tormatic.de
7. Umschaltung der Codierung
Halten Sie die Tasten 1, 3 und 0 zusammen für ca. 8 Sekunden gedrückt, bis die
LED erlischt, um die Verschlüsselung umzustellen.
Werkseinstellung: Classic KeeLoq (64 Bit)
7. Changing the encryption
Keep the buttons 1, 3 and 0 pressed together for about 8 sec until the LED goes out,
in order to change the coding.
Default setting: Classic KeeLoq (64 Bit)
DE
EN
7. Commutation du codage
Pour modifier le cryptage, appuyez en même temps sur les touches 1, 3 et 0 pendant
env. 8 secondes, jusqu'à que la LED s'éteigne.
Réglage usine: Classic KeeLoq (64 Bit)
FR
7. Cambiar la codificación
Para cambiar el cifrado, mantenga pulsadas las teclas 1, 3 y 0 durante aprox.
8 segundos hasta que se apague el LED.
Configuración de fábrica: Classic KeeLoq (64 Bit)
ES
7. Omschakeling van de codering
Houd de toetsen 1, 3 en 0 samen ca. 8 seconden lang ingedrukt totdat de LED dooft
om de codering om te schakelen.
Fabrieksinstelling: Classic KeeLoq (64 Bit)
NL
7. Přepínání kódování
Chcete-li kódování změnit, podržte tlačítka 1, 3 a 0 společně po dobu asi 8 sekund,
dokud LED dioda nezhasne.
Tovární nastavení: Classic KeeLoq (64 Bit)
CS
Digicode 433 Premium
Digicode 433 Professional Digicode 868 Premium
Digicode 868 Professional
f = 433,92 MHz f = 868,3 MHz
Perp < 10 mW Perp < 25 mW
-20 °C
+40 °C
This manual suits for next models
3
Other Tormatic Gate Opener manuals
Popular Gate Opener manuals by other brands
Beninca
Beninca BULL 1524 manual

Viking Access Systems
Viking Access Systems K-2 installation instructions
Erreka
Erreka MAGIC Installer manual

Estate Swing
Estate Swing E-S 1000H Series instruction manual
Chamberlain
Chamberlain LiftMaster CSW200UL Series owner's manual
Tuv nord
Tuv nord ACM 400 S Assembly, installation, connection and programming instructions for the fitter
