Tornado 99617 Manual

1
TORNADO INDUSTRIES, LLC
3101 WICHITA COURT
FORT WORTH, TX 76140
PHONE: 800-VACUUMS
FAX: 817-551-0719
WWW.TORNADOVAC.COM
Operations & Maintenance Manual
For Commercial Use Only
Form No. L9617MAB02/17©Tornado Industries, LLC. All rights reserved
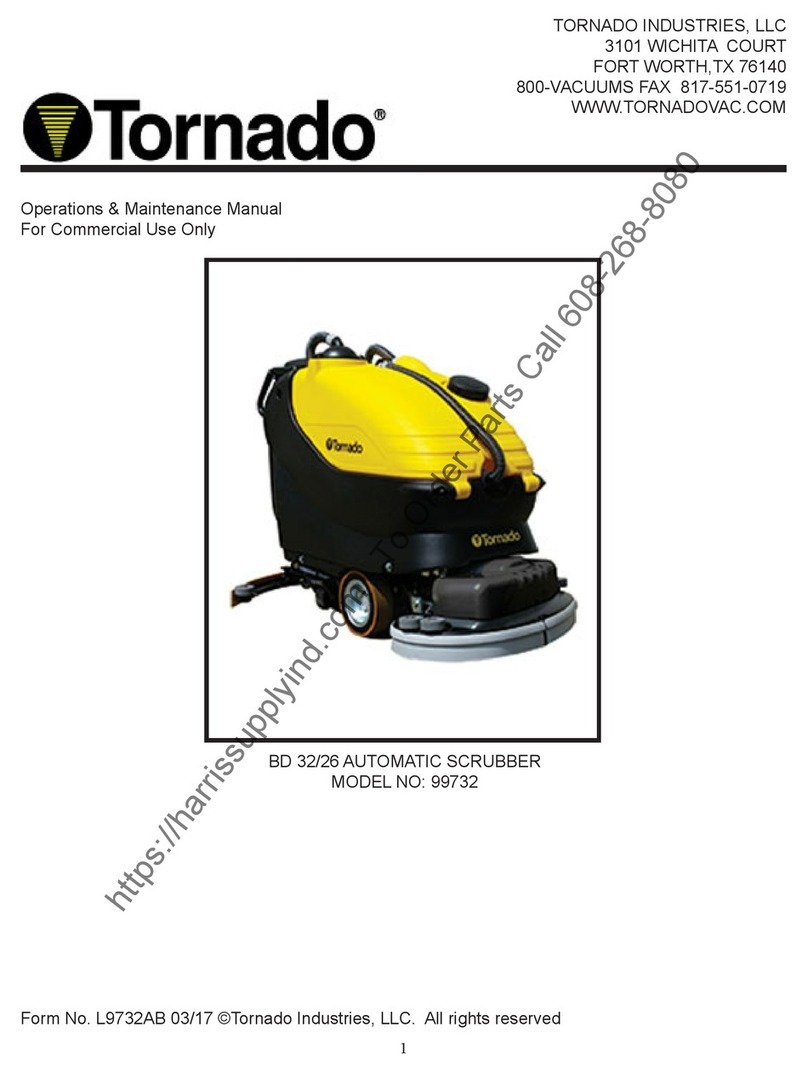
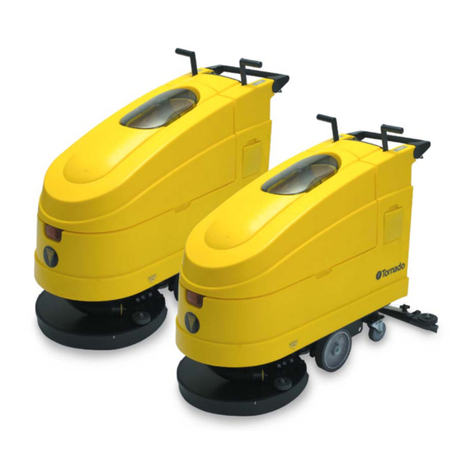
BD 17/6 17” AUTOMATIC SCRUBBER
MODEL NO: 99617

Long Term Buyer Protection Limited Warranty
10 Years*
Plastic water tanks and Rotationally-molded bodies
2 Years*
Parts on all Tornado cleaning equipment
1 Year*
Labor on all Tornado cleaning equipment
1 Year*
Warranty on batteries, one year prorated
All battery warranties are handled directly by the battery manufacturer, on a one year prorated basis
Tornado Industries, LLC. (Tornado) warrants to the end/user customer that the Tornado product(s) will
be free from defects in material and workmanship for the duration(s) described below. This limited
warranty DOES NOT cover machines and/or components subject to normal wear and tear, damage
that occurs in shipping, failures resulting from modication, accident, unsuitable operating environ-
ment, misuse, abuse, neglect, or improper maintenance by you. For full details, contact your Autho-
rized Tornado Distributor, Service Center, or the Tornado Technical Service Department. Tornado
sales and service representatives are not authorized to waive or alter the terms of this warranty, or to
increase the obligations of Tornado under the warranty.
Terms subject to change without notice
1. Except all Windshears™ Blowers, Storm, TV2SS, Side and Downdraft, Insulation Blowers, CV 30,
CV 38, CK14/1 PRO, CK 14/2 PRO, SWM 31/9, CK LW13/1, CK LW 13/1 ROAM, CV 38/48 Dual,
PV6, PV10, PV6 ROAM, Wall Mount Vacuum and all chargers are warranted for 1 (one) year for both
parts and labor.
2. All non-wear item parts purchased after warranty expiration are warranted for 90 days.
3. Warranty starts from the date of sale to the consumer or, at Tornado’s discretion, 6 months after
the dealer purchased the unit from Tornado, whichever comes rst.
4. The EB 30 is warranted for a period of 90 days for both parts and labor.
5. The warranty on engines used on propane powered equipment is limited to motor manufacturer’s
warranty.
6. Ride-on Scrubbers are warranted for 24 months, parts, 6 months labor or 1,000 hours, whichever
occurs rst.
Note: Tornado, The Latest Dirt, Floorkeeper,
Carpetkeeper, Carpetrinser, Carpetrinser/Dryer,
Headmaster, Taskforce, PAC-VAC, T-Lite, Glazer,
Windshear, Max-Vac and Trot-Mop are trademarks
of Tornado Industries
Website: www.tornadovac.com
Phone 1-800-VACUUMS
Fax 817-551-0719
Address 3101 Wichita Court
Fort Worth, TX 76140
Form F2662.©2017. All rights reserved
1-800-VACUUMS 90 Years of Cleaning Innovation A Tacony Company

3
NOTES

4
INTRODUCTORY COMMENT
Thank you for selecting our machine.
This oor cleaning machine is used for
the commercial cleaning of most types
of hard oors. During forward move-
ment, the combined action of the brush
and the detergent solution remove the
dirt which, is recovered through the rear
squeegee assembly, giving a perfectly
dry surface.
The machine must be used only for this
purpose. It gives the best performance
if it is used correctly and maintained in
good condition. Read this instruction
booklet carefully prior to using this ma-
chine and whenever difculties arise in
the course of the machine’s use. Con-
tact our service department for all advice
and servicing as may prove necessary.
GENERAL RULES OF SAFETY
The rules below must be followed care-
fully in order to avoid injury to the opera-
tor and damage to the machine.
- Read the labels on the machine care-
fully. Do not cover them for any reason
and replace them immediately if dam-
aged.
- The machine must be used only by au-
thorized staff that have been instructed
on its correct and proper use.
- When operating the unit, pay attention
to other people and especially to chil-
dren.
- Do not allow the machine to be used
as a toy.
- The machine is not to be used by per-
sons, with reduced physical, sensorial
or mental capabilities, or with lack of
experience and/or knowledge.
- The outlet for the charger must be
equipped with a standard electrical
ground system.
- Do not allow the cord to become dam-
aged.
- Do not mix different detergents.,
- Storage temperature: between 32°F
(0°C) and 131°F (+55°C).
- Operating temperature: between 32°F
(0°C) and 104°F (+40°C).
- Place appropriate signs in and around
the cleaning area.
- If the machine does not work properly,
check by conducting simple mainte-
nance procedures. Otherwise, ask for
technical advice from an authorized
service center.
- Where parts are required, ask for
ORIGINAL spare parts from the distribu-
tor and/or from an authorized dealer.
- Use only ORIGINAL brushes indicated
in the paragraph “RECOMMENDED
BRUSHES".
- For any cleaning and/or maintenance
operation remove the power from the
machine.
- Do not take off the protections which
require the use of tools for their removal.
- Do not wash the machine with direct
water jets or with high water pressure
nor with corrosive material.
- Every 200 working hours have a ma-
chine check by an authorized service
technician.
- Before using the machine, check that
all panels and coverings are in their
position as indicated in this use and
maintenance manual.
Symbol denoting the charge
level of the batteries.
Symbol that indicates the posi-
tion of the drain plug of the solution tank.
This symbol indicates
that the tanks are to be emptied before
rotating the machine.
Indication of the maximum tem-
perature of the solution detergent.
Symbol that indicates the ow
adjuster of the detergent solution.
Symbol denoting the crossed
bin. Indicates that at the end of its activ-
ity, the machine has to be disposed
conforming to the laws in force.
Symbol denoting the open book.
Indicates that the operator has to read
the manual before the use of the ma-
chine.
- The humidity should not exceed 95%.
- Do not use the machine in explosive
atmosphere.
- Do not use the machine as a means of
transport.
- Do not use the machine onstairs.
- Do not use acid solutions which could
damage the machine.
- To avoid damage to the oor, do not
allow the brush to rotate while the
machine is in one place.The machine
muust be moving while the brush is
rotating.
- Do not use the machine on surfaces
covered with inammable liquids or
dusts (for example hydrocarbons, ashes
or soot).
- In case of re, use a powder based re
extinguisher. Do not use water.
- Do not strike structures where there is
a danger of falling objects.
- Do not use the machine on areas hav-
ing a higher gradient than the one stated
on the number plate.
- Restore all electrical connections after
any maintenance operation.
- Provide for the scrapping of the mate-
rial of normal wear (brushes, squeegee
blades etc.) following strictly the respec-
tive rules.
- When your machine has stopped
functioning, provide for the appropri-
ate waste disposal of its materials,
especially oils, batteries and electronic
components, and considering that the
machine itself has been, where possible,
constructed using recyclable materials.
SYMBOLOGY
Symbol 0/1 indicating the ON/
OFF switch and its signal lamp.
Symbol denoting the solution
valve. Indicates the switch and
the signal lamp of the solenoid valve.
Symbol denoting the brush.
Indicates the switch and the signal lamp
of the brush motor.
Symbol denoting the suction
motor. Indicates the switch and the
signal lamp of the suction motor.
5
SUMMARY
INTRODUCTORY COMMENT 4
GENERAL RULES OF SAFETY 4
SYMBOLOGY 4
TECHNICAL DESCRIPTION 6
LEGEND INSTRUMENT BOARD AND CONTROLS 7
LEGEND MACHINE 7
BEFORE USE 8
HANDLING OF THE PACKED MACHINE 8
UNPACKING OF THE MACHINE 8
MOVEMENTS OF THE HANDLE BAR 8
BATTERY CONNECTIONS 8
BATTERY CHARGING 8
BATTERIES DISPOSAL 8
RECOVERY TANK 9
SOLUTION TANK 9
FLOOR CLEANING 9
STARTING OF THE MACHINE 9
COMPLETE SQUEEGEE ROTATION 9
DRYING GOING BACKWARDS 9
SQUEEGEE LIFTING 10
HANDLE BAR ADJUSTMENT 10
OVERFLOW DEVICE 10
STOPPING THE MACHINE AFTER CLEANING OPERATION 10
DAILY MAINTENANCE 11
RECOVERY TANK CLEANING 11
EMPTYING AND CLEANING OF THE SOLUTION TANK AND FILTER 11
SUCTION FILTER CLEANING 11
VERTICAL POSITIONING OF THE MACHINE 11
BRUSH CLEANING 11
BRUSH REMOVAL/INSTALLATION 11
SQUEEGEE CLEANING 12
ORDINARY MAINTENANCE 12
REAR SQUEEGEE RUBBER REPLACEMENT 12
FRONT SQUEEGEE RUBBER REPLACEMENT 12
TROUBLESHOOTING GUIDE 12
THE SUCTION MOTOR DOES NOT WORK 12
THE BRUSH MOTOR DOES NOT WORK 13
INSUFFICIENT WATER ON THE BRUSH 13
THE MACHINE DOES NOT CLEAN PROPERLY 13
THE SQUEEGEE DOES NOT DRY PERFECTLY 13
EXCESSIVE FOAM PRODUCTION 13
LED (2), (3) AND (4) BECOME RED 13
PROGRAMMED MAINTENANCE 14
RECOMMENDED BRUSHES 14

6
TECHNICAL DESCRIPTION
Cleaning width mm/in. 430/17
Squeegee width /in.mm 510/20
Battery voltage V 24
Battery capacity Ah 5 34
Power rating W/A 670/28
Working capacity, up to sqm/h/sqft/hr 1505/16,200
Brush diameter mm/in. 430/17
Brush rpm rpm 155
Brush pressure kg/lbs. 35/77
Suction vacuum mbar/in. water lift 83/33
Type of drive semi autom.
Maximum gradient % 2
Capacity solution tank l/gal. 22/6
Capacity recovery tank l/gal. 22/6
Machine length (min) mm/in. 793/31
Machine height mm/in. 603/24
Machine width mm/in. 518/21
Machine weight (empty, with batteries) kg/lbs. 86,5/191
Weight of the batteries kg/lbs. 30/66
Recharging time max h 10
Battery compartment (L x W x H) mm/in. 346 x 207 x 21013.6 x 8 x 8
Acoustic pressure level (in conformity
with EN 604¬_01)
dB (A) <70
Class III
Protection level IP X3
Battery charger voltage V ~ 120-230
Battery charger frequency Hz 50-60
Battery charger class I

7
LEGEND INSTRUMENT PANEL AND CONTROLS
1 ON/OFF SWITCH WITH SIGNAL SIGNAL LAMP 5 SQUEEGEE LIFT LEVER
2BRUSH MOTOR SWITCH WITH SIGNAL LAMP 6 HANDLE BARS
3 SUCTION MOTOR SWITCH WITH SIGNAL LAMP 7 SCRUB CONTROL LEVERS
4SOLENOID VALVE SWITCH WITH SIGNAL LAMP 8 HANDLE BAR RELEASE LEVER
LEGEND MACHINE
9 EXHAUST HOSE RECOVERY TANK 17 CAP FOR SOLUTION TANK FILLING
10 SUCTION COVER 18 RECOVERY TANK
11 INSTRUMENT BOARD 19 WHEELS
12 BATTERY CHARGE LEVEL LED INDICATOR
(AGM)
20 SQUEEGEE ASSEMBLY
13 SERIAL NUMBER PLATE 21 BRUSH COVER
14 MAINS PLUG FOR ELECTRIC CABLE BATTERY
CHARGER
22 SOLUTION TANK FILTER
15 DRAIN PLUG SOLUTION TANK 23 SOLUTION FLOW ADJUSTMENT
16 SOLUTION TANK

8
Warning symbol.
Read carefully the sections marked with
this symbol, for the security of both the
operator and the machine.
BEFORE USE
HANDLING OF THE PACKED MA-
CHINE
The machine is supplied with suitable
packing.
The total weight is 221 lbs. (100 kg)
Packing dimensions:
Base: 33” x 22” (84,5 cm x 57 cm)
Height: 33” (85 cm)
ATTENTION:
Do not stack more than 2 machines.
UNPACKING THE MACHINE
1. Remove the outer package.
2. Loosen the two screws that hold the
two brackets to the machine.
3. Remove the screws that hold the
brackets to the pallet and remove the
brackets.
4. Rotate the handle bar into working
position (see under “MOVEMENTS OF
THE HANDLE BAR”) lower the machine
from the pallet and push it forwards on
the wheels, tilting the machine back-
wards to avoid damaging the mechani-
cal parts.
MOVEMENT OF THE HANDLE BAR
The handle bar arrives in the closed
position.
To rotate the handle bar into one of the
different working positions:
1. Pull up the release lever (1) near the
handle bar.
2. Rotate the handle bar into the work-
ing position while holding the release
lever (1).
3. release the release lever (1) to lock
the handle bar.
Use the same procedure for further
height adjustment of the handle bar in
order to nd the most comfortable work-
ing position.
BATTERY CONNECTIONS
This machine is supplied with two bat-
teries already connected, placed in the
appropriate compartment under the
recovery tank. In case the batteries
need to be replaced, please contact the
authorized technical assistance.
The replacement batteries must have
the identical performance as the ones
already installed.
2 batteries AGM 12V 34Ah5.
With the connector (2) it is possible to
connect or disconnect the batteries.
BATTERY CHARGING
The label with the indication “AGM”
placed on the frame in the rear part of
the machine, identies that the machine
is equipped with AGM batteries and a
suitable battery charger.
Switching on the machine using the ON/
OFF switch (3), in the rear part of the
machine the charge level of the batteries
(4) is visible.
A: green led on = batteries charged.
B: orange led on = batteries almost dis-
charged.
C: red led on = complete discharge of
the batteries.
When the led of the charger becomes
red (C), the led of the ON/OFF switch
(3) becomes red also. This will cause all
functions of the machine to be shut off.
During the charging operation the ma-
chine’s functions are disabled.
To charge the batteries, park the ma-
chine on a level surface near a single-
phase socket. Switch off the machine
at the on/off switch (3). Connect the
charging cable, supplied with the ma-
chine, to both the machine (5) and to the
outlet socket as indicated in the gure.
At the end of the charging phase, re-
move the charging cable. The charge
phase is complete only when the green
led (A) on the charger comes on
ATTENTION:
In order not to cause permanent dam-
age to the batteries, never leave them
completely discharged. If the machine
is not to be used for more than two
weeks, disconnect the battery connector
(see under “CONNECTION BATTER-
IES”).
ATTENTION:
Never charge batteries with a non-suit-
able charger. Strictly follow the instruc-
tions supplied by the batteries and
charger manufacturer.
BATTERIES DISPOSAL
It is mandatory to dispose of exhausted
batteries, classied as dangerous waste,
to an authorized institution according to
the current laws.

9
RECOVERY TANK
Check that the cover of the suction lter
(1) is correctly secured, after rotating the
levers (B). Also check that the squee-
gee hose is correctly seated (A).
SOLUTION TANK
Remove the cap (6) on top of the tank
and ll the solution tank with clean
water at a maximum temperature of
122°F (50°C). Add the liquid detergent
in the percentage recommended by
the manufacturer. To avoid excessive
foaming, which could cause problems
to the vacuum motor, use the minimum
percentage of detergent. Screw down
the plug to close the tank
ATTENTION:
Always use low foam detergent. To
avoid excessive foaming, before starting
operation, add into the recovery tank a
quantity of anti-foam product as recom-
mended by the product manufacturer.
Never use acid.
FLOOR CLEANING
STARTING OF THE MACHINE
The push buttons on the instrument
panel are lit with a green signal LED that
shows the activation of each control.
1. Switch on the machine by pressing
the on/off switch (1).
2. Check the battery charge level (see
under “BATTERY CHARGING”).
3. Lower the squeegee by rotating the
handle of the squeegee lifting lever (5),
placed on the rear of the handle bar,
down.
4. Press the switch for the brush motor
(2).
5. Press the switch for the vacuum mo-
tor (3).
6. Press the switch for the solenoid
valve (4).
The machine is equipped with a sole-
noid valve, which activates the solution
ow automatically when the control le-
vers (7) are engaged. Releasing these
levers will stop the ow automatically.
7. Activate the levers (7) and push the
unit forward, the brush will start rotat-
ing. The solution ow begins and the
squeegee will start drying the oor.
8. During the rst few feet check that the
solution ow is appropriate. The ow ad-
juster of the solution is already adjusted
at the factory to satisfy the cleaning of
most oors. If it is necessary to adjust
the quantity of solution onto the oor,
adjust the lever of the ow adjuster (8).
COMPLETE SQUEEGEE ROTATION
Thanks to the complete squeegee
rotation, it is possible to wash and dry
both in forwards and reverse. Following
the indicated drawings, the reversal of
the squeegee position is made easier,
permitting the drying in reverse.
Drying going forward
Reversal of squeegee position with
rotation to the right
Reversal of squeegee position with
rotation to the left
Drying going backwards
DRYING GOING BACKWARDS
With the squeegee positioned in the
front part of the machine it is possible
to dry where a traditional squeegee can
not. Below are some examples of how
to use the complete squeegee rotation.
Wash the interested surface (1).
Wash the surface (1).

10
Rotate the squeegee to the right or
to the left (see under “COMPLETE
SQUEEGEE ROTATION”) to bring it to
the front.
By pushing down on the handle, lift the
machine slightly (2) and move onto the
surface to dry (3).
ATTENTION:
When the machine is lifted, release the
handle bar levers to stop the brush rota-
tion avoiding water splashing.
Proceed backwards to dry the surface
just washed (4).
SQUEEGEE LIFTING
To lift the squeegee, lift the lever (5) situ-
ated ion the rear of the handle bar.
It is only possible to lift the squeegee
when it is situated close to the center
point. If the squeegee is not close to the
center point, even moving the lever (5) it
will not lift the squeegee assembly.
ATTENTION:
During normal operation, the lifting lever
of the squeegee must be kept in the
down position.
HANDLE BAR ADJUSTMENT
When approaching obstacles or near
walls, it is possible to simplify the han-
dling of the machine by adjusting the
handle bar more vertically with respect
to the machine.
To rotate the handle bar:
1. Lift the release lever (8) near the
handle bar.
2. Rotate the handle bar into the new
working position keeping the release
lever (8) pulled.
3. Release the lever (8) to lock the
handle bar in the desired position.
Once the obstacle has been passed
repeat the operation to return to the
previous working position.
This operation is also possible with the
machine in motion while maintaining
pressure on the release lever.
OVERFLOW DEVICE
In order to avoid damage to the vacuum
motor, the machine is equipped with a
oat that closes off the suction when
the recovery tank is full. When this
happens, it is necessary to empty the
recovery tank.
1. Hold the exhaust hose (9) of the
recovery tank.
2. Remove the exhaust plug and empty
the recovery tank into appropriate con-
tainers, according to the standard norms
for liquid disposal.
ATTENTION:
This operation must be carried out using
gloves to protect from contact with dan-
gerous solutions.
STOPPING THE MACHINE AFTER
CLEANING OPERATION
Before carrying out any type of mainte-
nance:
1. Switch off the on/off switch (1).
2. Lift the squeegee by rotating the
lever (5), placed in the rear center of the
handle bar, up (see under “SQUEEGEE
LIFTING”).
3. Move the machine to an appropriate
place for tank draining.

11
ATTENTION:
The machine is not equipped with a
parking brake, do not leave it unattend-
ed on slopes.
DAILY MAINTENANCE
RECOVERY TANK CLEANING
1. Hold the exhaust hose (9) of the
recovery tank.
2. Remove the exhaust plug and empty
the recovery tank into appropriate con-
tainers (see under "OVERFLOW DE-
VICE").
3. Take off the suction cover (10) after
rotating the blocking levers (11).
4. Empty the tank by using the hose
(9).
5. Rinse the tank with a water jet.
ATTENTION:
This operation must be carried out using
gloves to protect from contact with dan-
gerous solutions.
EMPTYING AND CLEANING OF THE
SOLUTION TANK AND FILTER
To empty any solution remaining in the
solution tank:
1. Move the machine to an appropriate
place for tank draining.
2. Switch off the machine by pressing
the on/off switch.
3. Unscrew the cap (12) of the solution
tank and take off the lter (14).
4. Unscrew the drain plug (13) placed in
the rear low left part of the machine and
allow the solution to drain out.
5. Manually rotate the squeegee (15)
towards the front part of the machine to
access the lter (16).
6. Unscrew the lter cover (16), remove
the cartridge (17) and rinse it with a
water jet.
7. Reassemble all parts.
ATTENTION:
This operation should be carried out
wearing gloves to prevent contact with
dangerous solutions.
SUCTION FILTER CLEANING
1. Take off the suction cover (16) after
rotating the blocking levers (17).
2. Take off the lter with the oat, bend-
ing the lter edge to release it from the
screws on the cover.
3. Clean all parts with a water jet.
4. Reassemble everything.
VERTICAL POSITIONING OF THE
MACHINE
The machine can be placed in a verti-
cal position tipped over on its back after
having folded the handle bar onto the
machine.
This position allows the unit to be stored
in a small space and simplies mainte-
nance operations.
To rotate the machine it is necessary to:
1. Switch off the machine.
2. Check that both tanks are empty,
otherwise, empty them (see under
“EMPTYING AND CLEANING OF THE
RECOVERY TANK” and “EMPTYING
AND CLEANING OF THE SOLUTION
TANK”).
3. Pull up on the handle bar release
lever (8) near the handle bar.
4. Rotate the handle bar towards the
tanks keeping the release lever (8)
pulled.
5. Release the lever (8) to lock the
handle bar in position.
6. Hold the machine with both hands in
point (A) of the tank side and (B) from
the handle bar as indicated in the gure.
7. Lift the front part of the machine rotat-
ing it on the rear wheels and bringing it
into the vertical position as shown in the
gure.
ATTENTION:
The position of the vertical parking
should be used when you expect not to
use the machine for more than 2-3 days,
to avoid the weight of the machine dam-
ageing the brush.
BRUSH CLEANING
Remove the brush and clean it with a
water jet (for the disassembly see under
“BRUSH REMOVAL/FITTING”).
BRUSH REMOVAL/FITTING
1. Tip the machine over backwards
(see under “VERTICAL POSITION-
ING OF THE MACHINE") remember to
switch off the on/off switch and to empty
the tanks.

12
2 With the machine in this position
rotate the brush clockwise, as indicated
in the gure, until it is released from the
pins of the brush holder plate.
3. To reassemble the brush insert the
pins into the slots of the brush holder
plate and rotate counter-clockwise until
it locks.
It is possible to use other brush types,
depending on the oor type to be
cleaned and on its dirt conditions (see
under “RECOMMENDED BRUSHES”).
ATTENTION:
The handling of the brush operation
must be carried out wearing suitable
gloves to protect both from contact with
the bristles and dangerous solutions.
SQUEEGEE CLEANING
Keeping the squeegee clean guaran-
tees the best drying action.
1. Tip over the machine backwards
(see under “VERTICAL POSITION-
ING OF THE MACHINE") remember to
switch off the on/off switch and to empty
the tanks.
2. With the machine in this position
clean both the rubber squeegee blades
and the suction inlet. Also remove any
bres (string or hair) that can prevent
the support from turning freely.
ORDINARY MAINTENANCE
REAR SQUEEGEE RUBBER RE-
PLACEMENT
Check the squeegee rubber wear and
turn or replace it, as needed.
For replacement:
1. Lower the squeegee by lowering the
handle lever (1) placed in the rear center
of the handle bar.
2. Rotate the squeegee outwards.
3. With the squeegee in this position
remove the wing nuts (2) to free the
squeegee.
4. Take off the of the squeegee hose (3)
and take off the squeegee.
5. Release the catch (4) of the rubber
blade clamp and take the rubber off to
turn it to a new side or replace it.
6. Check that the coupling and the
squeegee hose are not obstructed, clean
the entire assembly.
To reassemble the squeegee reverse the
operations above.
FRONT SQUEEGEE RUBBER RE-
PLACEMENT
Check the wear of the front squeegee
rubber and replace it if worn out.
For the replacement it is necessary to:
1. Lower the squeegee by lowering
the handle lever (1) placed in the rear
center of the handle bar.
2. Rotate the squeegee outwards.
3. With the squeegee in this position
tremove it and then take off the
rear squeegee rubber (see under
“REAR SQUEEGEE RUBBER
REPLACEMENT”).
4. Remove the wing nuts (5) in the up-
per part of the squeegee body, separate
the two metal parts that form the squee-
gee body to take off the front rubber.
5. Clean all the components with water.
To reassemble the squeegee reverse
the operations above.
TROUBLESHOOTING GUIDE
THE VACUUM MOTOR DOES NOT
WORK
1. Check the charge level of the bat-
teries (see under “BATTERY CHARG-
ING”).
2. Verify that the vacuum motor switch
is activated and the green signal lamp
is on.
3. Check the level in the recovery tank
(see under “OVERFILL PROTECTION”)
and if necessary, empty the tank.
If the problem persists, please contact
the authorized service center.

13
THE BRUSH MOTOR DOES NOT
WORK
1. Check the charge level of the batter-
ies (see under “BATTERY CHARGING”).
2. Verify that the brush motor switch is
activated and the green signal lamp is
on.
3. Activate the scrub control levers (3).
If the problem persists, please contact
the authorized service center.
INSUFFICIENT WATER ON THE
BRUSH
1. Check that the solenoid valve switch
is activated and the green signal lamp
is on.
2. Check the level of the liquid in the
solution tank (see under “SOLUTION
TANK”).
3. Check that the solution ow adjuster
(3) placed in front underneath the solu-
tion tank is open.
4. Press the brush control levers (2).
5. Check that the solution lter (4) is
clean.
If the problem persists, please contact
the authorized service center.
THE MACHINE DOES NOT CLEAN
PROPERLY
1. The brush is not suited to the oor
and/or conditions: use only original
brushes. For advice, contact the author-
ized service center.
2. The solution ow is insufcient: open
the solution ow adjuster (3).
3. Check that the liquid detergent is in
the recommended percentage.
Contact the authorized service center for
advice.
THE SQUEEGEE DOES NOT DRY
PERFECTLY
1. Check that the squeegee rubbers are
clean.
2. Check that the suction hose is cor-
rectly inserted in the proper
seat on the recovery tank and on the
squeegee bar.
3. Check the suction lter.
4. Replace the rubbers if worn.
5. Check that the vacuum motor switch
is on.
6. Check the level in the recovery tank
(see under “OVERFILL PROTECTION”)
and if necessary, empty the tank.
EXCESSIVE FOAM PRODUCTION
Check that low foam detergent has been
used. Add small quantities of anti foam
liquid into the recovery tank.
Do not use excessive amounts of deter-
gent as even with low foaming agent,
the foam will be created and lead to
vacuum motor damage. Also exces-
sive detergent will result in solution pipe
becoming blocked over time.
LED (2), (3) AND (4) BECOME RED
If the machine is operating, with the
switch (1) on green and one of the
three led (2), (3) or (4) change color,
from green to red, it means that, an
overload protection is taking place, for
example:
- LED (2) RED: the brush mo-
tor is overloaded.
- LED (3) RED: the vacuum
motor is overloaded.
- LED (4) RED: the coil of the
solenoid valve may be short-circuited.
To reset, switch off the ON/OFF
switch (1), wait a few minutes and
then switch on again.
If the problem persists, please contact
the authorized service center.

14
PROGRAMMED MAINTENANCE
REQUIRED ACTION DAILY WEEKLY ORDINARY/MONTHLY
RECOVERY TANK CLEANING •
SUCTION FILTER CLEANING •
BRUSH CLEANING •
BRUSH REMOVAL •
SQUEEGEE ASSEMBLY CLEANING •
FRONT SQUEEGEE RUBBER REPLACEMENT • if required
REAR SQUEEGEE RUBBER REPLACEMENT • if required
SQUEEGEE HOSE CLEANING •
SOLUTION TANK CLEANING •
SOLUTION FILTER CLEANING •
RECOMMENDED BRUSHES
Brushes must be chosen depending on the type of oor and the dirt to be removed.
The material and the bristle diameter are the elements that distinguish different types of brushes.
MATERIAL CHARACTERISTICS
PPL (Polypropylene) Good wear resistance. Maintains characteristics with hot water up to 140°F (60°C). It is not
hygroscopic.
TYNEX Nylon bristles with grains of abrasive material. Use with caution in order not to mark the oor
or ruin the nish.
BRISTLES THICKNESS Thicker bristles are more rigid and must be used on smooth oor or oor with small joints. On
irregular oors with deep joints or relieves, softer bristles penetrate more easily and deeper.
Please be aware that when brush bristles are worn out they become rigid and unable to pen-
etrate and clean deeper. This may also cause brush vibration with thicker bristles
PAD HOLDER Pads are recommended to clean smooth surfaces. The pad holder has anchor points to retain
the pad. It is important that the height of the pad holder with its pad is the same as the one of
the brush.
MACHINE PART NO. QTY DESCRIPTION USE
BD 17/6 48903130 1Brush PPL 0,9 Ø 430 Floors of resistant material and particularly
dirty.
48903150 1Brush 5-mix Ø 430 For all types of oors.
48803050 1Pad holder Ø 425 + center lock green For pads of 17”, for smooth surfaces cleaning.

Please provide additional information on
Tornado equipment: (Check choices below)
__ Automatic Scrubbers __Sweepers
__Propane Floor Machines __Rotary Floor Machine
__High Speed Burnishers __Carpet Vacuums
__Carpet Extractors & Spotters __Wet/Dry Vacs
__ Steam Cleaners __Jumbo Vacs
__Ride-On Equipment __Pressure Washers
See complete product info at www.tornadovac.com
Selling Dealer:(Required)__________________________
Warranty
Registration
Form
_____________________________________________________________________________
Company/Institution
_____________________________________ ____________________________________
Contact Name Title
_____________________________________ ____________________________________
Address City/State/Zip Code
_____________________________________ ____________________________________
Phone Fax
_____________________________________ ____________________________________
Date of Purchase Email
Please Print Clearly
See white metal plate or sticker on unit for this information.
MACHINE TYPE/MODEL NUMBER: MACHINE SERIAL NUMBER:
1. 1.
2. 2.
3. 3.
4. 4.
How did you rst learn about
Tornado cleaning and
maintenance equipment?
In square feet (meters)
Total Hard Floor Area
Total Carpeted Area
Square feet (square meters)
o Contacted by local dealer
o Previous experience with
Tornado products
o Reputation/
Recommendation
o Advertising
o Direct mail
o Internet
o Other
o 0-10,000 (0-930)
o 10-50,000 (930-4,650)
o 50-250,000 (4,650-23,250)
o Over 250,000 (over
23,260)
o 0-10,000 (0-930)
o 10-50,000 (930-4,650)
o 50-250,000 (4,650-23,250)
o Over 250,000 (over
23,260)
Damage or defect arising from abuse, neglect or other misuse is excluded from this warranty. Other items
may or may not apply based on your specic machine. If any defect occurs, the warranty is voided if service is
attempted by non-Authorized Tornado Service Centers.
©2017 Tornado Industries. All rights reserved.
X8449-TOR 1/2017
Facility Description (please circle all that apply)
1. School 9. Hospital 17. U.S. Govt.
2. Retail Store 10. Nursing Home 18. Other Govt.
3. Restaurant 11. Religious Institution 19. Auto Service
4. Ofce Building 12. Airport 20. Airport
5. Contract Cleaning 13. Warehouse 21. Non-Prot
6. Light Manufacturing 14. Apartment/Condo 22. Other (specify)
7. Heavy Manufacturing 15. Warehouse
8. College/University 16. Supermarket
Return to :
Tornado Industries
3101 Wichita Court
Fort Worth, TX 76140
Fax: 817-551-0719
or online at
www.tornadovac.com

=
=
=
b= = b=
=
=
NT
ðkaf`b=
=
ibvbka^=q^_ibol=ab=fkpqorjbkqlp=v=j^kalp= NU
ibvbka^=jžnrfk^= NU
abp`ofm`fþk=q°`kf`^= NV
^asboqbk`f^= OM
kloj^p=dbkbo^ibp=ab=pbdrofa^a= OM
pfj_lildð^= OM
mofj^=^kqbp=abi=bjmibl= ON
jçî ã Éåíç=ã•èì å~=ÉãÄ~ä~Ç~= ON
aÉëÉãÄ~ä~àÉ=ÇÉ=ä~=ã•èì å~= ON
jçî ã Éåíç=ÇÉä=í ãµå= ON
`çåÉñ µå=Ä~íÉê∞~ë= ON
oÉÅ~êÖ~=ÇÉ=ä~ë=Ä~íÉê∞~ë= ON
bä ã å~Å µå=ÇÉ=ä~ë=Ä~íÉê∞~ë= ON
aÉéµë íç=ÇÉ=êÉÅìéÉê~Å µå= ON
aÉéµë íç=ÇÉ=ä~=ëçäìÅ µå=ÇÉíÉêÖÉåíÉ= ON
ifjmfbw^=ab=ilp=prbilp= OO
^ÅÅ çå~ã Éåíç=ÇÉ=ä~=ã•èì å~= OO
oçí~Å µå=ÅçãéäÉí~=ÇÉ=ä~=Äçèì ää~=ÇÉ=ëÉÅ~Çç= OO
pÉÅ~Çç=Éå=ã~êÅÜ~=~íê•ë= OO
iÉî~åí~ã Éåíç=ÇÉ=ä~=Äçèì ää~=ÇÉ=ëÉÅ~Çç= OO
oÉÖä~àÉ=ÇÉä=í ãµå= OO
a ëéçë í îç=êÉÄçë~ÇÉêç= OP
abqbk`fþk=ab=i^=jžnrfk^=^i=cfk^i=ab=i^=ifjmfbw^= OP
j^kqbkfjfbkql=af^ofl= OP
i ãé Éò~=ÇÉéµë íç=ÇÉ=êÉÅìéÉê~Å µå= OP
s~Å ~Çç=ó=ä ãé Éò~=ÇÉä=ÇÉéµë íç=ëçäìÅ µå=ó=ÇÉä=Ñ äíêç= OP
i ãé Éò~=ÇÉä=Ñ äíêç=ÇÉ=~ëé ê~Å µå= OP
m~êèìÉ=îÉêí Å~ä=ÇÉ=ä~=ã•èì å~= OP
i ãé Éò~=ÇÉä=ÅÉé ääç= OQ
aÉëãçåí~àÉLãçåí~àÉ=ÇÉä=ÅÉé ääç= OQ
i ãé Éò~=ÇÉ=ä~=Äçèì ää~=ÇÉ=ëÉÅ~Çç= OQ
j^kqbkfjfbkql=loafk^of^= OQ
pìëí íìÅ µå=ÇÉä=ä~Ä ç=íê~ëÉêç=ÇÉ=ä~=Äçèì ää~=ÇÉ=ëÉÅ~Çç= OQ
pìëí íìÅ µå=ÇÉä=ä~Ä ç=ÇÉä~åíÉêç=ÇÉ=ä~=Äçèì ää~=ÇÉ=ëÉÅ~Çç= OQ
`lkqoli=ab=crk`flk^jfbkql= OQ
bä=ãçíçê=ÇÉ=~ëé ê~Å µå=åç=ÑìåÅ çå~= OQ
bä=ãçíçê=ÇÉä=ÅÉé ääç=åç=ÑìåÅ çå~= OR
bä=~Öì~=Éå=Éä=ÅÉé ääç=åç=Éë=ëìÑ Å ÉåíÉ= OR
i~=ã•èì å~=åç=ä ãé ~=Ä Éå= OR
i~=Äçèì ää~=ÇÉ=ëÉÅ~Çç=åç=ëÉÅ~=éÉêÑÉÅí~ãÉåíÉ= OR
mêçÇìÅÅ µå=ÉñÅÉë î~=ÇÉ=Éëéìã~= OR
iÉÇ=EOFI=EPF=ó=EQF=ëÉ=éçåÉå=ÇÉ=Åçäçê=êçàç= OR
j^kqbkfjfbkql=moldo^j^al= OS
`bmfiilp=^`lkpbg^alp= OS
d^o^kqð^=ifjfq^a^=^=i^odl=mi^wl=ab=molqb``fþk=^i=`ljmo^alo= OT
=

1-800-VACUUMS 90 Years of Cleaning Innovation A Tacony Company
Form F2662.©2017. All rights reserved
Long Term Buyer Protection Limited Warranty
Tornado Industries, Inc. (Tornado) garantiza al consumidor nal que los productos Tornado no tendrán defec-
tos de materiales ni mano de obra durante el período indicado abajo. Esta garantía limitada NO cubre a las
máquinas y/o componentes sujetos al desgaste normal, los daños ocasionados durante el envío, las fallas
producidas por modicaciones, accidentes, entorno operativo inadecuado, mal uso, abuso, negligencia o mal
mantenimiento por parte del usuario. Para más detalles, contáctese con su Distribuidor de Tornado Autorizado,
el Centro de Reparaciones, o el Departamento de Servicio Técnico de Tornado. Los representantes de ventas
y servicio técnico de Tornado no están autorizados a renunciar o alterar los términos de esta garantía, ni a
incrementar las obligaciones de Tornado bajo esta garantía.
10 Años*
Tanques de agua plásticos y cuerpos moldeados en forma rotatoria
2 Años*
Piezas de todos los equipos de limpieza Tornado
1 Año*
Mano de obra de todos los equipos de limpieza Tornado
1 Año*
Garantía de baterías, un año prorrateado.
Todas las garantías de las baterías son manejadas directamente por el fabricante de las baterías,
en base a un año prorrateado
Términos sujetos a cambios sin previo aviso.
1. Con excepción de los Ventiladores-Secadores Windshear™, de tiro lateral y descendente, Ventiladores de Aislamien-
to, CV 30, CV 38, CK14/1 PRO, CK 14/2 PRO, SWM31/9, CK LW 13/1, CK LW 13/1 ROAM, CV 38/48 Dual, PV6, PV10,
PV6 ROAM, Wall Mount todas las Barredoras, Aspiradoras en Seco, y todos los cargadores tienen garantía por 1 (un)
año tanto para sus piezas como para la mano de obra.
2. Todas las piezas no desgastadas compradas después del vencimiento de la garantía, tienen garantía por 90 días.
3. La garantía comienza a correr desde la fecha de venta al consumidor o, a discreción de Tornado, 6 meses después de
que el vendedor compre la unidad a Tornado, lo que ocurra primero.
4. El artículo EB 30 tiene garantía por un período de 90 días tanto para sus piezas como para la mano de obra.
5. La garantía de los motores utilizados en equipos a propano se limita a la garantía de fábrica del motor.
6. Las fregadoras con conductor tienen garantía de 24 meses para sus piezas, 6 meses para la mano de obra o 1000
horas, lo que ocurra primero.
Nota: Tornado, The Latest Dirt, Floorkeeper, Carpetkeeper, Carpetrinser,
Carpetrinser/Dryer, Headmaster, Taskforce, PAC-VAC, T-Lite, Glazer,
Windshear, Max-Vac,y Trot-Mop son marcas registradas de Tornado
Industries
Sitio web: www.tornadovac.com
Teléfono 1.800.VACUUMS
Fax: 817-551-0719
Dirección: 3101 Wichita Court
Fort Worth, TX 76140

=
=
=
b= = b=
=
=
NU
ibvbka^=q^_ibol=ab=fkpqorjbkqlp=v=j^kalp=
=
NK fkqboormqlo=dbkbo^i=v=qbpqfdl=
OK fkqboormqlo=jlqlo=abi=`bmfiil=v=qbpqfdl=
PK fkqboormqlo=jlqlo=ab=^pmfo^`fþk=v=qbpqfdl=
QK fkqboormqlo=bib`qolsžisri^=v=qbpqfdl=
=
=
RK m^i^k`^=bibs^alo^=_lnrfii^=ab=pb`^al=
SK j^kdlp=abi=j^kfii^o=
TK j^kbq^p=ab=`lkqoli=fkf`flLm^ol=
UK m^i^k`^=abp_ilnrbl=abi=qfjþk=
=
=
=
ibvbka^=jžnrfk^=
=
VK qr_l=ab=abp`^od^=abmþpfql=ab=ob`rmbo^`fþk=
NMK q^m^=^pmfo^`fþk=
NNK q^_ibol=ab=fkpqorjbkqlp=
NOK iba=ab=pb¢^i=kfsbi=`^od^=ab=i^p=_^qboð^p=E^djF=
NPK mi^`^=j^qoð`ri^=
NQK bk`ercb=ab=^ifjbkq^`fþk=bi°`qof`^=`^od^alo=_^qboð^p=
NRK q^mþk=ab=s^`f^al=plir`fþk=abqbodbkqb=
NSK
abmþpfql=ab=plir`fþk
=
=
=
=
NTK q^m^=ab=iibk^al=plir`fþk=abqbodbkqb=
NUK abmþpfql=ab=ob`rmbo^`fþk=
NVK orba^p=
OMK dorml=_lnrfii^=ab=pb`^al=
ONK molqb``fþk=
OOK cfiqol=plir`fþk=abqbodbkqb=
OPK
obdri^alo=ab=
`^ra^i=
ab=i^=plir`fþk=abqbodbkqb
=
=
=
=
=

=
=
=
b= = b=
=
=
NV
abp`ofm`fþk=q°`kf`^=
=
=
^åÅÜç=ÇÉ=íê~Ä~àç= ããL å= QPMLNT=
^åÅÜç=ÇÉ=ä~=Äçèì ää~=ÇÉ=ëÉÅ~Çç= ããL å= RNMLOM=
qÉåë µå=ÇÉ=ä~ë=Ä~íÉê∞~ë= s= OQ=
`~é~Å Ç~Ç=Ä~íÉê∞~ë= ^Ü=
R
= PQ=
mçíÉåÅ ~= åëí~ä~Ç~= tL^= STMLOU=
oÉåÇ ã Éåíç=ÇÉ=íê~Ä~àç=Eã~ñF= ã
O
LÜ==ëèÑíLÜ= NRMRLNNQUP=
a •ãÉíêç=ÇÉä=ÅÉé ääç= ããL å= QPMLNT=
sÉäçÅ Ç~Ç=Ö êç=ÇÉä=ÅÉé ääç= êéã= NVM=
mêÉë µå=ÇÉä=ÅÉé ääç== âÖLäÄëK= PRLTT=
aÉéêÉë µå=ãçíçê=ÇÉ=~ëé ê~Å µå= ãÄ~êLï~íÉê=ä Ñí= UPLPP=
q éç=ÇÉ=~î~åÅÉ= = ëÉã =~ìíçãK=
aÉëå îÉä=ã•ñ ãç= B= O=
`~é~Å Ç~Ç=ÇÉéµë íç=ÇÉ=ëçäìÅ µå= äLÖ~ä= OOLS=
`~é~Å Ç~Ç=ÇÉéµë íç=ÇÉ=êÉÅìéÉê~Å µå= äLÖ~ä= OOLS=
içåÖ íìÇ=ã•èì å~=Eã åF= ããL å= TVPLPN=
^äíìê~=ã•èì å~= ããL å= SMPLOQ=
^åÅÜìê~=ã•èì å~= ããL å= RNULOM=
mÉëç=ã•èì å~=EÉå=î~Å∞ç=Åçå=ä~ë=Ä~íÉê∞~ëF= âÖLäÄëK= USIRLNVN=
mÉëç=Ä~íÉê∞~ë= âÖLäÄëK= PMLSS=
q Éãéç=ÇÉ=êÉÅ~êÖ~=ã~ñ= Ü= NM=
eìÉÅç=Ä~íÉê∞~ë=Eä=ñ=~åÅÜ=ñ=~äíF= ããL å= PQS=ñ=OMT=ñ=ONMLNQ=ñ=UIN=ñ=UIO=
k îÉä=ÇÉ=éêÉë µå=~Å∫ëí Åç=EÉå=ÅçåÑçêã Ç~Ç=Åçå=bkSMQ|MNF= Ç_=E^F= YTM=
`ä~ëÉ= = fff=
k îÉä=ÇÉ=éêçíÉÅÅ µå= fm= uP=
`~êÖ~Ççê=ÇÉ=ä~ë=Ä~íÉê∞~ëW=íÉåë µå=ÇÉ=ä~=êÉÇ= s=ú= OPM=
`~êÖ~Ççê=ÇÉ=ä~ë=Ä~íÉê∞~ëW=ÑêÉÅìÉåÅ ~=ÇÉ=ä~=êÉÇ= eò= RM=
`~êÖ~Ççê=ÇÉ=ä~ë=Ä~íÉê∞~ëW=Åä~ëÉ= = f=

=
=
=
b= = b=
=
=
OM
^asboqbk`f^==
iÉë= ~Öê~ÇÉÅÉãçë= éçê= Ü~ÄÉê= ëÉäÉÅÅ çå~Çç= åìÉëíê~=
ã•èì å~K= bëí~= ã•èì å~= ÑêÉÖ~Ççê~= ëÉ= ÉãéäÉ~= Éå= ä~=
ä ãé Éò~= åÇìëíê ~ä= ó= Å î ä= é~ê~= Åì~äèì Éê= í éç= ÇÉ=
é~î ãÉåí~Å µåI= ÉñÅäì Ç~= ä~= ä ãé Éò~= ÇÉ= ãçèìÉí~ëK=
aìê~åíÉ= ëì= ãçî ã Éåíç= ÇÉ= ~î~åÅÉI= ä~= ~ÅÅ µå=
ÅçãÄ å~Ç~= ÇÉä= ÅÉé ääç= ó= ÇÉ= ä~= ëçäìÅ µå= ÇÉíÉêÖÉåíÉI=
ä ãé ~=ä~=ëìÅ ÉÇ~Ç=èìÉ=ëÉ= êÉÅçÖÉ=Åçå=ä~=Äçèì ää~=ÇÉ=
~ëé ê~Å µå= íê~ëÉê~= ÇÉà~åÇç= éÉêÑÉÅí~ãÉåíÉ= ëÉÅ~= ä~=
ëìéÉêÑ Å ÉK=
i~=ã•èì å~=Ü~=ÇÉ=ëÉê=ìí ä ò~Ç~=ëµäç=é~ê~=ÉëíÉ=Ñ åK=pÉ=
çÄí ÉåÉå= ä~ë= ãÉàçêÉë= éêÉëí~Å çåÉë= ë = ëÉ= ÉãéäÉ~=
ÅçêêÉÅí~ãÉåíÉ= ó= ëÉ= ã~åí ÉåÉ= Éå= éäÉå~= ÉÑ Å~Å ~K=
oçÖ~ãçë=éçê=Åçåë Öì ÉåíÉ=äÉÉê=Åì Ç~Ççë~ãÉåíÉ=Éëí~ë=
åëíêìÅÅ çåÉë=ó=îçäîÉê=~=äÉÉêä~ë=Å~Ç~=îÉò=èìÉ=íÉåÖ~å=
Ç Ñ Åìäí~ÇÉëK==
bå= Å~ëç= ÇÉ= åÉÅÉë Ç~ÇI= êÉÅçêÇ~ãçë= èìÉ= åìÉëíêç=
ëÉêî Å ç=ÇÉ=~ë ëíÉåÅ ~=èìÉÇ~=ë ÉãéêÉ=~=ëì=Ç ëéçë Å µå=
é~ê~=ÉîÉåíì~äÉë=ÅçåëÉàçë=ç= åíÉêîÉåÅ çåÉë=Ç êÉÅí~K==
=
=
kloj^p=dbkbo^ibp=ab=pbdrofa^a=
i~ë= åçêã~ë= ~èì∞= ~Ä~àç= åÇ Å~Ç~ë= í ÉåÉå= èìÉ=
Åìãéä êëÉ= Åì Ç~Ççë~ãÉåíÉ= é~ê~= Éî í~ê= Ç~¥çë= ~ä=
çéÉê~Ççê=ó=~=ä~=ã•èì å~K==
J=iÉÉê=Åì Ç~Ççë~ãÉåíÉ=ä~ë=Éí èìÉí~ë=Éå=ä~=ã•èì å~I=
åç= ÅìÄê êä~ë= éçê= å åÖ∫å= ãçí îç= ó= ëìëí íì êä~ë= Éå=
ëÉÖì Ç~=Éå=Å~ëç=ÇÉ=èìÉ=ÑìÉëÉå=Ç~¥~Ç~ëK==
J= qÉåÇê•å= èìÉ= ìí ä ò~ê= ä~= ã•èì å~= ∫å Å~ãÉåíÉ= Éä=
éÉêëçå~ä=~ìíçê ò~Çç=ó=Ñçêã~Çç=é~ê~=Éä=ÉãéäÉçK==
J=aìê~åíÉ=Éä=ÑìåÅ çå~ã Éåíç=ÇÉ=ä~=ã•èì å~=Ü~ó=èìÉ=
íÉåÉê= Åì Ç~Çç= Åçå= ä~ë= ÇÉã•ë= éÉêëçå~ë= ó=
ÉëéÉÅ ~äãÉåíÉ=Åçå=äçë=å ¥çëK==
J= bå= éêÉëÉåÅ ~= ÇÉ= äçë= å ¥çëI= Ü~ó= èìÉ= î Ö ä~ê= ä~=
ã•èì å~= ÇÉ= ã~åÉê~= èìÉ= åç= çÅìêêÉ= èìÉ= äçë= ÇÉã•ë=
àìÉÖìÉå=Åçå=ä~=ã ëã~K=
J=i~=ã•èì å~=åç=Éë=ÇÉëí å~Ç~=~ä=ÉãéäÉç=ÇÉ=éÉêëçå~ëI=
å ¥çë= åÅäì ÇçëI= ä~ë= Åì~äÉë= Å~é~Å Ç~ÇÉë= Ñ∞ë Å~ëI=
ëÉåëçê ~äÉë= ç= ãÉåí~äÉë= ëÉ~å= êÉÇìÅ Ç~ëI= ç= Ä Éå= Åçå=
Å~êÉåÅ ~=ÇÉ=ÉñéÉê ÉåÅ ~=ç=ÇÉ=ÅçåçÅ ã ÉåíçI=~=ãÉåçë=
èìÉ= ¨ëí~ë= Ü~ó~å= éçÇ Çç= ÄÉåÉÑ Å ~êI= ~= íê~î¨ë= ÇÉ= ä~=
åíÉêãÉÇ ~Å µå=ÇÉ=ìå~=éÉêëçå~=êÉëéçåë~ÄäÉ=ÇÉ=ëìó~ë=
ëÉÖìê Ç~ÇI=î Ö ä~åÅ ~=ç= åëíêìÅÅ çåÉë=ÅçåÅÉêå ÉåíÉ=Éä=
ÉãéäÉçK=
J= i~= íçã~= ÇÉ= ä~= êÉÇ= ÇÉ= ~ä ãÉåí~Å µå= í ÉåÉ= èìÉ= ëÉê=
Éèì é~Ç~=ÇÉ=ÅçåÉñ µå=~=í Éêê~=êÉÖä~ãÉåí~ê ~K=
J=bî í~ê=Ç~¥~ê=Éä=Å~ÄäÉ=ÇÉ=~ä ãÉåí~Å µå=Åçå=éäÉÖ~ÇçëI=
~éä~ëí~ã Éåíçë=ç=ÉëÑìÉêòçëK=
J= kç= ãÉòÅä~ê= ÇÉíÉêÖÉåíÉë= ÇÉ= í éç= Ç ÑÉêÉåíÉ= é~ê~=
Éî í~ê=ä~=éêçÇìÅÅ µå=ÇÉ=Ö~ëÉë=åçÅ îçëK==
J=i~=íÉãéÉê~íìê~=ÇÉ=~äã~ÅÉå~ã Éåíç=í ÉåÉ=èìÉ=Éëí~ê=
ÅçãéêÉåÇ Ç~=ÉåíêÉ=POøc=ó=NPNøc=EMø`=ó=HRRø`FK==
J=qÉãéÉê~íìê~=µéí ã~=ÇÉ=íê~Ä~àçW==
ÉåíêÉ=POøc=ó=NMQøc=E=Mø`=ó=HQMø`FK==
J=i~=ÜìãÉÇ~Ç=åç=í ÉåÉ=èìÉ=ëìéÉê~ê=Éä=VRBK==
J=kç=ÉãéäÉ~ê=ä~=ã•èì å~=Éå=~íãµëÑÉê~=Éñéäçë î~K==
J= kç= ÉãéäÉ~ê= ä~= ã•èì å~= Åçãç= îÉÜ∞Åìäç= ÇÉ=
íê~åëéçêíÉK==
J=kç=ëìÄ ê=ç=Ä~à~ê=ä~ë=ÉëÅ~äÉê~ëK=
J=kç=ìí ä ò~ê=ëçäìÅ çåÉë=•Å Ç~ë=èìÉ=éçÇê∞~å=Ç~¥~ê=ä~=
ã•èì å~=óLç=ä~ë=éÉêëçå~ëK==
J= bî í~ê= èìÉ= Éä= ÅÉé ääç= íê~Ä~àÉ= Éëí~åÇç= ä~= ã•èì å~=
é~ê~Ç~=é~ê~=åç=Å~ìë~ê=Ç~¥çë=~ä=ëìÉäçK==
J=kç=ìí ä ò~ê=ä~=ã•èì å~=Éå=ëìéÉêÑ Å Éë=Éëé~êÅ Ç~ë=ÇÉ=
ä∞èì Ççë= ç= éçäîçë= åÑä~ã~ÄäÉë= Eéçê= ÉàÉãéäç=
Ü ÇêçÅ~êÄìêçëI=ÅÉå ò~ë=ç=í òåÉëFK==
J=bå=Å~ëç=ÇÉ= åÅÉåÇ çI=ÉãéäÉ~ê=ìå=Éñí åíçê=ÇÉ=éçäîçK=
kç=ÉãéäÉ~ê=~Öì~K=
J=kç=ÅÜçÅ~ê=Åçå= Éëí~åíÉê∞~ë=ç=~åÇ~ã çë=ÇçåÇÉ=Ü~ó=
éÉä Öêç=ÇÉ=Å~∞Ç~=ÇÉ=çÄàÉíçëK=
J= kç= ìí ä ò~ê= ä~= ã•èì å~= ëçÄêÉ= ëìéÉêÑ Å Éë= Åçå=
åÅä å~Å µå=ëìéÉê çê=~=ä~= åÇ Å~Ç~=Éå=ä~=éä~Å~K==
J= i~= ã•èì å~= í ÉåÉ= èìÉ= êÉ~ä ò~ê= ä~ë= çéÉê~Å çåÉë= ÇÉ=
ä~î~Çç= ó= ëÉÅ~Çç= ~ä= ã ëãç= í ÉãéçK= léÉê~Å çåÉë= ÇÉ=
å~íìê~äÉò~= Ç ÑÉêÉåíÉ= íÉåÇê•å= èìÉ= ëÉê= êÉ~ä ò~Ç~ë= Éå=
òçå~ë= éêçÜ Ä Ç~ë= é~ê~= Éä= é~ëç= ÇÉ= éÉêëçå~ë= åç=
ÉåÅ~êÖ~Ç~ë= ÇÉä= íê~Ä~àç= ó= Éä= çéÉê~Ççê= íÉãÇê•= èìÉ=
éçåÉêëÉ=Å~äò~Çç=~ÇÉÅì~ÇçK==
J= e~ó= èìÉ= ëÉ¥~ä~ê= ä~ë= òçå~ë= ÇÉ= é~î ãÉåíç= ãçà~Çç=
Åçå=äÉíêÉêçë=é~ê~=í~ä=ÉÑÉÅíçK==
J= `ì~åÇç= ëÉ= çÄëÉêî~ëÉå= ~åçã~ä∞~ë= Éå= Éä=
ÑìåÅ çå~ã Éåíç= ÇÉ= ä~= ã•èì å~I= ~ëÉÖìê~êëÉ= èìÉ= åç=
ëÉ~å= Å~ìë~Ç~ë= éçê= ä~= Ñ~äí~= ÇÉ= ã~åíÉå ã Éåíç=
çêÇ å~ê ~K=aÉ=åç=ëÉê=~ë∞I=ëçä Å í~ê=ä~= åíÉêîÉåÅ µå=ÇÉä=
ÅÉåíêç=ÇÉ=~ë ëíÉåÅ ~=~ìíçê ò~ÇçK==
J= bå= Å~ëç= ÇÉ= ëìëí íìÅ µå= ÇÉ= é Éò~ëI= éÉÇ ê= äçë=
êÉéìÉëíçë= lofdfk^ibp= ~= ìå= ÅçåÅÉë çå~ê ç= óLç=
Ç ëíê Äì Ççê=~ìíçê ò~ÇçK=
J=bãéäÉ~ê=ëçä~ãÉåíÉ=ÅÉé ääçë= lofdfk^ibp=ëÉ¥~ä~Ççë=
Éå=Éä=é•êê~Ñç=?`bmfiilp=^`lkpbg^alp?K==
J= m~ê~= Åì~äèì Éê= åíÉêîÉåÅ µå= ÇÉ= ä ãé Éò~= óLç=
ã~åíÉå ã Éåíç= Åçêí~ê= Éä= ëìã å ëíêç= Éä¨Åíê Åç= ~= ä~=
ã•èì å~K==
J=kç=èì í~ê=ä~ë=éêçíÉÅÅ çåÉë=èìÉ=êÉèì ÉêÉå=Éä=ÉãéäÉç=
ÇÉ=ìíÉåë ä çë=é~ê~=ëÉê=ëìëí íì Ç~ëK==
J=kç=ä~î~ê=ä~=ã•èì å~=Åçå=ÅÜçêêç=ÇÉ=~Öì~=Ç êÉÅí~=ç=~=
éêÉë µåI=ç=Åçå=ëìÄëí~åÅ ~ë=Åçêêçë î~ëK==
J= `~Ç~= OMM= Üçê~ë= ÇÉ= íê~Ä~àç= Ü~ÅÉê= Åçåíêçä~ê= ä~=
ã•èì å~=éçê=ìå=ÅÉåíêç=ÇÉ=~ë ëíÉåÅ ~=~ìíçê ò~ÇçK==
J=^åíÉë= ÇÉ= ìí ä ò~ê=ä~= ã•èì å~I=Åçåíêçä~ê=èìÉ= íçÇ~ë=
ä~ë=í~é~ë=ó=ä~ë=ÅçÄÉêíìê~ë=Éëí¨å=ÅçäçÅ~Ç~ë=Åçãç=ëÉ=Ü~=
åÇ Å~Çç=Éå=ÉëíÉ=ã~åì~ä=ÇÉ=ìëç=ó=ã~åíÉå ã ÉåíçK=
J=oÉëí~ÄäÉÅÉê=íçÇ~ë=ä~ë=ÅçåÉñ çåÉë=Éä¨Åíê Å~ë=ÇÉëéì¨ë=
ÇÉ=Ü~ÄÉê=ÉÑÉÅíì~Çç=Åì~äèì Éê= åíÉêîÉåÅ µåK=
J= mêçÅÉÇÉê= ~= ä~= Éä ã å~Å µå= ÇÉ= äçë= ã~íÉê ~äÉë= ÇÉ=
Åçåëìãç=ë Öì ÉåÇç=ä~ë=åçêã~ë=ÇÉ=äÉó=î ÖÉåíÉëK=
J= `ì~åÇç= îìÉëíê~= ã•èì å~= ÇÉàÉ= ÇÉ= ëÉê= ÉãéäÉ~Ç~I=
éêçÅÉÇÉê= ~ä= ÇÉëã~åíÉä~ã Éåíç= ~éêçé ~Çç= ÇÉ= äçë=
ã~íÉê ~äÉë= Éå= ä~= ã ëã~= ÅçåíÉå Ççë= ÉëéÉÅ ~äãÉåíÉ=
~ÅÉ íÉ= ó= ÅçãéçåÉåíÉë= ÉäÉÅíêµå ÅçëI= ó= Åçåë ÇÉê~åÇç=
èìÉ=ä~=ã•èì å~=ã ëã~=ÑìÉ=Åçåëíêì Ç~=Éå=ãÉÇ Ç~=ÇÉ=
äç=éçë ÄäÉ=Åçå=ã~íÉê ~äÉë=êÉÅ Åä~ÇçëK==
=
=
pfj_lildð^=
=
=
p∞ãÄçäç
=
MLN=èìÉ= åÇ Å~=Éä=
åíÉêêìéíçê=ÖÉåÉê~ä=ó=Éä=
íÉëí ÖçK=
=
=
p∞ãÄçäç=ÇÉä=Öê ÑçK
=
fåÇ Å~=Éä= åíÉêêìéíçê=ó=Éä=
íÉëí Öç=ÇÉ=ä~=ÉäÉÅíêçî•äîìä~K=
=
=
=
p∞ãÄçäç=ÇÉä=ÅÉé ääçK
=
fåÇ Å~=Éä= åíÉêêìéíçê=ó=Éä=
íÉëí Öç=ÇÉä=ãçíçê=ÇÉä=ÅÉé ääçK
=
=
=
=
p∞ãÄçäç=ÇÉä=ãçíçê=ÇÉ=
~ëé ê~Å µåK=
fåÇ Å~=Éä= åíÉêêìéíçê=ó=Éä=
íÉëí Öç=ÇÉä=ãçíçê=ÇÉ=
~ëé ê~Å µåK=
=
=
=
fåÇ Å~Ççê=ÇÉ=å îÉä=ÇÉ=Å~êÖ~=
ÇÉ=ä~ë=Ä~íÉê∞~ëK=
=
=
=
fåÇ Å~=ä~=éçë Å µå=ÇÉä=
í~éµå=ÇÉ=ÇÉëÅ~êÖ~=ÇÉä=
ÇÉéµë íç=ÇÉ=ä~=ëçäìÅ µåK=
=
p∞ãÄçäç
=
èìÉ=
åÇ Å~=ÇÉ=î~Å ~ê=
äçë=ÇÉéµë íçë=~åíÉë=ÇÉ=îçäîÉê=
~=Ö ê~ê=ä~=ã•èì å~K=
=
=
=
p∞ãÄçäç=èìÉ= åÇ Å~=ä~=
íÉãéÉê~íìê~=ã•ñ ã~=ÇÉ=ä~=
ëçäìÅ µå=ÇÉíÉêÖÉåíÉK=
=
=
=
p∞ãÄçäç=èìÉ=
åÇ Å~=Éä=
êÉÖìä~Ççê=ÇÉ=Å~ìÇ~ä=ÇÉ=ä~=
ëçäìÅ µå=ÇÉíÉêÖÉåíÉK=
=
=
=
p∞ãÄçäç=ÇÉä=Ä Çµå=ä ëí~ÇçK=
=
fåÇ Å~=èìÉ=~ä=Ñ å~ä=ÇÉ=ëì=
~Åí î Ç~ÇI=ä~=ã•èì å~=
íÉåÇê•=èìÉ=ëÉê=Éä ã å~Ç~=
Éå=ÅçåÑçêã Ç~Ç=ÇÉ=ä~=
äÉÖ ëä~Å µå=î ÖÉåíÉK=
=
=
=
p∞ãÄçäç=ÇÉä=ä Äêç=~Ä ÉêíçK
=
fåÇ Å~=~ä=çéÉê~Ççê=èìÉ=
ÇÉÄÉ=äÉÉê=Éä=ã~åì~ä=~åíÉë=
ÇÉä=ìëç=ÇÉ=ä~=ã•èì å~K=
=
=
=
p∞ãÄçäç=ÇÉ=~î ëçK=
=
iÉÉê=Åçå=~íÉåÅ µå=ä~ë=
ëÉÅÅ çåÉë=éêÉÅÉÇ Ç~ë=éçê=
ÉëíÉ=ë∞ãÄçäçI=é~ê~=ä~=
ëÉÖìê Ç~Ç=ÇÉä=çéÉê~Ççê=ó=
ÇÉ=ä~=ã•èì å~
K
=
=
Table of contents
Other Tornado Floor Machine manuals

Tornado
Tornado Marathon 800 Manual

Tornado
Tornado 64220 Manual

Tornado
Tornado 98260 Manual

Tornado
Tornado 99125A Manual

Tornado
Tornado ExSELLerate Series Setup guide

Tornado
Tornado MINI MARATHON 425 Manual

Tornado
Tornado 98473 Manual

Tornado
Tornado GLAZER P 1600 Manual

Tornado
Tornado PG K17-28 User manual

Tornado
Tornado FK 3000 Setup guide

Tornado
Tornado 99726 Manual

Tornado
Tornado ExSELLerate Series Setup guide

Tornado
Tornado 98150 Manual

Tornado
Tornado 97564 Manual

Tornado
Tornado 98458 Manual

Tornado
Tornado KARCHER BR 700 User manual

Tornado
Tornado EB 30/1 User manual

Tornado
Tornado 97580 Setup guide

Tornado
Tornado 99695 BR 22 Troubleshooting guide

Tornado
Tornado PG7435 User manual