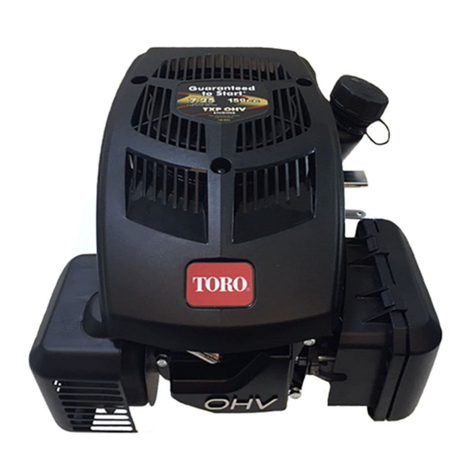
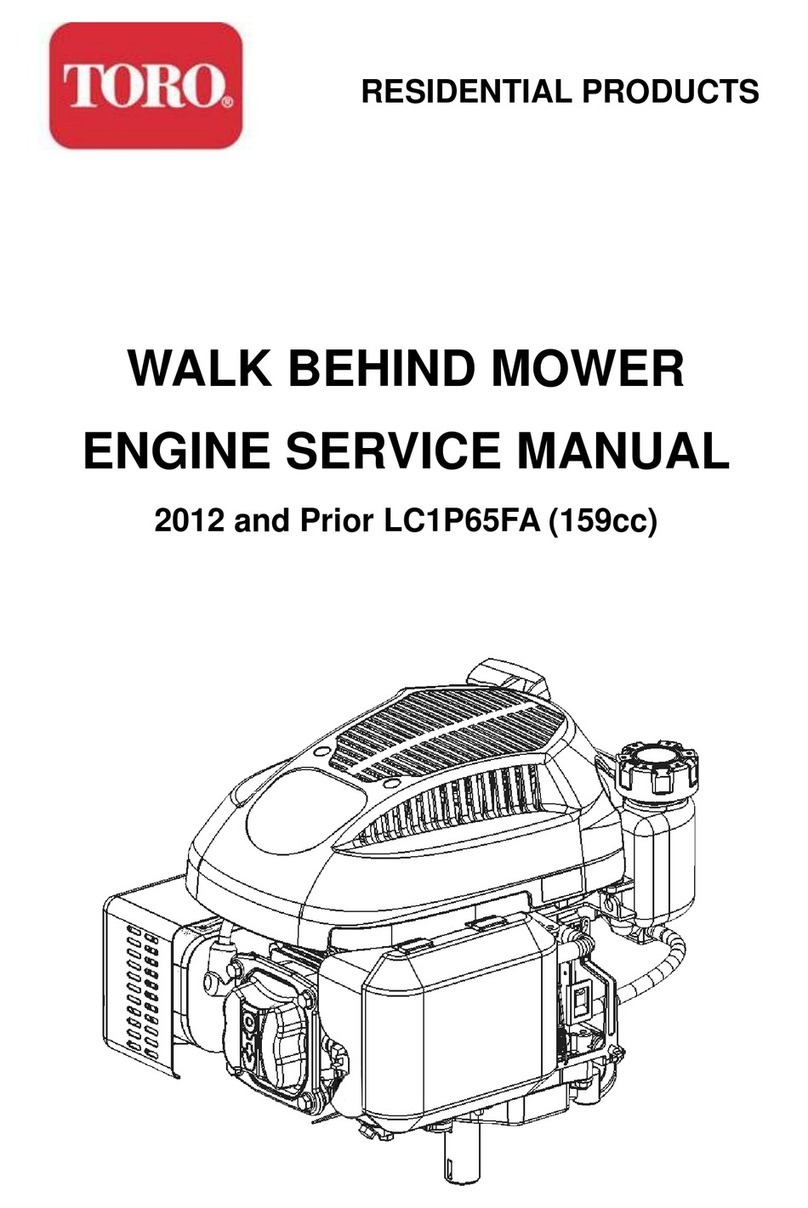
Toro 139-5637 User manual

FormNo.3437-588RevB
EngineConversionKit
SubaruPoweredWalk-BehindGreensmaster®Flex™1800,2100,
1820,or2120Mower
ModelNo.139-5637
InstallationInstructions
Introduction
Thisengineconversionkitisonlyformachineswith
followingmodelandserialnumbers:
ModelNumberSerialNumber
04040312000001through315999999
04041312000001through315999999
04044316000001through999999999
04045316000001through999999999
LightKit,Model04064(Flex1800/2100/1820/2120
tractionunits)iscompatiblewiththiskit.
Note:Olderlightkitsarenotcompatiblewiththiskit.
Important:Theseinstallationinstructions
containengineoperationandmaintenance
informationthatsupersedestheengineoperation
andmaintenanceproceduresinyourmachine
Operator’sManual.
Beforeoperatingormaintainingthemachineor
engine,alwaysrefertotheoperatingandsafety
instructionsinyourOperator’sManual.
Savetheseinstructions.
Important:Theenginewarrantyisprovided
bytheenginemanufacturer.Pleaserefertothe
enginemanufacturer'swarrantyandemissions
systemwarrantyincludedintheliteraturepacket.
Thatwarrantyappliesonlytotheengine.Itdoes
notexpandorotherwisealteranyexpressor
impliedwarrantytermsorwarrantyperiodthat
mayapplytotheproductintowhichtheengine
isinstalled.
WARNING
CALIFORNIA
Proposition65Warning
Theengineexhaustfromthisproduct
containschemicalsknowntotheStateof
Californiatocausecancer,birthdefects,
orotherreproductiveharm.
Contents
Introduction...............................................................1
Safety.......................................................................2
SafetyandInstructionalDecals..........................2
Installation................................................................3
1PreparingtheMachine.....................................3
2RemovingtheExistingEngine.........................3
3InstallingtheNewEngine.................................3
4LubricatingandAdjustingtheMachine.............5
ProductOverview.....................................................5
Controls.............................................................5
Operation..................................................................6
FuelSpecications.............................................6
UsingStabilizer/Conditioner...............................6
FillingtheFuelTank............................................6
OpeningandClosingtheFuel-Shutoff
Valve...............................................................7
Maintenance.............................................................8
RecommendedMaintenanceSchedule(s).............8
PreparingtheMachineforMaintenance..............8
ServicingtheEngineOil......................................9
ServicingtheAirCleaner...................................11
ServicingtheSparkPlug...................................12
©2020—TheToro®Company
8111LyndaleAvenueSouth
Bloomington,MN55420
Registeratwww.Toro.com.OriginalInstructions(EN)
PrintedintheUSA
AllRightsReserved*3437-588*B

Safety
SafetyandInstructionalDecals
Safetydecalsandinstructionsareeasilyvisibletotheoperatorandarelocatednearanyarea
ofpotentialdanger.Replaceanydecalthatisdamagedormissing.
decal130-8322
130-8322
1.Useonlyfuelwithan
alcoholcontentbyvolume
under10%.
3.Donotusefuelwithan
alcoholcontentbyvolume
greaterthan10%.
2.ReadtheOperator's
Manualformore
informationonfuel.
decal133-8062
133-8062
decal138-2138
138-2138
1.Poisonousfumesor
toxicgases,asphyxiation
hazard—donotrunthe
engineinanenclosed
space.
4.Warning—disconnectthe
sparkplugwirebefore
performingmaintenance.
2.Explosionhazard—shut
offtheenginebefore
addingfuel;nore,open
ames,orsmokingwhen
addingfuel.
5.Hotsurfacehazard—do
nottouchthehotsurface.
3.Warning—shutoffthe
engineandclosethe
fuelshutoffvalvebefore
leavingthemachine.
6.Attention—readthe
Operator’sManualfor
informationaboutlling
thefueltank.
2

Installation
Note:Ifthemachineisequippedwithan
incandescentlightkit,youmayneedtoorderanew
kit;contactyourauthorizedT orodistributorformore
information.
1
PreparingtheMachine
NoPartsRequired
Procedure
Preparethemachine;refertoPreparingtheMachine
forMaintenance(page8).
2
RemovingtheExisting
Engine
NoPartsRequired
Procedure
Important:Foradditionalengine-removal
instructionsandillustrations,refertothe
GreensmasterFlex1800/1820/2100/2120Service
Manualonwww.Toro.com.
Important:Retainallremovedpartsforreuse
unlessotherwisenoted.
1.Removethethrottlecablefromtheengine.
2.Disconnecttheelectricalconnectionsfromthe
engineandthehandle.
3.Removeengine-baseassembly(withtheengine
attached)frommachine.
4.Removetheenginefromtheenginebase.
Note:Thecapscrews,washers,andnutscan
bediscarded.
5.Removetheenginecouplerandthesquarekey
fromtheengineoutputshaft.
6.Removetheexistingcouplerguardfromthe
transmissioncover(Figure1).
g314125
Figure1
1.Couplerguard2.Bolt
3
InstallingtheNewEngine
Partsneededforthisprocedure:
1Engine
4Bolt
4Nut
4Spacer
4Washer
1Couplerguard
1Wireharness
Procedure
Important:Foradditionalengine-installation
instructionsandillustrations,refertothe
GreensmasterFlex1800/1820/2100/2120Service
Manualonwww.Toro.com.
1.Use4bolts,4washers,4spacers,and4nutsto
securetheenginetotheenginebase(Figure2).
3

g314123
Figure2
1.Nut4.Enginebase
2.Washer5.Bolt
3.Spacer
2.Performthefollowingstepstoinstallthecoupler
totheengine-outputshaft:
A.Applyanti-seizelubricanttothetopsurface
ofthesquarekeyandpositionthekeyin
theoutput-shaftkeyway.
B.Slidethecouplerontotheoutputshaftuntil
itcontactstheshaftshoulder.
C.Securethecouplertotheoutputshaftwith
the2previously-removedsetscrews.
D.Torquethesetscrewsto7N∙m(65in-lb).
3.Performthefollowingstepstoinstalltheengine
baseassemblytothemachine:
A.Ensurethatthecouplersleeveisplacedon
thetransmission-input-shaftcoupler.
B.Positiontheengine-baseassemblytothe
machine.
C.Carefullyslidetheengine-baseassembly
towardthetransmission,allowingthe
enginecouplertobeinsertedintothe
transmissioncouplersleeve.
Note:Youmayhavetoturntheengine
outputshafttoaligntheenginecouplerwith
thecouplersleeve.
D.Supporttheengine-baseassemblytoallow
forfastenerinstallation.
E.Installandnger-tightenthe2capscrews,
hardenedwashers,andangenutsthat
securetheengine-basereartotherear
frame.
F.Aligntheframeholewiththefrontmounting
bossoftheenginebase.
G.Installandngertightentheangehead
screwandhardenedwasherthatsecures
theenginebasetotheframe.
H.Positiontheengine-basefronttoalignthe
engineandtransmissioncouplers.Fully
tightentheange-headscrewstosecure
theengine-basefront.
I.Fullytightenfastenersatrearofengine
base.
4.Connectthewireharnesstotheappropriate
locationsontheengineandthehandle:
•Engineconnections:
–Connectthegroundwire(terminalring)
toenginewithanexistingnutunderthe
fueltank(Figure3).
g314124
Figure3
1.Groundwire2.Nut
–Refertothefollowingtableforthe
appropriatemachineandenginewire
harnessconnections:
Machine-wire-harness
connector
Engine-wire-harness
connector
BlackRed
GreyBlack
GreenBlue
•Handleconnections:Connectthewire
harnesstotheengineswitch,hourmeter,
interlockmodule,andthelightkitconnections
(ifequipped).
4

5.Connectthethrottlecabletoengine.
6.Usethepreviously-removedboltstosecurethe
newcouplerguardtothetransmissioncover.
4
LubricatingandAdjusting
theMachine
NoPartsRequired
Procedure
1.Lubricatethemachineaccordingtothe
instructionsinyourOperator’sManual.
2.Filltheenginecrankcasewithoil;referto
ServicingtheEngineOil(page9).
3.Adjusttheenginespeedtothefollowing
specications:
Highidle(noload)3450±100rpm
Lowidle(noload)1900±100rpm
ProductOverview
g265059
Figure4
1.Chokelever3.Recoilstarterhandle
2.Fuel-shutoffvalve
Controls
ChokeControl
Thechokecontrolislocatedonthesideoftheengine
(Figure4);youuseittohelpstartacoldengine
Note:Donotstartorrunawarmenginewiththe
chokeintheCLOSEDposition.
•Movethechokeleverallthewaytotheleft
(awayfromstarterhandle)tosetthechoketothe
CLOSEDposition.
•Movethechokeleverallthewaytotheright
(towardstarterhandle)tosetthechoketothe
OPENposition.
Fuel-ShutoffValve
Thefuel-shutoffvalveislocatedonthesideofthe
enginebelowthechokecontrol(Figure4).
Note:Closethefuel-shutoffvalvewhenthemachine
isnotusedforafewdays,duringtransporttoand
fromthejobsite,orwhenthemachineisparked
insideabuilding;refertoOpeningandClosingthe
Fuel-ShutoffValve(page7).
5

Operation
FuelSpecications
Fueltankcapacity:2.0L(0.59USgallons)
Recommendedfuel:Unleadedgasolinewithan
octaneratingof87orhigher((R+M)/2ratingmethod)
Ethanol:Gasolinewithupto10%ethanol(gasohol)
or15%MTBE(methyltertiarybutylether)byvolume
isacceptable.EthanolandMTBEarenotthesame.
Gasolinewith15%ethanol(E15)byvolumeisnot
approvedforuse.
•Neverusegasolinethatcontainsmorethan
10%ethanolbyvolume,suchasE15(contains
15%ethanol),E20(contains20%ethanol),orE85
(containsupto85%ethanol).
•Donotusegasolinecontainingmethanol.
•Donotstorefueleitherinthefueltankorfuel
containersoverthewinterunlessafuelstabilizer
isused.
•Donotaddoiltogasoline.
•Forbestresults,useonlyclean,fresh(lessthan
30daysold)fuel.
•Usingunapprovedgasolinemaycause
performanceproblemsand/orenginedamage,
whichmaynotbecoveredunderthewarranty
Using
Stabilizer/Conditioner
Important:Donotusefueladditivescontaining
methanolorethanol.
Addthecorrectamountoffuelstabilizer/conditioner
tothegasoline.
Note:Afuelstabilizer/conditionerismosteffective
whenmixedwithfreshgasoline.Tominimizethe
chanceofvarnishdepositsinthefuelsystem,usefuel
stabilizeratalltimes.
FillingtheFuelTank
DANGER
Incertainconditions,fuelisextremely
ammableandhighlyexplosive.Areor
explosionfromfuelcanburnyouandothers
andcandamageproperty.
•Fillthefueltankoutdoors,inanopenarea,
whentheengineiscold.Wipeupanyfuel
thatspills.
•Neverllthefueltankinsideanenclosed
trailer.
•Donotllthefueltankcompletelyfull.
Addfueltothefueltankuntilthelevelis6
to13mm(1/4to1/2inch)belowthebottom
ofthellerneck.Thisemptyspaceinthe
tankallowsfueltoexpand.
•Neversmokewhenhandlingfuel,andstay
awayfromanopenameorwherefuel
fumesmaybeignitedbyaspark.
•Storefuelinanapprovedcontainerand
keepitoutofthereachofchildren.Never
buymorethana30-daysupplyoffuel.
•Donotoperatewithoutentireexhaust
systeminplaceandinproperworking
condition.
DANGER
Incertainconditionsduringfueling,static
electricitycanbereleased,causingaspark
whichcanignitethefuelvapors.Areor
explosionfromfuelcanburnyouandothers
andcandamageproperty.
•Alwaysplacefuelcontainersontheground
awayfromyourvehiclebeforelling.
•Donotllfuelcontainersinsideavehicle
oronatruckortrailerbedbecauseinterior
carpetsorplastictruck-bedlinersmay
insulatethecontainerandslowthelossof
anystaticcharge.
•Whenpractical,removeequipmentfrom
thetruckortrailerandfuelitonthe
ground.Ifthisisnotpossible,thenfuel
suchequipmentwithaportablecontainer
ratherthanfromafuel-dispensernozzle.
•Ifyoumustuseafuel-dispensernozzle,
keepthenozzleincontactwiththerimof
thefueltankorcontaineropeningatall
timesuntilfuelingiscomplete.
6

WARNING
Fuelisharmfulorfatalifswallowed.
Long-termexposuretovaporscancause
seriousinjuryandillness.
•Avoidprolongedbreathingofvapors.
•Keepyourfaceawayfromthenozzleand
fueltankorconditionerbottleopening.
•Avoidcontactwithskin;washoffspills
withsoapandwater.
1.Parkthemachineonalevelsurfaceandshut
offtheengine.
2.Allowtheenginetocool.
3.Cleanaroundthefuel-tankcapandremoveit
(Figure5).
g265976
Figure5
1.Fuel-tankcap
4.Fillthetankwithfueluntilthelevelisjustinside
themeshlterbasket.
Donotllintothellerneckofthetank.
Important:Donotllthetankmoreabove
thellermeshbecausethefuelneedsroom
toexpand.
5.Installthefuel-tankcapsecurely.
6.Wipeupanyspilledfuel.
OpeningandClosingthe
Fuel-ShutoffValve
Controlfuelowtotheenginewiththefuel-shutoff
valveasfollows:
•T oopenthefuelvalve,turnthefuel-shutoffvalve
handletowardtherecoilstarterhandle(Figure6).
•T oshutthefuelvalve,turnthefuel-shutoffvalve
handleawayfromtherecoilstarterhandle(Figure
6).
g265993
Figure6
1.Turnthefuelvalveleverto
theONposition
2.FuelvalveleverintheOFF
position
7

Maintenance
Important:Refertoyourengineowner’smanual
foradditionalmaintenanceprocedures.
Important:Theenginegearbox(Figure7)does
notrequiremaintenance,asitislledwitha
high-performance,long-lifesyntheticsemi-uid
grease.
g312416
Figure7
1.Gearbox
RecommendedMaintenanceSchedule(s)
MaintenanceService
IntervalMaintenanceProcedure
Aftertherst20hours•Changetheengineoil.
Beforeeachuseordaily•Checktheengine-oillevel.
•Inspecttheair-lterelements.
Every50hours•Cleantheair-lterelements.
Every100hours•Changetheengineoil.
•Inspectandadjustthesparkplug;replaceitifnecessary.
Every300hours•Replacethepaperlterelement(Morefrequentlyindustyoperatingconditions).
•Replacethesparkplug.
PreparingtheMachinefor
Maintenance
WARNING
Whileyouaremaintainingoradjustingthe
machine,someonecouldstarttheengine.
Accidentallystartingtheenginecould
seriouslyinjureyouorotherbystanders.
Removethekeyfromtheignition,engage
parkingbrake,andpullthewire(s)offthe
sparkplug(s)beforeyoudoanymaintenance.
Alsopushthewire(s)asidesoitdoesnot
accidentallycontactthesparkplug(s).
Performthefollowingbeforeservicing,cleaning,or
makinganyadjustmentstothemachine.
1.Parkthemachineonalevelsurface.
2.Shutofftheengineandremovethekeyfromthe
machine(ifequipped).
3.Engagetheparkingbrake.
4.Waitforallmovingpartstostopandallowthe
enginetocoolbeforeservicingorstoring.
5.Disconnectthespark-plugwire(Figure8).
8

g265998
Figure8
1.Spark-plugwire
ServicingtheEngineOil
Fillthecrankcasewithapproximately0.56L(19
oz)oftheproperviscosityoilbeforestarting.The
engineusesahigh-qualityoilthathastheAmerican
PetroleumInstitute(API)serviceclassicationofSJor
higher.Selecttheproperoilviscosity(weight)based
ontheambienttemperature.Figure9illustratesthe
temperature/viscosityrecommendations.
g013375
Figure9
Note:Multi-gradeoils(5W-20,10W-30and10W-40)
increaseoilconsumption.Checktheengine-oillevel
morefrequentlywhenyouusetheseoils.
CheckingtheEngine-OilLevel
ServiceInterval:Beforeeachuseordaily
Theidealtimetochecktheengine-oilleveliswhenthe
engineiscoolorbeforeyouhavestartedtheengine
fortheday.Ifyouhavealreadyrantheengine,allow
theoiltodrainbackdowntothesumpforatleast10
minutesbeforeyouchecktheengine-oillevel.
9

1.Shutofftheengineandwaitforallmoving
partstostop;refertoPreparingtheMachinefor
Maintenance(page8).
2.Positionthemachinesothattheengineislevel,
andcleantheareaaroundtheoil-lltube(Figure
10).
g266053
Figure10
1.Dipstick2.Drainplugandwasher
3.Removethedipstickbyrotatingit
counterclockwise.
4.Removethedipstickandwipetheendclean.
5.Insertthedipstickfullyintotheoil-lltube,but
donotthreaditin.
6.Removethedipstickandchecktheengine-oil
level(Figure11).
g019686
Figure11
1.Fillertube4.Lowerlimit
2.Dipstick5.Drainplug
3.Upperlimit
7.Iftheengine-oillevelisincorrect,addordrainoil
tocorrectthelevel;refertoChangingtheEngine
Oil(page10).
ChangingtheEngineOil
ServiceInterval:Aftertherst20hours
Every100hours
WARNING
Oilmaybehotaftertheenginehasbeenrun,
andcontactwithhotoilcancausesevere
personalinjury.
Avoidcontactingthehotengineoilwhenyou
drainit.
1.Shutofftheengineandwaitforallmoving
partstostop;refertoPreparingtheMachinefor
Maintenance(page8).
2.Raisetheengineoffthegroundandplaceapan
underthedrainplugtocatchtheoil.
3.Removethedrainplug(Figure10).
4.Whentheoilhasdrainedcompletely,lowerthe
enginetotheground,replacethedrainplugand
washer,andtorquetheplugto18N⋅m(13ft-lb).
Note:Disposeoftheusedoilatacertied
recyclingcenter.
5.Removethedipstick,andslowlypouroilintothe
oil-llholeuntiltheoilisatthecorrectlevel.
10

6.Ensurethattheoilisatthecorrectlevelonthe
dipstick;refertoCheckingtheEngine-OilLevel
(page9).
7.Replaceandsecurethedipstick.
8.Wipeupanyspilledoil.
9.Connectthewiretothesparkplug.
ServicingtheAirCleaner
ServiceInterval:Beforeeachuseordaily
Every50hours
Every300hours/Yearly(whichevercomesrst)
Important:Donotoperatetheenginewithout
theairlterassembly;extremeenginedamage
willoccur.
1.Shutofftheengineandwaitforallmoving
partstostop;refertoPreparingtheMachinefor
Maintenance(page8).
2.Removethewingnutsecuringtheair-cleaner
cover(Figure12).
3.Removetheair-cleanercover.
Note:Ensurethatnodirtordebrisfromthe
air-cleanercoverfallintothebase.
4.Removethefoamandpaperelementsfromthe
base.
5.Removethefoamelementfromthepaper
element.
6.Inspectthefoamandpaperelements;replace
themiftheyaredamagedorexcessivelydirty.
g265999
Figure12
1.Wingnut4.Paperlterelement
2.Air-cleanercover5.Gasketandairduct
3.Foamelement
11

7.Cleanthepaperelementbytappingitgentlyto
removethedirt.
Note:Donottrytobrushdirtoffthepaper
element;brushingforcesthedirtintothebers.
Replacetheelementiftappingitfailstoremove
thedirt.
8.Cleanthefoamelementinwarm,soapywater
orinanonammablesolvent.
Note:Donotusegasolinetocleanthefoam
elementbecauseitcouldcreateariskofreor
explosion.
9.Rinseanddrythefoamelementthoroughly.
10.Wipedirtfromthebaseandthecoverwitha
moistrag.
Note:Ensurethatdirtanddebrisdonotenter
theairductleadingtothecarburetor.
11.Installtheair-cleanerelementsandensurethat
theyareproperlypositioned.Installthelower
wingnut.
12.Installthecoverandinstalltheupperwingnut
tosecureit.
ServicingtheSparkPlug
ServiceInterval:Every100hours
Every300hours
UseanNGKBPR6ESsparkplugorequivalent.
1.Shutofftheengineandwaitforallmoving
partstostop;refertoPreparingtheMachinefor
Maintenance(page8).
2.Cleanaroundthesparkplug.
3.Removethesparkplugfromthecylinderhead.
Important:Replaceacracked,fouled,or
dirtysparkplug.Donotsandblast,scrape,
orcleantheelectrodesbecauseengine
damagecouldresultfromgritenteringthe
cylinder.
4.Setthegapontheplugto0.7to0.8mm(0.028
to0.031inch)
g000533
Figure13
1.Center-electrodeinsulator3.Airgap
2.Sideelectrode
5.Carefullyinstallthesparkplugbyhand(toavoid
crossthreading)untilitishandtight.
6.Tightenthesparkpluganadditional1/2turnif
itisnew;otherwise,tightenitanadditional1/8
to1/4turn.
Important:Aloosesparkplugcanbecome
veryhotandcandamagetheengine;
overtighteningasparkplugmaydamagethe
threadsinthecylinderhead.
7.Connectthewiretothesparkplug.
12

Notes:

Notes:

Notes:

CaliforniaProposition65WarningInformation
Whatisthiswarning?
Youmayseeaproductforsalethathasawarninglabellikethefollowing:
WARNING:CancerandReproductiveHarm—www.p65Warnings.ca.gov.
WhatisProp65?
Prop65appliestoanycompanyoperatinginCalifornia,sellingproductsinCalifornia,ormanufacturingproductsthatmaybesoldinorbroughtinto
California.ItmandatesthattheGovernorofCaliforniamaintainandpublishalistofchemicalsknowntocausecancer,birthdefects,and/orother
reproductiveharm.Thelist,whichisupdatedannually,includeshundredsofchemicalsfoundinmanyeverydayitems.ThepurposeofProp65isto
informthepublicaboutexposuretothesechemicals.
Prop65doesnotbanthesaleofproductscontainingthesechemicalsbutinsteadrequireswarningsonanyproduct,productpackaging,orliteraturewith
theproduct.Moreover,aProp65warningdoesnotmeanthataproductisinviolationofanyproductsafetystandardsorrequirements.Infact,the
CaliforniagovernmenthasclariedthataProp65warning“isnotthesameasaregulatorydecisionthataproductis‘safe’or‘unsafe.’”Manyofthese
chemicalshavebeenusedineverydayproductsforyearswithoutdocumentedharm.Formoreinformation,gotohttps://oag.ca.gov/prop65/faqs-view-all.
AProp65warningmeansthatacompanyhaseither(1)evaluatedtheexposureandhasconcludedthatitexceedsthe“nosignicantrisklevel”;or(2)
haschosentoprovideawarningbasedonitsunderstandingaboutthepresenceofalistedchemicalwithoutattemptingtoevaluatetheexposure.
Doesthislawapplyeverywhere?
Prop65warningsarerequiredunderCalifornialawonly.ThesewarningsareseenthroughoutCaliforniainawiderangeofsettings,includingbutnot
limitedtorestaurants,grocerystores,hotels,schools,andhospitals,andonawidevarietyofproducts.Additionally,someonlineandmailorder
retailersprovideProp65warningsontheirwebsitesorincatalogs.
HowdotheCaliforniawarningscomparetofederallimits?
Prop65standardsareoftenmorestringentthanfederalandinternationalstandards.TherearevarioussubstancesthatrequireaProp65warning
atlevelsthatarefarlowerthanfederalactionlimits.Forexample,theProp65standardforwarningsforleadis0.5μg/day,whichiswellbelow
thefederalandinternationalstandards.
Whydon’tallsimilarproductscarrythewarning?
•ProductssoldinCaliforniarequireProp65labellingwhilesimilarproductssoldelsewheredonot.
•AcompanyinvolvedinaProp65lawsuitreachingasettlementmayberequiredtouseProp65warningsforitsproducts,butothercompanies
makingsimilarproductsmayhavenosuchrequirement.
•TheenforcementofProp65isinconsistent.
•CompaniesmayelectnottoprovidewarningsbecausetheyconcludethattheyarenotrequiredtodosounderProp65;alackofwarningsfora
productdoesnotmeanthattheproductisfreeoflistedchemicalsatsimilarlevels.
WhydoesToroincludethiswarning?
Torohaschosentoprovideconsumerswithasmuchinformationaspossiblesothattheycanmakeinformeddecisionsabouttheproductstheybuyand
use.T oroprovideswarningsincertaincasesbasedonitsknowledgeofthepresenceofoneormorelistedchemicalswithoutevaluatingthelevelof
exposure,asnotallthelistedchemicalsprovideexposurelimitrequirements.WhiletheexposurefromT oroproductsmaybenegligibleorwellwithinthe
“nosignicantrisk”range,outofanabundanceofcaution,T orohaselectedtoprovidetheProp65warnings.Moreover,ifT orodoesnotprovidethese
warnings,itcouldbesuedbytheStateofCaliforniaorbyprivatepartiesseekingtoenforceProp65andsubjecttosubstantialpenalties.
RevA
This manual suits for next models
4
Table of contents
Other Toro Engine manuals
Popular Engine manuals by other brands

Valor
Valor 1500KN installation manual
Kohler
Kohler PCV850 owner's manual

Detroit Diesel
Detroit Diesel MBE4000 Application and installation guide
O.S. engine
O.S. engine max-12TZ series Owner's instruction manual
YANGDONG
YANGDONG SERIES Y85 Operation & maintenance manual
Lutz
Lutz MA II Translation of the original instruction
