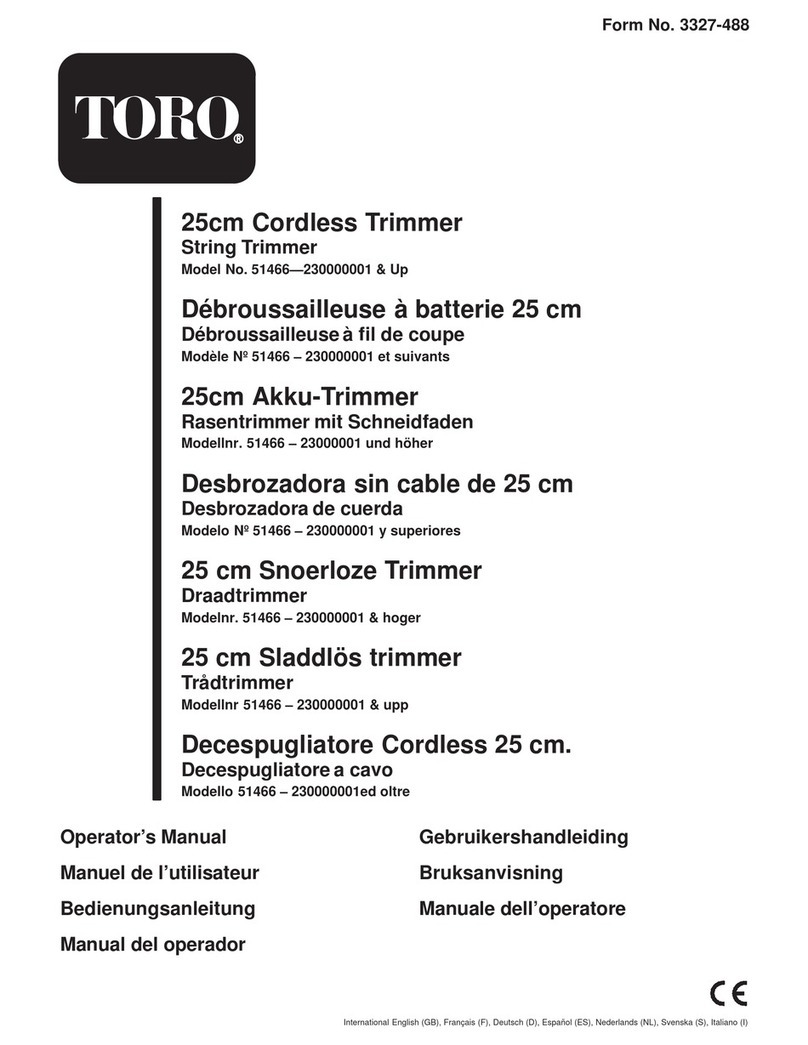
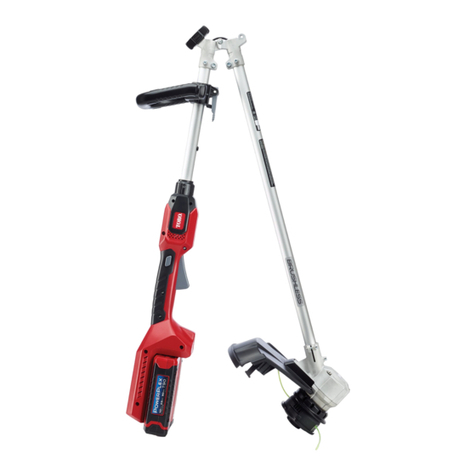
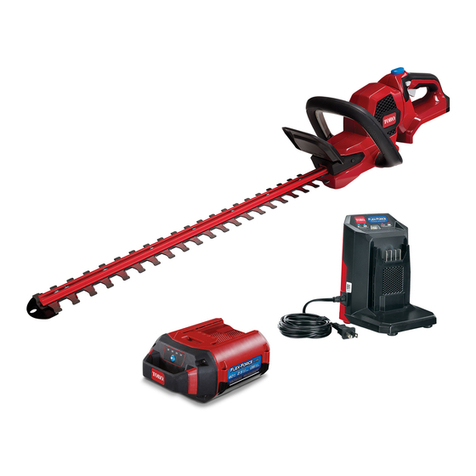
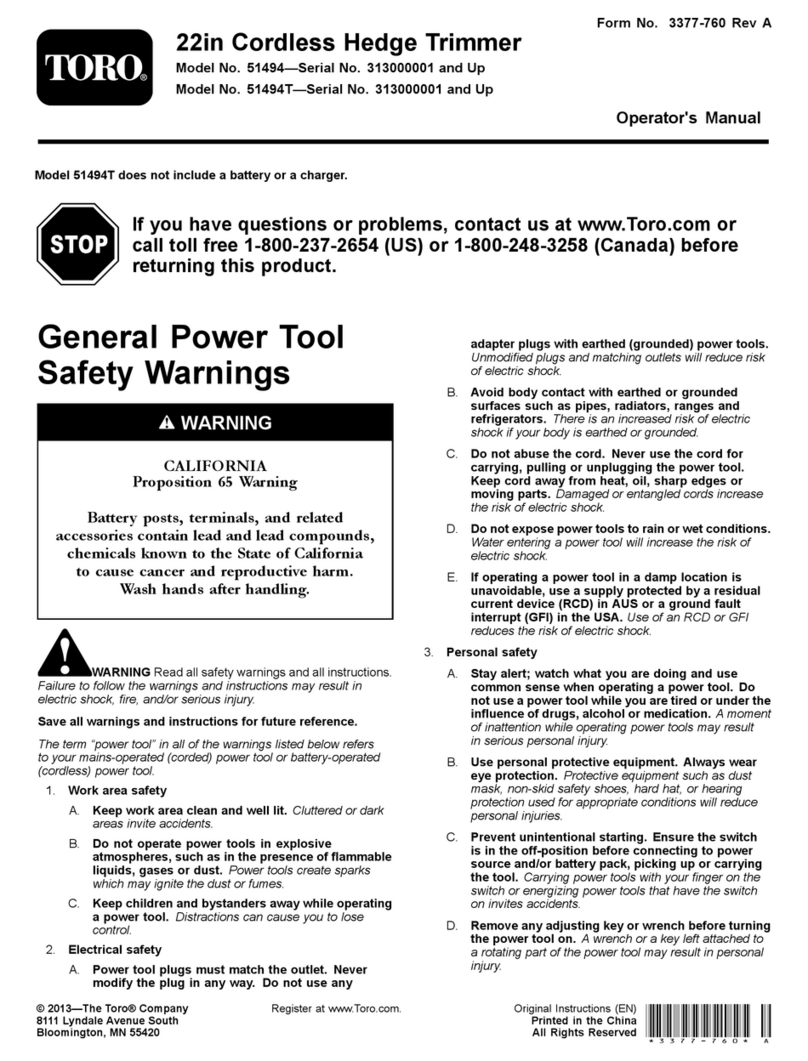
Toro PowerMax 51491 User manual

FormNo.3415-823RevB
PowerPlex™24in40VMAX
HedgeTrimmer
ModelNo.51491—SerialNo.317000001andUp
ModelNo.51491T—SerialNo.317000001andUp
Registeratwww.Toro.com.
OriginalInstructions(EN)*3415-823*B

Ifyouhavequestionsor
problems,calltollfree
1-888-367-6631(US)or
1-888-430-1687(Canada)
beforereturningthis
product.
WARNING
CALIFORNIA
Proposition65Warning
Thisproductcontainsachemical
orchemicalsknowntotheStateof
Californiatocausecancer,birthdefects,
orreproductiveharm.
Introduction
Thishedgetrimmerisintendedtobeusedby
residentialhomeownerstomaintainbushesand
hedges.ItisdesignedtouseonlybatterypackModel
88540(providedwithModel51491)or88541.
Readthisinformationcarefullytolearnhowtooperate
andmaintainyourproductproperlyandtoavoid
injuryandproductdamage.Youareresponsiblefor
operatingtheproductproperlyandsafely.
YoumaycontactT orodirectlyatwww.Toro.comfor
productandaccessoryinformation,helpndinga
dealer,ortoregisteryourproduct.
Model51491Tdoesnotincludeabatteryora
charger.
Safety
WARNING
Failuretofollowallwarningsandinstructions
mayresultinelectricshock,reand/or
seriousinjury.
Readallsafetywarningsandallinstructions.
Saveallwarningsandinstructionsforfuture
reference.
Theterm“powertool”inthewarningsreferto
yourmains-operated(corded)powertoolor
battery-operated(cordless)powertool.
1.Workareasafety
A.Keeptheworkareacleanandwelllit.
Clutteredordarkareasinviteaccidents.
B.Donotoperatepowertoolsinexplosive
atmospheres,suchasinthepresence
ofammableliquids,gasses,ordust.
Powertoolscreatesparks,whichmayignite
thedustorfumes.
C.Keepchildrenandbystandersaway
whileoperatingapowertool.Distractions
cancauseyoutolosecontrol.
D.Avoiddangerousenvironments.Donot
useappliancesindamporwetlocations.
2.Personalsafety
A.Stayalert;watchwhatyouaredoing
andusecommonsensewhenoperating
apowertool.Donotuseapowertool
whileyouaretiredorundertheinuence
ofdrugs,alcohol,ormedication.A
momentofinattentionwhileoperatingpower
toolsmayresultinseriouspersonalinjury.
B.Usepersonalprotectiveequipment.
Alwaysweareyeprotection.Protective
equipmentsuchasadustmask,non-skid
safetyshoes,ahardhat,orhearing
protectionusedforappropriateconditions
willreducepersonalinjuries.
C.Preventunintentionalstarting.Ensure
thattheswitchisintheOFFposition
beforeconnectingtoapowersource
and/orbatterypackandpickingupor
carryingthetool.Carryingpowertools
withyourngerontheswitchorenergizing
powertoolsthathavetheswitchoninvites
accidents.
D.Removeanyadjustingkeyorwrench
beforeturningonthepowertool.A
wrenchorakeyleftattachedtoarotating
©2018—TheToro®Company
8111LyndaleAvenueSouth
Bloomington,MN554202
Contactusatwww.Toro.com.
PrintedintheChina
AllRightsReserved

partofthepowertoolmayresultinpersonal
injury.
E.Donotoverreach.Keepproper
footingandbalanceatalltimes.This
enablesbettercontrolofthepowertoolin
unexpectedsituations.
F.Dressproperly.Donotwearloose
clothingorjewelry.Keepyourhairtied
backandyourclothingandglovesaway
frommovingparts.Looseclothes,jewelry,
orlonghaircanbecaughtinmovingparts.
G.Ifdevicesareprovidedforthe
connectionofdustextractionand
collectionfacilities,ensurethatthese
areconnectedandproperlyused.Use
ofdustcollectioncanreducedust-related
hazards.
3.Powertooluseandcare
A.Donotforcethepowertool.Usethe
correctpowertoolforyourapplication.
Thecorrectpowertoolwilldothejob
betterandsaferattherateforwhichitwas
designed.
B.Donotusethepowertooliftheswitch
doesnotturnitonandoff.Anypowertool
thatcannotbecontrolledwiththeswitchis
dangerousandmustberepaired.
C.Disconnecttheplugfromthepower
sourceand/orthebatterypackfrom
thepowertoolbeforemakingany
adjustments,changingaccessories,or
storingpowertools.Suchpreventive
safetymeasuresreducetheriskofstarting
thepowertoolaccidentally.
D.Storeidlepowertoolsoutofthereach
ofchildrenanddonotallowpersons
unfamiliarwiththepowertoolorthese
instructionstooperatethepowertool.
Powertoolsaredangerousinthehandsof
untrainedusers.
E.Maintainpowertools.Checkfor
misalignmentorbindingofmoving
parts,breakageofpartsandanyother
conditionthatmayaffectthepowertools
operation.Ifdamaged,havethepower
toolrepairedbeforeuse.Manyaccidents
arecausedbypoorlymaintainedpower
tools.
F.Keepcuttingtoolssharpandclean.
Properlymaintainedcuttingtoolswithsharp
cuttingedgesarelesslikelytobindandare
easiertocontrol.
G.Usethepowertool,accessoriesand
toolbitsetc.inaccordancewiththese
instructions,takingintoaccountthe
workingconditionsandtheworkto
beperformed.Usingthepowertoolfor
operationsdifferentfromthoseintended
couldresultinahazardoussituation.
4.Batterytooluseandcare
A.Chargeonlywiththechargerspecied
bythemanufacturer.Achargerthatis
suitablefor1typeofbatterypackmay
createariskofrewhenusedwithanother
batterypack.
B.Usepowertoolsonlywithspecically
designatedbatterypacks.Usingany
otherbatterypacksmaycreateariskof
injuryandre.
C.Whenbatterypackisnotinuse,keepit
awayfromothermetalobjects,suchas
paperclips,coins,keys,nails,screws,
orothersmallmetalobjectsthatcan
makeaconnectionfromoneterminal
toanother.Shortingthebatteryterminals
togethermaycauseburnsorare.
D.Underabusiveconditions,liquidmaybe
ejectedfromthebattery;avoidcontact.
Ifcontactaccidentallyoccurs,ush
withwater.Ifliquidcontactseyes,
additionallyseekmedicalhelp.Liquid
ejectedfromthebatterymaycauseirritation
orburns.
E.Chargingtimeincreasesifthebattery
packisnotchargedwithintheappropriate
temperaturerange;refertoSpecications
(page7).
5.Service
Haveyourpowertoolservicedbya
qualiedrepairpersonusingonlyidentical
replacementparts.Thiswillensurethatthe
safetyofthepowertoolismaintained.
HedgeTrimmerSafetyWarnings
•Keepallpartsofthebodyawayfromthecutter
blade.Donotremovecutmaterialorhold
materialtobecutwhenbladesaremoving.
Makesurethattheswitchisoffwhenclearing
jammedmaterial.Thebladescoastafteryou
turnthemoff.Amomentofinattentionwhile
operatingthehedgetrimmermayresultinserious
personalinjury.
•Carrythehedgetrimmerbythehandlewith
thecutterbladestopped.Properhandlingofthe
hedgetrimmerreducespossiblepersonalinjury
fromthecutterblades.
•Holdthepowertoolbyinsulatedgripping
surfacesonly,becausethecutterblademay
contacthiddenwiringoritsowncord.Cutter
bladescontactinga“live”wiremaymakeexposed
3

metalpartsofthepowertool“live”andcouldgive
youanelectricshock.
•DANGER—Keepyourhandsawayfromblade.
Contactwithbladewillresultinseriouspersonal
injury.
AdditionalSafetyWarnings
•Keephandsandfeetawayfromthecuttingdevice
atalltimesandespeciallywhenswitchingthe
producton.
•Donottrytograsporremovetrimmingswhenthe
productisrunning.Removeonlytrimmingswhen
theproductisswitchedoffanddisconnectedfrom
thepowersupply.
•Neverholdtheproductbytheguard.
•Alwaysbesureofasafeandsecureoperating
positionwhileusingtheproduct.
•Neverusetheproductwhilestandingonstepsor
aladder.Donotworkovershoulderheight.
•Alwaysensurethesafetyguardsuppliedis
ttedbeforeusingtheproduct.Neverattemptto
useanincompleteproductoronettedwithan
unauthorizedmodication.
•Checkthecuttingdeviceregularlyfordamage,
andifdamaged,repairimmediately.
•Donotoverloadtheproduct.
•Checkimmediatelyiftheproductstartstovibrate
abnormally.Excessivevibrationcancauseinjury.
•Switchtheproductoffwhenthecuttingdevice
isblocked.Disconnectitfrompowersupply
(i.e.,removethebatterypack)andremovethe
blockage.Inspectthecuttingdevicefordamage
beforeusingtheproductagain.
•Followthemaintenanceandrepairinstructionsfor
thisproduct.Nevercarryoutanymodicationsof
theproduct.Informationaboutmaintenanceand
repairisprovidedinthisinstructionmanual.
•Knowhowtostoptheproductquicklyinan
emergency.
•Donotexposetheproducttorain.Donotoperate
theproductonawethedge.
•Usetheproductonlyindaylightorgoodarticial
light.
•Checkthehedgeforforeignobjectsbefore
operation(e.g.,wirefences).Takecarethatthe
cuttingdevicedoesnotcomeintocontactwithwire
orothermetalobjects.
•Holdthehedgetrimmerproperly(e.g.,withboth
handsif2handlesareprovided).Lossofcontrol
cancausepersonalinjury.
AdditionalSafetyWarningsfortheCharger
•Thischargercanbeusedbypersonswithreduced
physical,sensoryormentalcapabilitiesorlack
ofexperienceandknowledgeiftheyhavebeen
givensupervisionorinstructionconcerninguse
ofthechargerinasafewayandunderstandthe
hazardsinvolved.
•Childrenshallnotplaywiththecharger.
•Cleaningandusermaintenanceshallnotbemade
bychildrenwithoutsupervision.
•Ifthesupplycordisdamaged,itmustbereplaced
bythemanufacturer,itsserviceagent,orsimilarly
qualiedpersonsinordertoavoidahazard.
•Disconnectthechargerfromthepowersupplyand
allowittocooldownbeforecleaning,maintenance,
storage,andtransportation.
•Beforeusingthecharger,readalltheinstructions
andcautionarymarkingsonthechargerand
batterypack.
•Thechargerandbatterypacksuppliedwithitare
specicallydesignedtoworktogether.Usethe
chargeronlywiththebatterypackforthistool.
•Chargethebatterypackindoorsonlyasthe
chargerisdesignedforindooruseonly.
•Donotchargenon-rechargeablebatteries.
•Protectthechargeragainstmoistureandwet
conditions.Thereisadangerofelectricshock.
•Donotplaceanyobjectontopofthechargerasit
couldcauseoverheating.Donotplacethecharger
nearanyheatsource.
•Donotuseanextensioncordonthecharger
unlessitisabsolutelynecessary.Theuseofan
improperextensioncordcouldcausetheriskof
re,electricshockorelectrocution.
•Donotusethechargerifithasbeensubjectedto
aheavyknock,droppedorotherwisedamagedin
anyway.Havethechargercheckedandrepaired
byanauthorizedservicecenter.
AdditionalSafetyWarningsforBatteryPacks
•Donotattempttochargethebatterypackwithany
otherchargerthantheonesupplied.Thecharger
andbatterypacksuppliedwithitarespecically
designedtoworktogether.
•T oensurethelongestbatterylifeandbest
performance,onlychargeandstorethebattery
packintemperaturesthatarewithinthe
appropriaterange;refertoSpecications(page
7).Donotchargeorstorethebatterypackin
temperaturesoutsideofthesuggestedrange.
•Smallleakageofliquidfromthebatterypack
mayoccurunderextremeusageortemperature
conditions.However,iftheoutersealisbroken
andthisleakagecomesintocontactwithyour
skin,washtheaffectedareaquicklywithwater.If
theleakagegetsinyoureyes,ushyoureyeswith
cleanwaterforaminimumof10minutesandseek
immediatemedicalattention.
4

•Neverattempttoopenthebatterypackforany
reason.Iftheplastichousingofthebatterypack
breaksopenorcracks,immediatelydiscontinueits
useanddonotrechargeit.
•Donotstoreorcarryasparebatterypackina
pocketortoolboxoranyotherplacewhereitmay
comeintocontactwithmetalobjects.Thebattery
packmayshort-circuit,causingdamagetothe
batterypack,burns,orare.
•Donotpiercethebatterywithnails,strikethe
batterywithahammer,steponthebattery,or
otherwisesubjectittostrongimpactsorshocks.
•Protectthebatterypackagainstheat.Donot
placethebatteryindirectsunlightoruseorstore
thebatteryinsidecarsinhotweather.Doingso
maycausethebatterytogenerateheat,explode
orignite.
•Nevertrytochargeabatterypackthatiscracked
ordamagedinanyotherway.Thereisadanger
ofelectricshockorelectrocution.
SafetyandInstructionalDecals
Safetydecalsandinstructionsareeasilyvisibletotheoperatorandarelocatednearanyarea
ofpotentialdanger.Replaceanydecalthatisdamagedormissing.
SymbolDesignation/Explanation
Readtheinstructionmanual.
Wearhearingprotection.
Weareyeprotection.
Wearadustmask.
Wearprotectivegloves.
Wearprotective,slip-resistant
footwear.
Donotexposetheproduct
torainorwetconditions
(moisture).
Keepngersawayfrom
movingcuttingdevice.
WEEEsymbol.Waste
electricalproductsshouldnot
bedisposedofwithhousehold
waste.Pleaserecyclewhere
facilitiesexist.Checkwith
yourLocalAuthorityorlocal
storeforrecyclingadvice.
decal136-2461
136-2461
Model51491
decal136-2462
136-2462
Model51491T
decal136-2471
136-2471
5

decal136-2473
136-2473
decal136-2476
136-2476
1.Thebatterypackis
charging.
3.Thebatterypackistoo
warm.
2.Thebatterypackisfully
charged.
4.Replacethebatterypack.
decal136-2539
136–2539
1.Chargethebatterywherethetemperatureisbetween0°C
and40°C(32°Fand104°F).
decal136-2533
136-2533
1.Warning—readtheOperator’sManual;keepawayfrom
movingparts;keepallguardsandcoversinplace;wear
eyeprotection;donotoperateinwetconditions.
decal136-2534
136-2534
1.Thebatterydoesnot
comeoutoftheboxfully
charged.
4.Stop—followthese
instructionsbeforerst
use.
2.Placethebatteryinthe
batterycharger.
5.ReadtheOperator’s
Manual.
3.Waituntilthebatteryis
fullychargedbeforethe
rstuse.
6

Setup
Note:Thebatterypackisnotfullychargedwhenit
ispurchased.Beforeusingthetoolforthersttime,
refertoChargingtheBatteryPack(page9).
MountingtheBattery
Charger(Optional)
Ifdesired,mountthebatterychargersecurelyona
wallusingthewall-mountkeyholesonthebackof
thecharger.
Mountitindoors(suchasagarageorotherdryplace),
nearapoweroutlet,andoutofthereachofchildren.
RefertoFigure1forassistanceinmountingthe
charger.
Note:Slideandtwistthechargeroverthe
appropriatelypositionedhardwaretosecurethe
chargerinplace(hardwarenotincluded).
g194202
Figure1
ProductOverview
g204357
Figure2
LeftSideofHedgeTrimmer
1.Blades6.Lockswitch
2.Guard7.Trigger
3.Auxiliary-handleswitch8.Batterylatch
4.Auxiliaryhandle9.Batterypack
5.Handle-rotationbutton10.Protectivecover
Specications
Model5149151491T
Cutting
Length
610mm
Rated
Voltage
40VDCmaximum,36VDCnominalusage
No-load
Speed
3000spmat40VDCmax
Cutting
width
18mm
Charger
Type
88542
BatteryType88540(includedwith51491),88541(sold
separately)
AppropriateTemperatureRanges
Chargethebatteryat0°C(32°F)to40°C(104°F)*
Useproductsat-15°C(5°F)to60°C(140°F)
Storeproductsat-15°C(5°F)to60°C(140°F)
UnplugthechargerifBelow0°C(32°F)orabove
40°C(104°F)
*Chargingtimewillincreaseifyoudonotchargethe
batterywithinthisrange.
Storethetool,batterypack,andbatterychargerinan
enclosedclean,dryarea.
7

Operation
StartingtheHedgeTrimmer
1.Removetheprotectivecoverfromthecutter
blades(Figure3).
WARNING
Thehedgetrimmerbladescancause
cutsoramputation.
Becarefulwhenhandlingthehedge
trimmerwiththeprotectivecover
removed.
g203890
Figure3
1.Protectivecover2.Blades
2.Makesurethattheventsonthehedgetrimmer
areclearofanydustanddebris.
3.Alignthecavityofthebatterypackwiththe
tongueinthehandlehousing,graspthehandle,
andpushthebatterypackintothehandleuntil
thelatchlocksintoplace(Figure4).
g194473
Figure4
1.Auxiliary-handleswitch4.Trigger
2.Auxiliaryhandle5.Batterylatch
3.Lockswitch6.Hedgetrimmerventing
areas
4.Place1handonthetriggerhandle.Placethe
otherhandontheauxiliaryhandle(Figure4).
5.Pressthelockswitchandthensqueeze
thetriggerswitchwhileengagingthe
auxiliary-handleswitchtoturnonthehedge
trimmer(Figure4).
Thetrimmerstaysonaslongasthe
auxiliary-handleswitchisengagedandthe
triggerissqueezed.Thelockswitchmaybe
releasedoncethehedgetrimmerisrunning
(Figure4).
RotatingtheHedgeTrimmer
Handle
1.Pressandholdtherotationallockbutton(Aof
Figure5).
2.Rotatethehandle90°totherightorleft
dependingondesiredcuttingdirection,then
releasetherotationallockbuttontolockthe
handleinthedesiredposition(BofFigure5).
g190070
Figure5
StoppingtheHedge
Trimmer
1.Releasethetriggerorauxiliary-handleswitch
(Figure4).
2.Allowatleast5secondsforthecuttingbladeto
stopmoving.
8

RemovingtheBatteryPack
Pressthebatterylatchonthetooltoreleasethe
batterypackandslidethebatterypackoutofthetool
(Figure6).
g194190
Figure6
1.Batterylatch
ChargingtheBatteryPack
Important:Readallsafetyprecautions.
Important:Chargethebatterypackonlyin
temperaturesthatarewithintheappropriate
range;refertoSpecications(page7).
Note:Atanytime,pressthebattery-charge-indicator
buttononthebatterypacktodisplaythecurrent
charge(LEDindicators).
1.Makesurethattheventsonthebatteryareclear
ofanydustanddebris.
2.Lineupthecavityinthebatterypack(Figure7)
withthetongueonthecharger.
g192748
Figure7
1.Batterypackcavity4.Battery-charge-indicator
button
2.Batterypackterminals5.LEDindicators(current
charge)
3.Batterypackventingareas
3.Makesurethattheventsonthebatterycharger
areclearofanydustanddebris.
4.Slidethebatterypackintothechargeruntilitis
fullyseated(Figure8).
g194423
Figure8
1.Chargerventingareas3.Rightindicatorlight
2.Leftindicatorlight
5.Toremovethebatterypack,slidethebattery
backwardoutofthecharger.
9

6.RefertothefollowingtabletointerprettheLED
indicatorsonthebatterycharger.
LeftLightRightLightIndicates
OffRedChargerison;nobattery
packinserted
RedRedBatterypackischarging
GreenRedBatterypackischarged
OrangeRedBatterypackistoowarm
RedBlinkingRedReplacethebatterypack
OperatingTips
•Usethepowertoolforcuttingineitherdirectionin
aslow,sweepingactionfromsidetoside.
•Standsothatyouarestableandbalancedonboth
feet.Donotoverreach.
•Inspectandcleartheareaofanyhiddenobjects.
•Neverusethehedgetrimmernearpowerlines,
fencing,posts,buildings,orotherimmovable
objects.
•Neveruseabladeafterhittingahardobject
withoutrstinspectingitfordamage.Donotuseif
itisdamaged.
•Nevertouchbladesorserviceunitwiththepower
supplyconnected.
•Donotforcethehedgetrimmerthroughheavy
shrubbery.Thiscancausethebladestobindand
slowdown.Ifthebladesslowdown,reducethe
pace.
•Donotattempttocutstemsortwigsthatarelarger
than18mm(0.71inch)indiameter,orthose
obviouslytoolargetofeedintothecuttingblade.
Useanon-poweredhandsaworpruningsawto
trimlargestems.
•Ifbladesdobecomejammed,stopthemotor,
allowthebladestostop,andremovethebattery
beforeattemptingtoremovetheobstruction.
•Ifdesired,youcanuseastringtohelpcutyour
hedgelevel.Decidehowhighyouwantthehedge.
Stretchapieceofstringalongthehedgeatthe
desiredheight.Trimthehedgejustabovethe
guidelineofstring.
•Weargloveswhentrimmingthornyorprickly
growth.Whentrimmingnewgrowth,useawide
sweepingactionsothatthestemsarefeddirectly
intothecuttingblade.
10

Maintenance
Disconnecttheproductfromthepowersupply(i.e.
removetheplugfromthepowersupplyorthebattery
pack)beforemaintenanceorcleaningwork.
Useonlythemanufacturer’srecommended
replacementpartsandaccessories.
Inspectandmaintaintheproductregularly.Havethe
productrepairedonlybyanauthorizedservicecenter
orsimilarqualiedspecialist.
OilingtheTrimmerBlade
Note:Oilthetrimmerbladebeforeandaftereach
use.
1.Stopthemotorandremovethebattery.
2.Cleandirtanddebrisfromthebodyofthe
hedgetrimmer,usingadampclothwithamild
detergent.
Note:Donotuseanystrongdetergentson
theplastichousingorthehandle.Theycanbe
damagedbycertainaromaticoils,suchaspine
andlemon,andbysolventssuchaskerosene.
3.Laythehedgetrimmeronaatsurface.Apply
light-weightmachineoilalongtheedgeofthe
topblade.Ifyouwillbeusingthehedgetrimmer
foranextendedperiodoftime,oiltheblade
duringuse.
Note:Donotoilthehedgetrimmerwhileitis
running.
Storage
Important:Storethetool,batterypack,and
chargeronlyintemperaturesthatarewithinthe
appropriaterange;refertoSpecications(page7).
Important:Ifyouarestoringthetoolforayearor
longer,removethebatterypackfromthetooland
chargethebatterypackuntil2or3LEDindicators
turnblueonthebattery.Donotstoreafully
chargedorfullydepletedbattery.Whenreadyto
useagain,chargethebatterypackuntiltheleft
indicatorlightturnsgreenonthechargerorall4
LEDindicatorsturnblueonthebattery.
•Disconnecttheproductfromthepowersupply
(i.e.,removetheplugfromthepowersupplyorthe
batterypack)andcheckfordamageafteruse.
•Cleanallforeignmaterialfromtheproduct.
•Whennotinuse,storethetool,batterypack,and
batterychargeroutofthereachofchildren.
•Keepthetool,batterypack,andbatterycharger
awayfromcorrosiveagents,suchasgarden
chemicalsandde-icingsalts.
•T oreducetheriskofseriouspersonalinjury,do
notstorethebatterypackoutsideorinvehicles.
•Storethetool,batterypack,andbatterycharger
inanenclosedclean,dryarea.
PreparingtheBatteryPack
forRecycling
Important:Uponremoval,covertheterminalsof
thebatterypackwithheavy-dutyadhesivetape.
Donotattempttodestroyordisassemblethe
batterypackorremoveanyofitscomponents.
Recycleorproperlydisposeoflithium-ionbattery
packsatabatteryrecyclingfacility.
Formoreinformationonrecyclinglithium-ion
batterypacksandtolocatethebattery
recyclingfacilityclosesttoyou,visit
www.Call2Recycle.org(USandCanadaonly).
IfyouarelocatedoutsideoftheUSand
Canada,pleasecontactyourauthorizedToro
distributor.
11

Troubleshooting
Performonlythestepsdescribedintheseinstructions.Allfurtherinspection,maintenance,andrepairwork
mustbeperformedbyanauthorizedservicecenterorasimilarlyqualiedspecialistifyoucannotsolvethe
problemyourself.
ProblemPossibleCauseCorrectiveAction
1.Thebatteryisnotfullyinstalledinthe
tool.
1.Removeandthenreplacethebattery
intothetool,makingsurethatitisfully
installedandlatched.
2.Thebatterypackisnotcharged.2.Removethebatterypackfromthetool
andchargeit.
3.Thebatterypackisdamaged.3.Replacethebatterypack.
Thetooldoesnotstart.
4.Thereisanotherelectricalproblem
withthetool.
4.ContactanAuthorizedServiceDealer.
1.Thebatterypackchargecapacityis
toolow.
1.Removethebatterypackfromthetool
andfullychargethebatterypack.
Thetooldoesnotreachfullpower.
2.Theairventsareblocked.2.Cleantheairvents.
Thetoolisproducingexcessivevibration
ornoise.
1.Thebladesaredullordamaged.1.ContactanAuthorizedServiceDealer.
Thebatterypackloseschargequickly.1.Thebatterypackisoverorunderthe
appropriatetemperaturerange.
1.Movethebatterypacktoaplace
whereitisdryandthetemperatureis
between0°C(32°F)and40°C(104°F).
1.Thebatterychargerisoverorunder
theappropriatetemperaturerange.
1.Unplugthebatterychargerandmove
ittoaplacewhereitisdryandthe
temperatureisbetween0°C(32°F)
and40°C(104°F).
Thebatterychargerisnotworking.
2.Theoutletthatthebatterychargeris
pluggedintodoesnothavepower.
2.Contactyourlicensedelectricianto
repairtheoutlet.
Thebatterypackshowsonly3LED
indicatorsafteronlyafewsecondsof
usingafullychargedbattery.
1.Thisisanormaloccurrence.1.Stopthetoolandpress
battery-charge-indicatorbuttonor
theremovethebatteryfromthetoolto
displaytheactualbatterycharge.
All4LEDindicatorsareblinkingon
thebatterypackafteryoupressthe
battery-charge-indicatorbuttononthe
batterypackandthecurrentcharge
displays(whenthebatterypackisnotin
use).
1.Thebatterypackisoverorunderthe
appropriatetemperaturerange.
1.Movethebatterypacktoaplace
whereitisdryandthetemperatureis
between0°C(32°F)and40°C(104°F).
All4LEDindicatorsareblinkingonthe
batterypackafterreleasingthetrigger
(whenthebatterypackisinuse).
1.Thebatterypackisoverorunderthe
appropriatetemperaturerange.
1.Movethebatterypacktoaplace
whereitisdryandthetemperatureis
between0°C(32°F)and40°C(104°F).
2LEDindicatorsareblinkingon
thebatterypackafteryoupressthe
battery-charge-indicatorbuttononthe
batterypackandthecurrentcharge
displays(whenthebatterypackisnotin
use).
1.Thereisadifferenceinvoltage
betweencellsinthebatterypack.
1.Placethebatteryonthechargeruntil
itisfullycharged.
2LEDindicatorsareblinkingonthe
batterypackafterreleasingthetrigger
(whenthebatterypackisinuse).
1.Thereisadifferenceinvoltage
betweencellsinthebatterypack.
1.Placethebatteryonthechargeruntil
itisfullycharged.
12

ProblemPossibleCauseCorrectiveAction
1LEDindicatorisblinkingonthebattery
pack.
1.Thebatterypackvoltageislow.1.Placethebatterypackonthecharger.
Itisdifculttoremovethebatterypack
fromthetool.
1.Thebatterypack/toolisneworthere
iscorrosioninthebatteryterminals
and/ortheterminalsonthetool.
1.Cleantheterminalsonthebatterypack
andthetool.Thenapplydielectric
greasetothebatteryterminals;donot
useanyothertypeoflubricantasitcan
damagetheterminals.
13

Notes:

Notes:

TheToroPromise-ElectricProducts
AThree-Year1FullWarrantyforResidentialUsefortheUnitedStatesandCanada
TheT oroCompanyanditsafliate,ToroWarrantyCompany,pursuanttoanagreementbetweenthem,jointlywarrantthisproductforthreeyears
againstdefectsinmaterialorworkmanshipwhenusedfornormalresidentialpurposes.*
1Doesnotincludethebattery.1YearBatteryWarrantyforResidentialUse.
IfyouthinkyourToroProductcontainsadefectinmaterialsorworkmanship,ifyouhavequestionsorproblems,andbeforereturningthisproductcall
tollfree:
Trimmers:Chainsaw:Blowers:Snowthrowers:
1-800-237-2654(US)1-855-340–7689(USandCanada)1-888-367-6631(US)1-800-808-2963(US)
1-800-248-3258(Canada)1-888-430-1687(Canada)1-800-808-3072(Canada)
Toreceiveareplacementorrepair,atouroption,returnthecompleteunittotheseller.UnitedStatesandCanadacustomersmayreturntheirproduct,
withproofofpurchase,toanyAuthorizedServiceDealer.UnitedStatescustomersmayalsoreturntheirproduct,withproofofpurchase,postage
prepaid,totheToroServiceCenter,5500SEDelaware,Ankeny,IA50021.
Thiswarrantycoversproductdefectsonly.NeitherTheToroCompanynorToroWarrantyCompanyisliableforindirect,incidental,or
consequentialdamagesinconnectionwiththeuseoftheToroProductscoveredbythiswarranty,includinganycostorexpenseof
providingsubstituteequipmentorserviceduringreasonableperiodsofmalfunctionornon-usependingcompletionofrepairsunderthis
warranty.Somestatesdonotallowexclusionsofincidentalorconsequentialdamages,sotheaboveexclusionsmaynotapplytoyou.This
warrantygivesyouspeciclegalrights,andyoumayalsohaveotherrightswhichvaryfromstatetostate.
CountriesOtherthantheUnitedStatesandCanada
ThiswarrantyisnotvalidinMexico.CustomerswhohavepurchasedToroproductsexportedfromtheUnitedStatesorCanadashouldcontacttheirToro
Distributor(Dealer)toobtainguaranteepoliciesforyourcountry,province,orstate.IfforanyreasonyouaredissatisedwithyourDistributor’sservice
orhavedifcultyobtainingguaranteeinformation,contacttheToroimporter.Ifallotherremediesfail,youmaycontactusatT oroWarrantyCompany.
AustralianConsumerLaw
AustraliancustomerswillnddetailsrelatingtotheAustralianConsumerLaweitherinsidetheboxoratyourlocalT oroDealer.
*Residentialusemeansuseoftheproductonthesamelotasyourhome.PartNumber374-0262Rev.G
374-0262RevG
This manual suits for next models
1
Table of contents
Other Toro Trimmer manuals

Toro
Toro Flex-Force Power System 51855T User manual

Toro
Toro 51484 User manual

Toro
Toro PowerPlex 51491 User manual

Toro
Toro 51803 User manual

Toro
Toro 51836 User manual

Toro
Toro Flex-Force Power System 51841 User manual

Toro
Toro 53002 User manual

Toro
Toro Flex-Force Power System 51834 User manual

Toro
Toro 66210T User manual

Toro
Toro 51452 User manual

Toro
Toro 51248 User manual

Toro
Toro 66210T User manual

Toro
Toro 51480A User manual

Toro
Toro 51950A-250000001 User manual

Toro
Toro 51490 User manual

Toro
Toro 51938 User manual

Toro
Toro 51494 User manual

Toro
Toro 51903; 51904; 51906; 51907 User manual

Toro
Toro 51955 User manual

Toro
Toro Power Plex 14in 40V MAX 51482 User manual