manuals.online logo
Brands
  1. Home
  2. •
  3. Brands
  4. •
  5. Toshiba
  6. •
  7. Printer
  8. •
  9. Toshiba HSP100 Operating and maintenance instructions

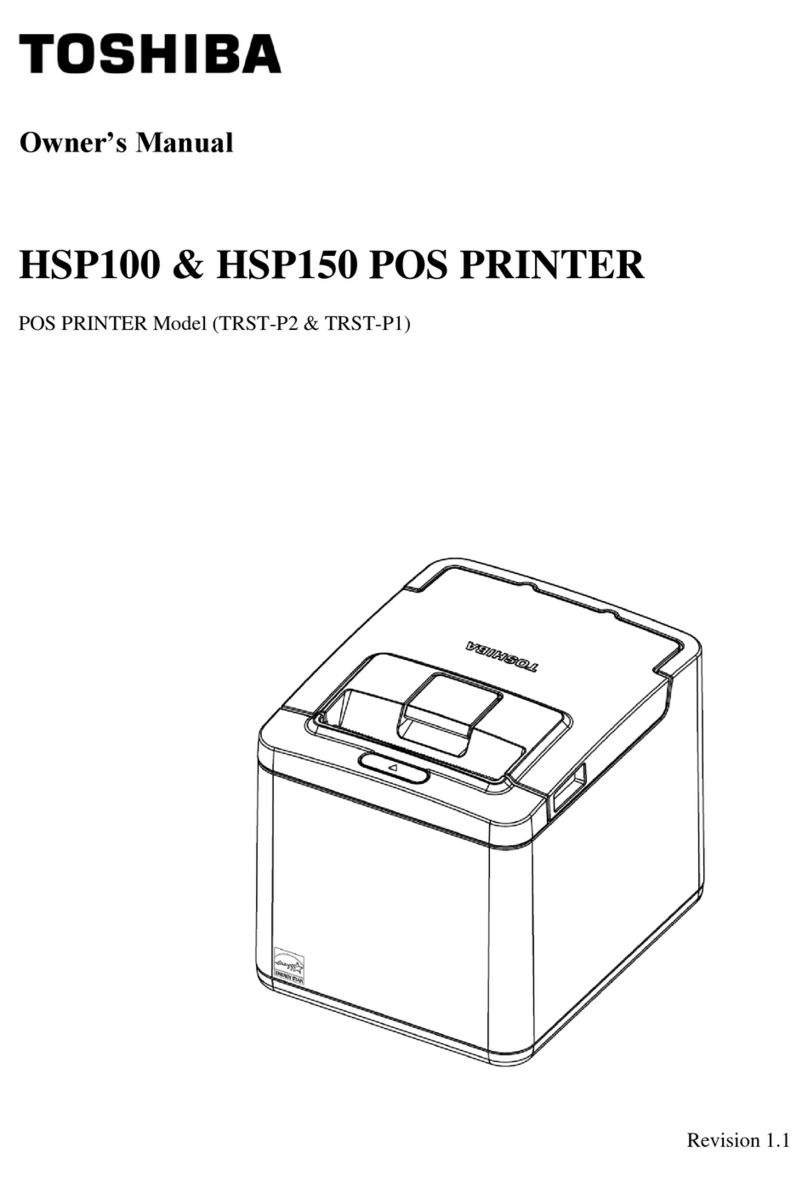
Toshiba HSP100 Operating and maintenance instructions

Quick Installation Manual
HSP100 & HSP150 POS PRINTER
POS PRINTER Model (TRST-P2 & TRST-P1)
1
Introduction to the Manuals
This sheet contains only the quick installation procedures. Please be sure to
read the Owner’s Manual in the web site for further information about this
printer.
http://business.toshiba.com/support/#downloads
Important Information to the User
In order to ensure compliance with the Product Safety, FCC marking
requirements, you must use the power supply, power cord, and interface cable
which were shipped with this product or which meet the following parameters:
Power Adapter
The power adapter is required to comply with the Safety and/or EMC
requirements depending on the county where the equipment is used, and to have
the following electrical characteristics, Class 1 power adapter with SELV
(Secondary Extra Low Voltage) and L.P.S (Limited Power Source), non-energy
hazard output, input rated 100-240 Vac, 1.8A Max, 50/60 Hz, output rated 24
Vdc, 2.5A. For the finest, please use TOSHIBA TEC recommended power
adapter.
Interface Cable
You are advised to use a shielded (360 degree) interface cable with this product.
The shield must be connected to the frame or earth ground connection or earth
ground reference at BOTH ends of the cable. If another cable is used than
described above you will need to test this cable with the TOSHIBA TEC printer
and your system for local EMC requirements where the equipment is used.
Power Cord
For this product a UL listed, detachable power cord is required. When the power
supply is mounted on the floor, a power cord with Type SJT marking is required.
If a power cord is used different from described above, you might violate safety
certifications which are in force in the country of use. The socket-outlet needs to
be installed near the equipment and must be easily accessible.
!00TSCC0403601!
2
USB
Caution (Hot surface)
Direct Current
Caution (Sharp edges)
WARNING!
This is a Class A product. In domestic environment, this product may cause radio interference in
which user may be required to take adequate measures.
Supplier’s Declaration of Conformity
This equipment has been tested and found to comply with the limits for a Class A digital device,
pursuant to Part 15 of the FCC Rules. These limits are designed to provide reasonable protection
against harmful interference when the equipment is operated in a commercial environment. This
equipment generates, uses, and can radiate radio frequency energy and, if not installed and used in
accordance with the instruction manual, may cause harmful interference to radio communications.
Operations of this equipment in a residential area is likely to cause harmful interference in which
case the user will be required to correct the interference at his own expense.
WARNING!
Changes or modifications made to this equipment, not expressly approved by TOSHIBA TEC or
parties authorized by TOSHIBA TEC, could void the user's authority to operate the equipment.
Toshiba America Business Solutions, Inc.
25530 Commercentre Drive
Lake Forest, CA 92630
Tel: 949-462-6000 (For USA only)
About The Symbols on TOSHIBA TEC Products
On TOSHIBA TEC products, there are symbols that represents safety and to ensure proper use of
the product, and to warn and prevent users and other persons about possible hazards or danger as
well as property damage. Below table indicates the meaning of the symbols. Be sure that you
completely understand the meaning of the symbols on the product before using it.
Changes or modifications not expressly approved by the manufacturer for compliance could void
the user’s authority to operate the equipment.
3
Safety Summary
Personal safety in handling or maintaining the equipment is extremely important. Warnings and
Cautions necessary for safe handling are included in this manual. All warnings and cautions
contained in this manual should be read and understood before handling or maintaining the
equipment.
Do not attempt to effect repairs or modifications to this equipment. If a fault occurs that cannot
be rectified using the procedures described in this manual, turn off the power supply, unplug the
machine, and then contact your authorized TOSHIBA TEC representative for assistance.
Meanings of Each Symbol
This symbol indicates warning items (including cautions).
Specific warning contents are drawn inside the symbol.
(The symbol on the left indicates a general caution.)
This symbol indicates prohibited actions (prohibited items).
Specific prohibited contents are drawn inside or near the symbol.
(The symbol on the left indicates “no disassembling”.)
This symbol indicates actions which must be performed.
Specific instructions are drawn inside or near the ● symbol.
(The symbol on the left indicates “disconnect the power cord plug from the
outlet”.)
This indicates that there is the risk of death or serious
injury if the machines are improperly handled contrary to
this indication.
Do not use voltages other
than the voltage (AC)
specified on the rating
plate, as this may cause fire
or electric shock.
Do not plug in or unplug
the power cord plug with
wet hands as this may
cause electric shock.
If the machines share the
same outlet with any other
electrical appliances which
consume large amounts of
power, the voltage will
fluctuate widely each time
these appliances operate.
Be sure to provide an
exclusive outlet for the
machine as this may cause
the machines to
malfunction.
Do not place metal objects
or water-filled containers
such as flower vases,
flower pots or mugs, etc.
on top of the machines. If
metal objects or spilled
liquid enter the machines,
this may cause fire or
electric shock.
WARNING!
Any other
than the
specified AC
voltage is
prohibited.
Prohibited
Prohibited
Prohibited
4
Do not insert or drop metal,
flammable or other foreign
objects into the machines
through the ventilation slits, as
this may cause fire or electric
shock.

Do not scratch, damage
or modify the power
cords. Also, do not
place heavy objects on,
pull on, or excessively
bend the cords, as this
may cause fire or
electrical shock.
If the machines are dropped or
their cabinets damaged, first
turn off the power switches and
disconnect the power cord
plugs from the outlet, and then
contact your authorized
TOSHIBA TEC representative
for assistance. Continued use
of the machine in that condition
may cause fire or electric
shock.
Continued use of the
machines in an
abnormal condition
such as when the
machines are producing
smoke or strange smells
may cause fire or
electric shock. In these
cases, immediately turn
off the power switches
and disconnect the
power cord plugs from
the outlet. Then,
contact authorized
TOSHIBA TEC
representative for
assistance.
If foreign objects (metal
fragments, water, liquids) enter
the machines, first turn off the
power switches and disconnect
the power cord plugs from the
outlet, and then contact
authorised TOSHIBA TEC
representative for assistance.
Continued use of the machine
in that condition may cause fire
or electric shock.
When unplugging the
power cords, be sure to
hold and pull on the
plug portion. Pulling
on the cord portion may
cut or expose the
internal wires and cause
fire or electric shock.
Ensure that the equipment is
properly grounded. Extension
cables should also be grounded.
Fire or electric shock could
occur on improperly grounded
equipment.
Do not remove covers,
repair or modify the
machine by yourself.
You may be injured by
high voltage, very hot
parts or sharp edges
inside the machine.
Prohibited
Prohibited
Disconnect
the plug.
Disconnect
the plug.
Disconnect
the plug.
Disconnect
the plug.
Connect a
grounding
wire.
No
disassembling.
5
Request Regarding Maintenance
Utilize our maintenance services.
After purchasing the machine, contact your authorized TOSHIBA TEC representative for
assistance once a year to have the internal cleaning of the printer. Otherwise, dust will build
up inside the machines and may cause a fire or a malfunction. Cleaning is particularly
effective before humid rainy seasons.
Our preventive maintenance service performs the periodic checks and other work required to
maintain the quality and performance of the machines, preventing accidents beforehand.
For details, please consult your authorized TOSHIBA TEC representative for assistance.
Using insecticides and other chemicals
Do not expose the machines to insecticides or other volatile solvents. This will cause the
cabinet or other parts to deteriorate or cause the paint to peel.
This indicates that there is the risk of personal injury or
damage to objects if the machines are improperly handled
contrary to this indication.
Precautions
The following precautions will help to ensure that this machine will continue to function
correctly.
Try to avoid locations that have the following adverse conditions:
* Temperatures out of the specification * Direct sunlight * High humidity
* Shared power source * Excessive vibration * Dust/Gas
The cover should be cleaned by wiping with a dry cloth or a cloth slightly dampened with a
mild detergent solution. NEVER USE THINNER OR ANY OTHER VOLATILE
SOLVENT on the plastic covers.
USE ONLY TOSHIBA TEC SPECIFIED paper.
DO NOT STORE the paper where they might be exposed to direct sunlight, high
temperatures, high humidity, dust, or gas.
Ensure the printer is operated on a level surface.
Any data stored in the memory of the printer could be lost during a printer fault.
Try to avoid using this equipment on the same power supply as high voltage equipment or
equipment likely to cause mains interference.
Unplug the machine whenever you are working inside it or cleaning it.
Keep your work environment static free.
Do not place heavy objects on top of the machines, as these items may become unbalanced
and fall causing injury.
Do not lean against the machine. It may fall on you and could cause injury.
Care must be taken not to injure yourself with the printer paper cutter.
Unplug the machine when it is not used for a long period of time.
CAUTION!
6
1. Front/Rear View
Front View Rear View
2. LED and Feed Button
Cover
Open
Lever
Main
Cover
Top
Cover
Front
Cover
POWERED LED (Blue)
Light up when the power is turned
on.
ERROR LED (Amber)
The Error LED indicates an error by
Amber color.
FEED BUTTON
Used to feed receipt paper. A touch
of this button causes one line feed.
Pressing and holding it feeds the
paper continuously. When the power
switch is turned on while the
[FEED] button is pressed and held,
the printer will perform a self-test
print
LED and
Feed Button
7
3. Loading the Receipt Roll
When you use this printer for the first time or when the receipt paper has been used
up, load a receipt roll in the following procedures while the printer power is set to
ON.
A thermal printer prints thermal receipt paper by applying heat to the paper to react
with the chemicals on the paper surface. A red line which appears on the either both
side of the receipt paper indicates that the paper is almost used up.
WARNING!
The print head becomes very hot while printing. Never touch the print head to avoid
getting burned. Standard operating temperature of printer is 5oC to 50oC. Please do
not operate out of range for safe operation.
Hazardous moving cutter. Keep fingers and other body parts away.
Print Head
Cutter Blades
8
1) Turn the printer power ON by connecting to the power supply.
2) Pull up the Cover Open Lever to open the printer cover.
3) Check for the correct orientation of the receipt roll, and put it into the paper
4) Pull the receipt until it extends past the paper outlet for about 5 cm.
5) Close the printer top cover gently and printer will automatically perform auto cut.
Horizontal Orientation
Vertical Orientation
Horizontal Orientation
Vertical Orientation
9
CAUTION!
1. Use only TOSHIBA TEC specified paper. Use of non-specified paper may
shorten the print head life resulting in problems with print quality, paper feed
failure, or shorten the cutter life.
2. Do not subject the thermal receipt roll to water, oil, or heat source as this will
darken the paper.
3. Load the receipt roll in the correct orientation. Failure to do this may cause a
paper jam error.
4. Care must be taken not to damage the print head and platen when the printer
cover is opened as this may cause a poor print or a printer failure.
5. Do not open the printer cover while the printer is printing.
6. Do not hold the receipt while the printer is printing. Doing so may cause a
paper jam.
7. When closing the printer cover, do not press it down too hard.
8. Do not put anything on the printer cover or push the cover too strongly. Doing
so may cause a print failure.
4. Choosing a Location
i. Table Top –Horizontal orientation
The POS Printer takes up relatively little counter space and may be set on or near the
POS terminal. Make sure that there is enough room to open the receipt cover for
changing the paper roll. The paper will be presented in the top exit direction.
10
ii. Table Top/Under Counter –Vertical orientation
The POS Printer can also be mounted in vertical manner as shown below. The paper
will be presented in the front exit direction. Hence it is also suitable to be placed
under the counter.
iii. Wall Mounted
CAUTION!
1. The wall mounting printer must be installed by a qualified and professional
installer who is familiar with building construction methods, building
materials, building codes, electrical codes, fire codes, and local laws governing
public access areas.
2. There is a wide variety of types of wall construction, age and condition. After
reviewing the conditions onsite, the installer must make the final judgment as
to the suitability of the existing wall material to determine if additional bracing
or supports are required. Attaching the screws involve making minor
modifications to the building construction. Be sure to observe proper safety
precautions to prevent injury. Unforeseen hazards, for example, natural gas and
power lines, can exist when drilling and cutting into walls.
3. Screws are not included with the printer and must be supplied by the installer.
The type of screws required are flat head metallic screws. Screw sizes can be
referred at the figure below.
4. Mount the printer to a flat, sturdy, structurally sound column or wall surface.
Before installing the wall mounting printer, ensure that all applicable building
and electrical codes and accessibility requirements and guidelines are followed.
Compliance with local building codes, electrical codes, and governing laws
should take precedence over this set of instructions.
11
The POS printer may be mounted on vertical wall. Make sure there is enough room
to open the receipt cover to change the paper. Mount the screws on the wall using the
following recommended mount dimensions. To fix the printer securely, install the
screws on the wall made of wood, concrete, or metal. The thickness of the wall
should be 10 mm (0.4”) or more. Be sure to use flat head metallic tapping screws.
Make sure that the POS printer fix on the mounting heights of 2 meters and below.
5. Connecting the Power Cord and Interface Cable
A. Remove and attach Cable Cover
Remove the cable cover before connecting all the interface cables. Attach back by
fitting the hooks back into the slotted openings.
Screw
Wall
Weight: 1.18Kg
Wall
Mount
Open cover by pressing
and pulling up
Close cover by fitting the hooks
back into the slots
12
B. Connect to Power Supply
Insert the power cable into the power connector.
C. Connect via standard USB Type-B cable
Connect USB Type-B is to link the printer to the POS Terminal
D. Connect via Option Card (RS232 & LAN)
Remove both screws and option metal cover to install the option card.
Screw
Option metal
cover
13
E. Serial Interface (RS232) Option:
F. Ethernet Interface (LAN) Option
G. Connect via Y-Cable
Y-cable is an option to connect power connector and USB Type-B connector to POS
terminal.
H. Connecting via Cash Drawer
1) Make sure that the printer does not connect to any power supply.
2) Connect the drawer cable to the drawer interface connector in the correct
orientation as shown in the figure on the right.
Attach
Screw
Connect the cable
Attach
Screw
Connect
the cable
14
6. Receipt Roll
Paper type
Thermal paper rolled with the print side facing
outside
Width (W1)
80 +0.5/ -1.2 mm
Width (W2)
58 +0/ -1.0 mm (With optional 58 mm paper guide)
Outer diameter (D)
83mm max
Paper thickness (T)
0.050 ~0.070 mm
Weight
50~70 g/m2
Outer core diameter
18 mm
Inner core diameter
12.5 +/ -0.5 mm
Recommended thermal
paper
Only paper rolled onto a core is acceptable, however,
the paper end should not be pasted to the core.
TOSHIBA TEC recommends using the following
thermal paper for this product.
Manufacturer : NIPPON PAPER
Type : TF50KS-EY
For further information please contact your authorized TOSHIBA TEC
representative or authorized paper manufacturer.
W1 or W2
15
Toshiba Tec Corporation
7. LED Indication Table
Printer Status
Color
Control
What to Do
Boot Up
BLUE
ON
Idle
BLUE
ON
Printing
BLUE
ON
Firmware Update (Online /
Offline / IPL)
BLUE
Constant
Blink
Offline Diagnostics
BLUE
Constant
Blink
Unrecoverable error:
Thermal Head Abnormal
Temperature
AMBER
3 Blinks
Pause 5
seconds
Turn off the printer for 5minutes to
cool down the printer.
Unrecoverable error:
Memory Error
AMBER
4 Blinks
Pause 5
seconds
Power cycle to check if the printer
recovers
Recoverable error: Paper
End
AMBER
ON
Change the paper now. Do not run a
transaction without paper as the
data may be lost.
Recoverable error: Cover
Open
AMBER
ON
Close the cover. The printer will not
operate with the cover open.
Recoverable error: Paper
Jam
AMBER
1 Blinks
Pause 5
seconds
Open the receipt cover, clear any
jammed paper. Place the paper
properly and restart the printer.
Recoverable error: Thermal
Head Over Heat
AMBER
Constant
Blink
Wait for 10 seconds and the printer
will resume printing
Recoverable error: Cutter
Jam
AMBER
2 Blinks
Pause 5
seconds
Open the receipt front cover first,
then follow by top cover and check
for the cutter. Clear any jammed
paper you can see. Tear off any
excess paper against the tear-off
blade.
Warning: Paper Low
BLUE
Constant
Blink
There are about 4.5 meters, 3
meters (15 feet, 10 feet) and 8
meters, 3 meters (25 feet, 10
feet) of paper left. Change the paper
soon to avoid running out of paper
part way through a transaction.
NOTE: If other LED status except for the above occurs, turn the power supply off, and then
reopen. If this does not restore the LED, contact your nearest TOSHIBA TEC representative
for assistance.
© 2019 Toshiba Tec Corporation All Rights Reserved
1-11-1, Osaki, Shinagawa-ku, Tokyo 141-8562, JAPAN
PRINTED IN INDONESIA
SPTM-0323

Other manuals for HSP100

1

This manual suits for next models

3

Other Toshiba Printer manuals

Toshiba GA-1121 Programming manual

Toshiba

Toshiba GA-1121 Programming manual

Toshiba B-570-QQ User manual

Toshiba

Toshiba B-570-QQ User manual

Toshiba E-STUDIO2323AM User manual

Toshiba

Toshiba E-STUDIO2323AM User manual

Toshiba GA-1121 User manual

Toshiba

Toshiba GA-1121 User manual

Toshiba B-SA4TM SERIES User manual

Toshiba

Toshiba B-SA4TM SERIES User manual

Toshiba TRST-A10 SERIES Operating and maintenance instructions

Toshiba

Toshiba TRST-A10 SERIES Operating and maintenance instructions

Toshiba B-EP2DL Series User manual

Toshiba

Toshiba B-EP2DL Series User manual

Toshiba 1NR User manual

Toshiba

Toshiba 1NR User manual

Toshiba B-EV4 Series User manual

Toshiba

Toshiba B-EV4 Series User manual

Toshiba B-FP2D Series User manual

Toshiba

Toshiba B-FP2D Series User manual

Toshiba B-EP2DL Series User manual

Toshiba

Toshiba B-EP2DL Series User manual

Toshiba SureMark 4610 1NR Installation instructions

Toshiba

Toshiba SureMark 4610 1NR Installation instructions

Toshiba B-SP2D Series User manual

Toshiba

Toshiba B-SP2D Series User manual

Toshiba e-STUDIO GL-1010 User manual

Toshiba

Toshiba e-STUDIO GL-1010 User manual

Toshiba B-EP4DL-GH20-QM-R User manual

Toshiba

Toshiba B-EP4DL-GH20-QM-R User manual

Toshiba B-672-QP User manual

Toshiba

Toshiba B-672-QP User manual

Toshiba B-FP3D SERIES User manual

Toshiba

Toshiba B-FP3D SERIES User manual

Toshiba TEC B-SP2D Series User manual

Toshiba

Toshiba TEC B-SP2D Series User manual
Toshiba TRST-A15 SERIES User manual

Toshiba

Toshiba TRST-A15 SERIES User manual

Toshiba TRST-A10 SERIES User manual

Toshiba

Toshiba TRST-A10 SERIES User manual
Toshiba B-EP2DL Series User manual

Toshiba

Toshiba B-EP2DL Series User manual
Toshiba TEC B-850 Series User manual

Toshiba

Toshiba TEC B-850 Series User manual

Toshiba B-SA4T User manual

Toshiba

Toshiba B-SA4T User manual

Toshiba E-STUDIO 282 User manual

Toshiba

Toshiba E-STUDIO 282 User manual

Popular Printer manuals by other brands

Xerox Wide Format 6030 user guide

Xerox

Xerox Wide Format 6030 user guide

SWIZ PP-38T5 user manual

SWIZ

SWIZ PP-38T5 user manual

Evolis Elypso user guide

Evolis

Evolis Elypso user guide

Kyocera TASKalfa PA4500ci Operation guide

Kyocera

Kyocera TASKalfa PA4500ci Operation guide

Printronix SMARTLINE SL4M Programmer's reference manual

Printronix

Printronix SMARTLINE SL4M Programmer's reference manual

Seiko I Infotech IP-5620 user guide

Seiko I Infotech

Seiko I Infotech IP-5620 user guide

Digital Equipment DEClaser 2200 installation guide

Digital Equipment

Digital Equipment DEClaser 2200 installation guide

SNBC BTP-M280 user manual

SNBC

SNBC BTP-M280 user manual

Ricoh SG 7100DN installation guide

Ricoh

Ricoh SG 7100DN installation guide

Edimax PS-1210MFn manual

Edimax

Edimax PS-1210MFn manual

Fujitsu DL4400 user manual

Fujitsu

Fujitsu DL4400 user manual

Boca Systems Micro Plus user manual

Boca Systems

Boca Systems Micro Plus user manual

Pantum M6700 Series installation manual

Pantum

Pantum M6700 Series installation manual

Rimage Desktop 360i Replacement guide

Rimage

Rimage Desktop 360i Replacement guide

VinTelecom FS10 user manual

VinTelecom

VinTelecom FS10 user manual

SATO CT 400 Manual list

SATO

SATO CT 400 Manual list

Citizen CT-S751 user manual

Citizen

Citizen CT-S751 user manual

Epson SureColor SC-T7000 datasheet

Epson

Epson SureColor SC-T7000 datasheet

manuals.online logo
manuals.online logoBrands
  • About & Mission
  • Contact us
  • Privacy Policy
  • Terms and Conditions

Copyright 2025 Manuals.Online. All Rights Reserved.