manuals.online logo
Brands
  1. Home
  2. •
  3. Brands
  4. •
  5. Toto
  6. •
  7. Toilet
  8. •
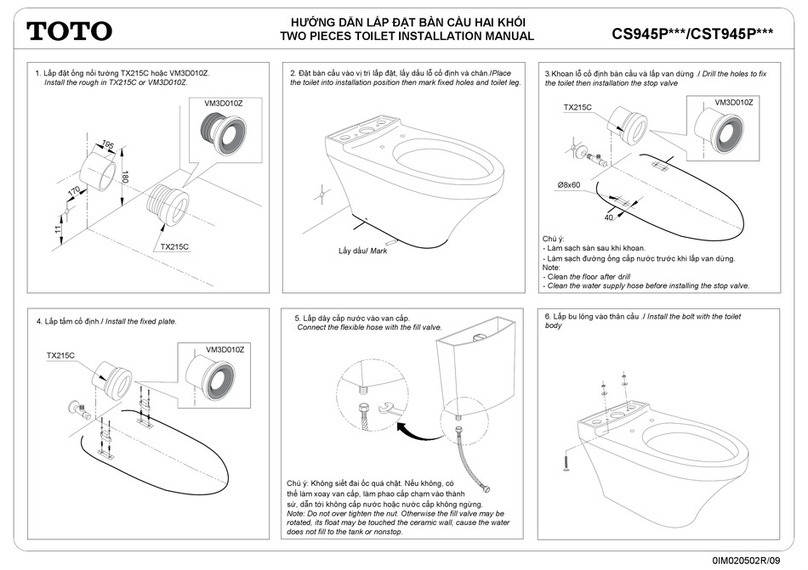
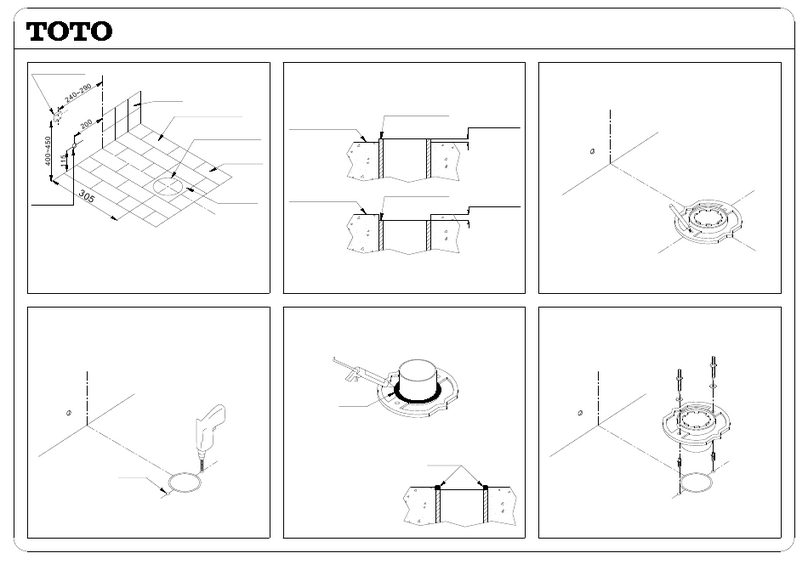
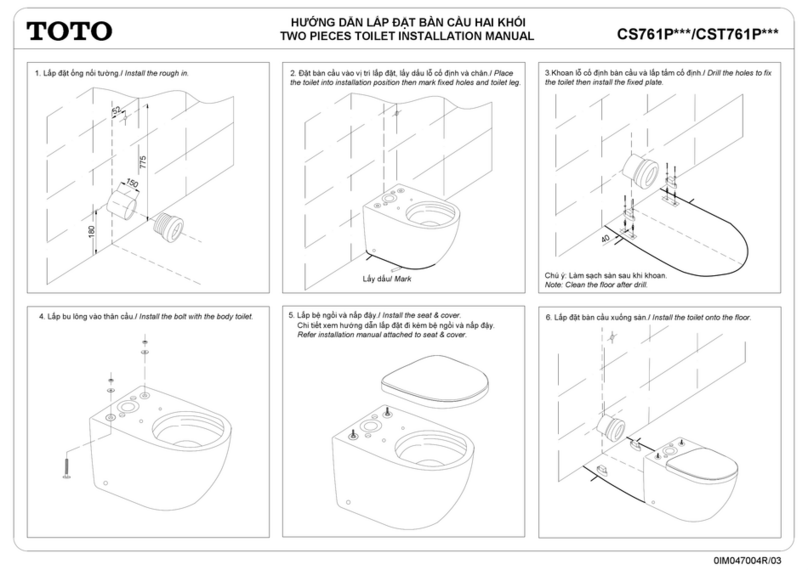
  9. Toto CS735 Series User manual

Toto CS735 Series User manual

Chú ý:
- Phải lắp gioăng cao su non nếu không có thể gây ra rò nước.
- Làm sạch đường ống cấp nước trước khi lắp van dừng.
Note:
- You must use rubber gasket to seal, otherwise it may cause of
water leakage.
- Clean the water supply hose before installing the stop valve.
5. Lắp gioăng cao su non, van dừng.
Install the rubber gasket, stop valve as below.
0IM089303S/02
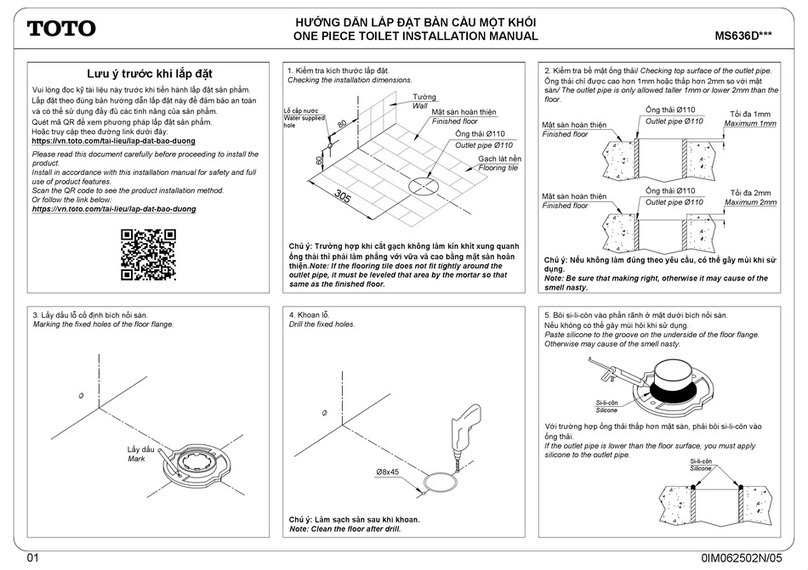
1. Kiểm tra kích thước lắp đặt.
Checking the installation dimensions.
2. Kiểm tra bề mặt ống thải./ Checking top surface of the outlet pipe.
Ống thải chỉ được cao hơn 1mm hoặc thấp hơn 2mm so với mặt
sàn./ The outlet pipe is only allowed taller 1mm or lower 2mm than
the floor.
4.Lắp bích nối sàn.Bôi si-li-côn vào phần rãnh mặt dưới bích nối
sàn trước khi lắp. Nếu không có thể gây mùi hôi khi sử dụng.
Install the floor flange. Paste silicone to the groove on the
underside of the floor flange before installation.Otherwise may
cause of the smell nasty.
Ø8x45
Silicone
3. Lấy dấu và khoan lỗ cố định bích nối sàn.
Marking and drill the fixed holes of the floor flange.
Silicone
Với trường hợp ống thải thấp hơn mặt sàn, phải bôi silicone vào
ống thải.
If the outlet pipe is lower than the floor surface, you must apply
silicone to the outlet pipe.
Tối đa 1mm
Maximum 1mm
Ống thải Ø110
Outlet pipe Ø110
Tối đa 2mm
Maximum 2mm
Chú ý: Trường hợp khi cắt gạch không làm kín khít xung quanh
ống thải thì phải làm phẳng với vữa và cao bằng mặt sàn hoàn
thiện.
Note: If the flooring tile does not fit tightly around the outlet pipe, it
must be leveled that area by the mortar so that same as the finished
floor.
Mặt sàn hoàn thiện
Finished floor
Ống thải Ø110
Outlet pipe Ø110
Chú ý: Nếu không làm đúng theo yêu cầu, có thể gây mùi khi sử
dụng.
Note: Be sure that making right, otherwise it may cause of the smell
nasty.
Ống thải Ø110
Outlet pipe Ø110
Tường
Wall
Gạch lát nền
Flooring tile
305
CS735***
HƯỚNG DẪN LẮP ĐẶT BÀN CẦU HAI KHỐI
TWO PIECE TOILET INSTALLATION MANUAL
152
200
115
200
Van dừng
Stop valve
Gioăng cao su non
Rubber gasket
Mặt sàn hoàn thiện
Finished floor
Mặt sàn hoàn thiện
Finished floor
Si-li-côn
Vui lòng đọc kỹ tài liệu này trước khi tiến hành lắp đặt sản phẩm.
Lắp đặt theo đúng bản hướng dẫn lắp đặt này để đảm bảo an toàn
và có thể sử dụng đầy đủ các tính năng của sản phẩm.
Quét mã QR để xem phương pháp lắp đặt sản phẩm.
Hoặc truy cập theo đường link dưới đây:
https://vn.toto.com/tai-lieu/lap-dat-bao-duong
Please read this document carefully before proceeding to install the
product.
Install in accordance with this installation manual for safety and full
use of product features.
Scan the QR code to see the product installation method.
Or follow the link below:
https://vn.toto.com/tai-lieu/lap-dat-bao-duong
Lưu ý trước khi lắp đặt
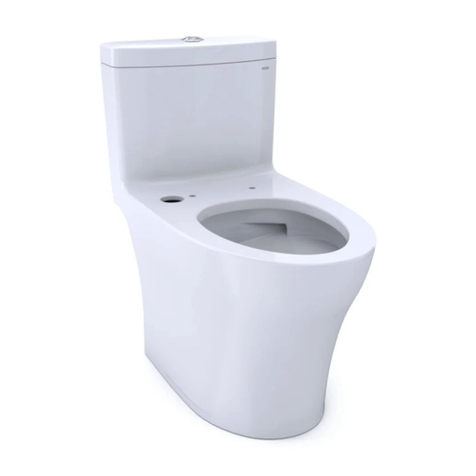
CS735***
Chú ý: Không siết đai ốc quá chặt, nếu không có thể làm xoay
van cấp dẫn đến rò nước.
Note: Do not swirl the nut too tightly, otherwise the fill valve
may be swirled that water leak happens.
6. Lắp dây cấp nước vào van cấp.
Connect the water supply hose to fill valve.
8. Lắp đặt bàn cầu xuống sàn và đậy nắp.
Install the toilet onto the floor and up lid.
Đế mũ chụp
Cover base
Long đen
Washer
Đai ốc
Nut
Mũ chụp
Cover
9 Lắp dây cấp nước với van dừng và lắp bệ ngồi và nắp đậy ( Chi tiết
xem hướng dẫn đóng kèm bệ ngồi và nắp đậy.)
Connect the water supply hose to the stop valve and Install the seat &
cover ( refer installation manual attached to seat & cover )
Chú ý: Phải đặt gioăng cao su vào đúng tâm lỗ thải. Nếu không
có thể rò nước khi lắp đặt.
Note: Have to place the rubber gasket right into center of outlet
hole. Otherwise may be water leakage.
7. Lắp két nước vào thân cầu.
Install the tank with the toilet body.
11. Làm kín bề mặt áp sàn bằng si-li-côn.
Seal the gap betwen leg and floor by silicone.
Si-li-côn
HƯỚNG DẪN LẮP ĐẶT BÀN CẦU HAI KHỐI
TWO PIECE TOILET INSTALLATION MANUAL
0IM089303S/02
Silicone
10. Xác nhận rò rỉ.
Leak confirm *Chú ý: Sau khi chạy thử (Xả
nước), hãy xác nhận chắc chắn
rằng không có vị trí kết nối nào
bị rò nước. Việc lắp đặt sản
phẩm không chính xác có thể
gây ra rò rỉ nước, làm hư hại tài
sản, ví dụ như các đồ gia dụng.
*Note: After conducting a test
run, confirm that no
connections are leaking water.
Not installing the product
properly may cause water leaks
that could result in flooding
damage to property, such as
household belongings.

Other Toto Toilet manuals

Toto CST405F Installation instructions

Toto

Toto CST405F Installation instructions

Toto UT105U Instruction Manual

Toto

Toto UT105U Instruction Manual

Toto SoftClose 0GU543 User manual

Toto

Toto SoftClose 0GU543 User manual

Toto CST244EF User manual

Toto

Toto CST244EF User manual

Toto NEOREST User manual

Toto

Toto NEOREST User manual

Toto MS604114CEF User manual

Toto

Toto MS604114CEF User manual

Toto CS320D Series User manual

Toto

Toto CS320D Series User manual

Toto NEOREST LE User manual

Toto

Toto NEOREST LE User manual

Toto CT970CEMFG User manual

Toto

Toto CT970CEMFG User manual

Toto MH Series User manual

Toto

Toto MH Series User manual

Toto MS604114CEFG User manual

Toto

Toto MS604114CEFG User manual

Toto MS642 User manual

Toto

Toto MS642 User manual

Toto UT105U User manual

Toto

Toto UT105U User manual

Toto CST423SF User manual

Toto

Toto CST423SF User manual

Toto CS320P Series User manual

Toto

Toto CS320P Series User manual

Toto UT105U User manual

Toto

Toto UT105U User manual

Toto washlet User manual

Toto

Toto washlet User manual

Toto CST446 Installation instructions

Toto

Toto CST446 Installation instructions

Toto CST436 Installation instructions

Toto

Toto CST436 Installation instructions

Toto CS320D Series User manual

Toto

Toto CS320D Series User manual

Toto NEOREST User manual

Toto

Toto NEOREST User manual

Toto Maris CT486FG User manual

Toto

Toto Maris CT486FG User manual

Toto CS767 Series User manual

Toto

Toto CS767 Series User manual

Toto CST703X.10 User manual

Toto

Toto CST703X.10 User manual

Popular Toilet manuals by other brands

Laufen Cleanet RIVA 8.2069.1 manual

Laufen

Laufen Cleanet RIVA 8.2069.1 manual

Invacare Aquatec 900 user manual

Invacare

Invacare Aquatec 900 user manual

EcoLet 25e owner's manual

EcoLet

EcoLet 25e owner's manual

Kohler SAN SOUCI CLASS FIVE K-21865T-S installation instructions

Kohler

Kohler SAN SOUCI CLASS FIVE K-21865T-S installation instructions

Kohler Wellworth K-4468 manual

Kohler

Kohler Wellworth K-4468 manual

rba The Big John Econo installation instructions

rba

rba The Big John Econo installation instructions

Ideal-Standard Alto Toilet Seat installation guide

Ideal-Standard

Ideal-Standard Alto Toilet Seat installation guide

WinZo WZ5081 installation instructions

WinZo

WinZo WZ5081 installation instructions

American Standard NEO MODERN CCAS2073 installation manual

American Standard

American Standard NEO MODERN CCAS2073 installation manual

Raritan PH Superflush Installation and maintenance instructions

Raritan

Raritan PH Superflush Installation and maintenance instructions

VITRA V-Care 5674/431470 user manual

VITRA

VITRA V-Care 5674/431470 user manual

Kohler K-5401IN-0 installation guide

Kohler

Kohler K-5401IN-0 installation guide

WECCO KWSZ4 6000237501 Instructions for use

WECCO

WECCO KWSZ4 6000237501 Instructions for use

Hindware OLYMPUS URINAL installation instructions

Hindware

Hindware OLYMPUS URINAL installation instructions

Invacare Aquatec 90 Ergo user manual

Invacare

Invacare Aquatec 90 Ergo user manual

Swiss Madison Concorde SM-1T107 installation instructions

Swiss Madison

Swiss Madison Concorde SM-1T107 installation instructions

American Standard ACACIA TF-2307T installation manual

American Standard

American Standard ACACIA TF-2307T installation manual

TECE TECEone Technical guidelines

TECE

TECE TECEone Technical guidelines

manuals.online logo
manuals.online logoBrands
  • About & Mission
  • Contact us
  • Privacy Policy
  • Terms and Conditions

Copyright 2025 Manuals.Online. All Rights Reserved.