Tower Hobbies T21002 User manual

T21002
3 Tier
Stainless Steel
Food Steamer
SAFETY AND INSTRUCTION MANUAL
PLEASE READ CAREFULLY
*Subject to registering your Extended Guarantee online at www.towerhousewares.co.uk.

2
GREAT BRITISH DESIGN, INNOVATION
AND EXCELLENCE SINCE 1912
Since the turn of the 20th century, Tower has been designing,
developing and manufacturing housewares and small
appliances used by millions of households throughout the
UK and beyond. During the 1960s, the rise in popularity
of pressure cooking saw Tower become the UK’s largest
producer of pressure cookers, right through into the late
1980s. In recent years the Tower brand has been reborn with
an exciting and varied range of housewares and electrical
appliances that have quickly reinstated the brand’s richly
deserved status as a household name.
Visit
www.towerhousewares.co.uk
for more fantastic products.

3
Contents:
Thank you for purchasing this appliance from the
Tower range.
Please read this manual carefully BEFORE using the
appliance for your own safety.
It has been designed to provide many years of
trouble-free use.
There are many benefits to using a Tower 3 Tier
Steamer:
• The steam baskets are removable and stackable
allowing the steamer to be stored neatly whilst
taking up the minimum amount of space
• Includes a rice steaming bowl for perfect, fluffy
rice
• 9 Litre steaming capacity
• Stainless steel base unit with power on indicator
light
• Dishwasher safe parts
• 60 minute timer with auto switch off
1. Specifications
Components and
structure
2. Technical Data
3. Important Safety
Information
4. Before First Use
5. Using your Appliance
6. Troubleshooting
7. Recycling
8. Cleaning & Care
9. Wiring Safety
10. Warranty Information
11. Your Receipt
See back page for Customer
Service Information.

4
This box contains:
Instruction Manual
Steamer Lid
Rice Steaming Tray (Note: The rice cooking tray can only fit into the first two
compartments.)
Steamer Baskets
Steam Sleeve
Steamer base unit and water reservoir
1. Lid
2. Steam vents
3. Steamer baskets
4. Handles with filling
opening
5. Base Unit
6. Water level indicator
7. Indicator Light
8. Countdown timer
dial
9. Rice Tray
10. Drip Tray
11. Steam sleeve
12. Steam generator
1 - Specifications:
Structure of your appliance:
9
10
11
12
3
4
5
21
76 8
Note: Actual product may vary slightly from image.

5
Description: 3 Tier 9 Litre Steamer
Model: T21002
Rated Voltage: 230V
Frequency: ~ 50Hz
Power Consumption: 800W
Documentation
We declare that this product conforms to the following product legislation in
accordance with the following directive(s):
2014/30/EU Electromagnetic Compatibility Directive.
2014/35/EU Low Voltage Directive.
2011/65/EU Restriction of Hazardous Substances Directive.
1935/2004/EC Materials & Articles in Contact With Food
(LFGB section 30 & 31).
2009/125/EC Eco-Design of Energy Related Products.
RK Wholesale LTD Quality Assurance, United Kingdom.
2 - Technical Data:
Should you encounter problems or require a replacement part, contact the Tower
Customer Support Team: +44 (0) 333 220 6066.
Some spare parts may be ordered from the Tower website.
Your warranty becomes void should you decide to use non Tower spare parts.
Spare parts can be purchased from www.towerhousewares.co.uk
Guarantee for spare parts:
The spares and accessories are guaranteed for 1 year from date of purchase.
The main body and housing are guaranteed for the extended free warranty subject
to registration.
If any defect arises due to faulty materials of workmanship, the faulty products must
be returned to the place of purchase within 12 months from the date of purchase.
Refund or replacement is at the discretion of the retailer.

6
• Check that the voltage
of the main circuit
corresponds with the rating
of the appliance before
operating.
• If the supply cord or
appliance is damaged,
stop using the appliance
immediately and
seek advice from the
manufacturer, its service
agent or a similarly qualified
person.
• WARNING! DO NOT let the
cord hang over the edge of
a table or counter, serious
burns may result from the
appliance being pulled off
the counter where it may
be grabbed by children or
become entangled with the
user.
• DO NOT carry the appliance
by the power cord.
• The use of accessory
attachments is not
recommended by the
appliance manufacturer
apart from those supplied
with this product. DO NOT
use extension cords with the
appliance.
• DO NOT pull the plug out
by the cord as this may
damage the plug and/or the
cable.
• Switch off at the wall socket
then remove the plug from
the socket when not in use
or before cleaning.
• Switch off and unplug
before fitting or removing
tools/ attachments, after use
and before cleaning.
• Close supervision is
necessary when any
appliance is used by or near
children.
• Children should not play
with the appliance.
• This appliance can be
used by children aged
from 8 years and above
and persons with reduced
physical, sensory or mental
capabilities or lack of
experience and knowledge
if they have been given
supervision or instruction
concerning use of the
appliance in a safe way and
understand the hazards
involved.
Please read these notes carefully BEFORE using your
Tower appliance
3 - Important Safety Information:

7
• DO NOT leave the appliance
unattended whilst it is in
use.
• Cleaning and user
maintenance should not
be undertaken by children
without supervision.
• Take care when any
appliance is used near pets.
• DO NOT use this product
for anything other than its
intended use.
• This appliance is for
household use only.
• This appliance has a short
supply cord to reduce
the risk resulting from
becoming entangled in or
tripping over a long cord.
• DO NOT use foil or paper to
line the baskets as this will
block the steam holes.
• DO NOT use near or under
shelves or plug sockets.
• WARNING! To avoid injury
and/or damage to persons
and/or property, DO NOT
touch the base, steamer
bowls, or lid during use as
they get very hot.
• This product will get hot
during use care must be
taken when handling.
• Always use oven mitts when
handling the steamer.
• DO NOT fill over the MAX
mark or the water might
overflow and cause damage
to the element
• WARNING! Ensure
that there is adequate
ventilation around the
appliance during operation.
Do not use under shelves
or cupboards or near any
surface where steam may
cause a problem.
• In the unlikely event the
appliance develops a fault,
stop using it immediately
and seek advice from the
Customer Support Team:
+44 (0) 333 220 6066

8
1. Remove all packaging, promotional materials and stickers.
2. Before using the steamer for the first time, carefully clean the steamer and all
accessories.
3. DO NOT use any aggressive detergents, brushes with metal or nylon bristles
or sharp objects such as knives or spatulas to clean the steamer. Wipe with a
sponge or cloth dampened in warm water to avoid damage.
4. Position your steamer on a dry, level and stable worktop. Ensure that your
steamer is not positioned under a cupboard or shelf or near any furnishings or
wallpaper that could be damaged by hot steam.
5. Dispose of packaging in a responsible manner.
Assembly:
1. Assemble your Steamer according to the specification page.
2. Place the appliance on a stable, level surface away from walls and overhanging
cupboards.
3. Pour cold tap water into the water reservoir. Fill to the min or max fill line.
DO NOT exceed the Max line as overfilling will take longer to produce steam
and prolong the cooking time. See the ‘Water Reservoir section’ for more
information.
4. Fit the required steaming bowl(s) and place the lid on the top layer.
5. Place the steaming bowl onto the base, plug the appliance into the wall outlet,
and set the timer to the desired cooking time (max 60 minutes). Condensation
during steaming is normal. CAUTION! DO NOT operate the appliance without
the Steaming Bowl and lid in place.
6. When the time expires, the power indicator light will turn off.
7. When you have finished using the appliance, unplug it from the wall socket
and leave the appliance to cool completely before removing any parts.
8. DO NOT attempt to operate the steamer without water.
Note: The manual timer operates regardless of whether the unit is plugged into
the electrical outlet or not. Be sure the indicator light is on when setting the
timer.
CAUTION! Use oven gloves when handling the steaming bowl or any other
accessories that may be hot after using the appliance.
Note: Meat or fish should always be placed in the lower steaming bowl to avoid
juices dripping onto the lower level.
4 - Before First Use
5 - Using Your Appliance

9
Filling With Water:
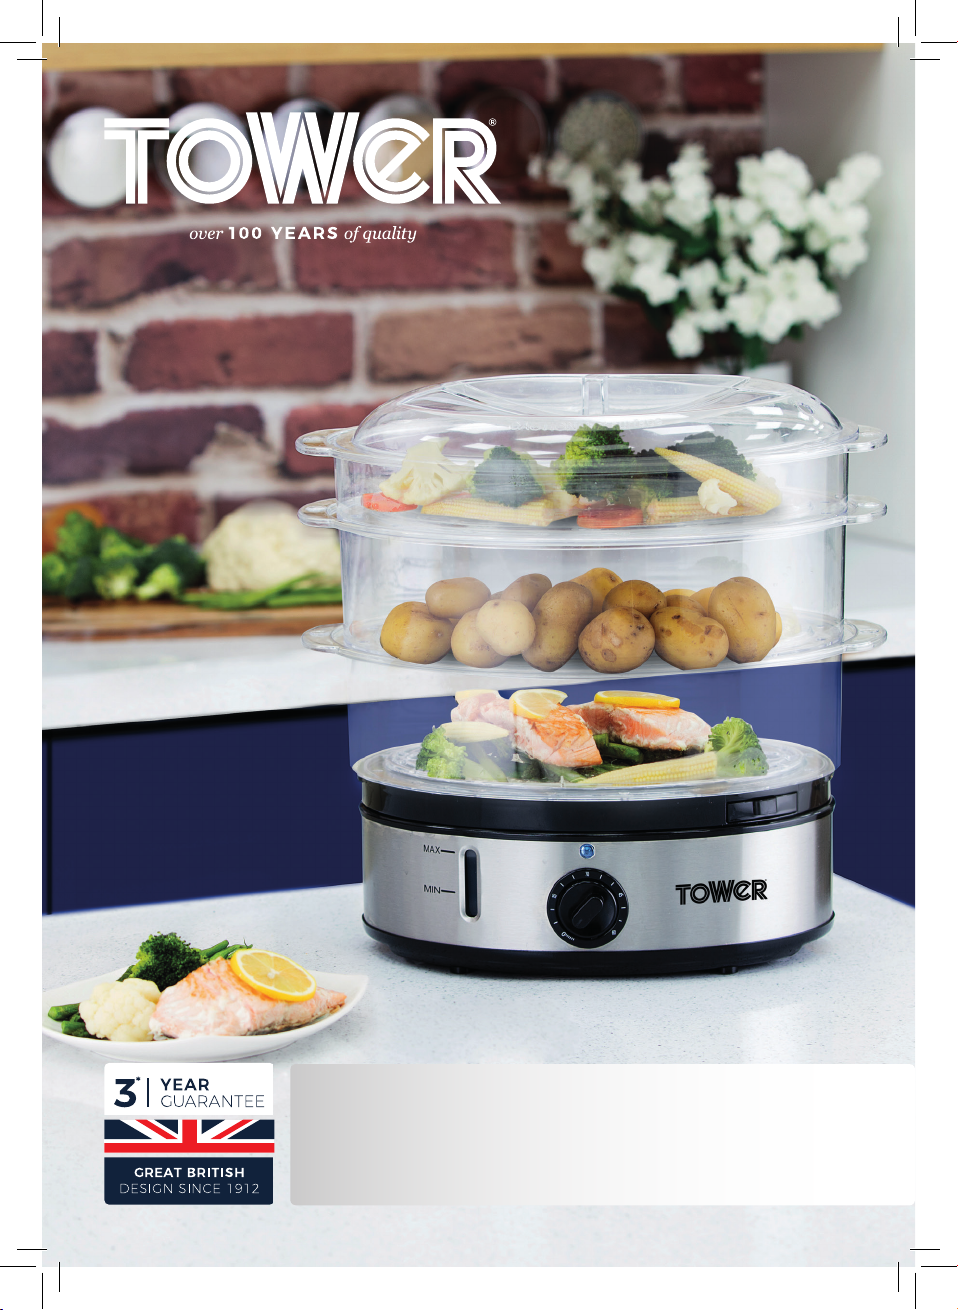
1. Fill Levels: The minimum and maximum fill levels are indicated by raised lines
inside the water reservoir.
2. Max Fill: Fill the reservoir to the max level for any foods requiring 13 to 60
minutes steaming time.
3. Min Fill: Fill to the min level for any foods that require less than 13 minutes
steaming time.
4. Refer to Steaming Charts or Recipes for recommended cooking times.
5. If the appliance stops producing steam, or there is a noticeable reduction in
steam before food is ready, add extra water to the reservoir.
Note: DO NOT add any herbs, wine, stock or any liquid other than tap water to
the water reservoir.
The water reservoir can be safely refilled while the machine is operating. Slide out
the top up drawer and add the desired amount of water to prolong the cooking
cycle.
Rice Steaming Bowl:
CAUTION! DO NOT remove the steaming bowls or drip trays during the cooking
cycle.
WARNING! To avoid injury, DO NOT allow your face or any part of your body to
come into contact with the steam as it will be scalding hot.
1. Add cold water in the water reservoir up to the max fill line
2. Cook rice on a ratio of 1:1 with water.
3. Wash rice and then pour into the rice steaming bowl.
4. Add the equivalent in cold water to the rice basket (i.e. 100g and 100ml water).
Place rice basket in lowest tier of the steamer.
5. Put the steamer lid on and set the timer to the required time.
Steamed Rice:
1. Different types of rice require different steaming times.
2. Steamed white rice should take around 20 -25 minutes.
3. Basmati rice: 200g/200ml 25 minutes.
4. Long grain rice: 200g/200ml 45 minutes
5. Brown rice: Will take around 45 minutes to cook.
Using the Steaming Bowls:
1. Always place the largest pieces of food with the longest cooking time in the
lower bowl.
2. You may place a different food in the stacking and lower bowls, but
as condensation will drip from the stacking bowl be sure the flavours
complement each other.
3. If steaming meat or poultry and vegetables, always place the meat or poultry
in the lower bowl so that juices from raw or partially cooked meat cannot drip
onto other foods.
4. Steaming times for food in the stacking bowl are usually slightly longer so
allow an extra 5 minutes.
5. If foods with different cooking times are being steamed, start the food with the
longest cooking time in the lower bowl.

10
Steaming tips:
1. For high altitude cooking, steaming times may need to be increased. Exact
times vary by location.
2. Steaming times stated in the charts and recipes are only a guide. Times may
vary depending on the size of food pieces, spacing of the food in the Steamer
Bowl, freshness of food, and personal preference. As you become familiar with
the Steamer, adjust cooking times.
3. For best results, be sure pieces of food are similar in size. If pieces vary in size
and layering is required, place smaller pieces on top.
4. DO NOT crowd food in the Steaming Bowl. Arrange the food with spaces
between pieces to allow for maximum steam flow.
5. When steaming large quantities of food, remove lid about halfway through the
steaming process and turn pieces using a long handled utensil, protecting your
hands from the steam with oven mitts.
6. DO NOT add salt and seasoning to the Steaming Bowl until after Cooking.
This is to avoid possible damage to the heating element located in the Water
Reservoir.
7. Never steam meat or poultry from frozen. Always thaw completely first.
8. All the times stated in the ‘Steaming Charts and Recipes’ are based on the use
of cold water in the Water Reservoir.
Cooking Tips:
1. When selecting fruit or vegetables to steam, always select ones with
unblemished skins and good colour. Steaming will only accentuate the taste in
any ‘old’ or bruised fruit and vegetables.
2. Put meats, fish and juicy foods in the lower or bottom tiers so that they cannot
drip onto foods below. DO NOT put frozen meat in the steamer. Defrost first.
3. Allow foods cooked in the upper tiers an extra five minutes cooking time
because they are further from the steam.
4. Ensure the ingredients are not immersed in water in the steamer.
5. Since all vegetables cook at different paces, it is recommended to cook
different types separately.
Vegetables:
1. Steam leafy green vegetables for the shortest possible time as they lose colour
easily.
2. Salt and season vegetables after steaming for best results.
3. Frozen vegetables should not be thawed before steaming. Cooking time will
vary from chart below.

11
Reference Guides:
The following tables are for reference only. Differing quantities, water levels and
temperature can all affect the end results.
FOOD QUANTITY SUGGESTED HERBS
& SPICES
WATER
LEVEL
STEAMING TIME
(MINUTES)
Artichokes (whole) 6 Medium Garlic, tarragon, dill MAX 35-38
Asparagus (spears) 250-500g Lemon, thyme,
bay leaves MIN 10-13
Green Beans (whole) 500g Dill MAX 15-18
Broccoli (spears) 500g
Garlic, basil cori-
ander, chilli flakes,
rosemary
MIN 14-17
Cabbage 500g, ½ small
head
Caraway seed, dill,
garlic MAX 22-25
Carrots 500g Coriander, mint,
dill, fennel MIN 16-19
Cauliflower (head) Medium Rosemary, basil MAX 20-23
Corn on the Cob Up to 8 pieces Chilli MAX 20-23
Courgette 500g Basil, oregano MIN 10-11
Mushrooms 250g MIN 10-11
Peas 250g in pods Coriander, garlic,
mint MIN 8-10
Peppers, whole (to
partially cook and stuff)
Up to 4 me-
dium MIN 9-11
Potatoes (halved) 500g Rosemary, chives,
dill, mint MAX 35-40
Spinach 500g Thyme, garlic MIN 10-12
Turnips 500g Basil, parsley MIN 14-16
Apples 5 medium MIN 10-13
Dumplings 10-12 MIN 15

12
FOOD QUANTITY SUGGESTED HERBS
& SPICES
WATER
LEVEL
STEAMING TIME
(MINUTES)
Potatoes (halved) 500g Rosemary, chives,
dill, mint MAX 35-40
Spinach 500g Thyme, garlic MIN 10-12
Turnips 500g Basil, parsley MIN 14-16
Apples 5 medium MIN 10-13
Dumplings 10-12 MIN 15
Eggs:
• Steam in Steam Bowl for best results.
• Always ensure you prick the eggshell
with a pin before steaming, as this
allows the steam to release during
cooking.
• There are indents in the steaming
bowls which are designed to fit 8
eggs on each layer.
Meat and poultry:
• Steaming has the advantage of allowing all the fat to drip away during cooking.
Due to the gentle heat only choose tender, lean cuts of meat and trim off all
fat. Steam in Steam Bowl for best results.
• Serve steamed meat and poultry with the sauce of your choice to flavour or
marinate before steaming.
• Thoroughly cook all food before serving. Pierce with a knife or skewer to check
that the centre is cooked and juices run clear.
• Sausage must be completely cooked before steaming.
• Use fresh herbs while steaming to add flavour.
FOOD TYPE QUANTITY WATER
LEVEL STEAMING TIME
Eggs, large
hard boiled 1-24 MIN 13-15 10-15 min
FOOD QUANTITY WATER LEVEL STEAMING TIME
Chicken breast, boneless fillets 4 MAX 22-25
Chicken breast (w/bone) 4 MAX 35-40
Chicken drumsticks 6 MAX 30-35
Chicken thigh (w/bone) 6 MAX 35-40
Frankfurters 8-10 MIN 14-16

13
Steaming Tips:
• Check the water level regularly to ensure the unit does not boil dry. If the water
level is getting low, carefully add water through one of the filling apertures in
the drip tray.
• As you become familiar with your steamer you can adjust cooking times to suit.
• A single layer of food steams faster than several layers.
• The cooking time for a large quantity of food will increase.
• Do not overload the steaming bowl.
• Only add salt to the steaming bowl when cooking is complete and the bowl
has been removed from the steamer. This will prolong the life of the heating
element.
• Always place larger pieces of food or those with a longer cooking time in the
lower steaming bowls.
Fish and seafood:
• Fish is done cooking when it is opaque and flakes easily with a fork.
• Frozen fish may be steamed without defrosting if separated before steaming
and the cooking time is extended.
• Add lemon wedges and herbs while steaming to improve flavour.
• Most fish and seafood cook very quickly, Steam in small portions or in the
amounts specified. Shell fish may open at different times; ensure the shells
that do not open are discarded.
FOOD QUANTITY WATER LEVEL STEAMING TIME
Fillets, sole, cod, haddock, 250g
(1cm thick) MIN 10-12
Steaks
Halibut
Salmon
Tuna
1-2 pieces
2.5 cm thick
2.5 cm thick
2.5 cm thick
MAX
MAX
MAX
13-14
19-22
20-25
Clams 500g MIN 12-17
Crab 500g MIN 15-18
King Prawns 500g in shell MIN 15-17
Lobster tails 2 or 3 MIN 18-20
Mussels (fresh) 500g in shell MIN 12-14
Oysters (fresh) 6 MIN 11-13
Scallops (fresh) 250g shucked MIN 14-17

14
• When using multiple steaming bowls you may place different types of food
in the different bowls. However, condensation will drip from the upper to the
lower bowls so make sure all flavours complement each other.
• When using multiple steaming bowls, always place meat and poultry in the
lowest bowl so the juices from the raw and partially cooked meat do not drip
onto other foods.
• Steaming times stated in the charts and any recipes are only a guide. Times
may vary depending on the size of food pieces, spacing of the food in the
Steamer Bowl, freshness of food, and personal preference. As you become
familiar with the Steamer, adjust cooking times.
• For best results, be sure pieces of food are similar in size. If pieces vary in size
and layering is required, place smaller pieces on top.
• Do not crowd food in the Steaming Bowl. Arrange the food with spaces
between pieces to allow for maximum steam flow.
• When steaming large quantities of food, remove lid about halfway through the
steaming process and turn pieces using a long handled utensil, protecting your
hands from the steam with oven mitts.
• All the times stated in the ‘Guidelines’ are based on the use of cold water in
the Water Reservoir.
• Put meats, fish and juicy foods in the lower or bottom tiers so that they cannot
drip onto foods below. Do not put frozen meat in the steamer. Defrost first.
• Allow foods cooked in the upper tiers an extra five minutes cooking time
because they are further from the steam.
• Ensure the ingredients are not immersed in water in the steamer.
• Since all vegetables cook at different paces, it is recommended to cook
different types separately.
• When selecting fruit or vegetables to steam, always select ones with
unblemished skins and good colour. Steaming will only accentuate the taste in
any ‘old’ or bruised fruit and vegetables.

15
6 - Troubleshooting
DISPOSAL OF THE UNIT
Appliances bearing the symbol shown here may not be disposed of in domestic
rubbish. You are required to dispose of old electrical and electronic appliances like
this separately.
Please visit www.recycle-more.co.uk or www.recyclenow.co.uk for access to
information about the recycling of electrical items.
Please visit www.weeeireland.ie for access to information about the recycling of
electrical items purchased in Ireland.
The WEEE directive, introduced in August 2006, states that all electrical items must
be recycled, rather than taken to landfill.
Please arrange to take this appliance to your local Civic Amenity site
for recycling, once it has reached the end of its life.
7 - Recycling
Questions Answers
Can you use one
basket at a time? Yes, you can use one, two or all three tiers at once.
Can the steamer run
without water?
No, the steamer should not be operated without any water in the
reservoir.
Can I steam frozen
vegetables?
Yes, frozen vegetables can be cooked using the steamer.
When cooking frozen meat or poultry, defrost before putting in
the steamer.
What is the capacity
of the steamer? The 3 Tier Steamer has a capacity of 9 Litres.
Why is my food
taking too long to
steam?
You may have put the incorrect amount of water into the water
reservoir. Always ensure the water is past the minimum ll line.
Use the steaming guides included in this manual for reference.
Filling the water reservoir to the max level should give you
60 minutes of steaming time.
You may have overlled the basket.

16
The steaming bowls and lid are dishwasher safe or can be washed in warm, soapy
water.
Rinse and dry all of the parts.
Remove plug from the mains socket and allow the appliance to cool down before
cleaning.
Do not immerse the base unit of the appliance in water and ensure no water enters
the appliance.
Clean the base unit by wiping it with a damp cloth. A little detergent can be added
needed.
Do not use scouring pads, steel wool, any form of strong solvents or abrasive cleaning
agents to clean the appliance; they may damage the outside surfaces of the appliance.
Do not use any scouring pads, steel wool, any strong solvents or abrasive cleaning
agents when cleaning accessories.
• Empty the water reservoir/drip tray, and change the water after each use (for the
water reservoir).
• Do not immerse the Water Reservoir in water. Fill it with warm, soapy water, then
rinse thoroughly. Wipe dry with a soft cloth.
NEVER IMMERSE THE BASE, CORD, OR PLUG IN WATER OR ANY OTHER LIQUID.
De-scaling the Water Reservoir:
Important: Failure to de-scale the water reservoir may invalidate your guarantee.
• After 2-3 months of consistent usage, chemical deposits may build up in the
Water Reservoir and heating element inside your Food Steamer. This is a normal
process and the build-up will depend on the degree of water hardness in
your area. It is essential the appliance is de-scaled regularly to maintain steam
production and extend the life of the unit.
• Fill the Water Reservoir to the Max level with approximately 3 cups of clear vinegar
(not brown vinegar). Do not use the lid, steaming bowls or drip tray during this
procedure.
IMPORTANT! Do not use any other chemical or a proprietary de-scaling agent.
• Plug in a wall socket. Set the timer for up to 20 minutes to begin steaming.
Unplug the steamer from the wall socket when finished.
• Allow the steamer to cool completely before emptying the water reservoir. Use
cold water to rinse the water reservoir several times.
WARNING! If vinegar begins to boil over the edge of base, unplug the unit and switch
the timer off. Reduce the quantity of vinegar slightly.
IMPORTANT!
After cleaning allow to dry fully before using again.
Do not use the appliance if damp. Ensure the appliance is completely clean and dry
before storing.
Storage:
To store your appliance:
1. Unplug power cord from the power outlet and clean as above.
2. Allow the appliance to dry fully.
3. Store on a flat, dry level surface out of reach of children.
8 - Cleaning & Care

17
WARNING:
This appliance MUST be earthed
9 - Wiring Safety for UK Use Only
IMPORTANT
As the colours in the
mains lead of this
appliance may not
correspond with the
coloured markings
identifying the
terminals in your plug,
please proceed as
follows:
The wires in the mains lead are coloured
in accordance with the following code:
Blue neutral [N] Brown live
[L] Green/Yellow [EARTH]
Plug Fitting Details (Where Applicable).
The wire coloured blue is the neutral
and must be connected to the terminal
marked [N] or coloured black.
The wire coloured brown is the live wire
and must be connected to the terminal
marked [L] or coloured red.
The wire coloured green/yellow must be
connected to the terminal marked with
the letter [E] or marked .
On no account must either the brown
or the blue wire be connected to the
[EARTH] terminal .
Always ensure that the cord grip is
fastened correctly.
The plug must be fitted with a fuse
of the same rating already fitted and
conforming to BS 1362 and be ASTA
approved.
If in doubt consult a qualified electrician
who will be pleased to do this for you.
Non-Rewireable Mains Plug
If your appliance is supplied with a non-
rewireable plug fitted to the mains lead
and should the fuse need replacing,
you must use an ASTA approved one
(conforming to BS 1362 of the same
rating).
If in doubt, consult a qualified
electrician who will be pleased to do
this for you.
If you need to remove the plug -
disconnect it from the mains - then cut
it off of the mains lead and immediately
dispose of it in a safe manner. Never
attempt to reuse the plug or insert it
into a socket outlet as there is a danger
of an electric shock.
FUSE

18
This product is guaranteed for 12 months
from the date of original purchase.
If any defect arises due to faulty materials
of workmanship, the faulty products must
be returned to the place of purchase.
Refund or replacement is at the discretion
of the retailer.
The Following Conditions Apply:
• The product must be returned to the
retailer with proof of purchase or a
receipt.
• The product must be installed and
used in accordance with the
instructions contained in this
instruction guide.
• It must be used only for domestic
purposes.
• It does not cover wear and tear,
damage, misuse or consumable parts.
• Tower has limited liability for incidental
or consequential loss or damage.
This guarantee is valid in the UK and Eire
only.
The standard one year guarantee is only
extended to the maximum available for
each particular product upon registration
of the product within 28 days of purchase.
If you do not register the product with us
within the 28 day period, your product is
guaranteed for 1 year only.
To validate your extended warranty, please
visit www.towerhousewares.co.uk and
register with us online. Alternatively, call
our customer registration line on
+44 (0) 333 220 6066.
Please note that length of extended
warranty offered is dependent on product
type and that each qualifying product
needs to be registered individually in order
to extend its warranty past the standard
1 year.
Extended warranty is only valid with proof
of purchase or receipt.
As a thank you for purchasing
one of our fantastic products,
we are offering you an extra
2 years peace of mind in
addition to your 1 year
guarantee.
To receive your extra 2 year
guarantee, register your
appliance online within 28
days of purchase by visiting
www.towerhousewares.co.uk
10 - Warranty

19
Afx your store receipt to
this page for safe keeping.
11 - Your Receipt

thank you!
We hope you enjoy your appliance for many years. As a thank you for
purchasing one of our fantastic products, we are offering you an extra
2 years peace of mind.
*To receive your extra 2 years guarantee, register your appliance online
within 28 days of purchase by visiting:
www.towerhousewares.co.uk
Should you have a problem with your appliance, or need any spare parts,
please call our Customer Support Team:
+44 (0) 333 220 6066
0418.V3
Your warranty becomes void should you
decide to use non Tower spare parts.
Spare parts can be purchased from
www.towerhousewares.co.uk
Table of contents
Other Tower Hobbies Electric Steamer manuals
Popular Electric Steamer manuals by other brands

Chicco
Chicco CuociPappa Natural Instructions for use

Philips
Philips NX0960 user manual

KHIND
KHIND SE1800 instruction manual

Rational
Rational SelfCookingCenter series Original operating instructions

Market Forge Industries
Market Forge Industries ST-E Service & parts manual

Broil King
Broil King FS-10 use and care manual