Tower Hobbies T21003 Operator's manual

T21003
3 Tier Digital
Steamer
SAFETY AND INSTRUCTION MANUAL
PLEASE READ CAREFULLY
*Subject to registering your Extended Guarantee online at www.towerhousewares.co.uk.

2
GREAT BRITISH DESIGN, INNOVATION
AND EXCELLENCE SINCE 1912
Since the turn of the 20th century, Tower has been designing,
developing and manufacturing housewares and small
appliances used by millions of households throughout the
UK and beyond. During the 1960s, the rise in popularity
of pressure cooking saw Tower become the UK’s largest
producer of pressure cookers, right through into the late
1980s. In recent years the Tower brand has been reborn with
an exciting and varied range of housewares and electrical
appliances that have quickly reinstated the brand’s richly
deserved status as a household name.
Visit
www.towerhousewares.co.uk
for more fantastic products.

3
Contents:
Thank you for purchasing this appliance from the
Tower range.
Please read this manual carefully BEFORE using the
appliance for your own safety.
It has been designed to provide many years of
trouble-free use.
There are many benefits to using a Tower Digital
Steamer:
• The steam baskets are removable and stackable
allowing the steamer to be stored neatly whilst
taking up the minimum amount of space.
• Includes a rice steaming bowl for perfect, fluffy
rice.
• 9.5L Litre steaming capacity.
• 60 minute digital timer.
• Stainless steel base unit with power on indicator
light.
• Dishwasher safe parts.
1. Specifications
Components and
structure
2. Technical Data
3. Important Safety
Information
4. Before First Use
5. Using your Appliance
6. Troubleshooting
7. Recycling
8. Cleaning & Care
9. Wiring Safety
10. Warranty Information
11. Your Receipt
See back page for Customer
Service Information.

4
This box contains:
Instruction Manual
Steamer Base Unit
Drip tray
Herb infuser
Steaming bowl (x 3)
Removable bowl grid (x 3)
Rice bowl
Lid
Structure of your
appliance
1. Handle
2. Lid
3. Removable bowl grid
(x3)
4. Steaming bowl (x3)
5. External water gauge
Control Panel
6. LCD display
7. Decrease button
8. Set time/set timer
button
9. Program button
10. Start/Stop/Cancel
button
11. Increase button
1 - Specifications:
2
3
4
5
6
7 8
9
1
1110

5
Description: 3 Tier Digital Steamer
Model: T21003
Rated Voltage: 220-240V
Frequency: 50Hz
Power Consumption: 560-650W
Documentation
We declare that this product conforms to the following product legislation in
accordance with the following directive(s):
2014/30/EU Electromagnetic Compatibility Directive.
2014/35/EU Low Voltage Directive.
2011/65/EU Restriction of Hazardous Substances Directive.
1935/2004/EC Materials & Articles in Contact With Food
(LFGB section 30 & 31).
RK Wholesale LTD Quality Assurance, United Kingdom.
2 - Technical Data:
Should you encounter problems or require a replacement part, contact the Tower
Customer Support Team: +44 (0) 333 220 6066.
Some spare parts may be ordered from the Tower website.
Your warranty becomes void should you decide to use non Tower spare parts.
Spare parts can be purchased from www.towerhousewares.co.uk
Guarantee for spare parts:
The spares and accessories are guaranteed for 1 year from date of purchase.
The main body and housing are guaranteed for the extended free warranty subject
to registration.
If any defect arises due to faulty materials of workmanship, the faulty products must
be returned to the place of purchase within 12 months from the date of purchase.
Refund or replacement is at the discretion of the retailer.

6
• Check that the voltage
of the main circuit
corresponds with the rating
of the appliance before
operating.
• If the supply cord or
appliance is damaged,
stop using the appliance
immediately and
seek advice from the
manufacturer, its service
agent or a similarly qualified
person.
• WARNING! DO NOT let the
cord hang over the edge of
a table or counter, serious
burns may result from the
appliance being pulled off
the counter where it may
be grabbed by children or
become entangled with the
user.
• DO NOT carry the appliance
by the power cord.
• DO NOT use any extension
cord with this appliance.
• DO NOT pull the plug out
by the cord as this may
damage the plug and/or the
cable.
• Switch off at the wall socket
then remove the plug from
the socket when not in use
or before cleaning.
• Switch off and unplug
before fitting or removing
tools/ attachments, after use
and before cleaning.
• Close supervision is
necessary when any
appliance is used by or near
children.
• Children should not play
with the appliance.
• This appliance can be
used by children aged
from 8 years and above
and persons with reduced
physical, sensory or mental
capabilities or lack of
experience and knowledge
if they have been given
supervision or instruction
concerning use of the
appliance in a safe way and
understand the hazards
involved.
• DO NOT leave the appliance
unattended whilst it is in
use.
Please read these notes carefully BEFORE using your
Tower appliance
3 - Important Safety Information:

7
• Cleaning and user
maintenance should not
be undertaken by children
without supervision.
• Take care when any
appliance is used near pets.
• DO NOT use this product
for anything other than its
intended use.
• This appliance is for
household use only.
• This appliance has a short
supply cord to reduce
the risk resulting from
becoming entangled in or
tripping over a long cord.
• Don not use foil or paper to
line the baskets as this will
block the steam holes.
• DO NOT use near or under
shelves or plug sockets.
• WARNING! To avoid injury
and/or damage to persons
and/or property, DO NOT
touch the base, steamer
bowls, or lid during use as
they get very hot.
• This product will get hot
during use care must be
taken when handling.
• Always use oven mitts when
handling the steamer.
• Don’t fill over the max mark
or the water might overflow
and cause damage to the
element
• WARNING! Ensure
that there is adequate
ventilation around the
appliance during operation.
Do not use under shelves
or cupboards or near any
surface where steam may
cause a problem.
• In the unlikely event the
appliance develops a fault,
stop using it immediately
and seek advice from the
Customer Support Team:
+44 (0) 333 220 6066

8
1. Remove all packaging, promotional materials and stickers. Remove the plastic
film covering the LCD digital display.
2. Before using the steamer for the first time, carefully clean the steamer and all
accessories.
3. Do not use any aggressive detergents, brushes with metal or nylon bristles
or sharp objects such as knives or spatulas to clean the steamer. Wipe with a
sponge or cloth dampened in warm water to avoid damage.
4. Position your steamer on a dry, level and stable worktop. Ensure that your
steamer is not positioned under a cupboard or shelf or near any furnishings or
wallpaper that could be damaged by hot steam.
5. Dispose of packaging in a responsible manner.
Assembly:
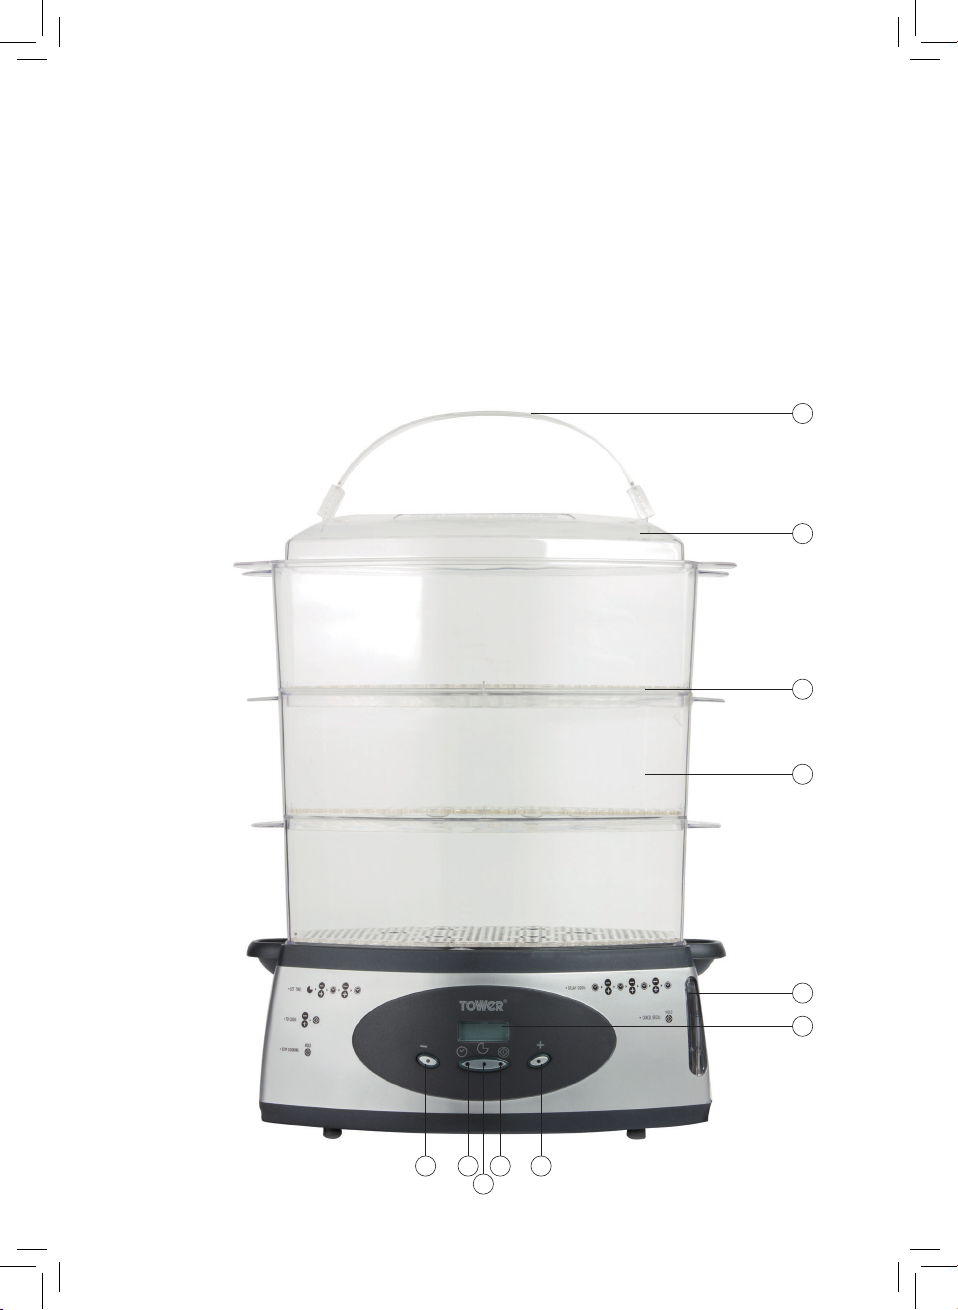
1. Fit the steam tube. One edge of the steam tube has a rim
and a small slot in it. This edge must face downwards.
2. Fit the drip tray. Never operate your steamer without the
drip tray fitted.
3. If required, fit the herb infuser. Place one or two
teaspoons of freshly chopped or dried herbs onto the
herb diffuser.
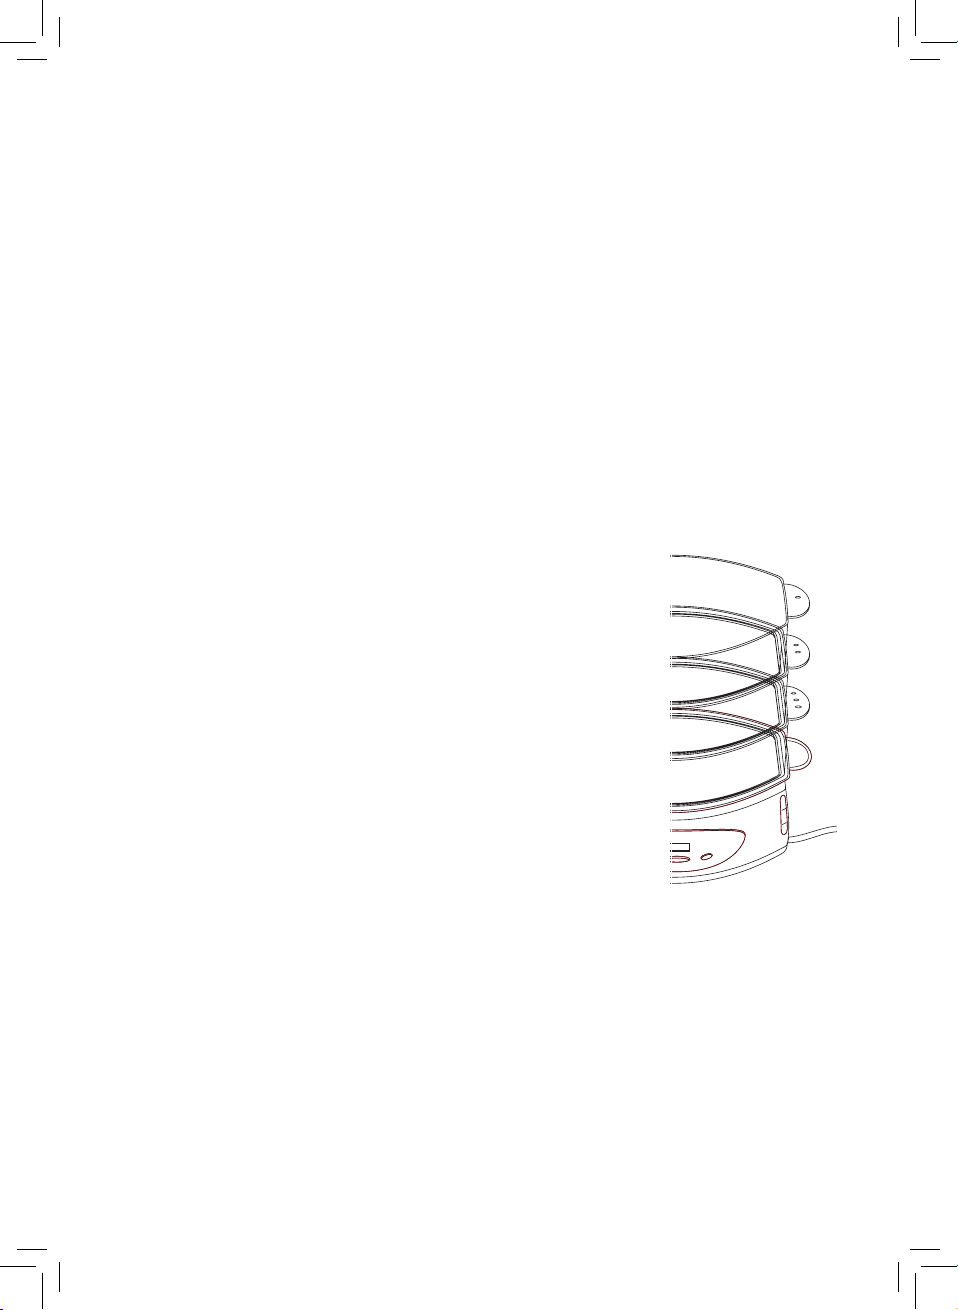
4. Fit the steam bowl(s). The bowls have dots on the
handles. The bowl with the three dots on the handle is
fitted first, then the bowl with two dots, then the bowl
with one dot. You can use one, two or three steaming
bowls depending on your cooking requirements. You
must always fit at least one steam bowl and it must have
a grid fitted.
5. If required, fit the rice bowl. The rice bowl can be placed
in any of the steamer bowls.
6. Fit the lid.
Note: The bowl grids can be removed from the bowls by pushing them up
from underneath. You can fit or remove the grids according to your cooking
requirements but the lowest steaming bowl must always have a grid fitted.
4 - Before First Use
5 - Using Your Appliance

9
Filling With Water:
You must only use water to fill your steamer. To accelerate the warm up period, you
can use hot (not boiling) water. You can fill your steamer in one of two ways:
A. At step 1 of assembly, use a jug and pour water directly into the reservoir. Make
sure the water level is not below the MIN mark or above the MAX mark.
B. Using a jug, pour water through the filling aperture in the drip tray. Using the
water gauge on the side of your steamer, make sure the water level is not
below the MIN mark or above the MAX mark. This method is used during
steaming to keep the water level topped up as required.
WARNING: Hot steam will escape from your steamer during use. Always make
sure that the lid is securely fitted during use. Take care when removing the lid.
Always use oven gloves.
1
4
2
5
3
6

10
Setting The Clock:
Each time you plug your steamer in the clock will require setting. You can still use
your steamer to cook food but you will need to set the clock if you are going to use
the timer cooking feature.
Immediate Cooking:
Immediate cooking does not require the clock to be set. Add the food to your
steamer and fill it with water.
Cancel Cooking:
Your steamer will start cooking and the display will count down in minutes. When
the cooking time is finished, your steamer will beep for approximately 30 seconds.
The steamer will automatically enter the keep warm mode unless you cancel
cooking or disconnect it from the supply socket.
Note: When you cancel cooking or the keep warm function, the alarm will sound
to alert you that cooking/warming has stopped. Press the start/stop/cancel
button to silence the alarm.
Press the program button.
The hours will flash.
Use the increase/decrease buttons
to set the hours. The hours are set
in 24 hour format.
Press the set time/set timer button.
The minutes will flash.
Use the increase/decrease buttons
to set the minutes
Press the set time/set timer button.
The clock is now set.
Press the increase button until the
required cooking time is displayed.
The clock is set in 5 minute
increments from 5 to 60 minutes.
Press the start/stop/cancel button.
The water gauge will light up red
and the dot icon on the display will
flash during cooking.
Press and hold the start/stop/
cancel button for two seconds to
cancel the cooking and keep warm
functions, or to silence the alarm.

11
Timed Cooking:
Timed cooking allows you to decide what time cooking will begin. Note that you
need to set the clock to the correct time of day before programming a timed
cooking session.
A clock icon will appear on the LCD display indicating that the delay timer has
been set.
At the selected time, your steamer will start cooking. The water gauge will light up
red and the dot icon on the display will flash during cooking.
Set The Time You Want Cooking To Start:
Set the clock as previously described.
Set The Cooking Time:
Press the set time/set timer button.
The hours will flash.
Use the increase/decrease buttons
to set the hours. The hours are set
in 24 hour format.
Press the set time/set timer button.
The minutes will flash.
Use the increase/decrease buttons
to set the minutes.
Press the set time/set timer button.
The display will show :00 Use the
increase/decrease buttons to set
the cooking time. The time is set in
5 minute increments from 5 to 60
minutes.
Press the set time/set timer button
to end programming.

12
Keep Warm Function:
Food is best served immediately after cooking. The keep warm function is designed
to keep food warm while you are serving your meal. The keep warm function
will automatically start after the cooking time has finished and will operate for
approximately 60 minutes.
In order for the keep warm function to operate the water level must be at or above
the MIN marking on the water level indicator.
When the keep warm function is in operation, the keep warm symbol will flash on
the digital display. The water gauge illumination will cycle between green and red
as your steamer cycles on and off.
The keep warm function can be cancelled at any time. To cancel, simply press the
start/ stop/cancel button for two seconds. An alarm will sound to confirm that the
setting has been cancelled. The alarm will stop after approximately 30 seconds.
Alternatively you can cancel the alarm by pressing the start/stop/cancel button.
Using the rice bowl:
1. Put 1 volume of rice and 1½ volumes of water into the rice bowl (maximum
250g of rice).
2. Place the rice bowl centrally into the steaming bowl.
3. Although the rice bowl can be used in any of the steaming bowls, it’s best
to place it in the top bowl so that juices and condensation from the other
steaming bowls don’t flavour the rice or make it too wet.
Herb Infuser:
Herbs can be placed in the herb infuser to enhance your cooking. Place one or two
teaspoons of your chosen chopped fresh (or dried) herb onto the infuser and use
the steamer as normal. The herb’s flavour will infuse the food in all three steaming
bowls. Remove, empty and clean the herb infuser after each use.
Boil Dry Condition:
It is important to never let your steamer boil dry. Always fill the reservoir with an
adequate amount of water and top it up during cooking when required. The water
level should always be between the MIN and MAX markings. In the event that the
steamer does boil dry, the heating element will cycle on and off. To restore normal
operation, top up the water level.

13
Steaming Tips:
• Check the water level regularly to ensure the unit does not boil dry. If the water
level is getting low, carefully add water through one of the filling apertures in
the drip tray.
• Steaming times are only a guide. Times will vary depending on the size,
freshness, spacing of the food in the bowl and personal preference.
• As you become familiar with your steamer you can adjust cooking times to suit.
• A single layer of food steams faster than several layers.
• The cooking time for a large quantity of food will increase.
• Do not overload the steaming bowl.
• When steaming large quantities of food, remove the lid halfway through
cooking and stir using a long-handled utensil. Make sure you wear oven gloves.
• Only add salt to the steaming bowl when cooking is complete and the bowl
has been removed from the steamer. This will prolong the life of the heating
element.
• Always place larger pieces of food or those with a longer cooking time in the
lower steaming bowls.
• When using multiple steaming bowls you may place different types of food
in the different bowls. However, condensation will drip from the upper to the
lower bowls so make sure all flavours complement each other.
• When using multiple steaming bowls, always place meat and poultry in the
lowest bowl so the juices from the raw and partially cooked meat do not drip
onto other foods.
• For high altitude cooking, steaming times may need to be increased. Exact
times vary by location.
• Steaming times stated in the charts and recipes are only a guide. Times may
vary depending on the size of food pieces, spacing of the food in the Steamer
Bowl, freshness of food, and personal preference. As you become familiar with
the Steamer, adjust cooking times.
• For best results, be sure pieces of food are similar in size. If pieces vary in size
and layering is required, place smaller pieces on top.
• Do not crowd food in the Steaming Bowl. Arrange the food with spaces
between pieces to allow for maximum steam flow.
• When steaming large quantities of food, remove lid about halfway through the
steaming process and turn pieces using a long handled utensil, protecting your
hands from the steam with oven mitts.

14
• Do not add salt and seasoning to the Steaming Bowl until after Cooking.
This is to avoid possible damage to the heating element located in the Water
Reservoir.
• Never steam meat or poultry from frozen.
• Always thaw completely first.
• All the times stated in the ‘Steaming Guidelines’ are based on the use of cold
water in the Water Reservoir.
• Put meats, fish and juicy foods in the lower or bottom tiers so that they cannot
drip onto foods below. Do not put frozen meat in the steamer. Defrost first.
• Allow foods cooked in the upper tiers an extra five minutes cooking time
because they are further from the steam.
• Ensure the ingredients are not immersed in water in the steamer.
• Use 30ml salt for every litre of water. The salt helps seal in the nutrients.
• Since all vegetables cook at different paces, it is recommended to cook
different types separately.
• When selecting fruit or vegetables to steam, always select ones with
unblemished skins and good colour. Steaming will only accentuate the taste in
any ‘old’ or bruised fruit and vegetables.
Reference Guides:
The following tables are for reference only.
Differing quantities, water levels and temperature can all affect the end results.
Vegetables:
Steam leafy green vegetables for the shortest possible time as they lose colour
easily.
• Salt and season vegetables after steaming for best results.
• Frozen vegetables should not be thawed before steaming. Cooking time will
vary from chart below.

15
Food Quantity Steaming Time Notes
Fresh fish fillets 250g 10-12 mins
Fresh mussels 250g 8-10 mins Stir half way through
cooking
Prawns - fresh 400g 6-8 mins
Carrots - fresh sliced 400g 20-22 mins Stir halfway through
cooking
Peas - fresh 400g 12 mins
Runner beans - fresh 400g 35-40 mins Arrange beans to let
steam through
Broccoli - fresh 400g 16-18 mins
Cauliflower 1 head, core
removed
15 mins
Artichokes - fresh 2 medium 45-50 mins Cut off the base
New potatoes - fresh 10-12 small 20-22 mins
Corn on the cob -
fresh
4 15 mins
White rice 200g + 300ml
water
25 mins If you are cooking
brown rice add 10
minutes to the cooking
time
Couscous 150g + 300ml
water
5-6 mins
Spaghetti 120g + 500ml
water
18-20 mins
Brussel sprouts 200g 18-20 mins
Steaming Guidelines:

16
6 - Troubleshooting
DISPOSAL OF THE UNIT
Appliances bearing the symbol shown here may not be disposed of in domestic
rubbish. You are required to dispose of old electrical and electronic appliances like
this separately.
Please visit www.recycle-more.co.uk or www.recyclenow.co.uk for access to
information about the recycling of electrical items.
Please visit www.weeeireland.ie for access to information about the recycling of
electrical items purchased in Ireland.
The WEEE directive, introduced in August 2006, states that all electrical items must
be recycled, rather than taken to landfill.
Please arrange to take this appliance to your local Civic Amenity site
for recycling, once it has reached the end of its life.
7 - Recycling
Questions Answers
Can you use one
basket at a time? Yes, you can use one, two or all three tiers at once.
Can the steamer run
without water?
No, the steamer should not be operated without any water in the
reservoir.
Can I steam frozen
vegetables?
Yes, frozen vegetables can be cooked using the steamer.
When cooking frozen meat or poultry, defrost before putting in
the steamer.
What is the capacity
of the steamer? The 3 Tier Steamer has a capacity of 9.5 Litres.
Why is my food
taking too long to
steam?
You may have put the incorrect amount of water into the water
reservoir. Always ensure the water is past the minimum ll line.
Use the steaming guides included in this manual for reference.
Filling the water reservoir to the max level should give you
60 minutes of steaming time.
You may have overlled the basket.

17
WARNING! Always ensure your steamer is switched off, has cooled down and is
unplugged from the mains supply before cleaning. Do not immerse your steamer
or power cord and plug in water or any other liquid.
• Remove the food from the steaming bowls.
• The drip tray collects water during the steaming process - ensure that this and
the remaining water in the reservoir have fully cooled before emptying.
• Wash the drip tray, herb infuser, rice bowl, steaming bowls, grids, steam tube
and lid in warm soapy water. Rinse and dry thoroughly before storing.
• Using a jug, fill the reservoir with a little warm soapy water. Swill the mixture
around using a clean cloth. Pour the soapy water away and rinse the reservoir
with clean water several times. Do not hold the base unit under a running tap.
De-scaling the Water Reservoir:
IMPORTANT:
• Failure to de-scale your kettle may invalidate your guarantee.
• If you do not de-scale your kettle regularly, the build-up of lime-scale may
result in the following:
• After 2-3 months of consistent usage, chemical deposits may build up in
the Water Reservoir and heating element inside your Food Steamer. This is a
normal process and the build-up will depend on the degree of water hardness
in your area.
• It is essential the appliance is de-scaled regularly to maintain steam production
and extend the life of the unit.
• Fill the Water Reservoir to the Max level with approximately 3 cups of clear
vinegar (not brown vinegar).
IMPORTANT:
• Do not use any other chemical or a proprietary de-scaling agent.
• Plug in a wall socket. Steamer bowl and lid should be in place during this
procedure.
• Set timer for 20-25 minutes to begin steaming.
WARNING!
• If vinegar begins to boil over the edge of base, unplug the unit and switch the
timer off. Reduce the quantity of vinegar slightly.
• When the unit stops after 20-25 minutes, unplug from the wall socket and
allow cooling completely before pouring out vinegars.
• Rinse the Water reservoir several times with cold water. Do not immerse the
base in any liquid. Clean other steamer parts as directed below.
8 - Cleaning & Care

18
IMPORTANT! After cleaning allow to dry fully before using again.
Do not use the appliance if damp. Ensure the appliance is completely clean and
dry before storing.
Storage
To store your appliance:
1. Unplug power cord from the power outlet and clean as above.
2. Allow the appliance to dry fully.
3. Store on a flat, dry level surface out of reach of children.
4. Fit the bowl marked with one dot to the drip tray.
5. Place the bowl marked with two dots inside the first bowl.
6. Place the bowl marked with three dots inside the second bowl.
7. Place the rice bowl inside the third bowl.
8. Fit the lid.

19
WARNING:
This appliance MUST be earthed
9 - Wiring Safety for UK Use Only
IMPORTANT
As the colours in the
mains lead of this
appliance may not
correspond with the
coloured markings
identifying the
terminals in your plug,
please proceed as
follows:
The wires in the mains lead are coloured
in accordance with the following code:
Blue neutral [N] Brown live
[L] Green/Yellow [EARTH]
Plug Fitting Details (Where Applicable).
The wire coloured blue is the neutral
and must be connected to the terminal
marked [N] or coloured black.
The wire coloured brown is the live wire
and must be connected to the terminal
marked [L] or coloured red.
The wire coloured green/yellow must be
connected to the terminal marked with
the letter [E] or marked .
On no account must either the brown
or the blue wire be connected to the
[EARTH] terminal .
Always ensure that the cord grip is
fastened correctly.
The plug must be fitted with a fuse
of the same rating already fitted and
conforming to BS 1362 and be ASTA
approved.
If in doubt consult a qualified electrician
who will be pleased to do this for you.
Non-Rewireable Mains Plug
If your appliance is supplied with a non-
rewireable plug fitted to the mains lead
and should the fuse need replacing,
you must use an ASTA approved one
(conforming to BS 1362 of the same
rating).
If in doubt, consult a qualified
electrician who will be pleased to do
this for you.
If you need to remove the plug -
disconnect it from the mains - then cut
it off of the mains lead and immediately
dispose of it in a safe manner. Never
attempt to reuse the plug or insert it
into a socket outlet as there is a danger
of an electric shock.
FUSE

20
This product is guaranteed for 12 months
from the date of original purchase.
If any defect arises due to faulty materials
of workmanship, the faulty products must
be returned to the place of purchase.
Refund or replacement is at the discretion
of the retailer.
The Following Conditions Apply:
• The product must be returned to the
retailer with proof of purchase or a
receipt.
• The product must be installed and
used in accordance with the
instructions contained in this
instruction guide.
• It must be used only for domestic
purposes.
• It does not cover wear and tear,
damage, misuse or consumable parts.
• Tower has limited liability for incidental
or consequential loss or damage.
This guarantee is valid in the UK and Eire
only.
The standard one year guarantee is only
extended to the maximum available for
each particular product upon registration
of the product within 28 days of purchase.
If you do not register the product with us
within the 28 day period, your product is
guaranteed for 1 year only.
To validate your extended warranty, please
visit www.towerhousewares.co.uk and
register with us online. Alternatively, call
our customer registration line on
+44 (0) 333 220 6066.
Please note that length of extended
warranty offered is dependent on product
type and that each qualifying product
needs to be registered individually in order
to extend its warranty past the standard
1 year.
Extended warranty is only valid with proof
of purchase or receipt.
As a thank you for purchasing
one of our fantastic products,
we are offering you an extra
2 years peace of mind in
addition to your 1 year
guarantee.
To receive your extra 2 year
guarantee, register your
appliance online within 28
days of purchase by visiting
www.towerhousewares.co.uk
10 - Warranty
Table of contents
Other Tower Hobbies Electric Steamer manuals
Popular Electric Steamer manuals by other brands

Moffat
Moffat Blue Seal E40AC DD Specification sheet

Scarlett
Scarlett SC-143 instruction manual

Middleby
Middleby Market Forge ECO-TECH PLUS ETP-10G Installation & operation manual

Cleveland
Cleveland 24-CGA-10.2 Operator's manual

V-ZUG
V-ZUG Combi-Steam MSLQ 600 installation instructions

Silvercrest
Silvercrest SDG 800 A1 operating instructions