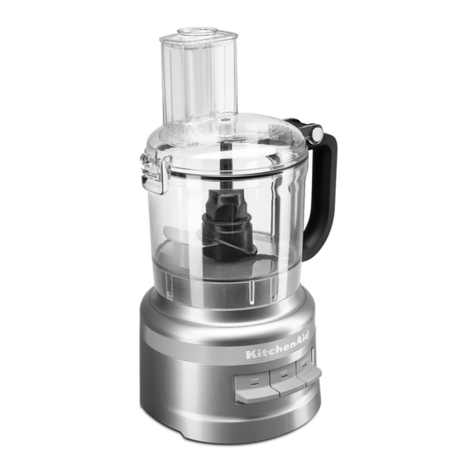
Tower Hobbies T18007BLK Operator's manual

T18007BLK
750W
FOOD PROCESSOR
AND BLENDER
SAFETY AND INSTRUCTION MANUAL
PLEASE READ CAREFULLY
*Subject to registering your Extended Guarantee online at www.towerhousewares.co.uk.

2
12
10
11
8
9
7
5
6
1
3
2
4
Description: Food Processor and Blender
Model: T18007BLK
Rated Voltage/ Frequency: 220-240V /50Hz
Power Consumption: 750W
Processing bowl capacity (Max.): 2000 ml
Documentation
We declare that this product conforms to the following product legislation in accordance with
the following directive(s):
2014/30/EU Electromagnetic Compatibility (EMC)
2014/35/EU Low Voltage Directive (LVD)
1935/2004/EC Materials & Articles in Contact With Food (LFGB section 30 & 31)
2015/863/EU Restriction of Hazardous Substances Directive.
(including amendment (EU) 2015/863).
2009/125/EC Eco-design of Energy related Products (ErP)
RK Wholesale LTD Quality Assurance, United Kingdom.
Technical Data:
Specifications:
This box contains:
1. Pusher
2. Bowl lid
3. Blade adapter
4. Processing bowl
5. Emulsifying disc
6. Stainless steel slicing and grating disc
7. Stainless steel blade
8. Plastic dough blade for kneading
9. Non slip suction feet
10. Function dial
11. Motor base
12. 1.8L Plastic blender (blending jug,
blending jug lid, blending cap)

3
Wiring Safety for UK Use Only
WARNING:
This appliance is double insulated.
Do not connect any wire to the earth
terminal.
DISPOSAL OF THE UNIT
Appliances bearing the symbol shown here may not be disposed of in domestic rubbish.
You are required to dispose of old electrical and electronic appliances like this separately.
Please visit www.recycle-more.co.uk or www.recyclenow.co.uk for access to information about the
recycling of electrical items.
Please visit www.weeeireland.ie for access to information about the recycling of
electrical items purchased in Ireland.
The WEEE directive, introduced in August 2006, states that all electrical items must be
recycled, rather than taken to landfill.
Please arrange to take this appliance to your local Civic Amenity site for recycling,
once it has reached the end of its life.
IMPORTANT
As the colours in the mains lead of this appliance
may not correspond with the coloured markings
identifying the terminals in your plug, please
proceed as follows:
The wires in the mains lead are coloured in
accordance with the following code:
Blue neutral [N] Brown live [L]
Plug Fitting Details (Where Applicable).
The wire coloured blue is the neutral and must be
connected to the terminal marked [N] or coloured
black.
The wire coloured brown is the live wire and
must be connected to the terminal marked [L] or
coloured red.
On no account must either the brown or the blue
wire be connected to the [EARTH] terminal .
Always ensure that the cord grip is fastened
correctly.
The plug must be fitted with a fuse of the same
rating already fitted and conforming to BS 1362
and be ASTA approved.
If in doubt consult a qualified electrician who will
be pleased to do this for you.
Non-Rewireable Mains Plug.
If your appliance is supplied with a non-rewireable
plug fitted to the mains lead and should the fuse
need replacing, you must use an ASTA approved
one (conforming to BS 1362 of the same rating).
If in doubt, consult a qualified electrician who will
be pleased to do this for you.
If you need to remove the plug – disconnect it
from the mains – and then cut it off of the mains
lead and immediately dispose of it in a safe
manner. Never attempt to reuse the plug or insert
it into a socket outlet as there is a danger of an
electric shock.
Fuse
Neutral
(Blue)
Live
(Brown)

4
• Check that the voltage
of the main circuit
corresponds with the
rating of the appliance
before operating.
• Always use a reliable
earthed power supply to
operate the appliance.
• This appliance is for
normal household use
only.
• DO NOT use this product
for anything other than its
intended use.
• DO NOT use the
appliance outdoors.
• DO NOT use the
appliance if damp.
• Always unwind any cord
to avoid overheating.
• This appliance can be
used by children aged
from 8 years and above
and persons with reduced
physical, sensory or
mental capabilities or
lack of experience and
knowledge if they have
been given supervision
or instruction concerning
use of the appliance in a
safe way and understand
the hazards involved.
• Young children must be
supervised to ensure that
they do not play with the
appliance.
• Close supervision is
required when any
appliance is used by or
near children or pets.
• Cleaning and user
maintenance should
not be made by children
without supervision.
• If the supply cord is
damaged, stop using the
appliance immediately
and seek advice from
the manufacturer or its
service agent or a similarly
qualified person.
• DO NOT use if the bowl or
jug are cracked or broken.
• The use of accessory
attachments is not
recommended by the
appliance manufacturer
apart from those supplied
with this product.
• DO NOT use extension
cords with the appliance.
• The appliance is not
intended to be operated
by means of an external
timer or separate remote-
control system.
Please read these notes carefully BEFORE using your
Tower appliance
Important Safety Information:

5
• Please ensure that the
appliance is used on a
stable, level and heat
resistant surface.
• DO NOT leave the
appliance unattended
while it is operating.
• Ensure adequate
ventilation; keep an open
space of approximately
20cm all around the
appliance.
• This appliance includes
a safety switch, which
prevents operation
unless the accessories
are securely installed. DO
NOT attempt to bypass
the interlock system that
powers the unit on.
• DO NOT use the lid as
a means to operate the
processor; always use the
ON/OFF speed control.
• The appliance is fitted
with a safety thermal
cut-out device and will
shut off in the event of
overload. If this occurs,
switch the appliance off
and it will automatically
reset when cool.
• WARNING! DO NOT
operate the motor
continuously for more
than 60 seconds at a
time, to prevent the
product overheating.
Allow the motor to rest
for 180 seconds before
continuing. DO NOT
process dry ingredients
for more than 30 seconds
at a time.
• Ensure the capacities
shown in the Using your
Appliance section are not
exceeded. Never exceed
the maximum capacity.
• CAUTION! Ensure the jug
gasket seal is correctly
seated in the blade
assembly recess prior to
affixing the jug. Failure to
do so could result in the
seal coming into contact
with the blades resulting
in damage, or leaking will
occur.
• CAUTION! Be very careful
when you handle the
discs, blender blade unit
or food processor blade
unit. Be especially careful
when you remove them
from the food processor
bowl or blender jug,
when you empty the
bowl or jug and when
you clean them. These are
extremely sharp and may
cause injury if handled
incorrectly. Always store
blades and cutting discs
in their respective covers
or processing containers.

6
• The processor is NOT
suitable for blending
soups or any other hot
liquids.
• Please wait until all the
components stop running
before unplugging the
power cord and taking off
the processing bowl.
• Place the processor bowl
& blender jug onto the
base of the processor
before fitting any
attachments.
• DO NOT push food with
fingers, or other objects
(like knives/ spatulas),
always use the enclosed
pusher for feeding food.
• DO NOT exert too
much pressure on the
pusher when you press
ingredients down the
feeding tube.
• Avoid contact with
moving parts. Keep
hands and utensils out of
processor bowl/jug while
operating to prevent
personal injury or damage
to the processor.
• Always remove the
processor blade before
emptying the bowl.
• To protect against risk
of electric shock, fire or
personal injury, do not
immerse power cord, plug
or motor base in water or
any form of liquid.
• Switch off and unplug
before fitting or removing
tools/ attachments, after
use and before cleaning.
• DO NOT pull the plug out
by the cord as this may
damage the plug and/ or
cable.
• DO NOT carry the
appliance by the power
cord.
• DO NOT immerse the
motor base in water or
other liquids, nor rinse it
under tap water. DO NOT
use near washbasins.
Ensure that the appliance
base does not get wet
(water splashes, etc.) and
do not operate it with wet
hands.
• DO NOT let power cord
hang over the edge of a
table or counter, or touch
any hot surface.
• DO NOT place the
appliance near a gas
outlet, electric burner, or
heated oven.
• DO NOT use the
appliance near flammable
materials such as curtains,
or other combustible
material.
• In the unlikely event the
appliance develops a fault,
stop using it immediately
and seek advice from the
Customer Support Team:
+44 (0) 333 220 6066

7
Before First Use
Read all instructions and safety information carefully before first use. Please retain this information
for future reference.
1. Remove the parts from the packaging.
2. Wash all parts except motor base in warm, soapy water. Rinse and dry immediately. DO NOT
IMMERSE MOTOR BASE IN WATER.
3. Place the processor on a flat, dry surface.
4. Assemble the appliance.
5. Your appliance is now ready for normal use.
IMPORTANT: The blade in this appliance is very sharp. Handle with care.
6. Dispose of the packaging in a responsible manner.
Using Your Appliance
WARNING: The product may emit a small amount of smoke when it is first turned on. This is due to
manufacturing oils and/or residue left on the motor. There is no need for alarm and is considered
normal. The smoke will eventually lessen once the oil and/or residue disappears.
Allow food/ liquids to cool to room temperature before placing them in the processing bowl or
blender jug.
Your processor is NOT suitable for crushing or grinding coffee beans, or converting granulated sugar
to caster sugar.
Additives such as almond essence, colourings and other flavourings may cause discolouration to the
bowl, jug and or lids.
Stainless Steel Blade Assembly:
1. Position the drive shaft onto the motor base.
2. Position processing bowl onto the drive shaft and turn clockwise to seat firmly on motor base.
3. Place blade adaptor onto the drive shaft.
4. Remove blade protectors and place stainless steel blade onto the blade adaptor.
5. Turn the stainless steel blade to the right position.
6. Place ingredients into processor bowl.
7. Place cover on bowl, turn clockwise until cover interlocks on bowl.
8. Place pusher into feeding chute.
9. Plug in to wall socket.
10. Switch on and select a speed. Do not use the lid as a means to operate the processor; always
use the ON/OFF speed control.
Processed Food Measurement Per batch
Chocolate ≤100g
Cheese ≤200g
Meat ≤500g
Tea or Spice 50-100g
Fruit & Vegetable 100-300g
Onion ≤500g

8
Note: (Stainless Steel Blade):
• Use pulse function several times to avoid cutting too fine. Do not run for too long while cutting
hard cheese or chocolate otherwise these materials will overheat and begin to melt.
• Standard chopping period: 30-60 sec.
• The processor will not work if the bowl and lid are fitted incorrectly.
• Use the pulse function in short bursts. The pulse will operate for as long as the control is held
in position.
• Reverse the above procedure to remove the lid, attachments and bowl.
• Always switch the unit off before removing the lid.
• The stainless steel blade is the most versatile of all the attachments.
• The length of the processing time will determine the texture achieved.
• For coarser textures use the pulse control.
• Use the stainless steel blade for cake and pastry making, chopping raw and cooked meat,
vegetables, nuts, pate, dips, puréeing soups and to also make crumbs from biscuits and bread.
• Cut food such as meat, bread, vegetables into cubes approximately 2cm before processing.
• Biscuits should be broken into pieces and added to the feed tube whilst the machine is
running.
• When making pastry use fat straight from the fridge cut into 2cm cubes.
• Take care not to over-process.
WARNING! The blade is very sharp, please be careful during assembly and washing.
Plastic Dough Blade Kneading Assembly:
1. Position the drive shaft onto the motor base.
2. Position processing bowl into the drive shaft and turn clockwise to seat firmly on motor base.
3. Place blade adaptor onto the drive shaft.
4. Place kneading blade onto the blade adaptor.
5. Turn the kneading blade to the right position.
6. Place ingredients into processor bowl.
7. Place cover on bowl, turn clockwise until cover interlocks on bowl.
8. Place pusher into feeding chute.
9. Plug in to wall socket.
10. Switch on and select a speed.
Processed Food Measurement Per batch
Flour / Soft Cheese ≤300g
Egg ≤5pieces
Note: (Kneading blade):
• Always attach kneading blade in the bowl before feeding food.
• Standard kneading period: 30-180 sec.
• The processor will not work if the bowl and lid are fitted incorrectly.
• Use the pulse function in short bursts. The pulse will operate for as long as the control is held
in position.
• Reverse the above procedure to remove the lid, attachments and bowl.
• Always switch the unit off before removing the lid.
Emulsifying Disc Assembly:
1. Position the drive shaft onto the motor base.
2. Position processing bowl into the drive shaft and turn clockwise to seat firmly on motor base.
3. Place blade adaptor onto the drive shaft.
4. Place emulsifying disc onto the blade adaptor.
5. Turn the emulsifying disc to the right position.
6. Place ingredients into processor bowl.
7. Place cover on bowl, turn clockwise until cover locks on bowl.
8. Place pusher into feeding chute.
9. Plug in to wall socket.
10. Switch on and select a speed.

9
Processed Food Measurement Per batch Time per batch
Egg 2-5pcs 30-70sec
Cheese 125-350ml 20sec
Note: (Emulsifying disc):
• Emulsifying disc can be used to make mayonnaise.
• The processor will not work if the bowl and lid are fitted incorrectly.
• Use the pulse function in short bursts. The pulse will operate for as long as the control is held
in position.
• Reverse the above procedure to remove the lid, attachments and bowl.
• Always switch the unit off before removing the lid.
Stainless Steel Slicing and Grating Disc Assembly:
1. Position the drive shaft onto the motor base.
2. Position processing bowl into the drive shaft and turn clockwise to seat firmly on motor base.
3. Place stainless steel disc onto the drive shaft.
4. Place cover on bowl.
5. Turn cover clockwise until cover interlocks on bowl.
6. Plug in to wall socket.
7. Use pusher to push the food down for processing.
8. Switch on and select a speed.
Note: (Stainless steel slicing and grating disc):
• Push gently when feeding food.
• Pre-cut food into smaller pieces according to the diameter of the feeding tube.
• Feed gradually for better effect.
• The processor will not work if the bowl and lid are fitted incorrectly.
• Reverse the above procedure to remove the lid, attachments and bowl.
• Always switch the unit off before removing the lid.
• Use the shredding side for cheese, carrots, potatoes and foods of a similar texture.
• Use the slicing side for cheese, carrots, potatoes, cabbage, cucumber, courgette, beetroot and
onions.
WARNING: Never remove the lid until the cutting disc has completely stopped.
1.8L Plastic Blender Assembly:
1. Fit the sealing ring into the blade unit ensuring the seal is located correctly.
2. Leaking will occur if the seal is damaged or not fitted correctly.
3. Screw the blade unit anticlockwise into the jug.
4. Place the blender on motor base and turn clockwise to ensure install in position.
5. Add ingredients into the blender.
6. Put lid on and turn clockwise to a lock position. Always check that this is secure.
7. Put the blending cap into the lid and turn clockwise to lock into position. Always check that
this is secure.
8. Plug in to wall socket.
9. Switch on and select a speed.
10
Troubleshooting
Problem Solution
Machine does not
work. Ensure the unit is plugged in to a suitable power outlet. Ensure the jug is
properly assembled on to the base and that it is not misaligned.
Machine stops
running suddenly. Processing bowl may loosen during vigorous processing. Please re-
install the bowl and cover.
Motor is running,
while components do
not run.
Make sure the drive shaft is installed correctly.
Food is unevenly
chopped/ mixed. Either too much food is being processed at once or is not being pulsed
properly. Reduce the amount of food in the processor.
Make sure your ingredients are cut into even, 1/2 - 1 inch pieces before
processing.
Do not overload the processor. Process your food in batches to allow all
of the ingredients to process evenly.
My food processor
moves around the
counter top too much
during use.
The food processor is fitted with heavy duty suction feet. Check that they
are clean and dry.
This can happen with heavier loads as the motor is required to work
harder, ensure the maximum load capacity is not exceeded.
Cleaning & Care
1. Remove plug from the mains socket and allow the appliance to cool down before cleaning.
2. Handle the blades and cutting discs with care - they are extremely sharp.
3. Some foods may discolour the plastic. This is perfectly normal and won’t harm the plastic
or affect the flavour of your food. Rub with a cloth dipped in vegetable oil to remove any
discolouration.
4. Do not immerse the base unit of the appliance in water and ensure no water enters the
appliance.
5. Clean the base unit by wiping it with a damp cloth and then dry. A little detergent can be
added needed. Ensure that the interlock area is clear of food debris.
6. Do not use scouring pads, steel wool, any form of strong solvents or abrasive cleaning agents to
clean the appliance; they may damage the outside surfaces of the appliance.
7. Clean all accessories in warm soapy water.
IMPORTANT!
Liquidiser:
• Empty the jug before unscrewing the blade unit clockwise.
• Wash the jug by hand.
• Remove and wash the seals.
• Don’t touch the sharp blades. Use a plastic or non-metallic dish brush with hot soapy water to
clean them, then rinse thoroughly under the tap. Don’t immerse the blade unit in water.
• Leave to dry upside down.
All other parts:
• The removable parts are dishwasher safe only in settings below 60ºC. If unsure then wash by
hand, and then dry.
To store your appliance:
1. Unplug power cord from the power outlet and clean as above.
2. Allow the appliance to dry fully.
3. Store on a flat, dry level surface out of reach of children.
4. Ensure the appliance is completely clean and dry before storing.
Note: Some foods, such as carrots, may discolour the outer surfaces of the appliance. To prevent
discolouration, rub the relevant areas with a cloth dipped in vegetable oil directly after use.

11
Notes:

0620.V1
thank you!
We hope you enjoy your appliance for many years.
This product is guaranteed for 12 months from the date of original purchase.
If any defect arises due to faulty materials of workmanship, the faulty products must be returned to
the place of purchase.
Refund or replacement is at the discretion of the retailer.
The Following Conditions Apply:
The product must be returned to the retailer with proof of purchase or a receipt.
The product must be installed and used in accordance with the instructions contained in this
instruction guide.
It must be used only for domestic purposes.
It does not cover wear and tear, damage, misuse or consumable parts.
Tower has limited liability for incidental or consequential loss or damage.
This guarantee is valid in the UK and Eire only.
The standard one year guarantee is only extended to the maximum available for each particular
product upon registration of the product within 28 days of purchase. If you do not register the
product with us within the 28 day period, your product is guaranteed for 1 year only.
To validate your extended warranty, please visit
www.towerhousewares.co.uk and register with us online.
Please note that length of extended warranty offered is dependent on product type and that each
qualifying product needs to be registered individually in order to extend its warranty past the
standard 1 year.
Extended warranty is only valid with proof of purchase or receipt.
Your warranty becomes void should you decide to use non Tower spare parts.
Spare parts can be purchased from
www.towerhousewares.co.uk
Should you have a problem with your appliance, or need any spare parts,
please call our Customer Support Team on:
+44 (0) 333 220 6066
Table of contents
Other Tower Hobbies Food Processor manuals

Tower Hobbies
Tower Hobbies T18002 Operator's manual

Tower Hobbies
Tower Hobbies T18001 Operator's manual

Tower Hobbies
Tower Hobbies T12032 Operator's manual

Tower Hobbies
Tower Hobbies Cavaletto Operator's manual

Tower Hobbies
Tower Hobbies T18004 Operator's manual

Tower Hobbies
Tower Hobbies T80433 Operator's manual

Tower Hobbies
Tower Hobbies T12030 Operator's manual

Tower Hobbies
Tower Hobbies T80435 Operator's manual