Toyotomi KR-47 User manual

KR-47
GB OPERATING MANUAL........ PAGE 2 (This product is not suitable for primary heating purpose)
DE GEBRAUCHSANWEISUNG..... PAGE 16 (Dieses Produkt eignet sich nicht als Hauptheizgerät)
NL GEBRUIKSAANWIJZING ...... PAGE 30 (Dit product is niet geschikt voor gebruik als primaire verwarming)
ES INSTRUCCIONES DE USO ..... PAGE 44 (Este producto no es adecuado para calefacción primaria)
IT ISTRUZIONI D’USO .......... PAGE 58 (Il presente prodotto non è adatto a funzioni di riscaldamento primario)
DK BRUGERVEJLEDNING ........ PAGE 72 (Dette produkt er ikke egnet til brug som primær opvarmningskilde)

around
150cm
100cm
Distance from flameable objects
4
16 TIPS FOR SAFE USE
1Make sure that children are always aware of the
presence of a burning heater.
2DO NOT move the heater when it is burning or still hot.
DO NOT refill nor service the heater when it is burning
or still hot.
3Position the front of the heater at a minimum distance
of 1.5 metres from flammables objects, furniture, spray
can and gas cylinder. DO NOT store the jerrycan near
the heater.
4DO NOT use the heater in dusty places or in a strong wind. In both cases you will
not have optimum burning.
5Switch off the heater, before you leave or go sleeping.
6Store and move fuel only in suitable tanks and jerrycans.
7Make sure that the fuel is not exposed to heat or extreme temperature changes.
ALWAYS store the fuel in a cool, dry and dark place (sunlight will affect the quality).
8NEVER use the heater in places where harmful gasses or fumes may be present
(e.g. exhaust gasses or paint fumes).
9The top plate of the heater becomes hot. DO NOT cover the heater (there is a risk of
fire). Avoid any contact with the top plate and grille.
Due to high surface temperature, keep away from children.
10 ALWAYS make sure that there is sufficient ventilation.
11 The heater must not be located immediately below a socket-outlet.
12 Children of less than 3 years should be kept away unless continuously supervised.
Children aged from 3 years and less than 8 years shall only turn on/off the appliance
provided that it has been placed or installed in its intended normal operating
position and they have been given supervision or instruction concerning use of the
appliance in a safe way and understand the hazards involved. Children aged from
3 years and less than 8 years shall not regulate and clean the appliance or perform
user maintenance.
CAUTION - Some parts of this product can become very hot and cause burns.
Particular attention has to be given where children and vulnerable people are
present.
13 Children shall not play with the appliance.
14 Cleaning and user maintenance shall not be made by children without
supervision.
15 DO NOT stay too close to the heater for a long time, in order to avoid burn or
dehydration.
16 WARNING - This heater is not equipped with a device to control the room
temperature.
DO NOT use this heater in unventilated places when they are occupied by persons
not capable of leaving the place on their own, unless constant supervision is
provided.

ca.
150cm
100cm
Abstand zu brennbaren Gegenständen
'
16 SICHERHEITSRATSCHLÄGE
1Machen Sie Kinder immer auf die Anwesenheit eines
brennenden Ofens aufmerksam.
2Transportieren Sie den Ofen NICHT, wenn er brennt oder
noch heiß ist. In diesem Fall auch KEINE Wartungsarbeiten
durchführen.
3 Stellen Sie den Heizofen so auf, daß er sich minimal 1,5
Meter von brennbaren Gegenständen, Möbeln, Sprühdoce
und Gas Zylinder befindet. Bewahren Sie den Kanister NICHT
neben dem Ofen auf.
4Benutzen Sie den Heizofen NICHT in staubigen Orten oder bei starkem Wind. In beiden
Fällen erhalten Sie keine optimale Verbrennung.
5Schalten Sie den Heizofen aus, bevor Sie das Haus verlassen oder zu Bett gehen.
6Lagern und transportieren Sie den Brennstoff ausschließlich in den dazu bestimmten
Tanks und Kanistern.
7Achten Sie darauf, daß der Brennstoff nicht Hitze oder extremen Temperaturunterschieden
ausgesetzt wird. Lagern Sie den Brennstoff IMMER an einem kühlen, trockenen und
dunklen Ort (Sonnenlicht schadet der Qualität).
8Benutzen Sie den Heizofen NIEMALS an Stellen, an denen schädliche Gase oder Dämpfe
auftreten könnten (zum Beispiel Auspuffgase oder Farbdämpfe).
9Die Oberseite des Ofens wird heiß. Der Ofen darf NICHT abgedeckt werden (Feuergefahr).
Berühren Sie die Oberseite und das Gitter nicht. Wegen der hohen Temperatur der
Oberfläche, verwenden Sie das Gerät außerhalb der Reichweite von Kindern.
10 Achten Sie IMMER auf ausreichende Belüftung.
11 Das Heizgerät darf nicht direkt unter einer Steckdose stehen.
12 Kinder unter 3 Jahren dürfen nicht in die Nähe kommen oder sind ständig zu
beaufsichtigen. Kinder von 3-8 Jahren dürfen das Gerät nur dann ein- oder ausschalten,
wenn es in seiner vorgesehenen Betriebsstellung aufgestellt bzw. installiert ist und wenn
die Kinder in die sichere Bedienung des Geräts eingewiesen wurden und die damit
einhergehenden Gefahren verstanden haben. Kinder von 3-8 Jahren dürfen das Gerät
nicht steuern, reinigen oder instand halten.
ACHTUNG - Einige Teile dieses Produkts können sehr heiß werden und Verbrennungen
verursachen. Achten Sie besonders auf Kinder und andere gefährdete Menschen.
13 Kinder nicht mit dem Gerät spielen lassen.
14 Reinigungs- und Wartungsarbeiten sollten nicht von Kindern ohne Aufsicht ausge-führt
werden.
15 Halten Sie sich NICHT zu lange in der Nähe der Heizgeräte auf, um Verbrennungen oder
Austrocknung zu vermeiden.
16 WARNUNG - Dieses Heizgerät ist nicht mit einer Vorrichtung zur Regelung der
Raumtemperatur ausgestattet. Verwenden Sie dieses Heizgerät NICHT n unbelüfteten
Orte, wenn diese von Personen besetzt sind, die nicht in der Lage sind, den Ort
selbständig zu verlassen, es sei denn, es wird eine ständige Aufsicht gewährleistet.

circa
150cm
100cm
Afstand tot ontvlambare voorwerpen
1
16 TIPS VOOR EEN VEILIG GEBRUIK
1Wijs kinderen altijd op de aanwezigheid van een brandende
kachel.
2Verplaats de kachel NIET als deze brandt of nog heet is. In
dat geval ook NIET bijvullen en geen onderhoud verrichten.
3Plaats de kachel op minimaal 1,5 meter van brandbare
voorwerpen, meubels, spuitbus en gascylinder. De jerrycan
NIET naast de kachel opslaan.
4Gebruik de kachel NIET op stoffige plaatsen of bij harde
wind. In beide gevallen krijgt u geen optimale verbranding.
5Zet de kachel uit voordat u vertrekt of naar bed gaat.
6Bewaar en vervoer de brandstof uitsluitend in de daarvoor bestemde wisseltankjes en
jerrycans.
7Zorg ervoor dat de brandstof niet bloot staat aan hitte of extreme temperatuurverschillen.
Bewaar de brandstof ALTIJD op een koele, droge en donkere plaats (zonlicht tast de
kwaliteit aan).
8Gebruik de kachel NOOIT op plaatsen waar schadelijke gassen of dampen aanwezig
kunnen zijn (bv. uitlaatgassen of verfdampen).
9De bovenzijde van de kachel wordt heet. De kachel mag NIET afgedekt worden
(brandgevaar). Vermijd elk contact met de bovenplaat en de grille. Houd het apparaat
buiten de reikwijdte van kinderen als gevolg van de hoge temperatuur van de buitenkant
van de kachel.
10 Zorg ALTIJD voor voldoende ventilatie.
11 De kachel mag niet direct onder een stopcontact geplaatst worden.
12 Houd kinderen jonger dan 3 jaar uit de buurt van de kachel, tenzij zij continu onder
toezicht staan. Kinderen in de leeftijd van 3 tot 8 jaar mogen het apparaat uitsluitend in-/
uitschakelen mits het in de beoogde, normale bedrijfsstand is geplaatst of geïnstalleerd
en mits zij begeleid worden of instructies hebben gekregen over het veilige gebruik van
de machine en de gevaren ervan begrijpen. Kinderen in de leeftijd van 3 tot 8 jaar mogen
het apparaat niet reguleren, reinigen of er onderhoud op uitvoeren.
LET OP - Een aantal onderdelen van dit product kan zeer heet worden en brandwonden
veroorzaken. Toezicht is met name belangrijk op plaatsen waar kinderen en kwetsbare
personen aanwezig zijn.
13 Zorg ervoor dat kinderen niet met het apparaat spelen.
14 Reiniging en onderhoud dient niet te worden uitgevoerd door kinderen waarop geen
toezicht wordt gehouden.
15 Blijf NIET te lang in de buurt van de kachel, om verbranding of uitdroging te voorkomen.
16 WAARSCHUWING - Deze kachel is niet uitgerust met een voorziening om de
kamertemperatuur te regelen.
Gebruik deze heater NIET op niet-geventileerde plaatsen wanneer zich hierin personen
bevinden die niet in staat zijn de plaats zelfstandig te verlaten, tenzij voortdurend
toezicht is voorzien.

unos
150 cm
100cm
Distancia a objetos inflamables
)
16 SUGERENCIAS PARA UN USO SEGURO
1Asegúrese de que los niños son siempre conscientes de la
presencia de una estufa encendida.
2NO transportar la estufa cuando esté encendida o esté aún
caliente, ni tampoco llenarla de combustible, ni efectuar
trabajos de mantenimiento.
3Coloque la estufa a una distancia mínima de 1,5 metros de
los objetos inflamables, los muebles, aerosol y cilindro de
gas. NO guarde el bidón junto a la estufa.
4NO utilice la estufa en lugares con polvo o con mucho viento. En ambos casos, no habrá
un funcionamiento óptimo.
5Apague la estufa antes de salir de casa o al acostarse.
6Conserve y transporte el combustible únicamente en los depósitos y bidones destinados
para ello.
7No exponga el combustible al calor o a cambios extremos de temperatura. SIEMPRE
Guarde el combustible en un lugar oscuro, seco y fresco (la luz solar afecta a la calidad).
8NUNCA utilice la estufa en lugares donde gases o vapores nocivos puedan estar
presentes (por ej., gases de escape o vapores de pintura).
9La parte superior de la estufa puede calentarse. NO cubra la estufa (hay un riesgo
de fuego). Evite cualquier contacto con la parte superior y la rejilla. Debido a la alta
temperatura de la superficie, manténgalo alejado de los niños.
10 Asegúrese SIEMPRE de una ventilación suficiente.
11 La estufa no deberá colocarse justo debajo de una toma de corriente.
12 Deberá mantenerse el aparato fuera del alcance de menores de 3 años, a menos que se
encuentren bajo supervisión constante. Los niños entre 3 y 8 años de edad solo podrán
encender o apagar el aparato siempre y cuando este haya sido colocado o instalado en
su posición operativa normal y el menor esté supervisado o haya sido instruido sobre su
uso seguro y comprenda los riesgos que entraña. Los menores de 3 a 8 años de edad no
deben ajustar, limpiar ni realizar tareas de mantenimiento en el aparato.
PRECAUCIÓN - Algunas partes de este producto pueden alcanzar temperaturas
elevadas y causar quemaduras. Se debe prestar especial atención cuando haya menores
y personas vulnerables.
13 Los niños no deben utilizar el aparato como un juguete.
14 Las tareas de limpieza y mantenimiento reservadas al usuario no deben ser realizadas
por niños sin supervisión.
15 NO permanezca demasiado tiempo cerca de la estufa, para evitar quemaduras o
deshidratación.
16 ADVERTENCIA - Esta estufa no está equipada con un dispositivo para controlar la
temperatura del lugar.
NO utilice esta estufa en lugares pequeños cuando estén ocupados por personas que
no sean capaces de salir del lugar por sí mismas, a menos que haya una supervisión
constante.

circa
150cm
100cm
Distanza dagli oggetti infiammabili
3
16 CONSIGLI PER UN USO SICURO
1Richiamare sempre l’attenzione dei bambini sui pericoli di
una stufa accesa.
2NON spostare la stufa se questa è accesa o se è ancora calda.
In tal caso, NON riempirla di combustibile e non eseguire la
manutenzione.
3Posizionare la stufa ad una distanza minima di 1,5 metri da
oggetti infiammabili, mobili, spray can e cilindro a gas. NON
conservare la tanica vicino alla stufa.
4NON usare la stufa in luoghi polverosi o con vento forte.
In entrambi i casi non si avrà una combustione ottimale.
5Spegnere la stufa prima di uscire o prima di andare a letto.
6Conservare e trasportare il combustibile nei contenitori appositi.
7Assicurarsi che il combustibile non sia esposto a fonti di calore o a forti escursioni termiche.
Conservare SEMPRE il combustibile in un luogo fresco, secco ed asciutto (la luce del sole ne
intacca la qualità).
8NON usare mai la stufa in luoghi dove possono essere presenti gas o vapori pericolosi (ad
esempio, gas di scarico o vapori di vernici).
9La parte superiore della stufa diventa molto calda. La stufa NON può essere coperto
(pericolo d’incendio). Evitare ogni contatto con il tettuccio e la griglia. A causa delle alte
temperature della stufa, si raccomanda di tenere i bambini a distanza di sicurezza.
10 Assicurarsi SEMPRE che la ventilazione sia sufficiente.
11 Non posizionare il dispositivo di riscaldamento immediatamente sotto ad una presa di
corrente.
12 Tenere fuori dalla portata dei bambini di età inferiore ai 3 anni, se non continuamente sotto
la supervisione adulta. I bambini di età compresa tra i 3 e gli 8 anni possono solo accendere
o spegnere il dispositivo a condizione che questo sia stato posizionato o installato nella
posizione in cui dovrà rimanere una volta in funzione e a condizione che siano supervisionati
o istruiti in merito all’utilizzo sicuro del dispositivo e che comprendano i rischi connessi. I
bambini di età compresa tra i 3 e gli 8 anni non potranno regolare e pulire il dispositivo o
eseguirne la manutenzione.
ATTENZIONE - Alcuni componenti di questo prodotto possono diventare molto caldi e
causare scottature. È necessario prestare particolare attenzione in presenza di bambini e
persone vulnerabili.
13 I bambini non dovrebbero giocare col dispositivo.
14 Le operazioni di pulizia e manutenzione da parte dell’utente non vanno eseguite dai
bambini senza supervisione.
15 NON stare troppo vicino alla stufa per lungo tempo, per evitare ustioni o disidratazione.
16 ATTENZIONE - Questa stufa non è dotata di un dispositivo per il controllo della temperatura.
NON utilizzare la stufa in stanze piccole quando sono occupate da persone non in grado di
lasciare la stanza da sole, a meno che non sia fornita una supervisione costante.

ca.
150 cm
100cm
Afstand fra brændbare genstande
6
16 TIPS FOR UFARLIG BRUG
1Børn bør være under opsyn, så det sikres, at de ikke
leger med apparatet.
2Flyt ALDRIG kaminen, når den brænder eller stadig
er varm. I dette tilfælde må den heller IKKE påfyldes
eller vedligeholdes.
3Placer kaminen mindst 1,5 meter fra brændbare
genstande, møbler, spray dåse og gas cylinder.
Opbevar IKKE dunken ved siden af kaminen.
4Brug IKKE kaminen på støvede steder eller i stærk vind. I begge tilfælde vil du
ikke få optimal forbrænding.
5Sluk kaminen før De forlader huset eller går i seng.
6Opbevar og transporter altid brændstoffet i de dertil beregnede tanke og dunke.
7Sørg for, at brændstoffet ikke udsættes for varme eller ekstreme
temperaturforskelle. Opbevar ALTID brændstoffet et køligt, tørt og mørkt sted
(sollys forringer kvaliteten af brændstoffet).
8Brug ALDRIG kaminen på steder, hvor der kan være skadelige gasser eller
dampe (f.eks. udstødningsgasser eller malingsdampe).
9Vær opmærksom på, at kaminens gitter bliver meget varmt. Hvis der
anbringes ting oven på kaminen, udgør det en brandfare. På grund af den høje
overfladetemperatur bør den holdes væk fra børn.
10 Sørg ALTID for tilstrækkelig ventilation.
11 Varmeapparatet må ikke være placeret umiddelbart under en stikkontakt.
12 Børn under 3 år skal holdes væk, medmindre de løbende overvåges. Børn i
alderen fra 3 år og under 8 år må kun tænde/slukke for apparatet forudsat at
den er anbragt eller installeret i den tilsigtede normale driftsposition, og de har
fået tilsyn eller instruktion om brugen af apparatet på en sikker måde og forstår
de involverede farer. Børn i alderen fra 3 år og under 8 år må ikke regulere og
rengøre apparatet eller udføre vedligeholdelse.
FORSIGTIG - Nogle dele af dette produkt kan blive meget varme og forårsage
forbrændinger. Særlig opmærksomhed skal udvises, hvor børn og udsatte
personer er til stede.
13 Børn må ikke lege med apparatet.
14 Rengøring og brugervedligeholdelse må ikke foretages af børn uden vejledning.
15 Du må IKKE opholde dig for tæt på varmelegemet i længere tid for at undgå
forbrændinger eller dehydrering.
16 ADVARSEL - Dette apparat er ikke udstyret med en anordning til regulering af
rumtemperaturen.
Brug IKKE dette apparat i ikke-ventilerede områder, hvor der er personer, som
ikke kan forlade området uden hjælp, medmindre der er konstant opsyn.

4
2
Thank you for choosing a “TOYOTOMI” product!
Toyotomi products are used by satisfied customers worldwide.In order to assure
the comfortable and safe use of our products by customers in each country, our
products conform to the safety standards not only in Japan but also in every
country around the world we do business with.
Toyotomi tailors its products to satisfy its customer’s needs by always pursuing
our business philosophy, “sharing joys in daily living”.We will continue to
research, develop and manufacture products that match people’s lifestyle for
efficiency, safety and comfort.
We hope that you’ll enjoy your Toyotomi appliance for years to come!
We invite you to read this instruction manual first, to ensure the maximum
lifetime for this appliance.
Get to know us better…visit us at www.toyotomi.eu for our full line of
products.
1 READ THE DIRECTIONS FORUSE FIRST.
2 IN CASE OF ANY DOUBT, CONTACT YOUR DEALER.
3 BEFORE YOU START READING, CONSULT THE MAIN COMPONENTS LIST ON THE LAST PAGE.

• As a fire precaution, the tank must be filled either when the heater has
been turned off or in another place than the place where the heater is
installed.
• Always ensure that the tank is closed properly after filling it at a safe dis-
tance from all sources of heat and open flames (see Section B).
• The first time you ignite your heater it will smell like ’new’ for a short
time.
• Store all fuel containers with their original caps and seals in a cool and
dark place.
• Fuel ages. Use new fuel at the start of every heating season.
• Only use high quality and water-free pure paraffin in accordance with
local legislation (TOYOTOMI fuel).
• Before changing brands and/or types of fuel make sure that the mobile
heater first completely empties all of the remaining fuel inside the heater.
Remove all packaging materials (refer to Section A).
Fill the fuel tank and wait 30 minutes before you
ignite the heater (refer to Section B, Fig. G).
Insert the batteries into the battery holder
(refer to Section A, Fig. E).
Check whether the combustion chamber is fully upright
(refer to Section C, Fig. K).
Ignite the heater by turning the wick adjuster knob as far
to the right as possible and then gently push down the igniter
lever (refer to Section C, Fig. I and J).
Prior to adjusting the flame (refer to Section D), let the heater
heat up for 30 minutes.
Switch off the heater (refer to Section E).
1
2
3
4
5
6
7
4
3
1 READ THE DIRECTIONS FORUSE FIRST.
2 IN CASE OF ANY DOUBT, CONTACT YOUR DEALER.
3 BEFORE YOU START READING, CONSULT THE MAIN COMPONENTS LIST ON THE LAST PAGE.
Below you will find the main steps to be taken for using your
heater. For more details, please refer to the MANUAL.
GENERAL DIRECTIONS FOR USE

WHAT YOU NEED TO KNOW IN ADVANCE
ALWAYS MAKE SURE THAT THERE IS SUFFICIENT VENTILATION
Read this user manual carefully before using the appliance and keep it for future
reference.Install this device only when it complies with local/national legislation,
ordinances and standards.
For comfortable and safe heating ensure that there is sufficient ventilation.
Regardless of the model, you must always make sure that the heater is used
in a place large enough to enable the heater to be used safely without extra
ventilation (refer to Section K).If the place is smaller than required, you must
always open a door or window slightly (ensuring an opening of approx.2.5 cm).
It is important that every place where the heater is used has sufficient air intake
and efficient air outflow (both openings must have a minimum cross section of
50 cm2). We also recommend doing this in highly insulated or draught-free places
and/or at altitudes above 1500 metres.Do not use your heater in cellars or other
underground areas.
OUTDOOR USE
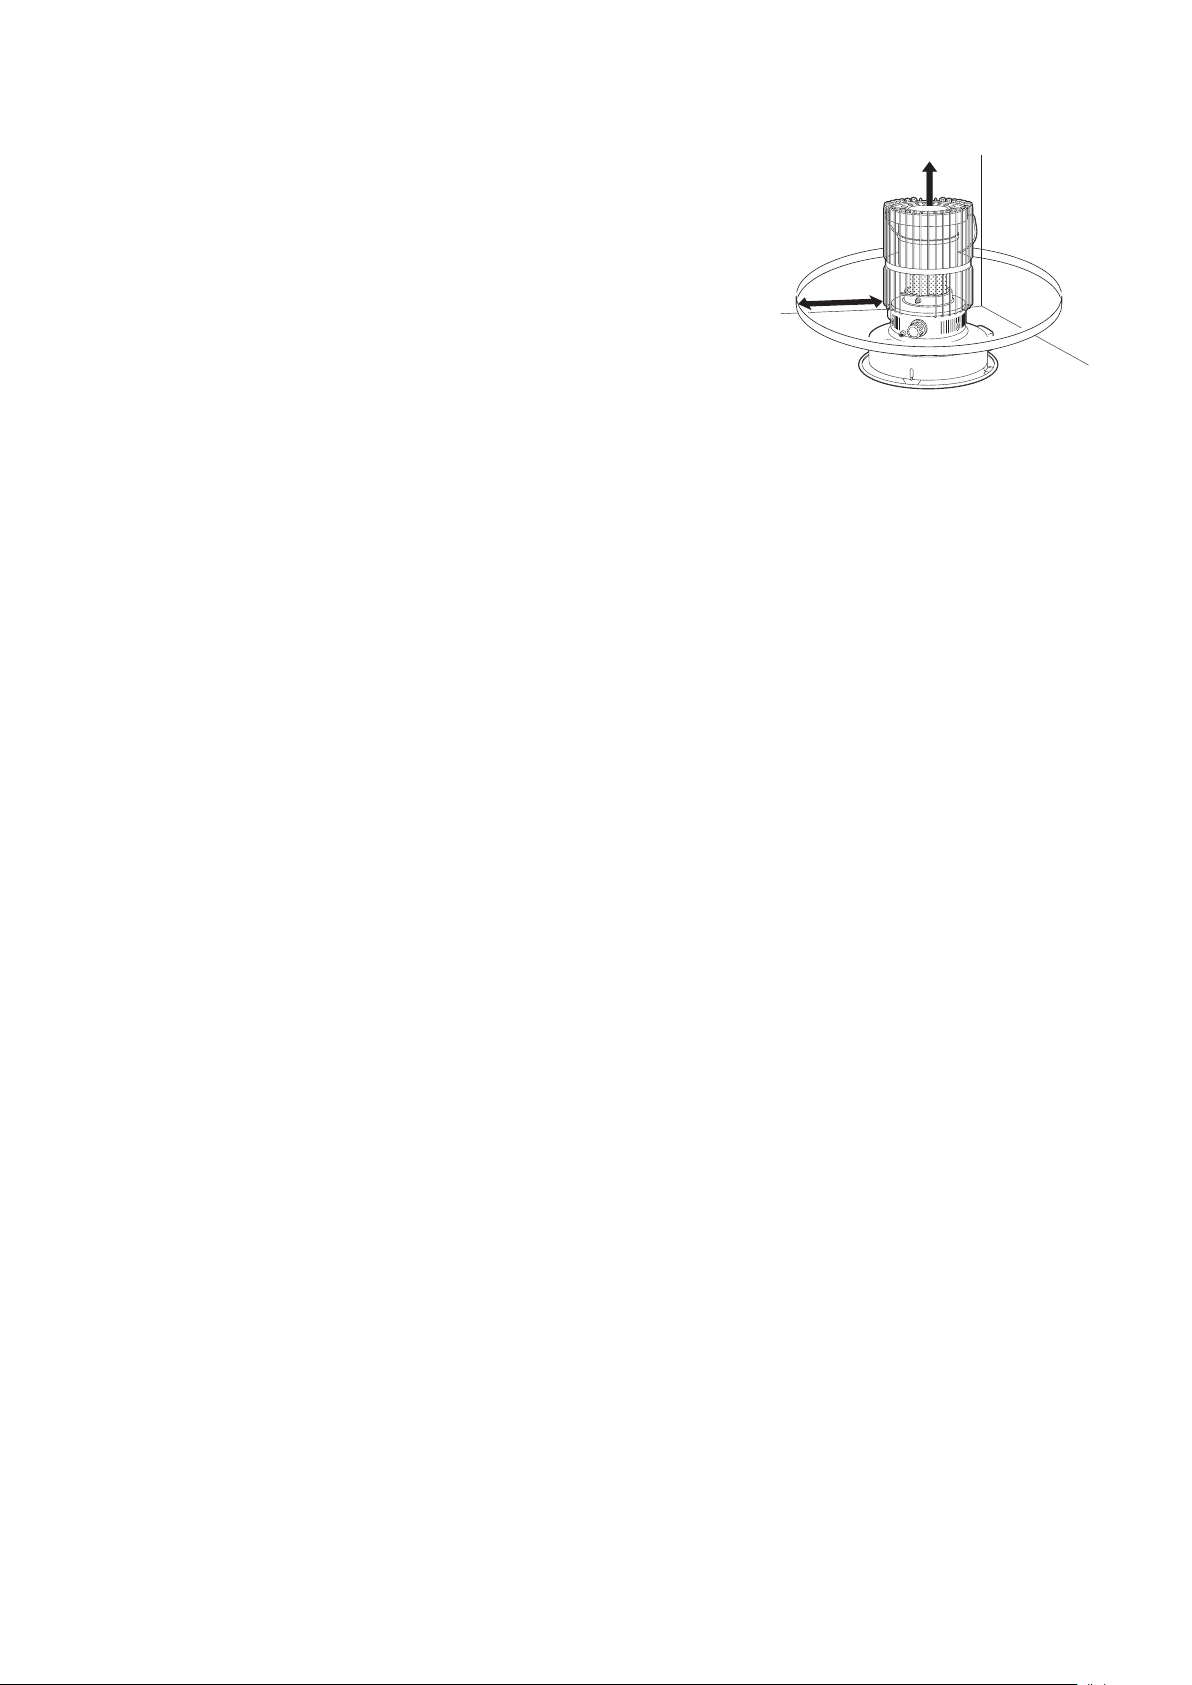
Your heater can be used in the garden or on the patio.Make sure the floor is firm
and completely level.Do not expose the heater to rain, hail, snow, etc.DO NOT
use the heater in a strong wind for reasons of safety and to prevent soot build-up.
Position the heater at a minimum distance of 1.5 metre from flammables objects;
take care when using the heater under awnings or canopies.
ESPECIALLY FOR UNITED KINGDOM: Only use Class C1 paraffin fuel in
accordance with BS2869; Part 2, or equivalent.
ESPECIALLY FOR FRANCE: This heater is prohibited to be imported or sold in
France, while it is not in conformity with French legislation (Décret no.92-1280 du
10-12-1992)
ESPECIALLY FOR SPAIN: This heater is only for outdoor use.This heater is not
equipped with a device to control the room temperature, therefore it can not be
used indoor.
The user must comply with the following instructions for proper use:
DO NOT
- use petrol
*In cases of emergency, use a fire extinguisher.
- use the liquid fuel-operated mobile heater in caravans, boats, and vehicle cabins.
- modify the heater safety features.
- heat the empty cooking utensils.
- use cooking utensils that are unstable and/or larger than the top plate.
*If there is a spill or boil over, wipe away any spilled water from the heater.
The use of this type of heating in public spaces is subject to prior regulatory
permission. Obtain proper information on this in advance.
THE RIGHT FUEL
Your heater has been designed for use with high-quality water-free pure paraffin
oil (TOYOTOMI fuel).Only fuels of this kind will ensure clean and proper burning.
Lower quality fuel may result in:
increased possibility of malfunctioning
incomplete burning
reduced heater lifetime
smoke and/or smells
deposits on the grid or mantle
Using the right fuel is therefore essential for safe, efficient, and comfortable use
of your heater.
Damage and/or malfunctions of the heater due to the use of other than high
quality water-free pure paraffin oil is not covered by the warranty.
Always refer to (www.toyotomi.eu) for the right fuel for your heater.
4
4
Only the use of the correct
fuel will ensure safe,
efficient, and comfortable
use of your heater.

!
!
!
4
5
MANUAL
A INSTALLING THE HEATER
1
Carefully remove your heater from the box and check the contents.In additi-
on to the heater you also need to have:
a manual fuel pump
the drip tray
these directions for use
Keep the box and the packaging materials for storage and/or transportation.
2
Remove the packaging material from the grill (Fig. A, B, C).
Risk of fire. The packing materials are flammable.
3
Loosen the screw on the drip tray (Fig.D).Place the heater housing on the
base plate, insert the fuel tank and attach it with a screw to the base plate.
Tigten the screw.
Do not operate your heater without the drip tray.
4
Fill the fuel tank as indicated in Section B.
5
Insert the batteries into their holder at the back of the heater (Fig.E).
Ensure that the positive and negative poles match the + and - marks indicated
on the battery housing. It is best to use new alkaline batteries (2x D-size).
Replace the battery holder.
6
The floor should be firm and completely level.Reposition the heater, when it is
not level.Do not correct the situation by placing books or other goods under
the heater.
7
Your heater is now ready for use.
Do not use the heater at a height of over 1500 meters.
BFILLING FUEL
Do not fill the fuel tank in the living room, but in a more suitable place (there can
always be some spillage). Follow the procedure below:
1
Make sure that the heater is switched off.
2
Insert the straight tube of the manual fuel siphon into the paraffin container.
Remove the fuel tank cap on the heater (Fig.F), and insert the siphon’s flexi-
ble hose into the fuel tank opening (Fig.G).
3
Lock the valve on top of the pump (turn clockwise).
4
Squeeze the pump a few times, until fuel starts flowing into the fuel tank.
As soon as this happens, there is no need to press any longer.
A
B
C
D
E
F
F E
G

!
!
!
!
!
5
Stop filling by loosening the valve on top of the pump (turn anti-clock-wise),
once the gauge indicates that the tank is full (Fig.G).
6
Remove the siphon carefully, allowing the excess paraffin to drain from the
tube back into container.Replace the fuel tank cap and tighten it securely (Fig.
H).Be sure to wipe away any spilled paraffin from tank or other heater parts.
Be especially careful to avoid overfilling the tank with very cold paraffin; other-
wise overflow might occur when the fuel warms up.
C IGNITING THE HEATER
When you first use your new heater, ignite it out of the living area of your house,
either in a garage or an outside area protected from strong drafts.Burn it for
about 15 minutes to remove all of the protective oil present on the burner parts.
If this 15 minute “burn-in” is done inside, some objectionable odour will be
observed.This procedure is necessary ONLY THE FIRST TIME you ignite your heater.
If you have fuelled your heater for the first time, or if you are refuelling it after
it has been out of fuel for a long time, you will need to wait about thirty (30)
minutes for the wick to become fully saturated before lighting. Failure to allow
enough time for the wick to become fully saturated may cause permanent dama-
ge to the wick when it is lighted.
Always ignite the heater with the igniter slide.Never use matches or cigarette lighters.
Follow the procedure below:
1
Turn the wick adjuster knob clockwise until it stops (Fig.I).The automatic
extinguisher is engaged automatically by turning the wick adjuster clockwise.
This raises the wick to its maximum height.As the wick rises within the heater,
the wick adjuster knob turns with some resistance and makes a sound like the
winding of a clock.Once the wick has reached its proper height, the automatic
extinguisher is fully engaged.
2
Gently push down the igniter lever (Fig.J).The igniter coil should glow and
touch the wick.When flame appears, release the igniter lever.The wick adjus-
ter knob will now move freely left or right to adjust the flame.
If you have difficulty igniting the wick, push back the igniter lever very slightly
to remove the igniter coil form direct contact with the wick.
After having ignited the heater, always check whether the combustion
chamber is level, by sliding it slightly to the left and the right by its handle
(Fig.K).This should be a smooth movement.If the combustion chamber is
not level, this will cause smoke and soot to develop.
4
6
I
J
K
H

!
!
!
✗ ✓ ✓ ✗ P
4
7
DADJUSTING THE FLAME
After you have ignited the heater, it will take 30 minutes for the flame to become
visible in the combustion chamber.Only then can you check whether the flame
is correct.Too high a flame may cause smoke and soot, whereas too low a flame
causes smells.The page opposite the folding page shows the minimum and
maximum permissible burning heights of the flame (Fig.P).The flame can be
adjusted with the wick adjuster knob (Fig. I).
If the flame remains low after the adjustment, the wick height must be adjusted
(refer to Section F).
Burning that is too low may be caused by:
insufficient fuel (fill the tank)
poor fuel quality (contact your dealer)
insufficient ventilation (leave window or door ajar)
wastage of the wick (contact your dealer or replace the wick,
refer to Section M)
ESWITCHING OFF THE HEATER
Turn the wick adjuster knob counter-clockwise to its stop.The flame will
extinguish after a little while.
For routine turn-off, DO NOT use the “Safety button” or activate the
“Automatic Extinguisher” by jarring the heater.These methods may cause
unwanted odour, soot and smoke.Only the wick adjuster knob should be used
for normal shutoff.
In case of an emergency, switch off the heater by pushing down the safety button
(Fig. M).
F ADJUSTING THE WICK HEIGHT
After a period of time the combustion may no longer be high enough (Section D).In
that case you can adjust the wick height to improve the flame.To do this, the heater
must have been switched off.Follow the procedure below:
1
Release the automatic extinguisher by pushing down the safety button (Fig.
M).
2
Pull the wick adjuster knob off the heater, so the wick height lock will be
visible.
3
Take the plastic collar between your thumb and index finger and pull it out.
Turn the collar up one step, to either position 2 or 3 (Fig.N).Carefully push
the collar back, so the pin engages in the recess.
I
M
L
N

!
4
Carefully reinstall the wick adjuster knob .This can be done in one
way only. Check the rear of the cap for the correct position.
If adjustment of the wick height does not have the required effect, let the hea-
ter burn until all fuel has been used up (Section H).
If the flame height is still too low and the wick is set on position 3, then contact your
dealer,
or replace the wick (refer to Section M).
If the flame gets too high after adjusting (Fig.P), the wick height lock should be pla-
ced one position lower again. Otherwise smoke or soot may be caused.
G MALFUNCTION, CAUSES AND SOLUTIONS
If any malfunctioning cannot be solved from the directions below, please contact
your dealer.
THE HEATER DOES NOT IGNITE
The batteries are not positioned correctly in the holder.
Check (Fig. E).
There is not enough power left in the batteries for the ignition.
Replace (Fig. E).
You have run out of fuel from the tank or the wick has been replaced.
After having refilled , wait for 30 minutes before igniting the heater.
You are pushing down the igniter lever with too much force.
Push it down less forcefully (Section C).
The ignition coil is defective.
Contact your dealer.
IRREGULAR FLAME AND/OR SOOT AND/OR SMELLS
The combustion chamber has not been positioned correctly.
Use the handle to put it level, until you can easily slide it slightly to the left
and to the right and the chamber is level.
The flame height has not been adjusted properly.
See Fig. P and the directions in Section D.
You are using fuel which is past its ‘use by’ date.
Start every heating season with fresh fuel.
You are using the incorrect type of fuel.
Refer to THE RIGHT FUEL (Section ’What you need to know in advance’).
Dust has gathered in the lower part of the heater.
Contact your dealer.
The wick height is not correct.
Contact your dealer.
You are using in unventilated place or where exposed to strong wind.
Turn off, and place the heater in ventilated place or avoid from the wind.
THE HEATER SLOWLY EXTINGUISHES
The fuel tank is empty.
Refer to Section B.
The fuel tank is contaminated by water.
Contact your dealer.
broken ignition coil
E
4
8

!
!
!
4
9
The wick has hardened on the upper side.
Burn the heater until all fuel is used (Section H). Use the right fuel.
You are using fuel which is past its ‘use by’ date.
Start every heating season with fresh fuel.
THE HEATER REMAINS BURNING LOW
Wick position too low.
Reinstall the wick height lock (Section F)
Before you refilled the tank, the heater had burnt up almost all the fuel.
After having refilled, wait for 30 minutes before igniting the heater.
You are using the incorrect type of fuel.
Refer to THE RIGHT FUEL (Section ’What you need to know in advance’).
The room is insufficiently ventilated.
Leave a window or a door wide open for a while.
THE HEATER BURNS TOO HIGH, THE FLAMES CANNOT BE ADJUSTED.
You are using an incorrect, too volatile type of fuel.
Refer to THE RIGHT FUEL (Section ’What you need to know in advance’).
Wick position too high.
Reinstall the wick height lock (Section F).
H MAINTENANCE
Your heater needs hardly any maintenance.It is, however, important that you
remove dust and stains in time with a damp cloth, because otherwise these
may cause stains that are hard to remove.Under normal conditions, only 3
components are subject to wear:
1. THE BATTERIES
You may replace the batteries yourself.Do not dispose of old batteries along with
the other domestic waste.Follow the locally applicable regulations regarding the
disposal of domestic chemical waste.
2. THE WICK
To extend the glass fibre wick life, you must occasionally let the heater burn
until the tank is completely emptied and the heater extinguishes by itself.Do
this when you notice that the flame is weakening.The burn-out will cause some
smells, so it is recommended that you take the heater outside of the living room.
3. THE IGNITION COIL
The ignition coil will last longer if you ignite in the right way.Replace the
batteries on time and make sure you do not push down the ignition lever too
forcefully. If the filament is broken, you should replace the coil.
Do not remove any heater components yourself.Always contact your dealer
for repairs.
Let the heater cool down first, before you start any maintenance or service
work.
For maintenance, wear gloves for your safety.
ignition coil

I STORAGE (END OF THE HEATING SEASON)
We recommend that you burn up all the fuel in the fuel tank at the end of the
heating season and store the heater properly.Follow the next procedure:
1
Ignite the heater outside the living room and let it burn until all fuel is used.
2
Let the heater cool down.
3
Clean the heater with a damp cloth and then dry it with a cloth.
4
Remove the batteries from the holder and store them in a dry place.
5
Store the heater in a dust-free place, if possible in its original packaging.
Unused fuel cannot be used for the next heating season.If there is still some
fuel left, do not throw it away, but dispose of it in accordance with the local
regulations for the disposal of domestic chemical waste.Always start the new
heating season with fresh fuel.When you start re-using the heater, follow the
instructions again (starting from Section A and as specified).
J TRANSPORTATION
Take the following measures to avoid fuel leakage during the transportation of
the heater:
1
Let the heater cool down.
2
Always move the heater in an upright position.
K SPECIFICATIONS
Ignition electrical Dimensions (mm) width 474
Fuel paraffin (including base plate) depth 474
Capacity (kW)*4.70 height 560
Suitable space (m3)** 73-180 Accessories: manual fuel pump
Fuel consumption (l/hr)*0.490 Required batteries
size D,
1.5V x 2
Fuel consumption (g/hr)*392
Burning time per tank (hr)*
15.0
Capacity fuel tank (litres)
7.5
Weight (kg) 12.0
Wick type R
*At maximum setting
** Specified values are indicative
4
10

4
11
L WARRANTY PROVISIONS
Your heater comes with a 24-month warranty starting on the date of purchase.
Within this period all defects in material or workmanship will be repaired without
any charge. The following provisions shall apply regarding this warranty:
1
We expressly dismiss all other claims for damages, including consequential
damages.
2
Any repairs or replacements of components within the term of warranty will
not result in an extension of the term of warranty.
3
The warranty will no longer apply, when the heater has been modified,
non-original parts have been used, or when it is repaired by third parties.
4
The warranty will not apply to parts that are subject to normal wear, such as
the batteries, the ignition coil, the wick and the manual fuel pump.
5
The warranty will only apply, when you present the original, dated proof of
purchase, provided no changes have been made to it.
6
The warranty will not apply to damages caused by actions not in compliance
with the Directions for Use, neglect, and the use of an incorrect type of fuel,
or fuel past its use-by date. The use of incorrect fuel can even be dangerous*.
7
Transportation costs and the risks involved during the transportation of the
heater or heater components will always be the responsibility of the purchaser.
In order to avoid unnecessary costs, we recommend that you always read the
’Directions for Use’ carefully first.In case they offer no solution, please take the
heater to your dealer for repair.
* Highly inflammable substances may induce uncontrollable burning, causing flames to break out.Should this
happen, never try to move the heater, but always switch off the heater immediately (refer to Section E).In
cases of emergency you may use a fire extinguisher, but only a type B extinguisher: a carbon dioxide or powder
extinguisher.

4
12
1
Release the automatic extinguisher by pushing down
the safety button.
2
Remove the three (3) screws holding heater cover, and
lift cover up. Remove batteries from the battery holder.
3
Remove the four (4) wing nuts around the wick adjus-
ter.Lift the wick adjuster off the heater while moving it
slightly back and forth.
4
Slide two fingers between the orange band on the wick
and the wick adjuster.After lifting all three (3) pins off
the slots, fold the wick and remove it.
5
Place the wick adjuster on its side.Next, line up the
three (3) openings in the wick adjuster:
1) the holes in the sleeve
2) the diagonal slots in the fixed part of the wick adjuster
3) the slots in the moving part of the wick adjuster con-
trolled by the wick adjuster knob.
6
Fold the new wick in quarters and insert it into the wick
adjuster from wick adjuster bottom.Place one of the
pins in one of the line-up openings.If you experience
difficulty, gently turn the wick adjuster knob clockwise.
Then insert the two other pins, turning the wick adjus-
ter knob if necessary.Ensure that the wick holder does
not bend!
7
Finally, gently press the wick, all along its circumferen-
ce, against the adjuster to insure that it is firmly in
place.
8
Lower the wick adjuster into the fuel tank, guiding the
tail of the wick so it fits over the primary air tube and
evenly into place.
Point the wick adjuster knob to the front of the heater.
Insure that the wick adjuster is centered over the studs
on the fuel tank.
NOTE: Be careful with the Rubber packing.
NOTE: The space between the wick adjuster and the pri-
mary air tube should be even all around.
REPLACING THE WICK
M ENSURE THAT THE HEATER IS OFF AND
COMPLETELY COOL BEFORE STARTING TO
REPLACE THE WICK.
2a
45
7
8b
6
2c
2b
1
3b
8a
3a
Hole
Space

4
13
NOTE: Make certain the top of the wick adjuster and
the top of primary air tube are the same height.
If they uneven, the flames tend to be uneven,
too.
9
Tighten the four (4) wing nuts around the wick adjus-
ter.
10
Turn the wick adjuster knob to be sure the wick moves
smoothly up and down.
After replacing the wick, check the operation of the
automatic extinguisher by pushing down the safety
button.
Wick height on position (1) of the wick height lock
should be 7 mm when wick adjuster knob is turned
fully clockwise. Be sure to check.
NOTE: Remember always to start a new wick on posi-
tion (1) of the wick height lock.
NOTE: If the wick does not move smoothly and easily,
or wick height on position (1) of the wick height
lock is not in the range of 7-8 mm, do not use
the heater.Disassemble and repeat items 5
through 10.
NOTE: If any ragged edges appear on the top of the
wick, trim them with a scissors carefully.DO NOT
cut the body of the wick.
11
Replace the heater cover on the fuel tank and secure it
into position with three (3) screws.Replace batteries in
the battery holder.Be sure that the combustion cham-
ber is properly seated by moving the combustion cham-
ber handle left and right.
Once again, check the proper operation of the automa-
tic extinguisher.
NOTE: Before lighting a new wick for the first time,
turn the wick to its lowest position and allow
the wick to saturate with paraffin for about
thirty (30) minutes.
11a
910a
10b
11b
10c
7mm

N PRODUCT FICHE
(a) Supplier's name/Trademark TOYOTOMI Europe Sales B.V.
(b) Model KR-47
(c) EEC A
(d) Direct heat output 4.7kW
(e) Indirect heat output N/A
(f) EEI 91.0%
(g) Useful energy efficiency 100%
(h) Specific precaution
For assembly, installation or main-
tenance instructions, please refer to
the operating manual.
Safety button
(for emergency stop)
Wick adjuster knob
Igniter lever
Combustion chamber
Combustion chamber
handle
Fuel indicator
Grill
Fuel tank
Ignition coil
Battery holder
Carrying handle
Fuel tank cap
Wick height lock
O MAIN COMPONENTS
4
14
Table of contents
Languages:
Other Toyotomi Electric Heater manuals