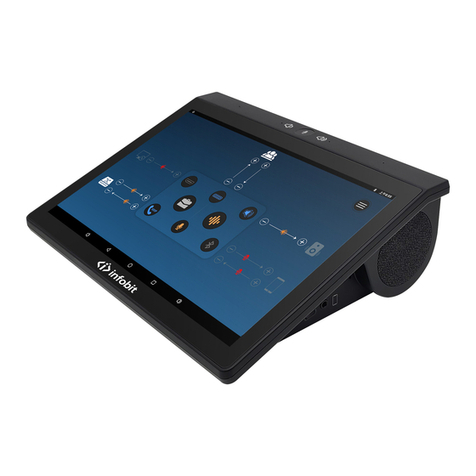
TP-Link MVOICE 1000-T User manual

MVOICE 1000-T
Wireless Daisy-Chain ConferenceSpeakerphone
Thankyouforyourpurchase oftheMVOICE1000-T.This deviceisthefirstintheindustrytoprovidea
wireless daisy-chainfunction .TheMVOICE1000-T scutting-edgespeakerphonecombines 2
conferencespeakerphones(MasterSlavespeakerphone+Slavespeakerphone),eachspeakerphoneis
built withawidebandspeakerand3embedded directionalmicrophones,resultingin top-quality audio
performance.
Highlights:
1.Usesdigitalwireless technology and stronganti-interferencetechnology.
2.Eachspeakerphoneemploys 3 microphones,broadbandspeakeroutputand speechenhancement.
3.SupportingoperatingsystemsWindows,MacandAndroid.
4.Slavespeakerphoneconnect withmasterdevicevia2.4G Wirelesstechnology transmission,the
masterspeakerphonesimply toconnect withPC/laptop byUSBcable
5.MasterspeakerphoneandSlavespeakerphonecanused alone.
6.Extra-lowpowerconsumption technology.
7.Algorithms forechocancellation,noisecancellation,automatic gain controlarebuilt in.
What'sin thebox:
MVOICE1000-T Speakerphone(includedMASTER&SLAVEunits)
UserManual
USB 2.0Cablex2(2meters)
Preparationforuse
MVOICE1000-T canbeusedas an externalmicrophoneand speakerforacomputerorconference
system, enablingsoftwarebasedteleconferencing.
Itis compatiblewithoperatingsystemsincludingMicrosoftWindows7/8/10,AndroidandAppleiOS.
AUSB 2.0oraboveportandnetwork connection arerequired;an IMapplicationorVoIPpackage
(e.g.WebEx,Zoom.us,Skype,GotoMeeting) with network conferencingfunction shouldbeinstalled.
USB connectionforMasterunit
Plugand play, simplyconnect theMVOICE1000-T MastertotheUSB porton yourPCwith USB cable.
Wireless ConnectionforSlaveunit
Step 1:ConnectMasterSpeakerphonetoyourcomputerviausbcable.
Step 2:TurnthepowerbuttontoONsideof Slavespeakerphone,all 3microphoneindicators
lightedup in orange.
Step 3:Longpress(2sec.) thewireless pairingbuttonon theSlavespeakerphone,untilthebutton
indicatorlightblinking.
Step4:Longpress (2sec.) thewirelesspairingbuttonon theMasterSpeakerphone,untilthebutton
indicatorlightturns tosolid blue,thewirelessconnectionisestablished.Thepairingbuttonindicator
on Slaveunitkeepsblinking.
Turn offthewirelessconnection
Longpress thewireless pairingbuttononMasterspeakerphonetoclose thewirelessconnection,
theMasterunit's wireless pairingbutton indicatorturns offwhentheconnectionisstopped.The

pairingbuttonindicatoronSlaveunitkeeps blinking.
Mute the speaker:
Pressthe buttonofMasterunit,canmute the speakerofMasterand Slave unit,the buttonisnochange.
Pressthe buttonofSlave unit,canonlymute the speakerofslave unit,the buttonturnsorange
Mute themicrophones:
Pressthe buttonofMasterunit,canmute themicrophonesall ofMasterand slave unit,thebuttonturnsorange
Pressthe buttonofSlave unit,canonlymute themicrophonesall ofslave unit,the buttonturnsorange
Increasethevolume
Pressthe buttonofMasterunit,canincreasethevolume levelofMasterandslaveunit simultaneously
Pressthe buttonofSlave unit,canonly increasethe volume levelofslave unit.
Decreasethevolume
Pressthe buttonofMasterunit,candecreasethevolume levelofMasterand slave unitsimultaneously
Pressthe buttonofSlave unit,canonlydecreasethe volume levelofSlaveunit
Separatemicrophoneselection
In normalroomconditions,thereceptiondistancecanreach to4meters.Built-inthreemicrophones
provides with360-degree coverage.
Forgroup meeting, allthree microphones opencan makeproperaudioreceptionof all participants.In
aconferenceroomwithweaksoundabsorptionandstrongacousticreflection(particularly theglass
rooms),andthetalkeris farfromthemicrophones,themicrophones will receivetheechofrom
differentdirections,which isimpossibletoeliminatecompletely.Theothersideoftheconferencemay
hearunclearvoice.Speakclose tothemicrophoneand use only onemicrophonepointed tothe
speakercan receivethevoicemoreclearly.
Press button could turn ononemicrophoneand mutetwoothers inturn.Theoperating
microphone sindicatorturns orange
Usagenotes:
1.Connect MasterspeakerphonetothePCatatime.
2.Connect theUSB portdirectly tothePCratherthan through aUSB hub,orsomeoperational
problems canarise.
3.Aftersuccessfulconnection,settheMVOICE1000-TMasterunit as thedefaultdevicein thePC s
ControlPanel-Sounds and AudioDevices-Play(output)andRecord (input).Otherwise,youcan select
theMVOICEUSBAUDIODEVICEmanually in thevarious softwarethatuses themic and speaker.
4.Adjustingthesound volumeoftheloudspeaker
Duringaconferencecall,ifthesoundvolumeoftheloudspeakeristoo lowortoo high,youcanpress
thevolumebuttonsonthedevicerepeatedly toadjustvolumetoasuitablelevel.Ifthesound volume
is stillnotappropriate,you can adjustthesound volumeof theloudspeakerfurtherviathePC saudio
settings.
5.Adjustingthesound volumeofthemicrophone
Duringaconferencecall,ifthesoundheardbythefarend is toolowortoo high,you can askthefar
end toadjustthesoundvolumeon theirend.Ifit s stillnotadequate,you canadjustthesoundvolume
of themicrophoneinthePC saudiosettings.
6.End theconferencecall
Use thecallcontrolfeatures inyourconferencingsoftwaretoend thecall
7.Music Playback

Thisdevicecan beused as anexternalspeakerforcomputerequipment.Usingmusic playersoftware
on thecomputer,you can hearmusic playbackthrough thespeakeron thedevice.
To Obtain theBestPerformance
1.Install theproductinadryplacewith good ventilation,avoidingdirect sunlight, vibration,moisture
and cold.Keepawayfromheatsources and dust.
2.Keep theproduct farfrommotors,transformers andotherelectronicequipmenttoavoidelectrical
ormagnetic interference.
3.Neverinstalltheproduct nearelectricalappliances such as inductioncookers ormicrowaveovens to
preventoperationfailurecaused byelectromagnetic waves ormagneticfields.
4.Keephandsdrywhenconnectingordisconnectinganycablestopreventelectricshock.
5.Neverusebruteforcewhen connectingcables,which maycauseafire,electric shock,product
damage,ashortoran open circuit.
6.Unplugallcablesbeforecleaningtheproduct.
7.Neveruseanychemicalsolventtocleantheproduct.
8.Unplugallcablesifyou donotintend forlong-termuseofthisproduct.
9.Pleasedonotputdeviceintoafire,which maycausean explosion.
10.Neverloosen thescrews on theproductortrytorepairtheproductbyyourself.Ifyoufind any
problems,pleasecontact yourdealer.
FCC Statement
Thisequipment hasbeen tested and found tocomplywith the limitsfora Class Bdigitaldevice, pursuant to Part 15 of
the FCCRules.Theselimitsaredesignedtoprovide reasonableprotection againstharmfulinterference in a residential
installation. Thisequipment generatesusesand can radiate radio frequencyenergyand, ifnot installed and used in
accordancewith the instructions, maycauseharmfulinterference to radiocommunications. However, thereisno
guaranteethat interferencewillnot occurin aparticularinstallation. Ifthisequipment doescauseharmfulinterference
to radioortelevision reception, whichcan bedetermined byturning theequipment off and on, the userisencouragedto
tryto correct the interference byone ormore ofthe following measures:
-- Reorient orrelocate the receiving antenna.
-- Increase the separation between the equipment and receiver.
-- Connect the equipment into an outlet on a circuit different fromthat to which the receiverisconnected.
-- Consultthe dealeroran experienced radio/TVtechnicianforhelp.
Thisdevicecomplieswithpart15oftheFCC Rules.Operationissubjecttothefollowingtwo conditions:(1)Thisdevice
maynotcause harmfulinterference, and (2)thisdevice must accept anyinterference received, including interference
that maycauseundesired operation.
Changesormodificationsnot expresslyapproved bythepartyresponsibleforcompliancecouldvoidthe user's
authorityto operate the equipment.
Table of contents
Other TP-Link Telephone manuals


