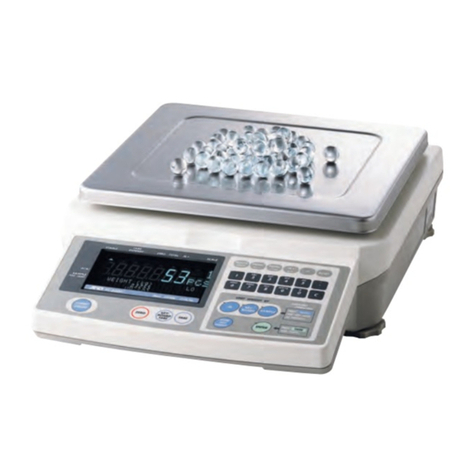
TPS FPA Series User manual

FPA series Electronic Balance
Operation Manual
TPS SCALES VIET NAM JSC
THINH PHAT SCALES JOINT STOCK COMPANY
57, D1 Street, Ward 25, Binh Thanh District, HCMC.Vietnam.
TEL: (0084 28) 62.888.666 FAX: (0084 28) 3512.7966

Contents
Contents
Warning and Safety Use Instruction.....................................................................1
Overview...............................................................................................................1
Basic Weighing Operation....................................................................................3
Basic Weighing Function......................................................................................3
Calibrate/Adjust ................................................................................................4
Application Function.............................................................................................4
Counting Function.................................................................................................5
Percentage Weigh Function...................................................................................5
Density Weigh Function.........................................................................................6
Operation Menu ..............................................................................................8
Communication Parameters....................................................................................9
Unit Conversion ....................................................................................................10
Technical Specification..........................................................................................10
Repairing and Maintenance ...................................................................................12

1
Warning and Safety use Instruction
● To avoid damage of the balance , please read the operation manual carefully before use .
☆Please do not use it in dangerous environment .
☆Please cut off the electricity without use for more than one week .
☆Please power off the balance when it connects with external device or before cut off the connection .
☆Magnet or static interference will affect the accuracy of balance, when these interference removed,
balance will recover to normal use .
Spare Parts
※The spare parts we used are the most compatible with the balance .
Any revision to the balance or use the third party’s cable and other device , it’s end user’s responsibility
to check and correct the power and voltage .
※Please do not open the out case. If the safety label is damaged, no warranty will be offered .
Overview
These series electronic balance are designed and developed by our company. Utilized the advanced
microcomputer controlled technology and high precision sensor technology (magnetic balance), it is the
ideal device for fast accurate weighing , widely used in medical research institute, schools, enterprise, road
construction and defense department etc.
▶LCD backlight display, easy and clear;
▶Operator-
▶Highly smart, tare and back to zero within the whole weighing scope, overload display .
▶Multi-mode choice : counting, percentage weigh, density weigh .
▶With RS-232C interface, easy to connect with printer, computer and other output device.
Part I: Open the package
☆Once open the package, please check any visible damage on the balance.
☆Please keep all the packing material until successful installation, to avoid any balance return. When pack
the balance, please remove all the cables to avoid any unnecessary damage.
Part II、Packing list
----balance
----operation manual
----scale
----power adapter
----weights(≤500g)
----Conformity certificate
----warranty card
Part III Remarks
Forbid to get wet in the rain or washed by water
Forbid to put balance in the place where is too hot or too wet, with vibration, corrosion, strong magnet
or with the risk of explosion;
Cockroach and other little creature are forbidden to live inside balance;
2
Forbid to be bumped or heavily pressed (not over the max capacity),when use the pan forbidden to be
dashed;
If the balance not used for a long time, please clean it up, pack it by plastic bag with drier in;
Please pre-heat for 60 minutes before balance was used to raise the precision.
Part IV. Preparation before Use
Put the balance in a level position before use. Use the level adjust feet under the front place to adjust the
level until the bubble move to the center of the circle.
Put the balance on the stable and flat table , not on the shaking or vibrating plate, to make the balance stable .
(Recommend to use aseismic marble)
Avoid to put balance in the place with big temperature change or air flow, such as the place with direct
sunlight or cold air outlet.
Please use the separate power socket to avoid the interruption by other device.
Please do not put anything on the scale when power on the balance.
※Make balance adjust itself to the change of temperature
When change the balance from lower temperature to higher temperature or reverse, please put the balance in
the new environment for about 2 hours, then pre-heat the balance, make it conform with the new
temperature.
Part V Out looking and Installation Adjustment
Part VI Display panel
Part VII Instruction for Button

3
Button
Name
Function
ON/OFF
ON/OFF
Short press:Switch on/off the balance.
Cal
Cal
Short press:When it ≤6gram ,back to zero;
Long press:enter calibration within 5 seconds
Zero/Tare
Zero/Tare
Short press:Tare;
Go to next step menu, number scroll;
Print
Print
Short press:data output, change the position when set the numbers;
Mode
Mode
Long press:mode exchange, weigh\count\percentage…
Unit
Unit
Short press:unit conversion
Long press:1d/10d conversion
Basic Weighing Operation
Preparation
Connect the power supply: when the panel display[*], press button 【ON/OFF】to switch on the
balance .
Pre-heat Time
【In order to ensure the precision of weighing, please preheat the balance completely reference to technical
parameter form (page 19-20), then start the following operation.】
Example
Basic weigh operation(balance already pre-heated), we take 210g/0.0001g balance as an example.
button(command)steps panel display
1.Zero position stable 0.0000 g
2.Put the container on the balance 50.0000 g
(e.g. 50g )
【ZERO/TARE】3.Tare the balance 0.0000 g
4.Put the sample in the container 100.0000 g
(e.g.100g)
Calibration / Adjustment
Only do the Calibration/Adjustment in the following case :

4
【In order to ensure the precision of weighing , please preheat the balance completely before do calibration】
※No load on the balance , balance already tared , innerweigh signal stable.
If the above conditions not fulfilled , it will display error message.
If the above conditions fulfilled , itwill display calibrate the scale value you need.
Outside Calibration
button(command)steps panel display
short press[CAL] 1.Balance goes to Zero position 0.0000 g
long press [CAL] 2. About 5 seconds CAL
Release[CAL]------
The scale value twinkles for 3 sec. 〖200.0000〗
3. Put on the indicated scale.
Display the calibrated scale value after 5 sec. 200.0000 g
4. Take off the scale, complete calibration. 0.0000 g
Application Function Operation
Choose the Mode:
button(command)steps panel display
Long press[MODE]Enter the choice for mode
Normal weigh mode NORMAL g
Count mode COUNT pcs
Percent weigh mode PERCENT %
Density measure mode* DENSITY d
*Density measure mode is an option, if you need please contact our company or authorized distributor.
Long press the button[MODE], all the modes will displayon the screen in a cycle, when the mode you want display on the screen , release the
button[MODE]to confirm the balancework mode.
Counting Function
Aim
By this procedure the user weigh the total weight of the certain samples which with similar single

5
weight, then divided by the single sample weight to get the final quantity of the sample.
Example
button(command)steps screen display
long press[MODE]Enter the choice of mode
Choose:COUNT mode COUNT pcs
When release,the radix number value twinkling 〖20〗pcs
press[ZERO/TARE]optional radix number value 10、20……1000
※End user can set the radix number alone, press button[PRINT]to change the position , press [TARE]to scroll the number.
Put on the certain number of sample,
Put all on the pan to set a radix number(In this e.g. we use 20 pcs)
press[CAL]To confirm the sample radix number 20 pcs
Remove the samples 0pcs
Weigh the unknown numbers(in this e.g.200pcs)200 pcs
※In Count Mode , if you want to reset the radix number value, please press[MODE]to reenter the Count Mode.
Exit the Count Mode: Long press[MODE], choose the normal weigh mode NORMALg
Percent Weigh Function
The end user can make a certain weight as definition 100%, then make other weight displayed as the percent
of the definition weight.
button(command)steps screen display
long press[MODE]Enter the choice of mode
choose:percent weigh PERCENT %
When release,twinkling 〖-000001 〗%
Press[ZERO/TARE]Choose the precision of percent
Put on the chosen percent sample 〖100.00 〗%
(e.g.100.00%)
press[CAL]confirm sample 100% 100.00 %
Take off the sample 0.00 %
Weigh the unknown percent sample 58.00 %
(e.g. 58.00%)

6
※In percent weigh mode , if you want to reset the percent precision and radixpercent value , please press button[MODE]to reset .
Exit percent weigh mode :long press[MODE], choose the normal weigh mode NORMALg
Density Weigh Function
Aim
By using this procedure user can measure the density value for solid or liquid so that judge the sample
desirable or not. (need to buy the necessary weighing kits from our company)
Weighing method for solid
Step 1:Use the density measure device to measure the solid density in the air;
Step 2:Put the solid into a certain liquid to measure the density.(The density of the certain liquid must be
known in advance)
button(command)steps screen display
Long press[MODE]Enter the choice of mode
1. Choose density mode DENSITY d
Solid density 〖SOLID〗d
Short press[CAL]2. Confirm the solid density measure mode
Enter the liquid temperature coefficient settings 01.00000 d
※The user can set the liquid temperature coefficient value on his own , please refer to Form1.
Press[PRINT]to change the position,press[TARE]to scroll down the number , press[CAL]to confirm , enter the solid density measure
situation .
3、The balance reminding to weigh in the air 〖HI〗
0.0000 g
4、Put the sample and weigh it in the air 〖HI〗
(e.g.:The quality of the sample in the air is 6.8135g)6.8135 g
button(command)steps screen display
short press[CAL]5. To record the current weigh value in the air 〖LO〗
and indicating solid weighed in liquid 6.8135 g
6. Take off the solid 〖LO〗
It indicating solid weighed in liquid 0.0000 g
7. Put the solid in liquid 〖LO〗
(e.g. Quality of the solid is 1.3518g in liquid)1.3518 g
Short press[CAL]8. It records the weigh value in liquid OK
In the meantime calculate the solid density 1.2398 gd
Measure result : 1.2398 g/cm3

7
※If you want to measure different solid’s density , please repeat step 4-8.
※In the solid density measure mode, if you want to reset the liquid density coefficient, please press[MODE], to re-enter the coefficient
settings.
Exit the density mode : Long press[MODE]and choose the normal weigh mode NORMALg
Appendix I. Pure water temperature and density cross reference.
T/℃
g/cm3
T/℃
g/cm3
T/℃
g/cm3
0
0.99986
14
0.99927
28
0.99626
1
0.99993
15
0.99913
29
0.99597
2
0.99997
16
0.99897
30
0.99567
3
0.99999
17
0.99880
31
0.99537
4
1.00000
18
0.99862
32
0.99505
5
0.99999
19
0.99843
33
0.99473
6
0.99997
20
0.99823
34
0.99439
7
0.99993
21
0.99802
35
0.99405
8
0.99988
22
0.99780
36
0.99369
9
0.99981
23
0.99756
37
0.99333
10
0.99973
24
0.99732
38
0.99297
11
0.99963
25
0.99707
39
0.99259
12
0.99953
26
0.99681
40
0.99221
13
0.99941
27
0.99654
The weigh method for liquid density
Use density measure device, the volume of planed standard sample must be known.
The user need to enter the volume of standard sample manually. The latest data entered will be stored for
further use.
Step 1:To measure the liquid density , please weigh the standard sample in the air;
Step 2:Then weigh the standard sample in the liquid want to be measured.
button(command)steps screen display
long press[MODE]Enter the choice of mode
1. Enter the density mode DENSITY d
2. Release,solid density 〖SOLID〗d
Short press[ZERO/TARE]3. Choose liquid density 〖LIQUID〗d
Short press[CAL]4. Confirm to enter liquid density measure
Enter “Gravity hammer volume”settings. 05.4957 d
※User can set the gravity hammer volume on his own, the gravity hammer volume of this balance:
press[PRINT]to change the position,press[TARE]to scroll down the number, press [CAL]to enter the situation for liquid density
measurement.
5.It indicating gravity hammer weighed in the air 〖HI〗
0.0000 g

8
6. Weigh the gravity hammer in the air. 〖HI〗
(e.g.: The quality of gravity hammer is 6.8135g in the air)6.8135 g
Short press[CAL]7. It records the value weighed in the air 〖LO〗
And indicating gravity hammer measured in liquid 6.8135 g
8、Take off the weighed sample 〖LO〗
It indicates gravity hammer measured in liquid 0.0000 g
9. Weigh the gravity hammer in liquid 〖LO〗
(e.g.: The quality of gravityhammer is 1.3518g in liquid)1.3518 g
Short press[CAL]10. It records the weigh value in liquid OK
In the meantime calculate the weighed liquid density 00.99707 gd
※If you want to measure different liquid’s density , please repeat step 5-10.
※In the liquid density measure mode, if you want to reset volume of gravity hammer, please press[MODE], to re-enter the gravity hammer
volume settings.
Exit the density mode : Long press[MODE]and choose the normal weigh mode NORMALg
Operation Menu
Switch on, enter the weigh condition; press[TARE]+[ZERO]at the same time,
in 3 seconds it displays Cod0000. Press[PRINT]to change the position, press[TARE]to scroll the numbers
or choose the parameters , press[ZERO]to confirm and enter the next step .
Code
Mark display
Description
Setting range
Cod0001
Zero-x.x
Zero range
0.0d to 6.0d
Stdy-x.x
Start sensitive range
0.0d to 6.0d
Sens--X
Inner sensitivity grade
1,2,3,4,5,6
Filt-X
Filter radix
1,2,3,4,5,6,7;1 weakest,7strongest
Speed
Weighing speed
1,2,3;3 fastest
BL-xxx
LCD back light mode
ON,OFF,AUT
BEPxxx
Beeper switch
ON, OFF
MOdRec
Whether record the weigh mode
0:Always goes to normal weigh mode when switch on;
1:record the weigh mode last used before switch off , enter
this mode directly when switch on .
TAdj
Display temperature correction
-1.9 to +1.9
Baudxx
Baud rate
12:1200;24:2400;48:4800;96:9600
Con—xxx
Communication method
Non :No communication ;CON: continuous ;Sty :
communicate when stable;Key:communication when press
[print];SOFT:software exchange ;Txxx:communicate by
time,xxx is the set time, unit is second.
dAT Con
Output Format
Prt: Our Company Standard Output Format
Com: Common Data Format

9
Communication Parameters
1、Baud Rate
12:1200bps;24:2400bps;48:4800bps;96:9600bps;
2、COM(Communication Method )
NON:No communication;CON:Continuous communication;
STY:Communicate when stable;KEY:Communicate when press button [PRINT];
SOFT:software exchange;Txxx:Communicate in every xxx seconds.
3、Communication data layout sample
3.1in six lines , easy for mini-printer;
MODE:NORMAL Mode
TEMP:31.8C Temperature
STATUS:STEADY Current status
STEP:NONE Current step
WT:0.00g Weight value
SIGN: Sign by the operator
Blank
3.2Common Data Format:
ST +/- 0000.0000×× g <CR><LF><LF>
ST Steady
+,≥0 Value
0000.0000
××g
CR
LF
US Unsteady
-,<0 Value
Number Display
Area
Unit Display Area
Carriage Return
Line Feed
4、The list of command which the communicating device can send in software exchange mode. (ASCII code)
No.
Command
Function
1
?
Sample
2
P
Print
3
T
Tare
4
Z
Back to Zero
5
U
Unit
Unit Conversion
Mark
Unit
Conversion radix
g
gram
1
ct
Carat
5
BLANk
Output the blank line
Line 0,1,2,3,4,5,6,7,8,9
Cod0002
Unit-xxx
ON:display;
OFF:close
Unit shielding choice,”Unit”means the unit displayed by 8
codes, at the same time the directly displayed unit will be
lighten. The shielded unit will not display when weighing.

10
oz
Ounce
0.03527396200
ozt
Troy weight ounce
0.03215074700
dwt
Penny weight
0.64301493100
GN
grain
15.43235835000
lb
pound
0.00220462260
N
Newton
0.00980654189
dr
Dram
0.56438222222
tlT
Taiwan tael
0.02666666000
tlS
Singapore tael
0.02645544638
tlH
Hong Kong tael
0.02671725000
T
tola
0.08573532418
mom
momme(Japan pearl)
0.26670000000
kg
Kilo gram
0.00100000000
mg
Micro gram
1000.00000000
Technical Parameter
Model
104
114
124
204
214
304
Max weigh scope
100g
110g
120g
200g
210g
300g
Precision level
Weigh scope
0~100g
0~110g
0~120g
0~200g
0~210g
0~310g
value of scale division
0.0001g
Standard weightsvalue
100g
100g
100g
200g
200g
300g
Repeatable tolerance
(standard tolerance)
±0.0003g
Linear tolerance
±0.0003g
Stable time
≈4s
Pre-heat time
60-120 min
Operation temperature
20±2.5℃
Pan diameter
90mm
Overall dimensions
325 x 205 x 305mm(L*W*H)
Weigh chamber dimensions
180mmX175mmX200mm(L*W*H)
Net weight
≈ 6kg
Gross weight
≈8kg
Adapter power supply
220V、50Hz,15V/600mA
Package size
460mmX360mmX400mm(L*W*H)
Model
213
313
413
513
613
813
1013
Max weigh scope
210g
310g
410g
510g
610g
810g
1010g
Precision level
Weigh scope
0~210g
0~310g
0~410g
0~510g
0~610g
0~810g
0~1010g
value of scale division
0.001g

11
Standard weightsvalue
200g
200g
200g
500g
500g
500g
1000g
Repeatable tolerance
(standard tolerance)
±0.002g
Linear tolerance
±0.002g
Stable time
≈3s
Pre-heat time
60-90 min
Operation temperature
20±7.5℃
Pan diameter
115mm
Overall dimensions
325mmX205mmX305mm(L*W*H)
Weigh chamber dimensions
180mmX175mmX200mm(L*W*H)
Net weight
≈6kg
Gross weight
≈8kg
Adapter power supply
220V、50Hz,15V/500mA
Package size
460mmX360mmX400mm(L*W*H)
Model
1102
2102
3102
4102
5102
6102
Max weigh scope
1100g
2100g
3100g
4100g
5100g
6100g
Precision level
Weigh scope
0~1100g
0~2100g
0~3100g
0~4100g
0~5100g
0~6100g
value of scale division
0.01g
Standard weights
value
1000g
2000g
3000g
4000g
5000g
5000g
Repeatable tolerance
(standard tolerance)
±0.02g
Linear tolerance
±0.02g
Stable time
≈3s
Pre-heat time
60-90 min
Operation temperature
20±7.5℃
Pan diameter
ф160mm
Overall dimensions
325mm×205mm×100mm(L*W*H)
Net weight
≈5kg
Gross weight
≈6kg
Adapter power supply
220V、50Hz,15V/500mA
Package size
460mm×360mm×245mm(L*W*H)
Repair and Maintenance
Repairing
Repairing must be done by the trained technicians.
Cleaning
Unplug the power adapter from the socket, if there is cable connecting with the balance interface ,

12
unplug the cable as well.
Clean the balance by a cloth soaked in neutral flush (soap) .
After cleaning, wipe the balance by a soft dry cloth.
Taking up the bracket to check the weighing system not damaged.
Don’t make the liquid flow into the shield of balance; Don’t use the corrosive flush(solvent) to clean the
stainless steel surface. All the stainless steel parts need to be flushed frequently, take out of all the stainless
steel parts and flush them completely, use the wet cloth or sponge to clean the stainless steel parts. Only use
the homely flush suitable to clean stainless steel parts.
Warranty
Please do not ignore the warranty right you should enjoy.
We offer one year warranty for the balance from the date it sold out, Damages not caused by misuse or
vandalism all belong to warranty exclude the following case:
Balance out of warranty.
Damage caused by misuses such as long time under sunshine or receive corrosion.
The user does not obey the operation manual such as overloading the balance.
Without our authorized department or technician repairing, the user disassembly the balance on his own.
Any brute force application caused the damage of balance. E.g. throw the heavy loads to the pan, open
or shut the chamber door violently.
If you have any quality problem, please pack the product well together with the warranty card, then send it
to the local agent or distributor. We will repair it immediately and send it back within one week, otherwise,
we will replace the product. The sensor is not within warranty range.
Any product out of warranty or caused by misuse will be charged a reasonable repairing fee.

13
Calibration of FPA Series Balance Internal/Linearity calibration
1) Remove all objects from pan, make sure the balance show zero,
2) Press CAL key for 5 seconds, it shows --CAL- , and then show ------, press ZERO/TARE key for 5 seconds, it shows
--CAL- again, then will show the first calibration weights, twinkling,
3) Put on the weights on the pan accordingly, it shows- , when it is stable, it shows the weights, remove the weights, it
shows- , and then shows the second calibration weights , twinkling,
4) Put on the weights on the pan accordingly, it shows- , when it is stable, it shows the weights, remove the weights, it turn
to zero automatically, the calibration is complete.
Note: We suggest you do external calibration too when you begin to use the balance. External calibration
1) Remove all objects from pan, make sure the balance show zero,
2) Press CAL key for 5 seconds, it shows --CAL- , and then show ------,and then show the calibration weights, twinkling,
3) Put on the weights , it shows ------ , when it is stable, it shows the weights, remove the weights, it turns to zero
automatically, the calibration is complete.
Table of contents
Other TPS Scale manuals

TPS
TPS VIBRA TPS SERI C User manual

TPS
TPS FGH300 User manual

TPS
TPS FRH300 User manual

TPS
TPS VIBRA HAW SERIES User manual

TPS
TPS OCS-TPS User manual

TPS
TPS JADEVER JPT User manual

TPS
TPS JS Series User manual

TPS
TPS VIBRA SHINKO GS Series User manual

TPS
TPS OS Series User manual

TPS
TPS FEJ SERI User manual