manuals.online logo
Brands
  1. Home
  2. •
  3. Brands
  4. •
  5. Weefine
  6. •
  7. Flashlight
  8. •
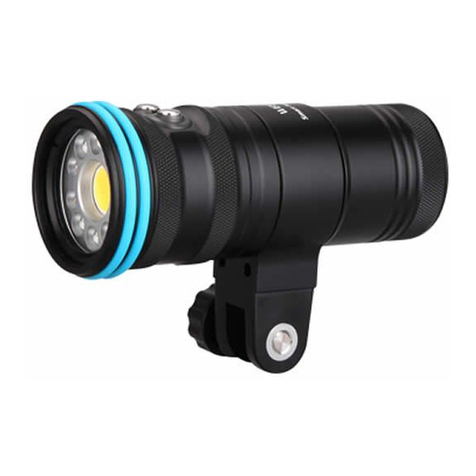
  9. Weefine Solar Flare 5000 User manual

Weefine Solar Flare 5000 User manual

Brightness
Beam Angle
Battery
Burn Time
Depth Rated
LED Life
Material
Oxidation
Dimensions
Weight
5000 Lumens/5000K/CRI:Ra90
120 Degrees
4 x 18650 Lithium-ion batteries (3400 mAh)
Approx. 50 min (100% flood)
100m / 330ft
Over 50,000 hours
Aviation aluminum
Hard anodic oxidation
115 (D) x 127.8 (L) mm
555g on land (Including the battery) /
265g in water (Including the battery)
1
3
2
Features
Light Head
Wide LightRed Light*8pcs
Specification
Standard Accessories
① Solar Flare 5000
④ YS Adapter + Ball mount
③ Lithium-ion battery
⑥ Anti-collision O rings x 3pcs
② Charger
⑤ Spare O-rings x 2pcs
To install the battery
1. Turn the tail cap counter-clockwise to open;
2. Put the Lithium-ion battery into the battery compartment, the battery
compartment is located in the body (diagram below).
NOTE:Look at the the label located on the inside of the tail cap, Make
sure to align the positive and negative ends of the battery with the
positive and negative terminals on the tail.
3. Turn the tail cap clockwise to close the battery compartment
(i.e. reattach the tail to the light head).
To operate the light
Turn ON:
Press the right and left buttons at the same time and hold them down for
one second. Then immediately press and release the left button. When
the light is turned on it will be in the flood light mode at 100% brightness.
Turn OFF:
Press the left button and hold it down for two seconds.
USER MANUAL
5000 Lumens Flood.
Waterproof to 100m/330ft
Wide lens
O-rings
(protect against bumps)
YS Adapter
Tail cap
ON/OFF Button
4 5
6
General Maintenance
There are two O-rings in the tail cap. Use silicone to keep the O-rings well
lubricated. It is important to lubricate the O-rings if the video light has not
been used in a long time or if the O-ring is hard. If the O-ring is damaged,
broken or deformed it should be replaced with a new O-ring. One spare
O-ring is included when you purchase your torch.
NOTE: Do not use a sharp tool to remove the O-ring.
Warnings
★ Do not open the tail cap when the torch is in the water;
★ Do not shine the light directly into your eyes or another person's eyes;
★ Do not touch the battery or the charger with wet hands;
★ Only use the manufacturer's battery and charger with this system;
★ If the torch will not be used for a long period of time the battery should
be removed. Failure to comply with these warnings may result in damage
to the video light and will nullify the warranty.
To Switch Modes
When the light is on: Press the left button, Then immediately release the
left button, To Switch Modes.
Wide Light → Red Light
When the light is on: Press the right and left buttons at the same time, Then
immediately release the right and left buttons. Open the SOS/Flash Light.
If you want to exit this mode, just operate again.
SOS(Wide Light) → Flash Light(Wide Light)
Adjust brightness
When the light is on: Press the right button, Then immediately release the
right button. Adjust brightness.
Wide Light:100% → 75% → 50% → 25%
Red Light:100% → 50% → 25%
Standby mode
To Charge the Battery
1. Insert the DC charger plug into the battery(as shown in the diagram below).
2. Plug the charger into the wall outlet.
When the battery starts to charge the indicator light on the charger will
be red.
When the battery is fully charged the indicator light on the charger will
turn green.
Thermal protection
When the inner temperature of the torch becomes too high the video light
will automatically decrease the brightness of the light prevent the light
from over heating.
Battery Stretch
When the battery level is low the troch will automatically decrease the
brightness to conserve power. When the battery is empty the torch will
power-off.
Remote control
The remote control is an optional accessory.
When the light is on,Press the left button and hold it down for one second
the light will be off.when the power is on and the the light is off,press the
left button and hold it down for one second the light will be back to the
previous mode.

Other Weefine Flashlight manuals

Weefine Smart focus 1000 User manual

Weefine

Weefine Smart focus 1000 User manual

Weefine WFS02 User manual

Weefine

Weefine WFS02 User manual

Weefine Smart Focus 3000 User manual

Weefine

Weefine Smart Focus 3000 User manual

Weefine WFS05 User manual

Weefine

Weefine WFS05 User manual

Popular Flashlight manuals by other brands

Fotodiox SkyFiller Series user manual

Fotodiox

Fotodiox SkyFiller Series user manual

Silverline 675189 manual

Silverline

Silverline 675189 manual

WUBEN TO40R user manual

WUBEN

WUBEN TO40R user manual

Bosch & 3452 24 Operating/safety instructions

Bosch

Bosch & 3452 24 Operating/safety instructions

Milwaukee ML-LED Original instructions

Milwaukee

Milwaukee ML-LED Original instructions

SATA 05232 quick start guide

SATA

SATA 05232 quick start guide

Makita ML100W instruction manual

Makita

Makita ML100W instruction manual

Daniamant Dan W2 Installation and maintenance instructions

Daniamant

Daniamant Dan W2 Installation and maintenance instructions

Victor SL60 installation instructions

Victor

Victor SL60 installation instructions

Olympia RG850 CREE XML LED user guide

Olympia

Olympia RG850 CREE XML LED user guide

Travis Industries Tempest Portable Torch owner's manual

Travis Industries

Travis Industries Tempest Portable Torch owner's manual

Nitecore NPS200 user manual

Nitecore

Nitecore NPS200 user manual

HIKOKI UB18DAL instruction manual

HIKOKI

HIKOKI UB18DAL instruction manual

YLP PROFESSIONAL Series user manual

YLP

YLP PROFESSIONAL Series user manual

Walther EFC1 operating instructions

Walther

Walther EFC1 operating instructions

Trelock LS 210 manual

Trelock

Trelock LS 210 manual

Milwaukee IR-HL450 Original instructions

Milwaukee

Milwaukee IR-HL450 Original instructions

Conrad 85 24 02 operating instructions

Conrad

Conrad 85 24 02 operating instructions

manuals.online logo
manuals.online logoBrands
  • About & Mission
  • Contact us
  • Privacy Policy
  • Terms and Conditions

Copyright 2025 Manuals.Online. All Rights Reserved.