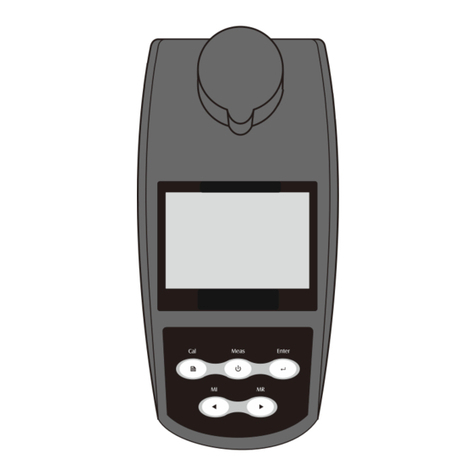
Trace2O OMAS User manual

OMAS
Densitometer
COLOR REFLECTION DENSITOMETER
OPERATION MANUAL
(Model R710, R720, R730)

2
GETTING STARTED ...............................................................
Packing List................................................................... ..5
Features ..........................................................................6
Precautions......................................................................9
Measurement Shoe / Power On....................................10
Charging Battery.............................................................11
LCD Contrast Adjustment..............................................13
GENERAL OPERATION........................................................
Function Keys................................................................15
Measurement Modes.....................................................18
System Setup................................................................21
How to Take a Measurement.........................................25
Guide to Measurement Functions.................................26
CALIBRATION PROCEDURES.........................................
Calibration .....................................................................28
Standard Calibration......................................................29
Quick Cal.......................................................................33
MEASUREMENT FUNCTIONS .........................................
Density...........................................................................36
Density Difference.........................................................40
Dot Area ........................................................................44
Dot Gain ........................................................................49
Ink-Trap.........................................................................53
Print Contrast.................................................................59
Hue Error/Grayness/ Saturation....................................63
Cast/Brightness.............................................................69
Dot Analysis...................................................................73
Auto-Function................................................................78
TABLE OF CONTENTS

3
APPENDIX ..........................................................................
Specifications................................................................86
Application Notes..........................................................87
Density/Density Difference.....................................88
Dot Area/Dot Gain..................................................89
Ink-Trap..................................................................90
Print Contrast.......................................................... 92
Hue Error................................................................ 93
Grayness ................................................................ 94
Typical Densitometer Values..................................... 95

4
TABLE OF CONTENTS
PACKING LIST
FEATURES
PRECAUTIONS
MEASUREMENT SHOE/
POWER ON
CHARGING BATTERY
LCD CONTRAST
ADJUSTMENT

5
PACKING LIST
Before operating this instrument, please inspect for damage
and check the packing list below to ensure that all parts are
included in this package.
If there is a sign of damage due to shipping, please contact
the shipper immediately.
Item # Part No. Description Quantity
1R7_0 Reflection Densitometer 1
2406-002 AC Adapter - U.S.A. (120 VAC) 1
406-003 AC Adapter - Europlug (220 VAC)
406-004 AC Adapter - Great Britain (230 VAC)
3403-004 Calibration Reference Card 1
4405-001 Carrying Case 1
5409-007 Operation Manual 1
6803-111 Warranty Statement 1
7563-101 Warranty Registration Card 1
(1) (2) (3)
(4) (5) (6) (7)
WARRANTY WARRANTY
REGISTRATION
OPERATION
MANUAL

6
FEATURES
1 2 3
5 4
(Top View)
1. Large graphic LCD display with contrast adjustment.
2. Menu key: Main selection for all measurement
functions.
3. Cable harness attachment (Ihara Part No. 413-001).
4. Help key: Help selection for all measurements.
5. Aperture target (3.0 mm or 1.7 mm).

7
FEATURES
8
6 7
(Bottom View)
6. Shoe lock.
7. Battery compartment.
8. Interchangeable aperture attachment.

8
FEATURES
9 10
13 12 11
(Rear View)
9. LCD contrast adjustment.
10. Configurable RS-232C communication port.
11. AC adapter receptacle.
12. Charge status indicator:
Green light indicates the battery is fully charged.
Orange light indicates the battery is charging.
13. On/Off switch.

9
PRECAUTIONS
Everyreflectiondensitometer is manufactured withthe highest
quality of workmanship. Toassure long-lasting operation with
thisinstrument,pleasereadthefollowinginformationcarefully.
Before operating this instrument for the first time,
charge the instrument for approximately 1.5 hours.
The unit is operable while it is charging.
Avoid operating in an area where the instrument may
beexposedtodirectsunlight,highhumidityorextreme
temperatures.
Examine periodicallyfordust or dirtinthe opticalarea.
Ifcleaningis necessary,pleasecontactIhara or a local
dealer for further assistance.
Calibrate the instrument periodicallyto ensureconstant
readings, especially after a long period of non-usage.
Use the AC adapter that came with theinstrument;
all others may result in damage to the instrument.
Dropping or misuse of this instrument may cause
serious damage.

10
MEASUREMENT SHOE / POWER ON
Lock/unlock shoe
1. Locate the shoe lock on
the underside of the
measurement shoe. 2
2. Tounlock: Gently slide
the shoe lock forward to
release the measure-
ment shoe.
To lock: Close the
measurement shoe and
gently slide the shoe
lock backward.
Power On
1. With the measurement
shoe unlocked, gently
slide the on/off switch to
the "on" position.
2. Depress any one ofthe
six function keys until
the LCD screen is lit.

11
CHARGING BATTERY
Everydensitometerisequippedwithabuilt-inchargingsystem.
Please give special attention to the following details. Incorrect
procedure may permanently damage this instrument.
1
Charging Sequence
1. Make sure the unit is
turned off prior to
connecting to the AC
adapter. 2
2. Insert the AC adapter
outlet plug into the
receptacle in the back of
the unit.
3. Plug the AC adapter into
an electric outlet. Full
charge should take
approximately 1.5 hours.
4. When the unit is not to be
used for a long period of
time, be sure to slide the
"on-off" switch to off.

12
CHARGING BATTERY
Note:
•Use the AC adapter that came with the instrument;
all others may result in damage to the instrument.
Make sure the AC adapter you use is center-negative.
•It takes approximately 1.5 hours to fully charge the
unit.
•Ni-Cad batteries may be charged repeatedly. However,
the time between required charges will reduce
gradually. If the charging frequency increases
dramatically, use the BATTERY REFRESH function
intheSYSTEMSETUPmenutorejuvenatethebattery
(seepage 28 for moredetails). If BATTERYREFRESH
is not successful, replacement of the battery will be
necessary.

13
LCD CONTRASTADJUSTMENT
It is possible to adjust the contrast of the liquid crystal display
(LCD) by turning the adjustment screw in the left rear of the
instrument (see diagram below).
The contrast of the LCD is adjusted at the factory. However,
contrast may change, depending on the ambient temperature.
Youmay adjust the LCD contrast to suit your preference.
We recommend that you use a flat jeweler's screwdriver to
make the adjustment.
1. LCD Contrast Adjustment
Turn clockwise: Increases contrast
Turn counterclockwise: Decreases contrast
1

14
GENERAL OPERATION
FUNCTION KEYS
MEASUREMENT MODES
SYSTEM SETUP
HOW TO TAKE A
MEASUREMENT
GUIDE TOMEASUREMENT
FUNCTIONS

15
FUNCTION KEYS
B A
C D
A MENU KEY
Opens the Function Menu. Each time you wish to
select a new function, press the MENU key to open
the Function Menu to begin selection.
B FUNCTION KEYS
The function of the three variable function keys is
indicated to the left of each key on the LCD.
C HELP KEY
Opens the Help Menu which offers explanations and
procedures for each measurement function and
setup option.
D EXIT KEY
Returns to the previous screen. Cancels the
instruction message.
IHARA
?
HELP
MENU
EXIT

16
FUNCTION KEYS
PREV
PAGE
Prompts you to
measure paper or enter
paper values manually.
Prompts you to
measure solid or enter
solid values manually.
Proceed to the next
cylinder. Return to the previous
cylinder.
Proceed to the next
page.
Scroll up.
Return to the previous
page.
Scroll down.
PAPER SOLID
NEXT
CYLND
NEXT
PAGE
PREV
CYLND

17
FUNCTION KEYS
Opens up the setup
options menu of the
function displayed.
Select item to revise
value.
Begins battery refresh
process.
Select highlighted item.
Proceed to next item.
Prompts you to measure
reference target or enter
values manually.
SETUP ENTER
EDIT
START
NEXT
REF

18
MEASUREMENT MODES
DENSITY (R710, R720, R730)
Measures the change in ink film thickness.
DENSITY DIFFERENCE (R710, R720, R730)
Measures the change in ink film thickness with
reference to a measurement standard.
DOT AREA (R720, R730)
Measures the dot area on a halftone patch.
DOT GAIN (R720, R730)
Measures the increase in size of the halftone. It
allows the user to evaluate the quality of the print.
AUTO-FUNCTION (R720, R730)
This measurement function allows the user to
measure density, dot gain and ink-trap (R730 only)
interchangeably.
INK-TRAP (R730)
This measurement evaluates the overprints, i.e., the
ability of a printed ink to accept a second ink.

19
MEASUREMENT MODES
CONTRAST (R730)
Evaluates the contrast of a specific print. It assists the
operator inattaining the maximum contrast between ink
laid down and dot gain at the 3/4 tone.
HUE ERROR (R730)
Measures the ink consistency of a color reproduction.
Also, hue error measurements are needed by the color
separator to adjust to the correct color.
GRAYNESS (R730)
Measures the contamination of one ink with another. If
the measurement deviates from the usual reading, then
contamination may have occurred.
SATURATION (R730)
Evaluates the color density as it deviates from a neutral
gray.
CAST (R730)
Evaluates the highest and lowest of the red, green and
bluereflectance. Castis measuredto evaluate thecolor
of the paper.

20
MEASUREMENT MODES
BRIGHTNESS (R730)
Evaluates the brightness of the paper. This value is equal
to the blue reflectance.
DOT ANALYSIS (R730)
This measurement allows the operator to measure and to
plot the print characteristic curve (dot gain curve) for a
press. Youmay record up to 8 cylinders.
SECURITY USER CODE (OptionalforR710,R720,R730)
As an option to safeguard your investment, the R-series
densitometers may be set to operate only with the correct
user code.
NOTE:
Please note that Ihara's R-series color reflection
densitometers are upgradeable. Should you be interested
in upgrading your instrument, please contact your local
dealer or Ihara for more information.
Table of contents
Other Trace2O Measuring Instrument manuals

Trace2O
Trace2O METALYSER DELUXE HM2000 User manual
Trace2O
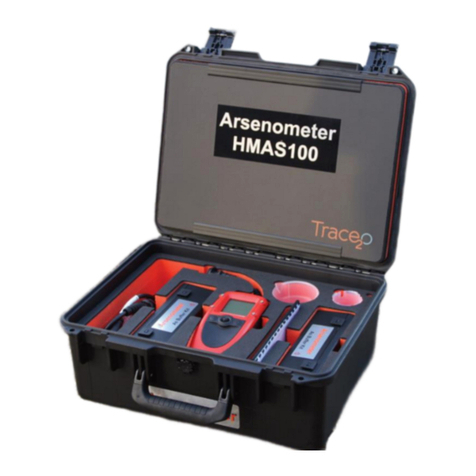
Trace2O ARSENOMETER HMAS100 User manual
Trace2O
Trace2O METALYSER FIELD PRO HM3000 User manual
Trace2O
Trace2O HT1000 User manual
Trace2O
Trace2O HMUV1825P User manual
Trace2O
Trace2O METALYSER HM4000 User manual

Trace2O
Trace2O Metalyser HM5000 User manual
Trace2O
Trace2O HydroTest HTTURB User manual
Trace2O
Trace2O METALYSER DELUXE HM2000 User manual
Trace2O
Trace2O METALYSER HM1000 User manual
