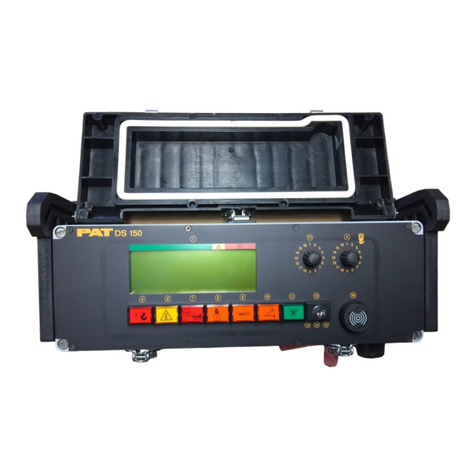
PAT DS 150 User manual


Service Manual
DS150
REV DATE NAME
DESCRIPTION
A 10/16/01 CSH ECN 01-283
B 03/08/02 CLC ECN 02-087
NOTICE
PAT America, Inc. makes no warranty of any kind with regard to this material, including, but not limited
to, the implied warranties of merchantability and/or its fitness for a particular purpose.
PAT America, Inc. will not be liable for errors contained in this manual or for incidental or
consequential damages in connection with the furnishing, performance, or use of this manual. This
document contains proprietary information, which is protected by copyright, and all rights are reserved.
No part of this document may be photocopied, reproduced, or translated to another language without
the prior written consent of PAT America, Inc.
PAT America, Inc. reserves proprietary rights to all drawings, photos and the data contained therein.
The drawings, photos and data are confidential and cannot be used or reproduced without the written
consent of PAT America, Inc. The drawings and/or photos are subject to technical modification
without prior notice.
All information in this document is subject to change without notice.
MANUAL REVISIONS

Service Manual
DS150

Service Manual
DS150
TABLE OF CONTENTS
1
MECHANICAL DESCRIPTION OF THE SYSTEM COMPONENTS ..............................................1
2
MECHANICAL AND ELECTRICAL DESCRIPTION OF THE CENTRAL UNIT.............................2
BASIC SYSTEM COMPONENT LAYOUT..........................................................................................................3
BASIC ADJUSTMENT OF THE COMPONENTS...............................................................................................4
3
DEFINITIONS ................................................................................................................................5
4
DRAWINGS...................................................................................................................................6
SYSTEM ELECTRICAL DIAGRAM..................................................................................................................6
CENTRAL UNIT 024-150-060-002 SPARE PARTS LIST .............................................................................7
CONSOLE 050-150-060-006 SPARE PARTS LIST......................................................................................9
CONSOLE 050-150-060-008 SPARE PARTS LIST....................................................................................11
CABLE REEL 068-208-060-013 LWG208 SPAREPARTS LIST............................................................. 13
CENTRAL UNIT BOARD LAYOUT AND MEASURINGPOINTS 024-150-300-001 ..............................15
5
PROCEDURE..............................................................................................................................16
EPROM REPLACEMENT IN CENTRAL UNIT................................................................................................16
PISTON & ROD PRESSURE CHANNEL ZEROPOINT ADJUSTMENT......................................................... 16
LENGTH & ANGLE ADJUSTMENTS...............................................................................................................17
MAIN BOARD REPLACEMENT.......................................................................................................................18
6
THEORY......................................................................................................................................19
ANTI-TWO BLOCK & SHUTOFF CIRCUIT.....................................................................................................19
LENGTH MEASURING CHANNEL...................................................................................................................19
PISTON SIDE PRESSURE MEASURING CHANNEL......................................................................................20
ROD SIDE PRESSUREMEASURING CHANNEL...........................................................................................20
MAIN BOOM ANGLE MEASURING CHANNEL...............................................................................................21
SECOND ANGLE MEASURING CHANNEL.....................................................................................................21
7
TROUBLESHOOTING FLOW CHARTS......................................................................................22
GENERAL FLOWCHART.................................................................................................................................22
LEVER LOCKOUT ACTIVATED.......................................................................................................................23
BROKEN LENGTH CABLE..............................................................................................................................24
NO DISPLAY...................................................................................................................................................25
ANTI TWOBLOCK PROBLEM........................................................................................................................27
LENGTH READING PROBLEM.......................................................................................................................30
LOAD READING PROBLEM............................................................................................................................33
BAD DATA TRANSFER BETWEEN CONSOLE & CENTRAL UNIT............................................................... 36
INTERFERENCE PROBLEM............................................................................................................................38
ANGLE PROBLEM..........................................................................................................................................39
8
ERROR CODE TABLE................................................................................................................40
ADDENDUM A BASIC ADJUSTMENT AND VOLTAGE CHECKS ...................................................46
ADDENDUM B REFERENCE TABLES FOR MEASURING SUPPLY AND SIGNAL VOLTAGES FOR
SENSOR CHANNELS .......................................................................................................................47

Service Manual
DS150

Mechanical Description Of The System
1
1 MECHANICAL DESCRIPTION OF THE SYSTEM COMPONENTS
Pressure Transducer: The pressure transducer transforms hydraulic pressure into an electric analog
voltage signal. Two pressure transducers are connected, one to the rod side and one to the piston
side of the lift cylinder. The pressure transducer is connected to the central unit with a four-conductor,
double-shielded cable.
The power supply voltage is 5V.
The output signal is 0.00V under 0 pressure to -1.00V at max. pressure (4410psi)
The Length-Angle Transducer: The length-angle sensor (LWG) is a combination of two transducers
in one box, fitted at the base section of the boom. It measures the length and angle of the boom.
A reeling drum drives a potentiometer, which is the length transducer. Part of the length transducer is
the length cable on the drum, which is a two-conductor cable (screen and live). It is connected to the
anti-two-block switch at the boom head and to a slip ring body in the reel. The angle transducer is
fitted into a small box filled with oil. A pendulum drives the axle of the angle potentiometer.
The power supply voltage for both is -5.00V
The output signal for the length transducer is: -0.500V up to -4.500V
The output signal for the angle transducer is: -1.875V up to -3.125V
Anti-Two-Block Switch: The anti-two-block switch monitors the load block and its relationship with
the head of the boom. In working condition, the switch is closed. When the hook block strikes the
weight, the circuit opens, disengaging a relay output to the lockout solenoid valves, where applicable.
To check the cable for damage, (short circuit to ground) there is a 4.7k resistor between ground and
the contact of the switch. The weight at the anti-two-block switch keeps the switch closed until the
hook block strikes it.
Console: The console displays the geometrical information such as length and angle of main boom,
working radius and head height of the boom. It also displays the actual load and the maximum load
permitted by load chart. Furthermore, it has an alarm horn and a warning light for overload, and a pre-
warning light. The analog instrument shows a percentage of the total permissible moment. The
console has a switch for the operating modes (duty-selection switch for crane configurations) and a
switch for the Reeving of the hook block. It also has a warning light for anti-two-block conditions and
an override switch for overload or anti-two block condition.
Duty Selection Switches (Digital Inputs): The system has to be programmed for the lifting area
configuration. The crane is going to be worked in (e.g. main boom) on outriggers over front, or rear, or
over the side for 360 degrees. For obtaining this information from the crane, micro switches are
installed in the electrical swivel that tells the system the exact location of the boom. Micro switches
are also located on the counterweight which tells the system if the counterweight is installed or not,
where applicable.

Mechanical Description Of The System
2
2
MECHANICAL AND ELECTRICAL DESCRIPTION OF THE CENTRAL UNIT
All the data of the crane is stored inside the central unit in EPROM‟s. The central unit receives all
actual information of the crane. This is computed against the reference data and the crane status is
continuously monitored.
Description of the Housing: The central unit DS150 is a rugged, waterproof sheet steel housing. It is
mounted on the left side of the turn table weldment or on the counterweight. The cables are led into
the central unit via strain reliefs and connected with fast-ons. An override switch is mounted on the
housing, which overrides the LMI function. The system is protected by a 2-AMP fuse, which is
mounted on the lower right side. The output signal is protected by a 10-AMP fuse, mounted on the
lower mid.
Description of the Boards: Inside the central unit (CU) there is a main board. The main board and
CPU is the heart of the system, and it contains the processor and the system and data EPROMs. The
system EPROM holds the operating system and data EPROM hold the crane and calibration
information. The wires from the various components are connected with fast-ons to the main board.
The main board holds the electronics necessary to receive, evaluate, and direct the continuous flow of
data from the sensors to the processor.
Main board components:
Power supply: Provides all the necessary voltages for the transducers and the electronics on the main
board.
Analog input part: Receives and prepares all the signals from the transducers for further processing.
Relays, an overload and anti-two-block relay: Controls the Bosch relay for lever lockout.
Incoming Signals: Signals from the transducers are connected to the main board. The signals vary
depending on the sensor:
Angle transducer signal is between -1.875V and -3.125V.
Length transducer signal is between -0.500V and -4.500V.
Pressure transducer signals are between 0.00V and -1.00V. (measured between the negative and
positive outputs)
Anti-two-block switch resistance is 4.7Kohms.
Digital inputs for the duty selection switches are on or off.
Outgoing Signal: The outgoing signal of the main board is the signal for lever lockout of connection
#48. In normal working conditions there are 12 volts at this connection. If there is an overload or anti-
two-block condition the signal becomes 0 volts. Furthermore, all voltages for the transducers are going
out through the main board.

Mechanical Description Of The System
3
Basic System Component Layout

Mechanical Description Of The System
4
Basic Adjustment Of The Components
Length: Ensure that the length cable tension is correct with fully retracted boom and no tension on the
cable reel. Turn the cable drum 5 to 8 turns counter clockwise. Then remove cover from cable reel
and adjust the potentiometer counter clockwise to end stop. See Procedure 3.
Angle: Set the boom between 0 and 5 degrees and set the inclinometer to the boom angle. Adjust
the angle sensor to the same angle as the boom. Check the angle at 20 degrees, 45 degrees, and 70
degrees. Angle display should be less than .5 degrees of the value of the inclinometer. See
Procedure 3.
Pressure Channel: Rest the boom and disconnect hydraulic hoses from the pressure transducers.
Measure and record the zero-points of both pressure transducers on the main board. Adjust P1 and
P2 on the main board to 500mV at test points MP11 and MP12. Connect hydraulic hoses back to the
pressure transducers. See Procedure 2.
Duty Selection Switches Digital Inputs): Check the duty selection switches for correct operation.
Check the voltage on digital input connections.
Check the function of the hoist limit switch (anti-two-block)
Check function of lever lockout.
Measure and record the power supply voltages. See Addendum A.

Definitions 5
3
DEFINITIONS
BOOM LENGTH: The straight line through the centerline of boom pivot pin to the centerline of the
boom point load hoist sheave pin, measured along the longitudinal axis of the boom. (Indicator 2%)
BOOM ANGLE: The angle between the longitudinal centerline of the boom base section and the
horizontal plane. (Indicator 65° to 90° boom angle + 0°/2°; less than 65° boom angle + 0°/-3°)
RADIUS OF LOAD The horizontal distance from a vertical projection of the crane‟s axis of rotation to
the supporting surface, before loading, to the center of the vertical hoist line or tackle with rated load
applied. (Indicator 100% to 110%)
RATED LOAD The load value shown on the applicable load-rating chart of the crane for the particular
crane configuration, boom length, boom angle, or functions or these variables. For radii outside those
shown on the load-rating chart, the rated load is to be considered as zero.
ACTUAL LOAD The weight of the load being lifted and all additional equipment such as blocks,
slings, sensors, etc. Also referred to as working load. (Indicator 100% to 110%)
CRANE CONFIGURATION The physical arrangement of the crane which is prepared for a particular
operation in conformance with the manufacturer‟s operating instructions and load rating chart.
TWO-BLOCKING Contact of the lower load block or hook with the upper load block, boom point, or
boom point machinery.
ANALOG: Electrical signals that vary in proportion to the quantities they represent. (Boom length,
angle, and pressure transducer)
DIGITAL: Electrical signals of an on-and-off state (two different voltage levels) to represent some
quantity of operation. (A2B, area definition switch)

Drawings
6
4
DRAWINGS
SYSTEM Electrical Diagram

Drawings
7
Central Unit 024-150-060-002 Spare Parts List

Drawings
8
PART NO. 024-150-060-002 CENTRAL UNIT, DS150/0002 STANDARD PARTS LIST
NO. PART NO. QTY DESCRIPTION
01 024-150-300-001 1 BOARD, MAIN, DS150, CU, 12V
02
024-350-100-135 1 CENTRAL UNIT ACCY, SCREW SET, DS150
03
024-000-100-041 1 CENTRAL UNIT ACCY, GROUNDING KIT FOR COVER
04
024-350-100-139 1 CENTRAL UNIT ACCY, WALL MOUNT SET, DS150/350
05 024-150-100-001 1 HOUSING, CENTRAL UNIT, DS150
06
024-350-100-661 1 KEYSWITCH, CENTRAL UNIT, NEW STATIONARY
07
031-300-101-131 1 KEY ASSY, ONE OLD STYLE KEY/ONE NEW STYLE KEY
08
024-350-110-067 2 STRAIN RELIEF ASSY, PG 11, GRN W/NUT+WASHER
09
000-314-022-006 2 FUSE HOLDER, CENTRAL UNIT,MAIN BOARD
10 000-313-062-001 1 FUSE, 2 AMP 1/4 x 1 1/4, 250V FAST-ACTING
11 000-313-062-002 1 FUSE, 10 AMP 1/4 x 1 1/4, 250V FAST-ACTING
12 000-304-140-122 1 RELAY, SHUT-OFF 12 V (BOSCH)
13
024-350-110-066 1 CENTRAL UNIT ACCY, GASKET, FOR C.U. COVER
14
021-441-161-213 1 STRAIN RELIEF, PG 13.5,12-15mm GRY/WHT INSERT
15
050-350-110-116 1 STRAIN RELIEF ASSY, PG 13.5 RED, W/NUT+WASHER
16
000-214-340-011 4 STRAIN RELIEF ACCY, PG11 HOLE PLUG
17 000-214-210-011 4 NUT, PG11
18 000-214-340-013 1 STRAIN RELIEF ACCY, PG13.5 HOLE PLUG
19 000-214-210-013 1 NUT, PG13.5
20 000-214-340-016 1 STRAIN RELIEF ACCY, PG16 HOLE PLUG
21 000-214-210-016 1 NUT, PG16
22
024-150-100-002 1 CENTRAL UNIT ACCY, BASEPLATE, DS150
23
031-300-100-078 1 CHEMICAL, MOISTURE PACK
24 024-150-110-002 1 COVER, CENTRAL UNIT, DS150

Drawings
9
4.4
Console 050-150-060-008 Spare Parts List
To change DS150/0006 (12V) to DS150/0036 (24V) a jumer wire must be soldered on main board, J3
added, and the ligth bulbs changed. When ordering spare part please specify 12 or 24 volt machine.

Drawings
10
4.4
Console 050-150-060-008 Spare Parts List
NO. PART NO. QTY DESCRIPTION
01 050-150-300-003 1 CONSOLE BOARD W/ROTARY SWITCH - DS150
02 050-350-110-292 1 LCD DISPLAY DS150
03
050-000-100-060 1 CONSOLE HOUSING W/LID
04
050-350-110-116 1 STRAIN RELIEF/LONG RED
05 000-305-045-141 2 LUMINOUS HOUSING
06
003-051-405-423 5 LUMINOUS PUSH BUTTON HOUSING
07 000-311-023-114 7 LIGHT BULB 12V
07
000-311-023-128 7 LAMP, SPARE LIGHT BULB 28V
08 050-350-110-277 1 CAP A2B (RED)
09 050-350-110-278 1 CAP PREWARNING (YELLOW)
10 050-350-110-279 1 CAP STOP/ALARM OFF (RED)
11 050-350-110-280 1 CAP LOAD (ORANGE)
12 050-350-110-281 1 CAP INFO (ORANGE)
13 050-350-110-282 1 CAP ANGLE (ORANGE)
14 050-350-110-283 1 CAP ENTER (GREEN)
15 003-051-903-364 1 KEY SWITCH
16 050-350-110-139 1 CONSOLE OVERRIDE KEY DS150/350
17 050-000-110-007 1 ALARM BUZZER
18 050-150-100-006 1 FRONT PANEL
19 000-209-022-095 850mm GASKET FOR FRONT PANEL
20 050-000-100-092 1 CONSOLE LID DS150/0006
21 050-150-110-005 1 GASKET FOR LID
22 050-000-110-014 3 LATCH ASSEMBLY
23 050-000-700-301 2 KNOB FOR ROTARY SWITCH
23 024-350-100-312 1 LABYRINTH MOISTURE ELEMENT

Drawings
11
4.4
Console 050-150-060-008 Spare Parts List
To change DS150/0008 (12V) to DS150/0012 (24V) a jumer wire must be soldered on main board, J3
added, and the ligth bulbs changed. When ordering spare part please specify 12 or 24 volt machine.

Drawings
12
4.4
Console 050-150-060-008 Spare Parts List
NO. PART NO. QTY DESCRIPTION
01
050-150-300-003 1 BOARD, MAIN, DS150 CONSOLE 12V FOR 4x20mm DISPLAY
02
050-350-110-292 1 INDICATOR, DISPLAY, LCD, DS150 CONSOLE
03
050-000-100-048 1 HOUSING, DS150 CONSOLE, COMPLETE
04
050-150-110-001 1 BRACKET, CONSOLE, DS150 COMPLETE
05 050-350-110-183 2 KNOB, MOUNTING KNOB
06
050-350-110-116 1 STRAIN RELIEF ASSY, PG 13.5 RED/WHITE W/NUT+WASHER
07
000-312-043-141 2 LAMP ACCY, PILOT,BASIC HOUSING
08
003-051-403-423 5 SWITCH, PUSHBUTTON w/o LENS & BULB
09
000-311-023-114 7 LAMP, SPARE LIGHT BULB 12V
09 000-311-023-128 7 LAMP, SPARE LIGHT BULB 28V
10
050-350-110-074 1 SWITCH ACCY, LENS CAP, RED (A2B)
11
050-350-110-073 1 SWITCH ACCY, LENS CAP, YELLOW (PREWARNING)
12
050-350-110-075 1 SWITCH ACCY, LENS CAP, RED (STOP/BUZZER OFF)
13
050-350-110-076 1 SWITCH ACCY, LENS CAP, ORANGE (LOAD)
14
050-350-110-077 1 SWITCH ACCY, LENS CAP, ORANGE (INFO)
15
050-350-110-078 1 SWITCH ACCY, LENS CAP, ORANGE (ANGLE)
16
050-350-110-079 1 SWITCH ACCY, LENS CAP, GREEN (ENTER)
17
003-051-903-364 1 KEYSWITCH W/KEYS, CONSOLE DS150
18
050-350-100-001 1 KEY, CONSOLE KEYSWITCH
19
050-150-110-002 1 SWITCH ACCY, KNOB WITH SCALE DISK 1-63
20
050-350-110-140 1 SWITCH ACCY, KNOB WITH SCALE DISK 1-16
21 050-350-110-049 1 ALARM, BUZZER, DS150 & DS350C CONSOLE
22 050-150-100-008 1 FACEPLATE, DS150 CONSOLE, LARGE DISPLAY (STD.)
23 050-000-050-309 1 GASKET, HOUSING
24 002-053-703-101 1 SCREW, 3mm x 10mm, PANHEAD, PHILLIPS FACEPLATE

Drawings
13
4.5
Cable Reel 068-208-060-013 LWG208 Spare Parts List
Other manuals for DS 150
1
Table of contents
Other PAT Measuring Instrument manuals
Popular Measuring Instrument manuals by other brands

Liquid Controls
Liquid Controls CENTRILOGiQ LCR.iQ Setup and operation manual

Stahl
Stahl 9182 Series operating instructions

BERTHOLD TECHNOLOGIES
BERTHOLD TECHNOLOGIES LB 567 user guide

Thermo Scientific
Thermo Scientific iCAP 6000 Series Maintenance manual

Ranger
Ranger PM7000 Start guide

Toppan Forms
Toppan Forms ONTRASYS TAG instruction manual