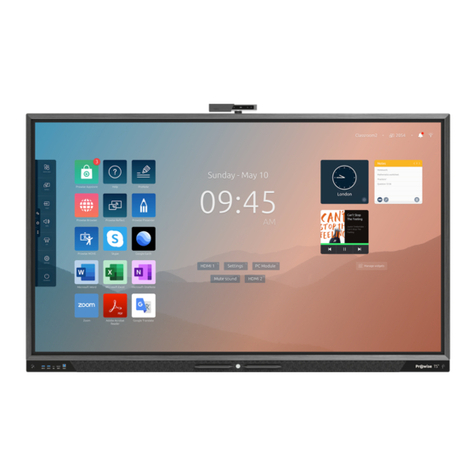
TRACEboard TD-xxL User manual

Beijing TRACEBoard Technology Co., Ltd.
TD-Series
TRACEBoard
Interactive Touch Monitor
User Manual

Interactive Touch Monitor-TD Series Interaction in Life
1
Product Figure
Certificate
Models:
TD-xxL (interactive touch monitor)
TD-xxLE(interactive touch monitor with embedded computer)
xx=32/42/55/65/70

Interactive Touch Monitor-TD Series Interaction in Life
2
Content
Precautions.................................................................................................................................................... 3
Installation...................................................................................................................................................... 5
Hardware Instruction.................................................................................................................................... 6
Appearance diagram & Port instruction ............................................................................................ 6
Romote Control..................................................................................................................................... 8
Basic Operation............................................................................................................................................ 9
Connection and Set-up................................................................................................................................ 9
Backlight automatic shut down........................................................................................................... 9
Resource automatic switch............................................................................................................... 10
Installation and Remove of PC module........................................................................................... 10
Connect external PC to interactive touch monitor......................................................................... 10
Connect video & audio device.......................................................................................................... 11
Software....................................................................................................................................................... 14
Operation software installation......................................................................................................... 14
Software Functions............................................................................................................................. 18
Specification of Touch Screen.................................................................................................................. 29
Interactive Touch Monitor Parameter....................................................................................................... 29
Simple Troubleshooting............................................................................................................................. 30

Interactive Touch Monitor-TD Series Interaction in Life
3
Precautions
Please read the following precautions before using the product for your personal safety.Any improper
use may cause personal injury, property loss and product damage.
Symbol description
Symbols listed below are the ones used in this manual or on the device. Please make a full sense of
the symbols before reading the content.
It shows heavy injury or even death would be probably caused by
incorrect operation.
It shows injury or property loss would be probably caused by
incorrect operation.
It shows there is high voltage inside. Only professional staff is
allowed to maintain and replace the parts, to avoid any fire or
electronic shock accidents.
Safe use is limited under 2000m height
Safe use is limited the non-tropical climate conditions
To avoid any electronic shock accidents, please do not open the back cover.
There is no parts inside which can be fixed by users. Please turn to professional
staff if any problem happened.
Please do not insert any metal parts into the hole of machine, to avoid any
electronic shock accidents.
Please do not install this machine on any instable position, like shaking shelf,
tilted floor or insecure wall. Please turn off the power and contact the local dealer
if the machine is dropped, striked or damaged.
Please do not put this machine in rain or any places near by water, like bathtub,
basin or wet floor. If got wet accidently, please turn off the power and plug out
power cable and contact your local dealer.
The holes on back cover is designed for ventilation and heat output. Please do
not block the holes or use this machine in any places without necessary
ventilation.
Please use good condition grounding plug. Otherwise electronic shock or
damage would be caused.
The user should plug out the power cable and TV tuner to avoid any damage in
bad weather of thunderstorm.
Please use clean and soft cloth to for cleaning and maintenance. Harsh cleaning
is not allowed.
Please do not use hard thing to engrave, impact or fractionize on monitor.

Interactive Touch Monitor-TD Series Interaction in Life
4
Please do not place anything on touch screen. Please keep it clean.
Please do not drop the remote control.
To keep LED screen long life and normal work, do not leave monitor keep light
on without operation over 2 hours. To avoid keeping long time, please reduce the
brightness and contrast when the screen display is on.
For a long time with a 4:3 display format, the sides and edges of the screen will
leave a different mark, so please do not use this mode for a long time.
Please do not touch the screen during the starting time around 30 seconds,
as the feature of automatic setting when plug power cable each time.
Keep safe installation space
Keep proper gap between touch monitor and other objects as wall, to ensure good ventilation.
Otherwise, there is breakdown to the product caused by internal high temperature.
While installing wall-mount, please use the one attached in the packing.
Outer appearance varies among different models.
Remove the touch monitor
While moving the touch monitor, there must be more than two people to move it safely. Hold the product
frame vertically to keep it stable, shown as in the figure.

Interactive Touch Monitor-TD Series Interaction in Life
5
Installation
Machine drawing
Wall mount installation
Machine installation

Interactive Touch Monitor-TD Series Interaction in Life
6
Hardware Instruction
Appearance diagram & Port instruction
front bottom
A-1: Remote control sensor
A-2: Indicator of TV power
A-3: Indicator of PC power
A-4: Distance sensor-sender
A-5: Distance sensor-receiver
B: PC Port(only for model with build-in PC)
B-1: 19V input, for testing only
B-2:USB 2.0 *4
B-3:VGA output
B-4:Ethernet
B-5:Audio output
C-1: HDMI input
C-2:USB-Host(only for build-in PC)
C-3: USB-Touch(to connect touch screen)
C-4:Volume +-
C-5:Channel +-
C-6:TV function menu

Interactive Touch Monitor-TD Series Interaction in Life
7
C-7: Signal Source
C-8: LED backlight on/off button
C-9:Power switch
D-1:Power switch
E-1: AC power in
E-2:USB(multi-media)
E-3: HDMI iuput*2
E-4: VGA input
E-5: Audio input
E-6:Coaxial audio output
E-7: Audio output(earphone)
E-8:AV output
F-1: Component video input
F-2: Component audio unput
F-3:AV input
F-4: AV audio input
F-5: TV Antenna port
F-6: USB(multi-media)

Interactive Touch Monitor-TD Series Interaction in Life
8
Romote Control
Remote control range
Remote control can work well in the area of 8 meters to remote control sensor and 30 degree between
left and right side.

Interactive Touch Monitor-TD Series Interaction in Life
9
Basic Operation
Please follow instructions as below when you use interactive touch monitor.
Power on
After plug with power, indicator in front panel is red. To press POWER button, red indicator with flash for
5 seconds, and then TV and PC will be power-on. Indicator for TV is blue, PC is green. To press button
sleep or power button on remote control to power on TV only.
Power off
TV and PC power-off can operate by one button as following,
Initial State
POWER button(front panel) function
PC power off/TV power on
PC power on
PC/TV power on
PC power off, TV will power off after
PC/TV power off
PC power off, TV power on
Switch to the signal source of the PC or open the TV first, then turn it off, because there maybe
some operating procedures or documents on the PC that needs to be saved.
In case of accident that need to force off the PC, press the POWER button continuously over 3
seconds, then the PC will be forced off.
Backlight shut down
To press sleep button to shut down backlight.TV indicator will turn to red. Meanwhile, other parts of
machine remains working. To press sleep button, backlight is on, indicator TV indicator turns to blue
again.
Select signal source
Through button
①press SOURCE on the front panel, to pop up signal source list
②select signal source from top to bottom with P+/ P-.
③press SOURCE once again to confirm signal source.
Through remote control
①press SOURCE on remote control, to pop up signal source list.
②select signal source with ▲▼ in remote control.
③press ENTER in remote control to confirm signal source.
Connection and Set-up
Backlight automatic shut down
There is distance sensor in front panel, backlight will be shut down
automatically when there is shelter in the 10cm distance from the screen and
lasts 20-25 seconds.
This function is designed for education, especially for cabinet and compound
solution with black board or whiteboard, can save power and keep machine
longer life.

Interactive Touch Monitor-TD Series Interaction in Life
10
Resource automatic switch
For model with build-in PC, HDMI on build-in PC and preposed HDMI are using HDMI 1. HDMI1 will be
automatically switch from build-in PC to preposed HDMI when connect external PC.
If need resource from build-in PC, to disconnect external PC.
Installation and Remove of PC module
PC in touch monitor takes modular design, easy to install, expand and maintain, also compatible with
OPS module.
PC module is on the back side of machine, while taking out the module, spin out the screws, clench the
handle and pull it out slowly.
Normally, PC module does not need taking out; if need, shut down the touch monitor and power it
down before taking it out.
Installation method of OPS is the same with normal PC, but cannot interchange with normal ones.
Connect external PC to interactive touch monitor
Connect with preposed port
1. Connect external PC to preposed HDMI port by HDMI cable
2. Connect external PC to preposed USB-Touch port by USB cable
3. After correct connection , open interactive touch monitor and PC, choose resource.
Preposed HIMI port is HDMI1 in resource list.
Connect with ports on back panel
1. connect external PC to interactive touch monitor via back port with HDMI cable;

Interactive Touch Monitor-TD Series Interaction in Life
11
also can connect by VGAcable and audio cable. But only support one connection
way.
2. Connect external to USB-Touch port at front panel by USB cable.
3. Open interactive touch monitor and PC, choose right resource by remote control or button.
set resolution as 1920*1080, when connect external PC
some cables may need provide by users
Connect video & audio device
AV IN
1. Connect AV output supported equipment to interactive touch monitor by video & audio cable,
yellow is video, red is right channel, white is left channel.
2. After correct connection, open interactive touch monitor and video & audio device.
3. Choose AV in resource list
YPbPr(Component)
1. Connect YPbPr supported device by YPbPr cable, please note make cables correspond to ports with
same color.
2. After correct connection, open interactive touch monitor and device.
3. Choose component in resource list.

Interactive Touch Monitor-TD Series Interaction in Life
12
HDMI
1. Connect video & audio device by HDMI cable
2. After correct connection, open interactive touch monitor and video & audio device.
3. Choose HDMI in resource list.
video & audio device can connect to preposed HDMI port, the resource is HDMI1, and HDMI resource
will be switch to external device automatically.
Audio output
1. Connect earphone and other audio device to audio output(earphone)port.
2. After correct connection, open interactive touch monitor and external audio device.
Coaxial output
1. Connect coaxial input supported device to coaxial output port by coaxial cable.
2. After correct connection, open interactive touch monitor and video & audio device.

Interactive Touch Monitor-TD Series Interaction in Life
13
AV output
1. Connect AV input supported device to AV output port byAV cable.
2. After correct connection, open interactive touch monitor and video & audio device.
Note: AV can ouput only under AV IN/TV channel
Need 3.5mm AV tieline when AV output from TV
Connect TV antenna
1. Connect TV antenna or cable TV to RF port of TV
2. After correct connection, power on interactive touch monitor
3. Choose TV in resource list
4. Enter Menu to source channels
Interactive touch monitor video output
Emedded PC can support two screens display at the same time, can connect projector or flat panel to

Interactive Touch Monitor-TD Series Interaction in Life
14
VGA and HDMI output port on embedded PC.
Software
Operation software installation
Operating System Requirement: Microsoft Windows 7
Hardware Requirements: Minimum: CPU P4 2.4/Memory: 512M/Hard disk: 80G/Graphic card memory:
128M/USD interface
Software installation Steps
1. Power on the computer. After booting the operating system, insert TRACEBoard setup disc
contained in product package into your CD-ROM driver.
2. Double click the CD-ROM icon on your computer to open CD-ROM folder, and then double-click the
setup file (TRACEBoard-ITM) to run it manually, see fig 2.1.1
Fig 2.1.1

Interactive Touch Monitor-TD Series Interaction in Life
15
3. Installation window show is preparing to install, just wait a while, see fig2.1.2
Fig 2.1.2
4. It is ready to install, and click next to continue, see fig2.1.3
Fig 2.1.3
5.Click install to continue, see fig 2.1.4

Interactive Touch Monitor-TD Series Interaction in Life
16
Fig 2.1.4
6. Waiting a while for complete installation, see processing fig2.1.5
Fig 2.1.5
7. During installation, TRACEdriver installation pop up, click next to continue, see fig 2.1.6

Interactive Touch Monitor-TD Series Interaction in Life
17
Fig 2.1.6
8. Installation finish, click finish to quit TRACEdriver installation program, see fig 2.1.7
Fig 2.1.7
9. Installation finish, click finish to quit whole installation program, see fig 2.1.8

Interactive Touch Monitor-TD Series Interaction in Life
18
Software Functions
TRACE driver
1. Installation
After TRACEdriver installation, there is icon on desktop.
Double click TRACEdriver, icon will be shown on Windows task bar.
If icon is in grey, it means not connected, please check the driver and connection.
Until the icon is in blue color , it means good connection, touch monitor can use.
2. Functions instruction
a. software running
Normally the software will automatically running when
you start computer, and you can see the icon on the
Windows task bar. Also you can run it on program
menu.
b. main menu
Under well connection, right click the program icon
will pop-up the device menu as left picture.
Functions as follow:
Language: you can choose the display language;
Calibrate: for calibrate the screen;
Option: you can set screen parameter here, control
and check the device;
About: display software info;
Exit: Exit the software

Interactive Touch Monitor-TD Series Interaction in Life
19
c. Calibrate Option
Don’t choose “Custom” and “Senior” option, it will be
the normal mode.
“TouchPanel” used for monitor display,
“TouchBoard” use to Project display, it support
non-rectangle display.
Calibrate Position 1 means the calibrate marks
near the corner, 2 means marks near center,
normally we suggest choose “1”.
d. Calibrate interface
Click with the touch pen or finger on the screen
followed by the shaped icon in the center of the
screen to finish the calibration. After the positioning
on the screen, check whether the coincidence of the
cursor and touch pen, restart the “calibration” if
deviated from. (During the positioning process, the
touch pen touching the surface with a certain vertical
and make written overlap with the center location of
shaped icon)
e. Option
Info:
Display the screen info, for multi screen, you can
choose the No to display the corresponding info.
In the “Feature” frame, “√”means support,“×”means
don’t support.
f. Configuration
Some parameter used to set smooth coefficients and
right click function.
Users can be based on individual needs to select the
service configuration in the device menu
We suggest use the default value.
*
This manual suits for next models
1
Table of contents
Popular Touchscreen manuals by other brands
Universal Remote Control
Universal Remote Control TOTAL CONTROL TKP-7500 owner's manual
Ferrari Costruzioni Meccaniche
Ferrari Costruzioni Meccaniche FPC user manual
Eaton
Eaton HMi Series Instruction leaflet
GPEG
GPEG AOD 320 manual
Spring Air Systems
Spring Air Systems Truflow-TC Installation and operation manual
Touch Revolution
Touch Revolution K17A Series user guide
