Trail Tech ENDURANCE II User manual
2000-MANUAL
Tech Support: (844) 378-8143
BUTTON 3
Next Setting
BUTTON 1
Increment Up
BUTTON 2
Increment Down
1. BUTTONS OVERVIEW:
2. SETTINGS MENU:
3. QUICK RESETS:
To enter Endurance II set up menu, press and hold buttons 1, 2, and 3 for three seconds.
Make sure to press and hold all 3 buttons at the same time!
Screen 1: DST
• Press and hold buttons 1 & 2 for
three seconds to reset DST.
•Press and hold button 3 to enter
DST adjustment. Use buttons 1 &
2 to increment and decrement your
DST. Press button 3 to return to
main screen.
Screen 2: DST2
• Press and hold buttons 1 & 2 for
three seconds to reset DST2, Ride
Time, & AVG Speed.
•Press and hold button 3 to enter
DST2 adjustment. Use buttons 1 &
2 to increment and decrement your
DST2. Press button 3 to return to
main screen.
Screen 3: ODO
• Press and hold buttons 1 & 2 to
reset Max Speed.
• To view time remaining until
service maintenance interval icon is
activated press and hold Button 3
for three seconds.
•When the maintenance icon is
displayed, hold button 3 for three
seconds to enter maintenance
interval screen (to reset, hold
button 1 & 2 for three seconds.)
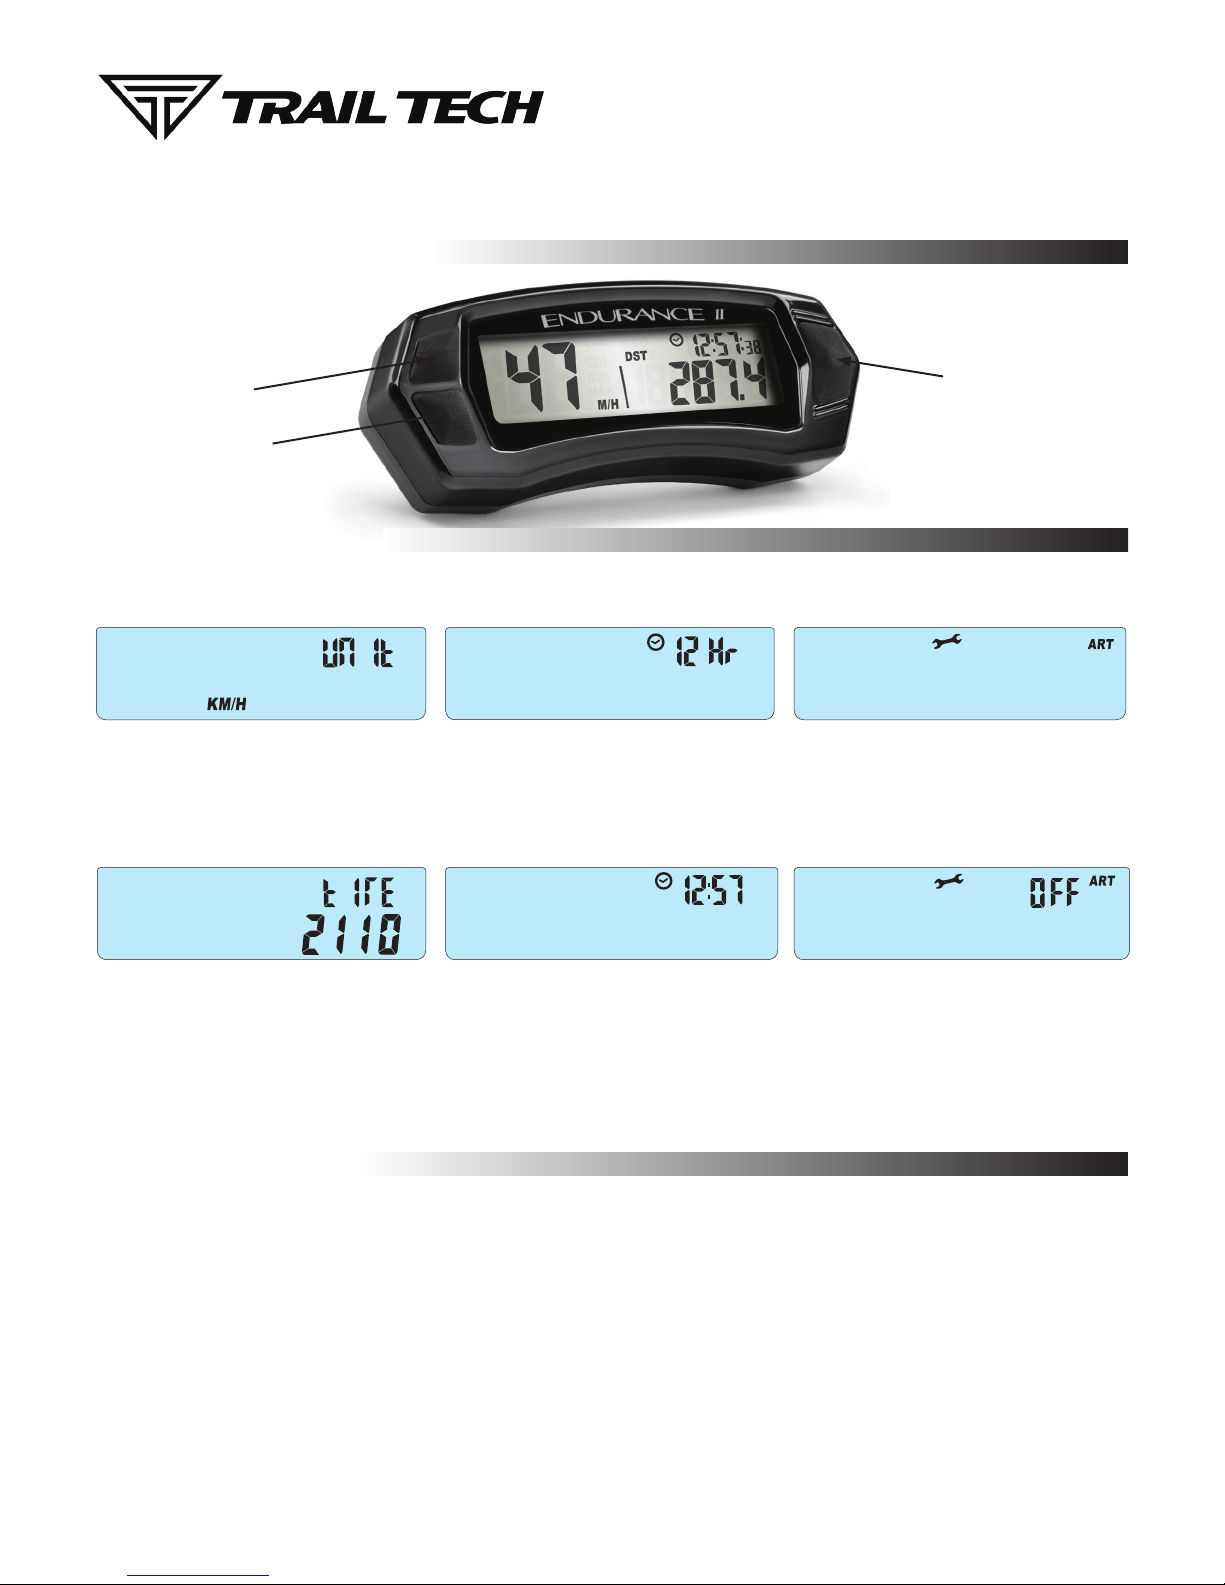
ENDURANCE II
QUICK-START GUIDE
Set Distance:
Select unit setting using button 1 or
2. (KM/H or M/H)
Set Clock Format:
Select desired clock format using
button 1 or 2. (12HR or 24HR)
Reminder Method:
Select maintenance method.
ODO = Mileage Odometer
ART = Accumulated Ride Time
Reminder Interval:
Set interval time or mileage
duration. Note: Represents either
accumulated hours or mileage until
maintenance, based on previous
menu selection (ART or ODO.)
Select Maintenance
Select MaintenanceSet Time Of Day:
Set your clock to desired time of day
using button 1 or 2.
Set Tire Size:
Choose your tire size using button 1
or 2. Note: To determine proper tire
size see: “Wheel Sensor” installation
instructions sheet.

POWER CONNECTION:
POWER NOTES:
Wired to Vehicle Battery:
• Connect the power wire to the vehicle 12V battery and to Endurance II.
• A 1A fuse (not provided) should be used between the power cable and
positve battery terminal when connecting directly to a battery.
• Use zip-ties to secure the cable to the bike as it is routed to Endurance II.
• Connect the red wire to the positive(+) battery terminal, and the black wire
to the negative(-) battery terminal. Endurance II is polarity independent, so
it cannot be installed backwards.
System Tap:
Tap into the electrical system at the lights, ignition, or CDI. When tapping
into the electrical system, connect to a fuse protected circuit. Make sure
power is not interrupted by the key switch when making the connection.
MX Bikes:
Motocross bikes do not have 12 volt power. For connection to an MX bike,
connect power leads to ignition power leads from stator. Use caution, as
this is a high voltage option.
Power Wire
SENSOR
POWER
2000-MANUAL
Tech Support: (844) 378-8143
1. Wakes on external power from bike.
2. Wakes on wheel movement.
3. Wakes on button press.
4. On external power backlight shuts off after 90 seconds of inactivity.
5. After 180 seconds of inactivity only clock will be displayed.
Endurance II will operate in the range of 9.0-55VDC/9.0-400VAC,
but will not draw enough power to drain a vehicle battery.
Other Trail Tech Motorcycle Accessories manuals


