Installation and operating manual - TUM5302
Cladding Penetration & Entry for Hand Rails
Mounting and installation
Incorrect mounting and installation may lead to risk for falling objects, risk for electric shock or fire and risk for
equipment malfunction. In turn, this can lead to severe damage and/or injuries.
Mounting
The two products covered by this instruction are designed to be fastened by several methods:
Blind rivets, self-tapping screws or welding. Select which method should be applied, then continue the process.
Depending on which fastening method is applied, a hole should be drilled in the railing or cladding to allow the
heating cable to be safely brought from the outside to the inside. After the hole is drilled, remove any sharp edges
in the railing or cladding by means of a file or other tool. Also ensure that there are no sharp object inside that may
damage the heating cable as the installation work progresses.
To obtain a watertight entry, use a sealant between the flange and the cladding/handrail. If the product is welded
to the surface, the sealant should be applied after the surfaces have cooled down.
After the product is fastened to the surface, push or pull the heating cable through the cable entry. The selected
method will depend on the application, type of heating cable, size and shape of pipe, etc. Always use an end seal
on the end of a heating cable, installed in accordance with the instructions provided.
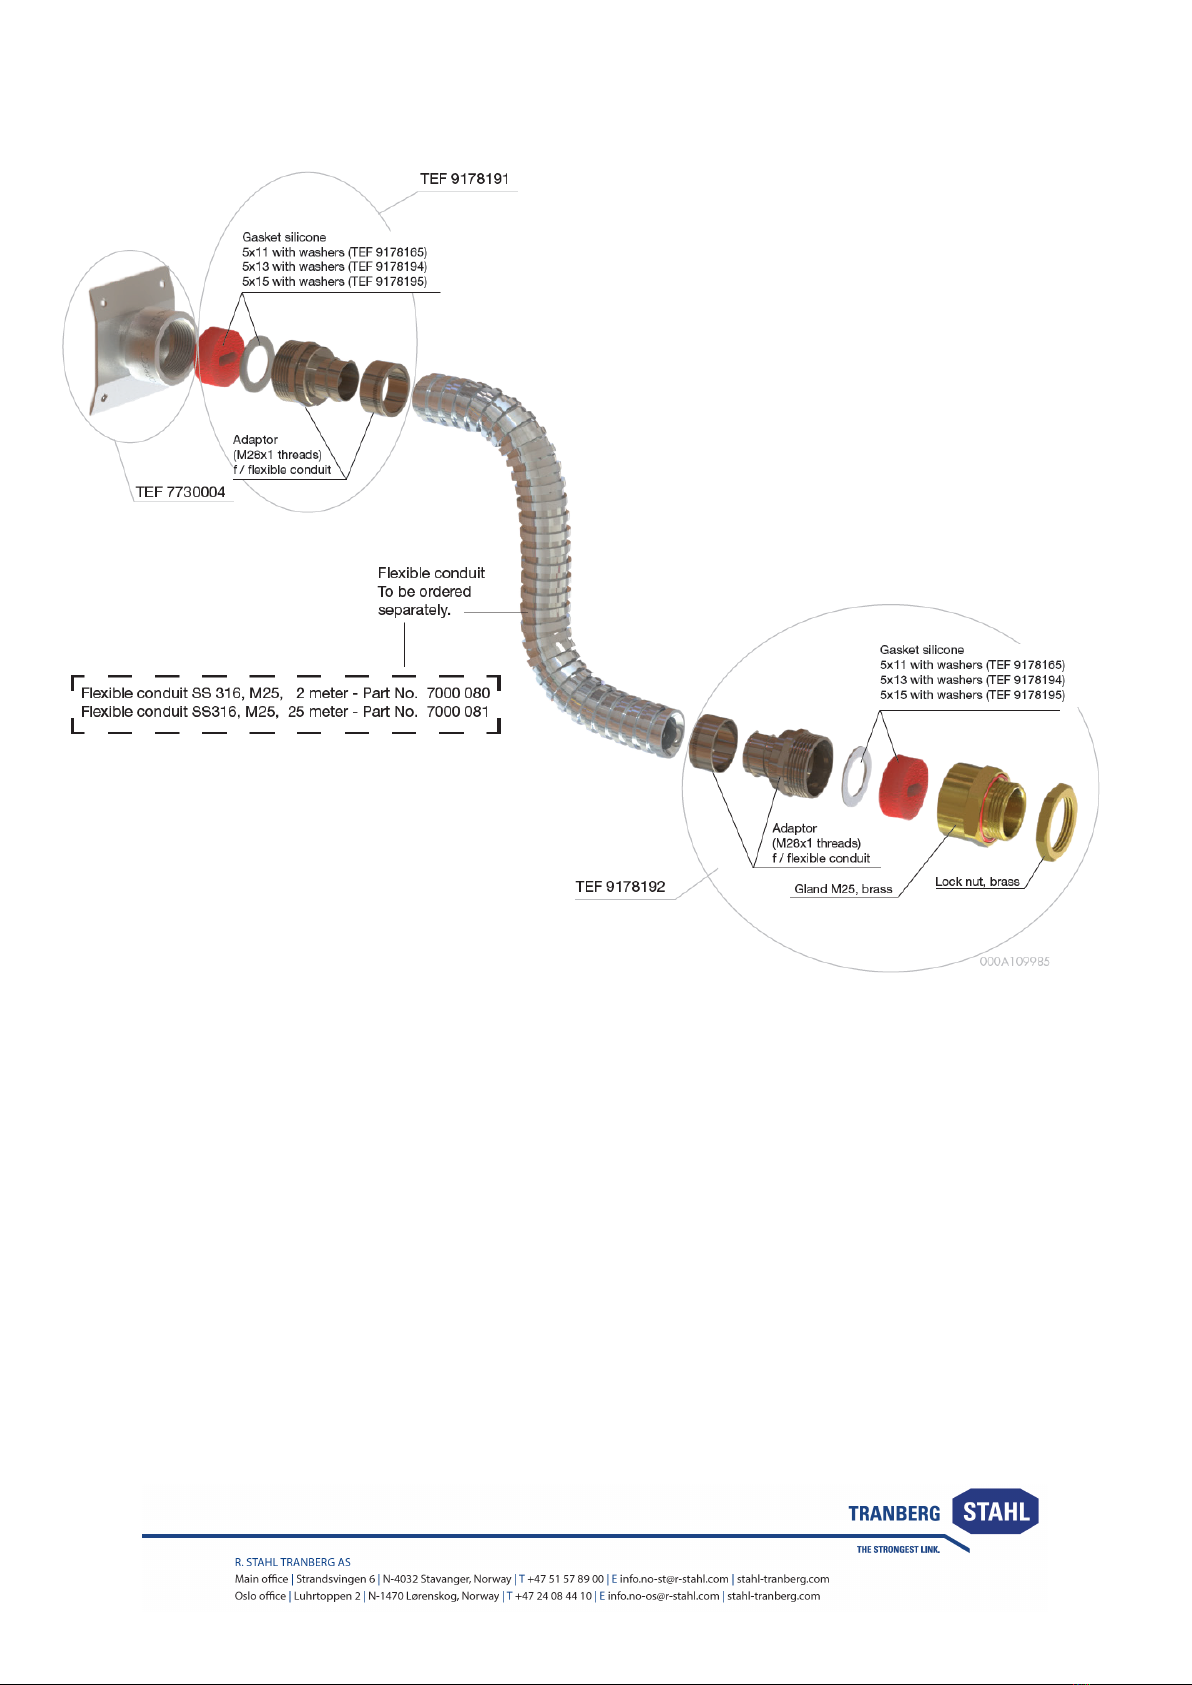
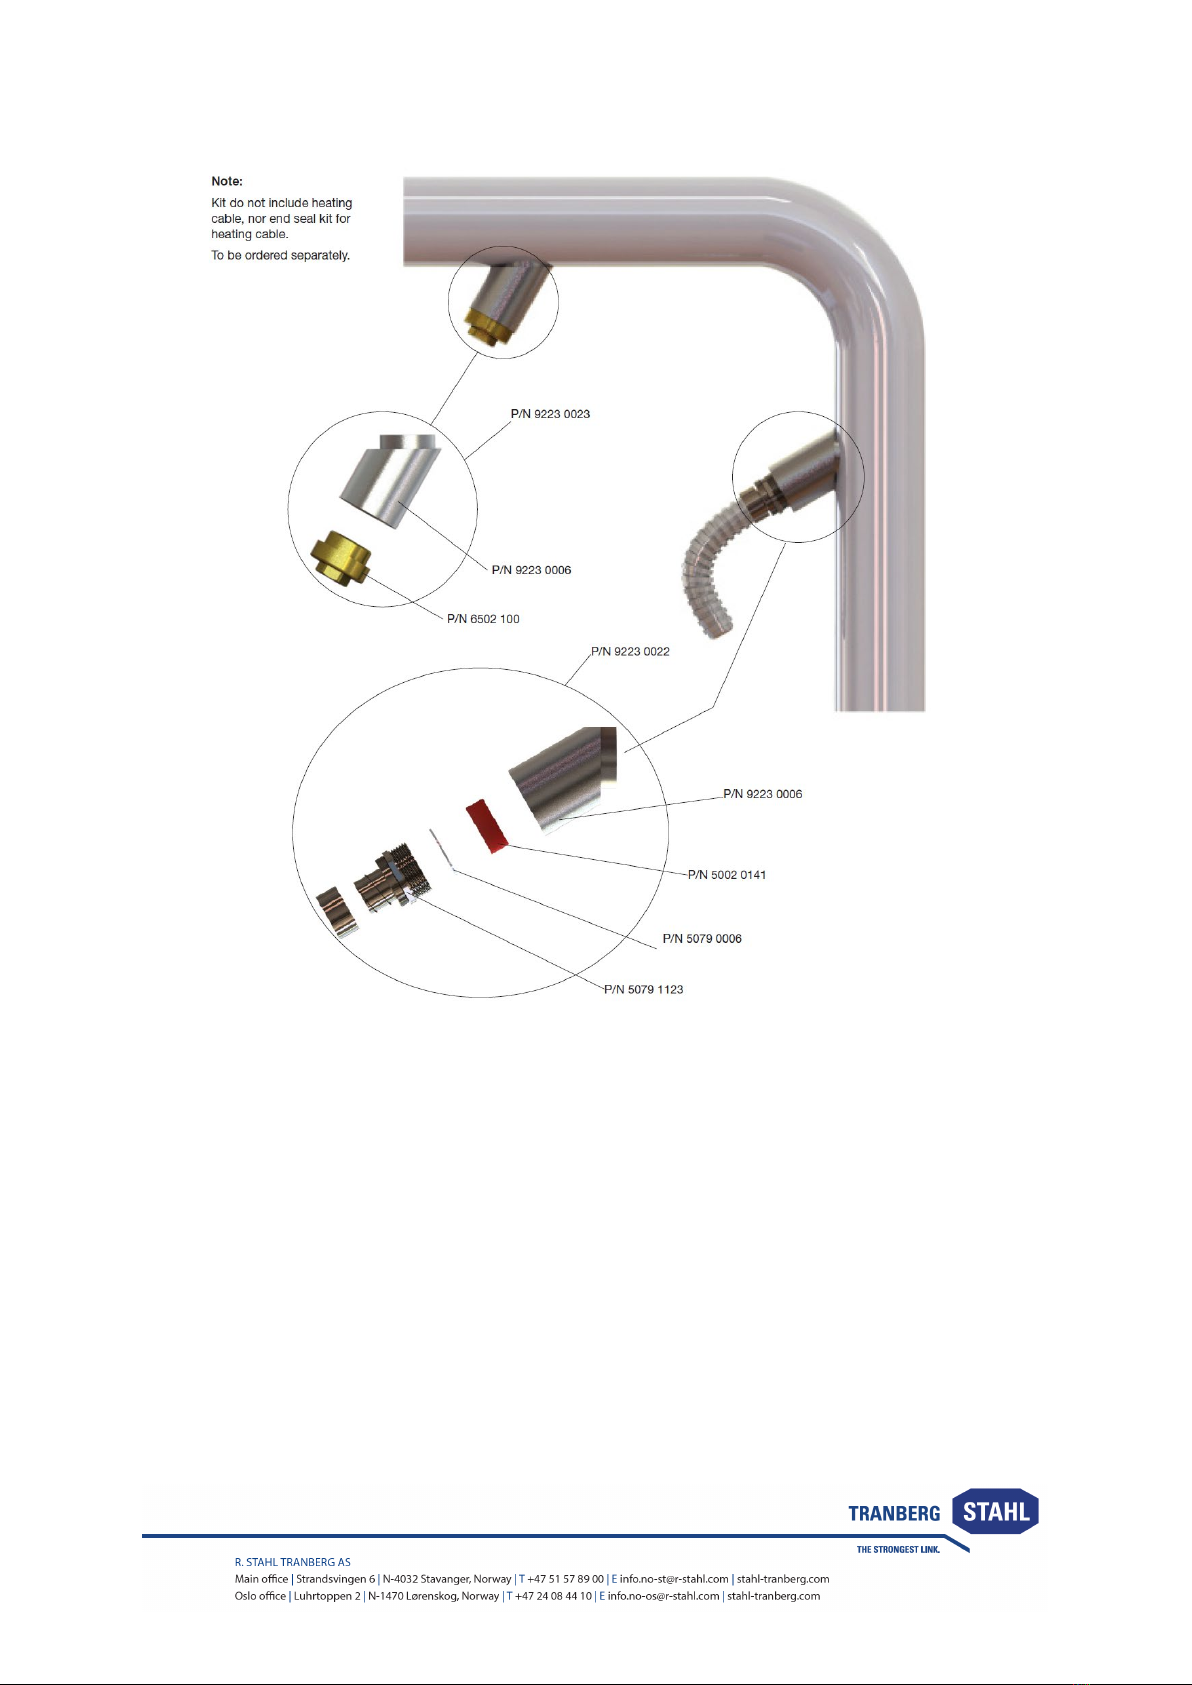
Use the corresponding grommet set to secure the heating cable to the cladding penetrator/hand rail entry. This will
secure the heating cable and also ensure a water tight entry. The flexible conduit is cut to the required length, and
secured to the adaptor now located at the cladding protector, likewise at the cable gland at the junction box. This
ensures an end-to-end protection of the heating cable.
Terminate the heating cable at the junction box, following relevant procedures for the electrical work.
The products are made of acid proof stainless steel, but may be painted as required.