manuals.online logo
Brands
  1. Home
  2. •
  3. Brands
  4. •
  5. Trane
  6. •
  7. Accessories
  8. •
  9. Trane WTS Installation and operating instructions

Trane WTS Installation and operating instructions

Installation, Operation, andInstallation, Operation, and
MaintenanceMaintenance
Wireless SensorsWireless Sensors
Models WTS, WZS, and WDSModels WTS, WZS, and WDS
April 2008April 2008
BAS-SVX04C-ENBAS-SVX04C-EN
Discover a library in your pocket
Unlimited* books, audiobooks, documents & more. All in one place.
*For more information, visit
our FAQ
.
Read Free for 30 Days
Discover a library in your pocket
Unlimited* books, audiobooks, documents & more. All in one place.
*For more information, visit
our FAQ
.
Read Free for 30 Days
Discover a library in your pocket
Unlimited* books, audiobooks, documents & more. All in one place.
*For more information, visit
our FAQ
.
Read Free for 30 Days
Discover a library in your pocket
Unlimited* books, audiobooks, documents & more. All in one place.
*For more information, visit
our FAQ
.
Read Free for 30 Days
CopyrightCopyright
© 200© 200
8 T8 T
rara
nene
AlAl
l ril ri
ghgh
ts rts r
eses
erer
veve
dd
This document and the This document and the
information in information in
it are the property of Trane and may not be usedit are the property of Trane and may not be used
or reproduced in whole oor reproduced in whole o
r in part, without tr in part, without t
he written permission of he written permission of
TT
rane. Trane. T
rane reservesrane reserves
the right to revise this publicatthe right to revise this publicat
ion at any time and to make changes to its content wition at any time and to make changes to its content wit
houthout
obligation to notify any person of such revision or change.obligation to notify any person of such revision or change.
TrademarksTrademarks
TT
rane and its logo rane and its logo
are trademarks of Trane in the United States and are trademarks of Trane in the United States and
other countries. Allother countries. All
trademarks referenced in this document are the trademarks of their respective owners.trademarks referenced in this document are the trademarks of their respective owners.
WarWar
nings, Cautions, nings, Cautions,
and Noticesand Notices
Warnings, cautions, and notices are provided in appropriate places throughout thisWarnings, cautions, and notices are provided in appropriate places throughout this
document:document:

WARNING:WARNING:
Indicates a potentiallIndicates a potentiall
y hazardous situation which, if not avoided,y hazardous situation which, if not avoided,
could result in death or serious injury.could result in death or serious injury.

CAUTION:CAUTION:
Indicates a potentially hazardous situation which, if not avoided,Indicates a potentially hazardous situation which, if not avoided,
may result in minor or moderate injury. It may also be used to alert againstmay result in minor or moderate injury. It may also be used to alert against
unsafe practices.unsafe practices.
NOTICE:NOTICE:
Indicates a situation that may result in equipment or property-damage-Indicates a situation that may result in equipment or property-damage-
only accidents.only accidents.
Discover a library in your pocket
Unlimited* books, audiobooks, documents & more. All in one place.
*For more information, visit
our FAQ
.
Read Free for 30 Days
Discover a library in your pocket
Unlimited* books, audiobooks, documents & more. All in one place.
*For more information, visit
our FAQ
.
Read Free for 30 Days
Discover a library in your pocket
Unlimited* books, audiobooks, documents & more. All in one place.
*For more information, visit
our FAQ
.
Read Free for 30 Days
ContentsContents
General InformatiGeneral Informati
on on
. . . . . . . . . . . .
. . . . . . . . . . . .
. . . . . . . . . . . .
. . . . . . . . . . . . . .
. . . . . . . . . . . .
. . . . . . . . . . . .
. . . . . . . . . . . .
. . . .. . . .
77
Product Description . . . . . . . . . . . . . . . . . . . . . . . . . . . . . . . . . . . . . . . . . . . . . . Product Description . . . . . . . . . . . . . . . . . . . . . . . . . . . . . . . . . . . . . . . . . . . . . .
77
Part Numbers . . . . . . . . . . . . . . . . . . . . . . . . . . . . . . . . . . . . . . . . . . . . . . . . . . . Part Numbers . . . . . . . . . . . . . . . . . . . . . . . . . . . . . . . . . . . . . . . . . . . . . . . . . . .
88
DimensDimens
ions ions
. . . . . . . . . . . . . . . . . . . . . . . . . . . . . . . . . . . . . . . . . . . . . . . . . . . . 9. . . . . . . . . . . . . . . . . . . . . . . . . . . . . . . . . . . . . . . . . . . . . . . . . . . . 9
Pre-Installation Pre-Installation
. . . . . . . . . . . . . . . . . . . . . . . . . . . . . . . . . . . . . . . . . . . . . . . . . . .. . . . . . . . . . . . . . . . . . . . . . . . . . . . . . . . . . . . . . . . . . . . . . . . . . .
1010
Location Considerations Location Considerations
. . . . . . . . . . . . . . . . . . . . . . . . . . . . . . . . . . . . . . . . . 10. . . . . . . . . . . . . . . . . . . . . . . . . . . . . . . . . . . . . . . . . 10
ReceivReceiv
er er
. . . . . . . . . . . . . . . . . . . . . . . . . . . . . . . . . . . . . . . . . . . . . . . . . . . .. . . . . . . . . . . . . . . . . . . . . . . . . . . . . . . . . . . . . . . . . . . . . . . . . . . .
1010
SensoSenso
r r
. . . . . . . . . . . . . . . . . . . . . . . . . . . . . . . . . . . . . . . . . . . . . . . . . . . . .. . . . . . . . . . . . . . . . . . . . . . . . . . . . . . . . . . . . . . . . . . . . . . . . . . . . .
1010
Height Requirements Height Requirements
. . . . . . . . . . . . . . . . . . . . . . . . . . . . . . . . . . . . . . . . . . . 11. . . . . . . . . . . . . . . . . . . . . . . . . . . . . . . . . . . . . . . . . . . 11
Mounting Surfaces Mounting Surfaces
. . . . . . . . . . . . . . . . . . . . . . . . . . . . . . . . . . . . . . . . . . . . . 11. . . . . . . . . . . . . . . . . . . . . . . . . . . . . . . . . . . . . . . . . . . . . 11
Address Setting Address Setting
. . . . . . . . . . . . . . . . . . . . . . . . . . . . . . . . . . . . . . . . . . . . . . . . 11. . . . . . . . . . . . . . . . . . . . . . . . . . . . . . . . . . . . . . . . . . . . . . . . 11
Installation Installation
. . . . . . . . . . . . . . . . . . . . . . . . . . . . . . . . . . . . . . . . . . . . . . . . . . . . . .. . . . . . . . . . . . . . . . . . . . . . . . . . . . . . . . . . . . . . . . . . . . . . . . . . . . . .
1313
Mounting the Receiver Back Plate Mounting the Receiver Back Plate
. . . . . . . . . . . . . . . . . . . . . . . . . . . . . . . . . 13. . . . . . . . . . . . . . . . . . . . . . . . . . . . . . . . . 13
Wiring the Receiver to the Unit Controller Wiring the Receiver to the Unit Controller
. . . . . . . . . .
. . . . . . . . . . . .
. . . . . . . . . . . .
. . . . . . . . . . . .
. . . 14. . . 14
Power Power
RequirRequir
ements . . . . . . . . . . . . . . . . . . . . . . . . . . . . . . . . . . . . . . . . . .ements . . . . . . . . . . . . . . . . . . . . . . . . . . . . . . . . . . . . . . . . . .
1414
Wiring PWiring P
rocedroced
ure ure
. . . . . . . . . . . . . . . . . . . . . . . . . . . . . . . . . . . . . . . . . . . .. . . . . . . . . . . . . . . . . . . . . . . . . . . . . . . . . . . . . . . . . . . .
1414
Replacing the Receiver Cover Replacing the Receiver Cover
. . . . . . . . . .
. . . . . . . . . . . .
. . . . . . . . . . . .
. . . . . . . . . . . .
. . . . . . . . . . . .
. . . . . . . . . . . .
. 17. 17
Applying Power to the Receiver Applying Power to the Receiver
. . . . . . . . . . . . . . . . . . . . . . . . . . . . . . . . . . . 17. . . . . . . . . . . . . . . . . . . . . . . . . . . . . . . . . . . 17
Observing the Receiver for Readiness to Associate . . . . . . . . . . . . . . . . . . . Observing the Receiver for Readiness to Associate . . . . . . . . . . . . . . . . . . .
1818
Associating the Sensor to the Receiver . . . . . . . . . . . . . . . . . . . . . . . . . . . . . Associating the Sensor to the Receiver . . . . . . . . . . . . . . . . . . . . . . . . . . . . .
1919
Testing Signal Strength and Battery Status Testing Signal Strength and Battery Status
. . . . . . . . . . . . . . . . . . . . . . . . . 20. . . . . . . . . . . . . . . . . . . . . . . . . 20
Mounting the Sensor Back Plate Mounting the Sensor Back Plate
. . . . . . . . . . . . . . . . . . . . . . . . . . . . . . . . . . 21. . . . . . . . . . . . . . . . . . . . . . . . . . . . . . . . . . 21
Configuring the Wireless Sensor (Model WDS only) Configuring the Wireless Sensor (Model WDS only)
. . . . . . . . . . . . . . . . . . 22. . . . . . . . . . . . . . . . . . 22
Configuration Procedure . . . . . . . . . . . . . . . . . . . . . . . . . . . . . . . . . . . . . . .Configuration Procedure . . . . . . . . . . . . . . . . . . . . . . . . . . . . . . . . . . . . . . .
2222
OptionOption
al Featural Featur
es es
. . . . . . . . . . . . . . . . . . . . . . . . . . . . . . . . . . . . . . . . . . . .. . . . . . . . . . . . . . . . . . . . . . . . . . . . . . . . . . . . . . . . . . . .
2626
Replacing the Sensor Cover Replacing the Sensor Cover
. . . . . . . . . . . . . . . . . . . . . . . . . . . . . . . . . . . . . . 27. . . . . . . . . . . . . . . . . . . . . . . . . . . . . . . . . . . . . . 27
Operation Operation
. . . . . . . . . . . . . . . . . . . . . . . . . . . . . . . . . . . . . . . . . . . . . . . . . . . . . . .. . . . . . . . . . . . . . . . . . . . . . . . . . . . . . . . . . . . . . . . . . . . . . . . . . . . . . .
2828
Temporary Occupancy (Timed Override) Temporary Occupancy (Timed Override)
. . . . . . . . . . . .
. . . . . . . . . . . .
. . . . . . . . . . . .
. . . . . . . . . . . .
. . . 28. . . 28
Model WZModel WZ
S SensoS Senso
r r
. . . . . . . . . . . . . . . . . . . . . . . . . . . . . . . . . . . . . . . . . . .. . . . . . . . . . . . . . . . . . . . . . . . . . . . . . . . . . . . . . . . . . .
2828
Model WDModel WD
S SensoS Senso
r r
. . . . . . . . . . . . . . . . . . . . . . . . . . . . . . . . . . . . . . . . . . .. . . . . . . . . . . . . . . . . . . . . . . . . . . . . . . . . . . . . . . . . . .
2828
Service Pin Request Service Pin Request
. . . . . . . . . . . . . . . . . . . . . . . . . . . . . . . . . . . . . . . . . . . . 29. . . . . . . . . . . . . . . . . . . . . . . . . . . . . . . . . . . . . . . . . . . . 29
Model WZModel WZ
S SensoS Senso
r r
. . . . . . . . . . . . . . . . . . . . . . . . . . . . . . . . . . . . . . . . . . .. . . . . . . . . . . . . . . . . . . . . . . . . . . . . . . . . . . . . . . . . . .
2929
Discover a library in your pocket
Unlimited* books, audiobooks, documents & more. All in one place.
*For more information, visit
our FAQ
.
Read Free for 30 Days
Discover a library in your pocket
Unlimited* books, audiobooks, documents & more. All in one place.
*For more information, visit
our FAQ
.
Read Free for 30 Days
Discover a library in your pocket
Unlimited* books, audiobooks, documents & more. All in one place.
*For more information, visit
our FAQ
.
Read Free for 30 Days
ContentsContents
Operating Mode (Model WDS) Operating Mode (Model WDS)
. . . . . . . . . . . . . . . . . . . . . . . . . . . . . . . . . . . . 32. . . . . . . . . . . . . . . . . . . . . . . . . . . . . . . . . . . . 32
ChangChang
ing Room Ting Room T
emperaempera
ture ture
. . . . . . . . . . . . . . . . . . . . . . . . . . . . . . . . . .. . . . . . . . . . . . . . . . . . . . . . . . . . . . . . . . . .
3333
Changing Heating and Cooling Room Temperature Settings (applies toChanging Heating and Cooling Room Temperature Settings (applies to
some ssome s
ystems) ystems)
. . . . . . . . . . . .
. . . . . . . . . .
. . . . . . . . . . . .
. . . . . . . . . . . .
. . . . . . . . . .
. . . . . . . . . . . .
. . . . . . . . . . . .
. . . . . .. . . . . .
3333
ChangChang
ing the Systeing the Syste
m Setting . . . . . . . . . . m Setting . . . . . . . . . .
. . . . . . . . . . . .
. . . . . . . . . . . . . .
. . . . . . . . . . . .
. . . . . .. . . . . .
3333
ChangChang
ing the Faing the Fa
n Setting n Setting
. . . . . . . . . . . . . . . . . . . . . . . . . . . . . . . . . . . . . .. . . . . . . . . . . . . . . . . . . . . . . . . . . . . . . . . . . . . .
3333
RequeReque
sting Testing Te
mporarmporar
y Occupy Occup
ancy ancy
. . . . . . . . . . . . . . . . . . . . . . . . . . . . . .. . . . . . . . . . . . . . . . . . . . . . . . . . . . . .
3434
ErroErro
r codes . . . . . . . . . . . . . . . . . . . . . . . . . . . . . . . . . . . . . . . . . . . . . . . . . .r codes . . . . . . . . . . . . . . . . . . . . . . . . . . . . . . . . . . . . . . . . . . . . . . . . . .
3434
Lock SyLock Sy
mbol mbol
. . . . . . . . . . . . . . . . . . . . . . . . . . . . . . . . . . . . . . . . . . . . . . . .. . . . . . . . . . . . . . . . . . . . . . . . . . . . . . . . . . . . . . . . . . . . . . . .
3434
Testing Signal Strength Testing Signal Strength
. . . . . . . . . . . .
. . . . . . . . . . . .
. . . . . . . . . . . .
. . . . . . . . . . . .
. . . . . . . . . . . .
. . . . . . . . . . . .
. . .. . .
3434
TestinTestin
g Batterg Batter
y Status . . . . . . . . . . . . . . . . . . . . . . . . . . . . . . . . . . . . . . . . .y Status . . . . . . . . . . . . . . . . . . . . . . . . . . . . . . . . . . . . . . . . .
3434
Maintenance and TrMaintenance and Tr
oubleshootinoubleshootin
g g
. . . . . . . . . . . .
. . . . . . . . . . . .
. . . . . . . . . . . .
. . . . . . . . . . . .
. . . . . . . . . . . . . .
. . .. . .
3535
Locations of LEDs, Test button, Test Symbols, Locations of LEDs, Test button, Test Symbols,
and Error Codes and Error Codes
. . . . . . . . . . . .
. . 35. . 35
Diagnostics Diagnostics
. . . . . . . . . . . . . . . . . . . . . . . . . . . . . . . . . . . . . . . . . . . . . . . . . . . 36. . . . . . . . . . . . . . . . . . . . . . . . . . . . . . . . . . . . . . . . . . . . . . . . . . . 36
Testing Signal Strength Testing Signal Strength
. . . . . . . . . . . . . . . . . . . . . . . . . . . . . . . . . . . . . . . . . 37. . . . . . . . . . . . . . . . . . . . . . . . . . . . . . . . . . . . . . . . . 37
Testing Battery Status . . . . . . . . . . . . . . . . . . . . . . . . . . . . . . . . . . . . . . . . . . . Testing Battery Status . . . . . . . . . . . . . . . . . . . . . . . . . . . . . . . . . . . . . . . . . . .
3838
24 V Power Status Indicator 24 V Power Status Indicator
. . . . . . . . . . . . . . . . . . . . . . . . . . . . . . . . . . . . . . 39. . . . . . . . . . . . . . . . . . . . . . . . . . . . . . . . . . . . . . 39
Using the WirelUsing the Wirel
ess Sensor Sess Sensor S
ystem to ystem to
Check Signal Check Signal
Strength on a Strength on a
Site Site
. . 39. . 39
Replacing Sensor Batteries Replacing Sensor Batteries
. . . . . . . . . . . .
. . . . . . . . . . . .
. . . . . . . . . . . .
. . . . . . . . . . . .
. . . . . . . . . . . .
. . . . . . . . . .
. . . 40. . . 40
BatterBatter
y Type . . . . . . . . . . . . . . . . . . . . . . . . . . . . . . . . . . . . . . . . . . . . . . . . .y Type . . . . . . . . . . . . . . . . . . . . . . . . . . . . . . . . . . . . . . . . . . . . . . . . .
4040
BatterBatter
y Life . . . . . . . . . . . . . . . . . . . . . . . . . . . . . . . . . . . . . . . . . . . . . . . . . .y Life . . . . . . . . . . . . . . . . . . . . . . . . . . . . . . . . . . . . . . . . . . . . . . . . . .
4040
BatterBatter
y Instally Install
ation ation
. . . . . . . . . . . . . . . . . . . . . . . . . . . . . . . . . . . . . . . . . . .. . . . . . . . . . . . . . . . . . . . . . . . . . . . . . . . . . . . . . . . . . .
4040
Manual Association . . . . . . . . . . . . . . . . . . . . . . . . . . . . . . . . . . . . . . . . . . . . . Manual Association . . . . . . . . . . . . . . . . . . . . . . . . . . . . . . . . . . . . . . . . . . . . .
4141
Disassociation Disassociation
. . . . . . . . . . . . . . . . . . . . . . . . . . . . . . . . . . . . . . . . . . . . . . . . . 41. . . . . . . . . . . . . . . . . . . . . . . . . . . . . . . . . . . . . . . . . . . . . . . . . 41
Sensor/Receiver Compatibility Sensor/Receiver Compatibility
. . . . . . . . . . . . . . . . . . . . . . . . . . . . . . . . . . . . 42. . . . . . . . . . . . . . . . . . . . . . . . . . . . . . . . . . . . 42
Replacing a Failed Sensor or Receiver Replacing a Failed Sensor or Receiver
. . . . . . . . . . . .
. . . . . . . . . . . .
. . . . . . . . . . . .
. . . . . . . . . . . .
. . . . . 42. . . . . 42
Servicing and Testing Servicing and Testing
. . . . . . . . . . . . . . . . . . . . . . . . . . . . . . . . . . . . . . . . . . . 42. . . . . . . . . . . . . . . . . . . . . . . . . . . . . . . . . . . . . . . . . . . 42
ServicServic
ing and Tesing and Tes
ting Toolting Tool
s s
. . . . . . . . . . . .
. . . . . . . . . . . .
. . . . . . . . . . . . . .
. . . . . . . . . . . .
. . . . . . . . . . . . . .
. . . .. . . .
4242
Procedure for Testing the Wireless Sensor System . . . . . . . . . . . . . . . . .Procedure for Testing the Wireless Sensor System . . . . . . . . . . . . . . . . .
4343
ProcProc
edure fedure f
or Testor Test
ing the Reing the Re
ceiver ceiver
. . . . . . . . . . . . . . . . . . . . . . . . . . . . . .. . . . . . . . . . . . . . . . . . . . . . . . . . . . . .
4343
ForcinForcin
g a Sensor to Tg a Sensor to T
ransrans
mit mit
. . . . . . . . . . . .
. . . . . . . . . . . .
. . . . . . . . . . . .
. . . . . . . . . . . .
. . . . . . . . . . . . . .
. . . .. . . .
4343
Output Power Level . . . . . . . . . . . . . . . . . . . . . . . . . . . . . . . . . . . . . . . . . . . . . 43Output Power Level . . . . . . . . . . . . . . . . . . . . . . . . . . . . . . . . . . . . . . . . . . . . . 43
Output Values—Failure and Default Modes of Operation Output Values—Failure and Default Modes of Operation
. . . . . . . . . . . .
. . . . . . . . . .
. . . 44. . . 44
Measuring Output Resistance Measuring Output Resistance
. . . . . . . . . . . .
. . . . . . . . . . . .
. . . . . . . . . . . .
. . . . . . . . . . . .
. . . . . . . . . . . .
. . . . . . 44. . . . . . 44
Cleaning the Sensor Cleaning the Sensor
. . . . . . . . . . . . . . . . . . . . . . . . . . . . . . . . . . . . . . . . . . . . 46. . . . . . . . . . . . . . . . . . . . . . . . . . . . . . . . . . . . . . . . . . . . 46
Discover a library in your pocket
Unlimited* books, audiobooks, documents & more. All in one place.
*For more information, visit
our FAQ
.
Read Free for 30 Days
Discover a library in your pocket
Unlimited* books, audiobooks, documents & more. All in one place.
*For more information, visit
our FAQ
.
Read Free for 30 Days
Discover a library in your pocket
Unlimited* books, audiobooks, documents & more. All in one place.
*For more information, visit
our FAQ
.
Read Free for 30 Days
ContentsContents
Appendix B: Agency CAppendix B: Agency C
ompliance ompliance
. . . . . . . . . . . . . . . . . . . . . . . . . . . . . . . . . . . .. . . . . . . . . . . . . . . . . . . . . . . . . . . . . . . . . . . .
5050
Discover a library in your pocket
Unlimited* books, audiobooks, documents & more. All in one place.
*For more information, visit
our FAQ
.
Read Free for 30 Days
Discover a library in your pocket
Unlimited* books, audiobooks, documents & more. All in one place.
*For more information, visit
our FAQ
.
Read Free for 30 Days
Discover a library in your pocket
Unlimited* books, audiobooks, documents & more. All in one place.
*For more information, visit
our FAQ
.
Read Free for 30 Days
Discover a library in your pocket
Unlimited* books, audiobooks, documents & more. All in one place.
*For more information, visit
our FAQ
.
Read Free for 30 Days
Discover a library in your pocket
Unlimited* books, audiobooks, documents & more. All in one place.
*For more information, visit
our FAQ
.
Read Free for 30 Days
Discover a library in your pocket
Unlimited* books, audiobooks, documents & more. All in one place.
*For more information, visit
our FAQ
.
Read Free for 30 Days
General Information
This section provides a description of the sensors, as well as part numbers and
dimensions.
Product Description
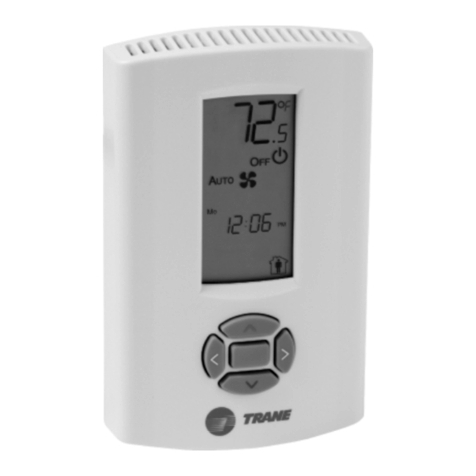
Trane
®
wireless sensor sets are compatible with any Trane unit controller that uses a
standard 10 k
Ω
temperature input. The sets include sensor, receiver, wiring harness, and
two AA lithium batteries. No further software or hardware is necessary for site
evaluation, installation, or maintenance. Zone temperature is standard on all models.
Notes:

The information in this manual applies to both factory and fiel
d installed versions of
the Trane wireless sensor sets.
•
A service tool
cannot be connected to
a T
rane wireless sensor.
Trane wireless sensors include the following models:
Model WDS
This configurable sensor has an LCD display. It provides the same functions as many
currently available Trane wired sensors. Configurable features include:
–
T
emperature units: Fahrenheit (ºF)
or Celsius (ºC)
–
T
emperature resolution:
1
.0, 0.5,
or 0.1 degrees
–
Ability to display setpoint only (zone temperature does not display)
–
Single, dual, or no setpoint
–
System settings: auto, off, cool, heat, emergency heat
–
Dead band (heat/cool setpoint offset for dual setpoint systems)
–
Fan settings: high, medium, low, auto, off
–
Timed override request function
–
Lockable settings to protect agains unauthorized use
–
Service pin request
Model WTS
This sensor measures and transmits the zone temperature only.
Model WZS
This sensor set transmits the zone temperature, all zone temperature setpoint functions,
temporary occupancy (timed override), and unoccupied (cancel) information to the
Discover a library in your pocket
Unlimited* books, audiobooks, documents & more. All in one place.
*For more information, visit
our FAQ
.
Read Free for 30 Days
Discover a library in your pocket
Unlimited* books, audiobooks, documents & more. All in one place.
*For more information, visit
our FAQ
.
Read Free for 30 Days
Discover a library in your pocket
Unlimited* books, audiobooks, documents & more. All in one place.
*For more information, visit
our FAQ
.
Read Free for 30 Days
General Information
Part Numbers
The following table lists available models by part number:
P
a
r
t n
u
m
b
e
r
D
e
s
c
r
i
p
t
i
o
n
X
13
7
9
08
2
1
01
Mo
de
l
WT
S
s
e
n
so
r
on
ly
X
13
7
9
08
2
20
1
M
od
e
l
W
DS
s
en
so
r
on
ly
X
1
3
7
9
0
8
2
3
0
1
M
o
d
e
l W
T
S s
e
n
s
o
r s
e
t
X
1
3
7
9
0
8
2
4
0
1
M
o
d
e
l W
D
S s
e
n
s
o
r s
e
t
X
1
3
7
9
0
4
9
2
M
o
d
e
l W
Z
S
, s
e
n
s
o
r o
n
ly
, F
a
h
r
e
n
h
e
i
t
X
1
3
7
9
0
4
9
4
M
o
d
e
l
W
Z
S
,
s
e
n
s
o
r
o
n
ly
,
C
e
l
s
i
u
s
X
1
3
7
9
0
4
9
6
M
o
d
e
l
W
Z
S
s
e
n
s
o
r
s
e
t
,
F
a
h
re
n
h
e
i
t
X
1
3
7
9
0
4
9
8
M
o
d
e
l W
Z
S
s
e
n
s
o
r s
e
t
, C
e
l
s
i
u
s
X
1
3
7
9
0
8
5
4
R
e
c
e
i
v
e
r
o
n
l
y
,
a
l
l
m
o
d
e
l
s
X19
05
211
201
Wir
e
har
ne
ss,
se
ven
con
duc
to
r
, f
or
wir
ele
ss
rec
eiv
er
Discover a library in your pocket
Unlimited* books, audiobooks, documents & more. All in one place.
*For more information, visit
our FAQ
.
Read Free for 30 Days
Discover a library in your pocket
Unlimited* books, audiobooks, documents & more. All in one place.
*For more information, visit
our FAQ
.
Read Free for 30 Days
Discover a library in your pocket
Unlimited* books, audiobooks, documents & more. All in one place.
*For more information, visit
our FAQ
.
Read Free for 30 Days
Installation
Mounting the Sensor Back Plate
T
o mount
the sensor back plate:
1
.
Hold the b
ac
k plate ag
ainst the
mountin
g surfac
e and mar
k the scr
ew loca
tions.
2.
Secur
e the bac
k plate ag
ainst the mou
nting sur
face usin
g include
d hardwa
re.
The figure shows an example of
mounting the back plate of the sensor into sheetrock
or plaster.
Discover a library in your pocket
Unlimited* books, audiobooks, documents & more. All in one place.
*For more information, visit
our FAQ
.
Read Free for 30 Days
Discover a library in your pocket
Unlimited* books, audiobooks, documents & more. All in one place.
*For more information, visit
our FAQ
.
Read Free for 30 Days
Discover a library in your pocket
Unlimited* books, audiobooks, documents & more. All in one place.
*For more information, visit
our FAQ
.
Read Free for 30 Days
Discover a library in your pocket
Unlimited* books, audiobooks, documents & more. All in one place.
*For more information, visit
our FAQ
.
Read Free for 30 Days
Installation
Configur
ing the Wireless Sensor
(Model WDS only)
The configuration of the
sensor determines which system features can be accessed and
changes can be made by the tenant (for example, changes to cooling/heating mode,
setpoint, or fan speed. Verify system and associated unit features before configuring the
sensor.
The building owner or operator may
choose to limit tenant access to certain features. Thi
s
can be done through configuration. Or, if a sensor is configured to match all control
capabilities of the building aut
omation system, the locking feature can be used to restrict
the tenant from making changes.
Configuration
Procedur
e
T
o configure settings on
the model WDS
sensor, follow this procedure in
the order
presented.
1
.
Pr
ess th
e conf
igur
atio
n but
ton for 3 se
cond
s.
The display will change to configuration mode. When the sensor is in configuration
Configuration button
Discover a library in your pocket
Unlimited* books, audiobooks, documents & more. All in one place.
*For more information, visit
our FAQ
.
Read Free for 30 Days

Other manuals for WTS

1

This manual suits for next models

2

Other Trane Accessories manuals

Trane UCM 4.0 and WirelessVAV Communication Specifications

Trane

Trane UCM 4.0 and WirelessVAV Communication Specifications

Trane ZUSTATALMS2 Assembly instructions

Trane

Trane ZUSTATALMS2 Assembly instructions

Trane 7722TX User manual

Trane

Trane 7722TX User manual

Trane WTS Installation and operating instructions

Trane

Trane WTS Installation and operating instructions

Trane Wired Temperature Sensors Installation and operating instructions

Trane

Trane Wired Temperature Sensors Installation and operating instructions

Trane Energy Wheels Owner's manual

Trane

Trane Energy Wheels Owner's manual

Trane WZS User manual

Trane

Trane WZS User manual

Trane BAYSENS050m User manual

Trane

Trane BAYSENS050m User manual

Trane 2TTB3 Series Assembly instructions

Trane

Trane 2TTB3 Series Assembly instructions

Trane LonWorks TR1 Series VFD User manual

Trane

Trane LonWorks TR1 Series VFD User manual

Trane ZZSENSAL0300AA User manual

Trane

Trane ZZSENSAL0300AA User manual

Trane LonWorks TR1 Series VFD User manual

Trane

Trane LonWorks TR1 Series VFD User manual

Trane CLCH-IN-18A User manual

Trane

Trane CLCH-IN-18A User manual

Trane Adaptive Frequency VFDB Installation and operating instructions

Trane

Trane Adaptive Frequency VFDB Installation and operating instructions

Trane CLCH-SVX02C-EN Owner's manual

Trane

Trane CLCH-SVX02C-EN Owner's manual

Trane WDS Installation and operating instructions

Trane

Trane WDS Installation and operating instructions

Trane BAYCO2K011A User manual

Trane

Trane BAYCO2K011A User manual

Trane Air-Fi WCS-SB Installation and operating instructions

Trane

Trane Air-Fi WCS-SB Installation and operating instructions

Popular Accessories manuals by other brands

FT Technologies FT205EV user manual

FT Technologies

FT Technologies FT205EV user manual

Behringer U-PHORIA UMC404HD quick start guide

Behringer

Behringer U-PHORIA UMC404HD quick start guide

Morrison Bros. co. 925 Series Installation & maintenance instructions

Morrison Bros. co.

Morrison Bros. co. 925 Series Installation & maintenance instructions

Triex LLC Filabot Airpath Operator's manual

Triex LLC

Triex LLC Filabot Airpath Operator's manual

Suunto Tank POD user guide

Suunto

Suunto Tank POD user guide

SICK EventCam technical information

SICK

SICK EventCam technical information

Guzzanti GZ-40R instruction manual

Guzzanti

Guzzanti GZ-40R instruction manual

Larson Electronics IND-HL-HDB-FUVC-EX-1L-120V-15C instruction manual

Larson Electronics

Larson Electronics IND-HL-HDB-FUVC-EX-1L-120V-15C instruction manual

cabstone PocketPower Series user manual

cabstone

cabstone PocketPower Series user manual

Festo SOPA Series instructions

Festo

Festo SOPA Series instructions

Perry 1SPSP005 quick start guide

Perry

Perry 1SPSP005 quick start guide

Waterpik WF-10 Series manual

Waterpik

Waterpik WF-10 Series manual

Ryobi Phone Works ES1500 manual

Ryobi

Ryobi Phone Works ES1500 manual

BEA CGS-KF112 manual

BEA

BEA CGS-KF112 manual

Newer Technology 20A-TR Power2U user guide

Newer Technology

Newer Technology 20A-TR Power2U user guide

Telrad BreezeCOMPACT System manual

Telrad

Telrad BreezeCOMPACT System manual

Honeywell Home DC312 P2USB Series manual

Honeywell Home

Honeywell Home DC312 P2USB Series manual

Hama 14110 Operating	 instruction

Hama

Hama 14110 Operating instruction

manuals.online logo
manuals.online logoBrands
  • About & Mission
  • Contact us
  • Privacy Policy
  • Terms and Conditions

Copyright 2025 Manuals.Online. All Rights Reserved.