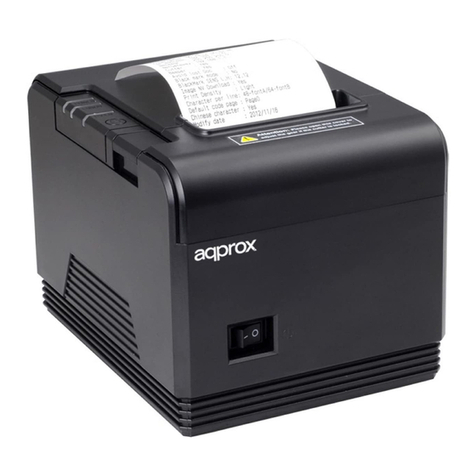
Trax STAMP MACHINE User manual

USER MANUAL
www.traxxprinter.com

2
TRAXX Stamp Machine 1 unit
(includes 4 UV lamps)
Stopwatch - timer 1 piece
Glasses with magnetic clamp 1 set
Clear plastic tray 1 piece
Polyerster sheets A4 for printing 3 sheets
(suitable for laser printers)
TRAXX POLYGEL A7 10 pieces
(Do not expose to light before use)
Washing brush 1 piece
Post exposure salts (additive) 1 bag
CD-ROM with videos, artwork & templates 1 piece
A. Design a stamp ............................................................................. 3
B. Printing the negative .................................................................... 4
C. Using the stamp machine ............................................................ 5
D. After exposure ............................................................................. 6
Troubleshooting ............................................................................... 7
Specifications ................................................................................... 8
Box contents:
Contents
1
2
3
4
5
6
7
8
9
You will need:
- Computer
- B&W Printer
- Scissors/Knife
- Warm water
- Dish soap
- Gloves
1
2
3
4
5
6
7
89

3
A. Design a stamp
Use a design software to create a stamp such as CorelDraw, Adobe
illustrator, etc. or use our word template to easily produce your own stamps.
For text stamps
1. Use an easy to read font like Arial, Helvetica or similar
2. Type the text in white color font on a black box
3. Make sure the size is suitable for your stamp (i.e. 58x22mm for 9013)
4. For better printing results, always make the artwork 1-2mm smaller than the
maximum stamp size.
5. Print the negative on the polyester sheets using a laser printer.
6. If black is not dark enough, use thr TRAXX toner density enhancer spray.
For stamps with logos
1. All color logos and picture need to be converted into grayscale.
2. Adjust the conrast and brightness accordingly so that black stands out.
3. Convert the file to a 1-bit B&W file and invert the image so that the part to
be used in the stamp is in white.
4. For better printing results, always make the artwork 1-2mm smaller than the
maximum stamp size.
5. Print the negative on the polyester sheets using a laser printer.
6. If black is not dark enough, use TRAXX toner density enhancer spray.
Tips & Tricks
1. Make sure you make the most out of your TRAXX PolyGEL by placing various
stamps to be exposed together.
2. For better printing results always make your artwork 1-2mm smaller
than the stamp size (i.e. 9013: 58x22 --> Artwork: 56x20 mm)
3. The type and size of the font is crucial. To get best results use enough spacing
and fonts like Arial, Helvetica, etc.
4. If the black in your negatives is not strong enough, using the TRAXX toner
density enhancer spray will provide a more vivid black.
4. Always use TRAXX A4 Polyester sheets for printing your negative.

4
B. Printing the negative
Using a laser printer
1. Print using the TRAXX polyester sheets A4.
2. In case black is not strong enough, use the TRAXX toner density enhancer spray
to darken the film.
3. Your negative must be black and opaque. The black part prevents the
UV light from hardening the gel. The clear part (letters, logos, etc.) allows
the light to go through and create the stamp.
Using an inkjet printer
1. Find the best printer setting for optimum black printing.
2. Use suitable TRAXX inkjet sheets (not included in the box)
3. Your negative must be black and opaque. The black part prevents the
UV light from hardening the gel. The clear part (letters, logos, etc.) allows
the light to go through and create the stamp.
Tips & Tricks
1. If you can see through the black area of your negative when held up
to the light, then the negative will not work. You must select a different
printer setting and make sure you are using the appropriate printing film.
2.You can improve / darken the black on your negatives using the
TRAXX density enchancer spray (Only works with negatives printed on a
laser printer).

5
C. Using the stamp machine
See below how to make a stamp with the TRAXX stamp machine
1. Preparing the machine for the first time
1. Remove the machine from the box. Do not plug in yet.
2. Remove the bottom plate and install the four (4) UV lamps
3. Remove the protective plastic film from the bottom plate.
4. Connect the plug in the power outlet.
5. Your TRAXX stamp machine is now ready for use.
2. Preparing for use
Always warm up the machine before use. Turn it on for at least 2 minutes using
the built in timer (press the red button).
3. Making a stamp
1. Open the glasses with the magnetic clamp.
2. Place the TRAXX PolyGEL on the bottom with the soft side facing up.
3. Place the negative on top of the polyGEL (reading side down).
4. Close with the other glass and apply pressure in the middle so that
the negative is well aligned over the polyGEL plate.
5. Slide the glasses in the stamp machine and expose with the polyGEL
facing downwards for 30 seconds.
6. Then flip the glasses over so that the negative is on top and reinsert in
the stamp machine. Expose for 120 seconds using the machine timer (press
the red round button).
7. After 120 seconds the machine will automatically close.
Important !
Always warm up the machine before every use.
Turn it on for at least two (2) minutes before using it.

6
D. After exposure
1. Washing
1. Remove the glasses from the machine. Open the glasses and remove
the polyGEL.
2. Remove and discard the protective cover.
3. Use warm water and dish washer soap and use the brush to clean the
polyGEL until all liquid resin residues have been removed.
4. Rinse with clean water and make sure the stamp is clean.
2. Post Exposure
1. Fill the plastic tray with enough water to cover the stamp.
2. Add a table spoon of TRAXX post exposure salt flakes.
3. Place the polyGEL in the plastic tray and slide the tray in the stamp
machine.
4. Post exposure for at least two (2) minutes.
Water and the post exposure salts (additive) help harden the stamp and make it
more durable.
5. Remove from the water and dry using a clean cloth.
3. Mounting on a stamp
1. Cut the polyGEL to the required size.
2. Mount to a TRAXX self-inking or manual stamp.
3. Your stamp is now ready to use!

7
Troubleshooting
1. Machine does not start
- Check that the machine is plugged in.
- Check that the 3-way switch is not in the “0” position.
- Check and replace if necessary the fuse on the back of the machine.
2. Some letters / parts were washed away
- The negative is not dark enough, use spray or a different printer setting.
- You inserted the glasses the wrong way or exposure times were not
correct (base: 30 seconds, char: 120 seconds).
- The exposure times were too short or the bulbs have not been
properly warmed up before exposure.
3. The stamp impression is not clear
- You did not wash all the gel residue away.
- The negative was not dark (black) enough.
- The negative was not placed properly on the polyGEL.
- The font you used is either too small or condensed.
4. The stamp was liquid after exposure
- The exposure times were too short (base: 30-35 seconds, char: 120 seconds)
- The machine (bulbs) has not been properly warmed up before use.
- Bulbs are starting to deteriorate, replace the bulbs.
4. The polyGEL is blank after exposure
- The exposure times were too long (base: 30-35 seconds, char: 120 seconds)
- The polyGEL was exposed to light before use.
- The negative was not placed properly on the polyGEL.

Specifications
TRAXX Stamp Machine
•
Type:36WUVstampmachine •ModelNumber:TRX-818
•
Color:White •Material:Plastic
•
Automatic:Yes •PowerSupply:Electric
•
Input:220-240V,110-130V/0,35A/50-60Hz •Timer:120seconds
•
Output: 4 x 9W
•
Item dimensions: 105 mm x 225 mm x 250 mm
•
Item weight: 950 gr. (net), 1,4 Kg (Gross)
•
Package includes: See page 2 for box contents
•
Certification: GS, CE, ROHS
Caution:
The machine is not intended for use by person with reduced physical, senory
or mental capabilities or lack of experience and knowledge, unless supervised
or given instructions concenring the use of the appliance by a person respon-
sible for their safety.
For instructions, instructional videos, tutorials, templates, etc please visit our
site at www.traxxprinter.com
For consumables and accessories please contact your local TRAXX agent. You
can locate your closest TRAXX dealer at www.traxxprinter.com/partners
Table of contents
