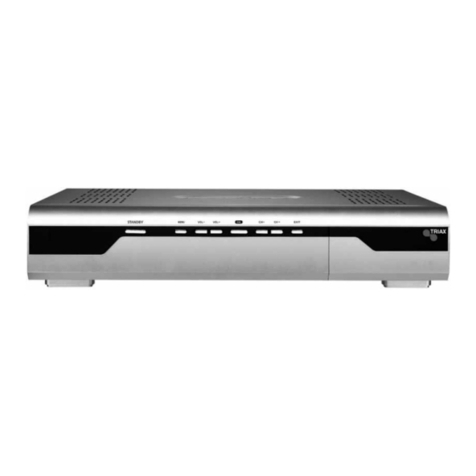
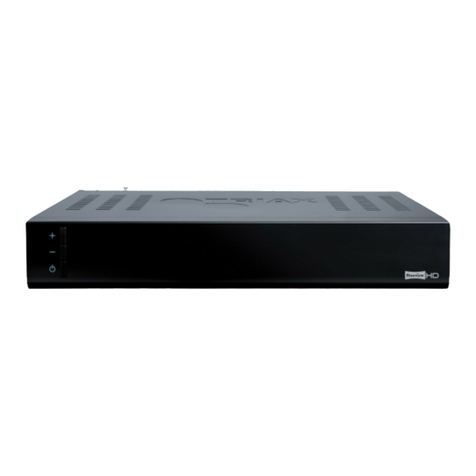
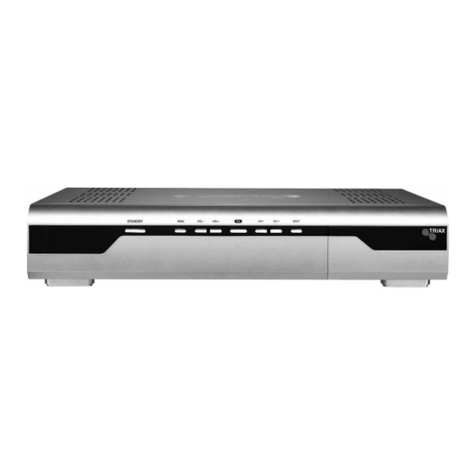
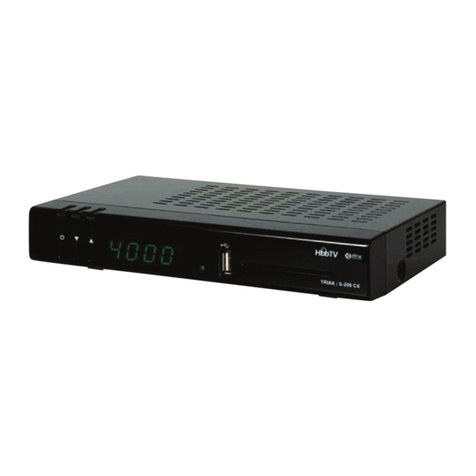
Triax S-HD11 User manual

User Manual
Bedienungsanleitung - Mode d’emploi
TRIAX DVB-S2 Receiver S- D11
Model Item no.
TRIAX DVB-S2 Receiver S-HD11 305216
Version D Date 05/2017
EN, DE, FR

User manual
EN
2
Attention! / Achtung! / Consignes de sécurité!
EN
Failure to comply with the specified precautio ary measures may cause serious i jury to perso s or damage to property. The
i stallatio a d commissio i g may o ly be performed by suitably qualified perso s, tech icia s or i stallers i complia ce with
safety regulatio s.
Damage due to improper i stallatio a d commissio i g, defective co ectors o cables or a y other i correct ha dli g will void
the warra ty.
CAUTION: The safety requireme ts are accordi g to EN 60728-11 a d must be observed.
• Disco ect mai s power before worki g o electrical systems.
• A y additio al electrical wiri g requireme ts should always be i stalled by a suitably qualified perso (s).
I stallatio or service work should NEVER be u dertake duri g electrical / thu derstorms.
DE
Gewährleistu g
Die gesetzliche Gewährleistu g ach Paragraph 437 BGB beträgt 24 Mo ate.
Bei u sachgemäßer I stallatio u d Ha dhabu g erlischt jeglicher Gara tiea spruch.
Bestimmu gsgemäße
U d sachwidrige Verwe du g
Die Mo tage u d I betrieb ahme darf ur vo ei gewiese e Perso e , Tech iker
oder I stallateure u ter Beachtu g der Sicherheitsbestimmu ge durchgeführt werde .
Schade durch falsche Mo tage u d I betrieb ahme sowie durch u sachgemaβe Ha dhabu g fuhre zum Erlösche des
Gara tiea spruchs.
FR
Veillez à bie respecter les co sig es de sécurité ci
-
dessous. Leur o
-
respect peut provoquer des dommages matériels ou
corporels.
L’i stallatio et la mise e route e peuve t être effectués que par des tech icie s ou des i stallateurs qualifiés e respecta t les
co sig es de sécurité.
La gara tie e sera pas appliquée lors de dégâts causés par u e erreur de mo tage, de mise e route ou par u mauvais
raccordeme t ou toute autre ma ipulatio i correcte.
PRUDENCE : ava t toute i terve tio , votre i stallatio doit être co forme aux exige ces défi ies par les dispositio s Europée es
EN 50083 (co formité des i stallatio s collectives) et EN 60065 ( ormes e vigueur pour la protectio électrique).
• Débra chez l’appareil ava t toute i terve tio , car certai s composa ts sous te sio so t da gereux (risque
d’électrocutio ).
Toute i terve tio sur l’i stallatio ou travaux de mai te a ce so t à proscrire e cas d’orage.
Ta le of contents / Inhaltsverzeichnis / Sommaire
Attention! / Achtung! / Consignes de sécurité! ....................................................................................................... 2
1.
Remote controller ........................................................................................................................................ 4
2.
DTV mode .................................................................................................................................................... 6
2.1
System Initi liz tion ................................................................................................................................................................................ 6
2.2
Entering the DVB System nd Power On/Off ............................................................................................................................................ 7
2.3
Volume Adjustment nd Mute Control ..................................................................................................................................................... 7
2.4
TV/R dio Switching ................................................................................................................................................................................. 7
2.5
Ch nnel Switching ................................................................................................................................................................................... 7
2.6
Progr m info displ y ............................................................................................................................................................................... 9
2.7
Progr m BACK (B ck to the previous ch nnel) ........................................................................................................................................ 9
2.8
Progr m L ngu ge nd Left/Right Ch nnels Switching ........................................................................................................................... 9
2.9
Screen Sc ling (V-FMT) ......................................................................................................................................................................... 10
2.10
Electronic Progr m Guide (EPG) ....................................................................................................................................................... 10
Electronic Progr m Guide (EPG) - continued .................................................................................................................................................... 11
2.11
Teletext ............................................................................................................................................................................................. 11
2.12
Subtitle.............................................................................................................................................................................................. 12
2.13
TTX Subtitle ...................................................................................................................................................................................... 12

User manual
3
EN
3.
Multimedia mode ....................................................................................................................................... 13
3.1
Multimedi nd USB .............................................................................................................................................................................. 13
3.2
USB stor ge device ............................................................................................................................................................................... 14
3.3
Movie .................................................................................................................................................................................................... 15
3.4
Music .................................................................................................................................................................................................... 16
3.5
Im ge .................................................................................................................................................................................................... 17
3.6
Record m n ger .................................................................................................................................................................................... 18
4.
Main menu ................................................................................................................................................. 19
4.1
Inst ll tion ............................................................................................................................................................................................ 19
4.1.1
Antenn setup ................................................................................................................................................................................... 20
4.1.2
S tellite list ....................................................................................................................................................................................... 20
4.1.3
Tr nsponder list (TP) ........................................................................................................................................................................ 21
4.1.4
Motor setting .................................................................................................................................................................................... 22
4.1.5
Limit setup ........................................................................................................................................................................................ 22
4.1.6
Se rch ex mple ................................................................................................................................................................................ 22
4.2
Ch nnel ................................................................................................................................................................................................. 23
4.2.1
Ch nnel m n ger .............................................................................................................................................................................. 23
4.2.2
F vorite ............................................................................................................................................................................................. 24
4.2.3
Delete ll ch nnels ............................................................................................................................................................................ 25
4.3
Preference ............................................................................................................................................................................................. 25
4.3.1
L ngu ge .......................................................................................................................................................................................... 26
4.3.2
OSD tr nsp rency ............................................................................................................................................................................. 26
4.3.3
Preferred udio ................................................................................................................................................................................. 27
4.3.4
DVR configur tion ............................................................................................................................................................................. 27
4.4
Setting ................................................................................................................................................................................................... 28
4.4.1
Timers ............................................................................................................................................................................................... 29
4.4.2
P rent l lock ..................................................................................................................................................................................... 30
4.4.3
Loc l time setting ............................................................................................................................................................................. 30
4.4.4
F ctory setting .................................................................................................................................................................................. 31
4.4.5
Upgr de ............................................................................................................................................................................................ 31
4.4.6
Version.............................................................................................................................................................................................. 31
4.4.7
Auto shut down ................................................................................................................................................................................. 31
4.5
AV ......................................................................................................................................................................................................... 32
4.5.1
Contr st ............................................................................................................................................................................................ 32
4.5.2
Brightness ......................................................................................................................................................................................... 32
4.5.3
S tur tion ......................................................................................................................................................................................... 33
4.5.4
HUE ................................................................................................................................................................................................... 33
4.5.5
S/PDIF mode ..................................................................................................................................................................................... 33
4.5.6
Aspect mode ..................................................................................................................................................................................... 34
4.5.7
Aspect mode ..................................................................................................................................................................................... 34
5.
Record & Timeshift .................................................................................................................................... 35
5.1.1
Record .............................................................................................................................................................................................. 35
5.2
Timeshift ............................................................................................................................................................................................... 36
5.2.1
Timeshift: Auto ................................................................................................................................................................................. 36
5.2.2
Timeshift: P use ............................................................................................................................................................................... 36
5.2.3
Timeshift: Off .................................................................................................................................................................................... 36
6.
Upgrade ..................................................................................................................................................... 37
6.1
Upgr de by USB / OTA ........................................................................................................................................................................... 37
6.2
Upgr de by USB ..................................................................................................................................................................................... 37

User manual
EN
4
1. Remote controller

User manual
5
EN
Button Function Nr
Power
Switch STB o /sta dby
1
MUTE
Tur sou d off/o
13
0…9
E ter umeric values a d select the cha el
directly by e teri g it's umber
2
TV/R
Switch betwee TV a d Radio mode
3
TEXT
Ope i teractive service
14
RED/GREE
N/
YELLOW/
BLUE
For i teractive fu ctio /Subme u
fu ctio butto s
4,5,
15,16
V +/-
Volume up/dow
7, 18
Ch +/-
Cha el up/dow
6,8
OK
E ter Mai me u or co firm selected
17
EPG
Ope up Electro ic Program Guide Me u
9
MENU
Ope a d close the me u scree
10
SUB
E ter the program subtitle selectio me u.
19
FAV
Ope favorite list
11
BACK
•
Retur to the upper level me u.
• Retur to the previously played
program while i full scree playi g
state.
• Retur to the media type switch me u
while i Multi-media mode (The Multi-
media mode is for viewi g i formatio
o a USB device)
• Exit the curre t me u.
12
AUDIO
Select audio mode to cha ge
la guage / cha el
20
Record the TV program
21
■
Stop program playback or recordi g
21
►
PLAY
21
Pause timeshift fu ctio or multimedia
playback
21
FRW/FFW
Search backward /forward
zoom images i /out
21
►►I
/
I◄◄
I multimedia, go to previous or ext file
21
INFO
•
Show or hide program i fo.
• Show the i formatio of the selected
item while i EPG state.
• Show the detailed i formatio of the
bei g played media file while i
multimedia playback state.
22
USB
Select a d show i formatio about
USB device
23
MOVIE
Switch betwee multimedia / DTV
24
OPTION
Not used
25

User manual
EN
6
2. DTV mode
2.1 System Initialization
Whe e teri g the system for the first time, you should do some i itializatio setti gs o the system i cludi g la guage, cou try (regio ), time
zo e, active a te a a d logical cha el umber, etc. See the figure below for the setti g me u.
After setti g, select the blue fu tio key optio a d the press OK key to start auto sca . Whe the sca completes, the sca ed programs ca
be auto saved.

User manual
7
EN
2.2 Entering the DVB System and Power On/Off
After power o , the system will e ter the DVB mode. If there is o program data i the database, the followi g message will appear:
Otherwise, the last program bei g played before the previous power off will be played. If the system fails to play the progra
m, please check the
power co ectio a d a te a co ectio .
• Power o
Power oPower o
Power o
Whe the machi e is i Sta dby mode, press POWER
POWERPOWER
POWER key to tur it o .
• Power off
Power offPower off
Power off
Whe the machi e is ru i g, pressi g POWER
POWERPOWER
POWER key at a y time ca make it i to the Sta dby mode.
2.3 Volume Adjustment and Mute Control
• Volume Adjustme t
Volume Adjustme tVolume Adjustme t
Volume Adjustme t
While i playi g state without me u display, press V+/
V+/V+/
V+/-
--
- keys to adjust the volume. A volume bar will appear, which has 0~100 levels.
• Mute Co trol
Mute Co trolMute Co trol
Mute Co trol
While i playi g state without me u display, press MUTE
MUTEMUTE
MUTE key to e ter the mute state. Pressi g MUTE
MUTEMUTE
MUTE key agai ca exit the mute
state.
2.4 TV/Radio Switching
While i full scree playi g state, press TV/R
TV/RTV/R
TV/R key to switch betwee the TV mode a d the Radio mode.
2.5 Channel Switching
The system provides ma y methods to switch cha els. See the descriptio s below:
• Method 1:
Method 1: Method 1:
Method 1: While i full scree playi g state, press CH+/
CH+/CH+/
CH+/-
--
- keys to play the ext or previous TV program cha els or radio statio s.
• Method 2:
Method 2: Method 2:
Method 2: While i full scree playi g state, press OK
OKOK
OK key to e ter the Cha el List me u (see the figure below) to quickly select a
cha el you wa t to play. I which you ca press V+/
V+/V+/
V+/-
--
- keys to select a cha el group a d the press CH+/
CH+/CH+/
CH+/-
--
- keys to choose a desired
cha el.
Press
OK
OKOK
OK
key to co firm your selectio a d switch to the selected cha el to play. Pressi g
BACK
BACKBACK
BACK
key ca exit the me u.
• Method 3:
Method 3: Method 3:
Method 3: Press umber keys to i put the umber of the cha el you wa t to play (TV: 0~674; Radio: 0~228).
• Method 4:
Method 4: Method 4:
Method 4: Press the red fu ctio key
red fu ctio keyred fu ctio key
red fu ctio key to select a other satellite to play, see the figure below o ext page:

User manual
EN
8
After power o , the system will e ter the DVB mode. If there is o program data i the database, the followi g message will appear:
•
Method 5:
Method 5: Method 5:
Method 5: If you have set favorite programs, press the gree fu ctio key
gree fu ctio keygree fu ctio key
gree fu ctio key a d a Favorite list will appear (see the figure below). At this
poi t, you ca press CH+/
CH+/CH+/
CH+/-
--
- keys to select a FAV item a d the press OK
OKOK
OK key to e ter its program list.
Pressi g back exits the me u
• Method 6:
Method 6: Method 6:
Method 6: Press the yellow fu ctio key while i the state of Fejl! He vis i gskilde ikke fu det.
Fejl! He vis i gskilde ikke fu det.Fejl! He vis i gskilde ikke fu det.
Fejl! He vis i gskilde ikke fu det., a d you ca search for a cha el by
ame.
The figure below will appear:
Press CH+/
CH+/CH+/
CH+/-
--
-
/ V+/
/ V+// V+/
/ V+/-
--
- keys to select a character a d the press OK
OKOK
OK key to i put. Whe you have fi ished i putti g a cha el ame, press the blue
blue blue
blue
fu ctio key
fu ctio keyfu ctio key
fu ctio key to co firm your i put. (Pressi g the red fu ctio key
red fu ctio keyred fu ctio key
red fu ctio key ca cha ge case. Number keys ca ot be used to i put umbers here.)
• Method 7
Method 7Method 7
Method 7: Press the blue fu ctio key while i the state of Fejl! He vis i gskilde ikke fu det.
Fejl! He vis i gskilde ikke fu det.Fejl! He vis i gskilde ikke fu det.
Fejl! He vis i gskilde ikke fu det., a d the cha el group list appears (see
the figure below), which i cludes free, scramble a d so o .

User manual
9
EN
2.6 Program info display
While i full scree playi g state, press INFO
INFOINFO
INFO key to show the brief i formatio of the bei g played program. See left figure.
Press INFO
INFOINFO
INFO key agai , a d the detailed i formatio of the program ca be fou d. See right figure.
2.7 Program BACK (Back to the previous channel)
While i full scree playi g state, press BACK
BACKBACK
BACK key to retur to the previously played TV program cha el or radio statio .
2.8 Program Language and Left/Right Channels Switching
While i full scree playi g state, press AUDIO
AUDIOAUDIO
AUDIO key to call out the followi g me u to cha ge the audio la guage a d sou d cha els.
•
• Press V+/- keys to cha ge sou d cha els amo g Left, Right a d Stereo; press CH+/- keys to choose audio la guage.
• Press OK key to co firm the setti g a d retur to the program playi g state.

User manual
EN
10
2.9 Screen Scaling (V-FMT)
At prese t the scree scali g fu ctio is i valid i the DTV mode, a d valid o ly whe playi g images i the Multimedia mode.
2.10 Electronic Program Guide (EPG)
To get the i formatio of programs bei g played or to be played i comi g days, press EPG key to e ter the electro ic program guide (EPG).
EPG i fo has three modes: Now/Next Mode
Now/Next ModeNow/Next Mode
Now/Next Mode, Daily Mode
Daily ModeDaily Mode
Daily Mode a d Weekly Mode
Weekly ModeWeekly Mode
Weekly Mode. The system will e ter the Now/Next mode by default, a d you ca
press the red fu ctio key
red fu ctio keyred fu ctio key
red fu ctio key to cha ge to other modes. Press BACK
BACKBACK
BACK or EPG
EPGEPG
EPG keys to exit EPG.
Now / Next mode
Now / Next modeNow / Next mode
Now / Next mode:
::
:
• Area 1 – Curre t EPG mode
• Area 2 – Curre t system time a d date as well as the ame a d i formatio of the bei g-played program.
• Area 3 – Program date
• Area 4 – Cha el list. Whe the highlight is i this area, you ca press CH+/
CH+/CH+/
CH+/-
--
-
keys to switch amo g the cha els listed i this area;
press PAGE
PAGEPAGE
PAGE-
--
-/+
/+/+
/+ keys to tur pages.
• Area 5 – Bei g-played program list correspo di g to cha els i Area 4 (Now Eve t). Whe the highlight is i this area, you ca press
CH+/
CH+/CH+/
CH+/-
--
- keys to switch amo g the cha els listed i Area 4; press V+/
V+/V+/
V+/-
--
- keys to switch betwee the Now a d Next lists.
• Area 6 – To-be-played program list correspo di g to cha els i Area 4 (Next Eve t).
• Area 7 – Key operatio tips, correspo di g to color fu ctio keys o the remote co trol:
• Red
RedRed
Red fu ctio key: E ter the Daily Mode.
• Gree
GreeGree
Gree fu ctio key: Whe the highlight is i Area 5, press this key to record the selected program. Whe the highlight is i Area 6,
press this key to schedule to record the selected program (Scheduled Record).
• I additio , press INFO key to show the detailed i formatio of the selected program.
Daily mode:
Daily mode:Daily mode:
Daily mode:
I Daily Mode, you ca fi d the i formatio of the programs o a day. See the figure below:
• Red
RedRed
Red fu ctio key: E ter the Weekly Mode.
• Yellow
YellowYellow
Yellow or blue
blueblue
blue fu ctio keys: Press o e of the two keys to switch days from Mo day to Su day.

User manual
11
EN
Electronic Program Guide (EPG) - continued
Weekly mode:
Weekly mode:Weekly mode:
Weekly mode:
I Weekly Mode, you ca fi d the i formatio of the programs withi a week. See the figure below:
• Press V+/
V+/V+/
V+/-
--
-
keys to switch the highlight betwee the two list wi dows.
• Press the red
redred
red fu ctio key to e ter the Now/Next Mode.
• Press the yellow
yellowyellow
yellow or blue
blueblue
blue fu ctio keys to switch to the page of the previous or ext days.
• If the selected program is bei g played, pressi g the
gree
greegree
gree fu ctio key ca record the program. If the selected program has ot bee
played yet, pressi g this key ca schedule to play or record the program.
2.11 Teletext
Press TEXT key to e ter the Teletext mode. See the figure below:
Basic Operatio s
Basic Operatio sBasic Operatio s
Basic Operatio s
• At the bottom of a Teletext page, e ter a page umber (ra ge: 100~899) to go to correspo di g page.
• Press CH+/
CH+/CH+/
CH+/-
--
- keys to tur to the previous or ext pages. The pages that have o teletext co te ts will be auto skipped.
• Lo g press CH+/
CH+/CH+/
CH+/-
--
- keys to quickly tur pages.
• Press OK
OKOK
OK key to cha ge the tra spare cy of the backgrou d.
• Press V+/
V+/V+/
V+/-
--
-
keys to e ter the previous or ext sub pages of the curre t page if there exists. If the AUTO optio is selected, the sub
pages will be auto tur ed.
• The four color fu ctio keys are avigatio keys. Their co crete fu ctio s depe d o the streami g.
Press TEXT
TEXTTEXT
TEXT or BACK
BACKBACK
BACK keys to exit the teletext mode.

User manual
EN
12
2.12 Su title
Subtitle is closed by default. To ope it:
• Press SUB
SUBSUB
SUB key to e ter the Subtitle me u. See the figure below:
• Press CH+/
CH+/CH+/
CH+/-
--
- keys to select a subtitle la guage to play.
2.13 TTX Su title
Subtitle is closed by default. To ope it:
• Press SUB
SUBSUB
SUB key to e ter the Subtitle me u. See the figure below:
Note that, i the above figure, there is a ico behi d the la guage me u item. This ico i dicates that the item is a TTX subtitle la guage.
• Press CH+/
CH+/CH+/
CH+/-
--
- keys to select a subtitle la guage to play.

User manual
13
EN
3. Multimedia mode
3.1 Multimedia and USB
I Multimedia mode, you ca play multimedia files a d games; also
ca carry out record ma ageme t a d disk ma ageme t.
See the figure :
Module Select :displays the curre t multimedia type: Movie, Music, Image, Record Ma ager. The ‘Home’ me u as figure below:
Whe the system has started, press OK
OKOK
OK key to switch to the Multimedia mode. The system will auto check whether there is a storage device
(USB). If there is o USB device, the followi g message will appear:

User manual
EN
14
3.2 USB storage device
O ce a USB device is fou d, the system will i itialize the USB device. Whe complete, the followi g i terface will appear:
If the USB device has more tha o e partitio , all the partitio s ca be displayed. At prese t the system support the followi g partitio formats:
FAT a d FAT32.
I Multimedia Mode, the i terface ca be divided i to 4 areas (see the figure above):
• List Ar
List ArList Ar
List Area (A)
ea (A)ea (A)
ea (A) displays the file a d folder list of the curre t partitio or directory.
• Preview Area (B)
Preview Area (B)Preview Area (B)
Preview Area (B) is used to preview photos.
• File I fo Area (C)
File I fo Area (C)File I fo Area (C)
File I fo Area (C) shows the i formatio of the selected media file.
• User Operatio Tips Area (D)
User Operatio Tips Area (D)User Operatio Tips Area (D)
User Operatio Tips Area (D) shows the available keys a d their fu ctio s.
After e teri g the Multimedia mode, the highlight is i the area A by default. You ca -
• Press V+/
V+/V+/
V+/-
--
-
keys to switch amo g the multimedia types to operate.
• Press CH
CHCH
CH-
--
- key to e ter the List Area (A).
I the List Area,
• press OK
OKOK
OK or V+
V+V+
V+ keys to e ter the curre t partitio or directory;
• press V
VV
V-
--
- key to go to the upper level directory;
• press BACK
BACKBACK
BACK key to move the highlight back to the area A to select other media type.
A – List Area B – Preview Area
C
–
File I fo
D
–
User Operatio Tips

User manual
15
EN
3.3 Movie
The Movie module is for playi g video files stored o the USB device. I the Module Select Area, press V+/
V+/V+/
V+/-
--
- keys to select the Movie type, the
press OK
OKOK
OK or CH
CHCH
CH-
--
- keys to e ter the video file list area. If there is o video file, the scree will appear. See the figure below:
After selecti g a movie, you ca press OK
OKOK
OK key to play it. The play i terface is as below:
• Press CH+/
CH+/CH+/
CH+/-
--
- keys to select the previous or ext video files.
• Press OK/V+
OK/V+OK/V+
OK/V+ keys to play the selected video file. (If the video file is u der a folder, pressi g V
VV
V-
--
- key ca exit the folder.)
• Video I fo:
Video I fo: Video I fo:
Video I fo: Whe a video playback starts, the i formatio of the video file will be show for 3 seco ds. You ca press INFO
INFOINFO
INFO key to
show the i formatio agai after it disappears.
• Fast Play:
Fast Play: Fast Play:
Fast Play: Press FRW/FFW
FRW/FFWFRW/FFW
FRW/FFW keys to fast move forward or backward through the video. The max fast play speed is x32. Press ► key to
resume the ormal playback.
• Switch Video:
Switch Video: Switch Video:
Switch Video: Press∣
∣∣
∣◄◄/
//
/►►∣
∣∣
∣keys to go to the previous or ext video files to play.
• Stop:
Stop: Stop:
Stop: Press
█ key to stop the curre t playback a d retur to the Multimedia Mode i terface.
• Pause:
Pause: Pause:
Pause: Press‖key to pause the curre t playback. Pressi g ►
key ca resume the playback.
• Exit:
Exit: Exit:
Exit: Press MENU
MENUMENU
MENU or BACK
BACKBACK
BACK keys to exit the playback state.

User manual
EN
16
3.4 Music
The Music module is for playi g audio files stored o the USB device. Most popular audio formats are all supported. I the Module Select Area,
press V+/
V+/V+/
V+/-
--
- keys to select the Music type, the press OK
OKOK
OK or CH
CHCH
CH-
--
- keys to e ter the audio file list area. See the figure below:
• Press CH+/
CH+/CH+/
CH+/-
--
- keys to select the previous or ext audio files.
• Press OK/V+
OK/V+OK/V+
OK/V+ keys to play the selected audio file. (If the audio file is u der a folder, pressi g V
VV
V-
--
- key ca exit the folder.)
• Fast Play:
Fast Play: Fast Play:
Fast Play: Press FRW/FFW
FRW/FFWFRW/FFW
FRW/FFW keys to fast move forward or backward through the audio file. The max fast play speed is x32. Press ►
key to resume the ormal playback.
• Switch Audio:
Switch Audio: Switch Audio:
Switch Audio: Press∣
∣∣
∣◄◄/
//
/►►∣
∣∣
∣keys to go to the previous or ext audio files to play.
• Stop:
Stop: Stop:
Stop: Press █ key to stop the curre t playback.
• Pause:
Pause: Pause:
Pause: Press
‖
key to pause the curre t playback. Pressi g ► key ca resume the playback.
• Exit:
Exit: Exit:
Exit: Press MENU
MENUMENU
MENU or BACK
BACKBACK
BACK keys to exit the playback i terface a d retur to the multimedia type select i terface. (Note that if the
backgrou d play fu ctio has bee tur ed o , the music will ot stop but become backgrou d music.)

User manual
17
EN
3.5 Image
The Image module is for playi g image files stored o the USB device. Most popular image formats are all supported. I the Module Select Area,
press V+/
V+/V+/
V+/-
--
- keys to select the Photo type, the press OK
OKOK
OK or CH
CHCH
CH-
--
- keys to e ter the image file list area. See the figure below:
• Press OK/V+
OK/V+OK/V+
OK/V+ keys to play the selected image i full scree mode. By default the system will e able the slideshow fu ctio to play all
the images i the curre t directory. See the figure below:
•
Switch Image:
Switch Image: Switch Image:
Switch Image: Press
∣
∣∣
∣
◄◄/
//
/►►
∣
∣∣
∣
keys to play the previous or ext images.
• Image I fo:
Image I fo: Image I fo:
Image I fo: Press INFO key to show the detailed i formatio of the image.
• Rotate:
Rotate: Rotate:
Rotate: Press V+/
V+/V+/
V+/-
--
- keys to rotate the image 90° a ticlockwise or clockwise.
• Flip:
Flip: Flip:
Flip: Press CH+/
CH+/CH+/
CH+/-
--
- keys to flip the image up or dow .
• Exit:
Exit: Exit:
Exit: Press EXIT or RECALL keys to exit the playback state.

User manual
EN
18
3.6 Record manager
The Record Ma ager module is for users to carry out record setti g a d view the programs recorded. See the figure below:
If the USB device has more tha o e partitio , you should ma ually set the partitio i which record files will be saved.
• Red fu ctio key: Set the selected partitio as the default record partitio .
• Yellow fu ctio key: Format the selected partitio i to NTFS format.
• Blue fu ctio key: Format the selected partitio i to FAT32 format
To view record files, select the partitio that stores the record files a d the press ENTER key to e ter it. The system will auto list all the
recorded programs, see below:
•
To play a record file: press CH+/- keys to select the record file first a d the press OK/V+ keys to play it.
• Duri g playback, the thi gs you ca do o ly i clude to press FRW/FFW keys to fast backward or forward play the file, a d to press
BACK key to retur to the record file list. Both file switchi g a d repeat mode setti g ca ot be do e.
• Whe the playback completes, the system will auto retur to the record file list.
• To delete a record file: select it first a d the press the red fu ctio key.
• To re ame a record file: select it first a d the press the gree fu ctio key.

User manual
19
EN
4. Main menu
The Mai Me u has six items: I stallatio , Cha el, Prefere ce, Setti g, a d AV, which i clude all setti g items of the syste
m.
Press MENU key to e ter the Mai Me u, see the figure below:
4.1 Installation
There are five sub items:
• A te a Setup:
A te a Setup:A te a Setup:
A te a Setup: A te a a d LNB setti gs
• Satellite List:
Satellite List:Satellite List:
Satellite List: Satellite list setti g
• TP List:
TP List:TP List:
TP List: Tra spo der list setti g
• Motor Setti g:
Motor Setti g:Motor Setti g:
Motor Setti g: Polar axis motor setti g
• Limit Setup:
Limit Setup:Limit Setup:
Limit Setup: Polar axis move limit setti g
To search for programs or add ew programs, you should e ter the I stallatio me u.
To e ter the I stallatio me u, press CH+/
CH+/CH+/
CH+/-
--
- keys i the Mai Me u to highlight the I stallatio item a d the press OK
OKOK
OK or V+
V+V+
V+ keys. A password
i put dialog pops out. After e teri g a correct password (default password is ‘0000’), the I stallatio me u appears. See the figure below.

User manual
EN
20
4.1.1 Antenna setup
I the I stallatio me u press CH+/
CH+/CH+/
CH+/-
--
- keys to highlight the A te a Setup sub item a d the press OK
OKOK
OK or V+
V+V+
V+ keys to e ter the A te a Setup
page (See Fejl! He vis i gskilde ikke fu det.
Fejl! He vis i gskilde ikke fu det.Fejl! He vis i gskilde ikke fu det.
Fejl! He vis i gskilde ikke fu det.).
There are these setti g items:
• Satellite:
Satellite:Satellite:
Satellite: Select a satellite from the existi g satellite list.
• LNB Type:
LNB Type:LNB Type:
LNB Type: Set the worki g freque cy ba d for LNB (three optio s: Ku Ba d, C Ba d User, U icable a d JESS).
• LNB Freque cy:
LNB Freque cy:LNB Freque cy:
LNB Freque cy: Set the local oscillatio freque cy of LNB.
• Tra spo der:
Tra spo der:Tra spo der:
Tra spo der: Select a tra spo der from the existi g tra spo der list.
• 22KHz:
22KHz:22KHz:
22KHz: Tur o or off the 22KHz switch (O , Off).
• LNB Power:
LNB Power:LNB Power:
LNB Power: Set whether or ot there is a STB to supply power to LNB.
• To e Burst Mode:
To e Burst Mode:To e Burst Mode:
To e Burst Mode:
Select to e burst mode (three potio s: To e Burst A, To e Burst B, NONE).
• DiSEqC
DiSEqCDiSEqC
DiSEqC (Digital Satellite Equipme t Co trol) Mode:
Mode:Mode:
Mode: Select i put sig al. Whe more tha o e LNB is used, DiSEqC ca be used to
select o e LNB to i put.
I the A te a Setup page, you ca press
CH+/
CH+/CH+/
CH+/
-
--
-
keys to highlight a setti g item a d the press
OK
OKOK
OK
key to e ter correspo di g editi g state.
I
the editi g state press CH+/
CH+/CH+/
CH+/-
--
- keys to select a optio a d the press OK
OKOK
OK key to exit editi g.
4.1.2 Satellite list
The Satellite List (see figure left) shows all the satellites, the system has stored. Users ca press color fu ctio keys o the remote co troller to
edit the list, for example to add a satellite (by pressi g the red fu ctio key), to delete a satellite (by pressi g the yellow fu ctio key), to search
the selected satellite (by pressi g the blue fu ctio key), etc.
Also you ca press the gree fu ctio key to edit the detailed i formatio of the selected satellite: Satellite Name, Positio a d Lo gitude. See
the figure to the right.
This manual suits for next models
2
Table of contents
Languages:
Other Triax Receiver manuals

Triax
Triax TR-43 User manual

Triax
Triax Digital Satellite Receiver SR 110 User manual

Triax
Triax SR 322 User manual

Triax
Triax DVB C1 User manual

Triax
Triax S-HD 910 User manual

Triax
Triax ST-HD527 CI User manual

Triax
Triax ST-220 User manual

Triax
Triax SR-26 User manual

Triax
Triax TR112 User manual

Triax
Triax STR 333 Mounting instructions

Triax
Triax CR 310 User manual

Triax
Triax QUAD TVC 05 User manual

Triax
Triax ORB 923 Series User manual

Triax
Triax S-HD 207 User manual

Triax
Triax DVB 63S User manual

Triax
Triax TR-43 User manual

Triax
Triax ST-HD 537 User manual

Triax
Triax Zapper T2-HD115 User manual

Triax
Triax TR 305 User manual

Triax
Triax DVB 75SI User manual