manuals.online logo
Brands
  1. Home
  2. •
  3. Brands
  4. •
  5. Tripp Lite
  6. •
  7. Switch
  8. •
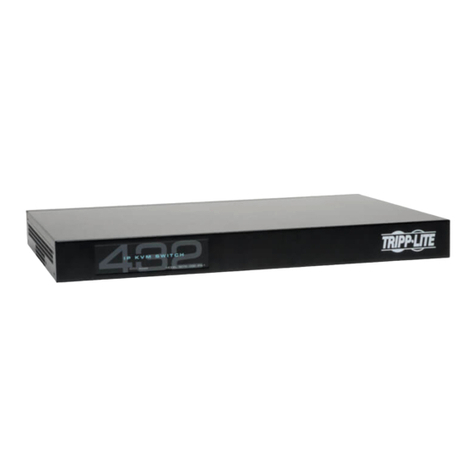
  9. Tripp Lite Minicom Smart 108 IP User manual

Tripp Lite Minicom Smart 108 IP User manual

2
Connector Function
Console KVM (Optional) Connect a keyboard, video and mouse
116 IP
locally
Serial This port is for future Serial
functionality
Flash To update firmware of the analogue part of the S
m
OSD, Switch, RICCs and
RoCs.
LAN Connect to 10/100 Mbit Ethernet. Green LED ill
um
connected to a 100 Mbit/sec network. Yellow Led
connected to a 10 Mbit/sec
network.
Server ports Connect to servers via
RICC/ROCs
Smart 108 / 116 IP - Quick
Start
1.
Introduction
To take advantage of the full range of features, we recommend
y
User Guide after performing the Quick Start procedure. It’s in
P
on the supplied CD or on our website www.minicom.com in
the
All references throughout this guide to the Smart 116 IP refer
equal
108 IP. The two units are functionally the same. The Smart 116
ports and the Smart 108 IP has 8 Server
ports.
The Smart 116 IP extends your KVM (keyboard, video, and m
ouse)
computer or server over TCP/IP via LAN, WAN or Internet
connec
can control, monitor and manage up to 16 remote servers from
wherever
inside or outside the organization. The Smart 116 IP is a cost-ef
f
solution, for secure remote KVM access & control of 16 com
puter
the BIOS level - independent of the OS. One local analog or
one
user can access and control 16 multi-platform (PS/2, SUN,
USB)
QUICK START GUIDE
Figure 2 illustrates the rear panel of the Smart 116 IP. The Sm
art
Server
ports.
Monitor
I
CONSOLE
0
SERIAL
9
10 11 12 13 14 15
16
POWER
100-240 VAC 50/60
Hz
FLASH
LAN
1234567
8
Flash
(download) LAN (Ethernet)
Power
connector
Mouse
Keyboard connector connector Server ports
4.2 Connector table
Figure 2 Smart 116 IP rear panel
5. Pre-installation
guidelines
•
Place cables away from fluorescent lights, air conditioners,
are likely to generate electrical
noise
•
Place the Smart 116 IP on a flat, clean and dry
surface
•
The Smart 116 IP is not intended for connection to exposed
•
Ensure that the maximum distance between each computer
and
IP, does not exceed 10m/33ft for RICCs and 30m/100ft for
1111 W. 35th Street, Chicago, IL 60609 USA
www.tripplite.com/support
Copyright ©2012
Tripp Lite. All rights reserved.
LED Function
Power
Power
Indicator
Remote
Illuminates when r
e
Link
Unit is connected t
o
Button Function
Local
When pressed, Sm
a
and the local mo
use
LED turns
off.
Reset
Press and hold for
m
to operate the
Smart
m
art 116 IP system
-
um
inates when unit
is
illuminates when unit
is
Start
Guide
SM
A
2. System
components
The system consists
of:
•
1 Smart 116 IP (p/n 0SU600
0
•
Rack mounting set (p/n
5AC20247)
•
1 RS232 Download cable
(p/n
•
ROCS - PS/2, USB.
(Ordered
3.
Compatibility
The Smart 116 IP is compatible
w
ith:
•
PS/2, SUN and USB
computer
s/servers
•
VGA, SVGA, or XGA
monitors
•
Windows, Linux, UNIX and
other
4. The Smart 116 IP
unit
Figure 1 illustrates the front panel of
y
ou read
the softcopy
P
DF
format
MINICOM
Power Remote
Link
Figure 1 S
m
the
Support
section.
equal
ly to the
Smart
IP has 16
Server
ouse)
from
any
connec
tion. Now
you
wherever
you
are,
f
ective
hardware
puter
s/servers
from
one
remote digital
IP
USB)
servers.
4.1 LED and button table
art
108 IP has
8
SM
A
6. Connecting the
sy
stem
Figure 3 illustrates the Smart 116 IP
system
I
CONSOLE
0
POWE R
100-240
VAC 50/60
Hz
Remote User
Internet / VPN /
L
A
6.1 The
ROCs
Figure 3 Sma
r
and machines
that
outdoor
lines
and
the Smart
116
ROCs.
Each computer/server is directly
connected
ROC using CAT5 cable in a star con
f
remote ROCs. The ROCs draw their
power
(ROC PS/2) or from the USB port (
ROC
6.1.1 Connecting a ROC
PS/
2
You can connect the ROC PS/2 to a
powered
following order. Failure to connect
in
lead to the mouse malfunctioning
until
1. Connect the Mouse connector to
the
2. Connect the Keyboard connector
to
3. Connect the Screen connector to
the
6.1.2 Connecting a ROC
US
B
The ROC USB supports Windows
98
modern Linux
distributions.
To connect the ROC
USB:
1. Connect the Screen connector to
the
2. Connect the USB connector to
the
1111 W. 35th Street, Chicago, IL 60609 USA
www.tripplite.com/support
Tripp Lite. All rights reserved.
3
e
mote session is
active
o
the
network
a
rt 116 IP disconnects the Client remote
session
use
and keyboard become operational. The
Remote
m
ore than 7 seconds to reset the Smart 116 IP
unit
A
RT 108 / 116 IP
0
5)or 1 Smart 108 IP (p/n
0SU70032
5AC20247)
(p/n
5CB40419)
(Ordered
separately). CAT5 cables (1.5m
provided)
ith:
s/servers
other
major operating
systems
the Smart 116
IP.
m
art 116 IP front panel
SMART 116 IP
Local
Reset
1
A
RT 108 / 116 IP
stem
system
overview.
SERI AL
9 1 0 11 12 13 14 15
16
FLASH LAN 1 2 3 4 5 6 7 8
To LAN port
To servers
A
N
ROCs
r
t 116 IP system overview
connected
to the Smart 116 IP via the
appropriate
f
iguration. No external power is needed at
the
power
from the computer’s keyboard
port
ROC
USB).
2
powered
on computer, but it must be in
the
in
this order while the server is running,
may
until
the server is
rebooted.
the
computer’s Mouse
port.
to
the computer’s Keyboard
port.
the
computer’s Video
port.
B
98
SE and later, MAC, SUN and SGI, and
all
the
computer’s Video
port.
the
computer’s USB
port.
All manuals and user guides at all-guides.com
all-guides.com
6 7
QUICK START GUIDE
6.2 Connecting to the network
Connect the network cable to the LAN port of the Smart 116 IP. This must be
done
before powering on the Smart 116
IP.
6.3 Connecting the CAT5 cables
1. Connect one connector to the RICC/ROCs RJ45
port.
2. Connect the other connector to one of the Smart 116 IP’s Computer
ports.
3. Follow the above 2 steps for each
computer.
6.4 Connecting the power supply
1. Using the Power cord provided, connect the Smart 116 IP to a socket outlet
with
grounding connection. Only use the power cord supplied with the
unit.
2. Switch on the Smart 116
IP.
7. Initial settings - Default IP
address
The following sections provide instructions for setting the IP address for the
Smart
116 IP
unit.
By default, Smart 116 IP boots with an automatically assigned IP address from
a
DHCP (Dynamic Host Configuration Protocol) server on the network. The
DHCP
server provides a valid IP address, gateway address and subnet
mask.
To identify the IP address, the Smart 116 IP MAC address appears on the
underside
of the Smart 116 IP box. The device number (D.N.) can also be found
there.
If no DHCP server is found on the network, Smart 116 IP boots with the static
IP
address
:
192.168.0.155.
Note! If a DHCP server later becomes available, the unit picks up the IP
settings
from DHCP server. To keep the static IP address, disable DHCP – explained in
the
softcopy User
Guide.
7.1 Static IP addresses for a number of units
Where you want to connect more than 1 Smart 116 IP to the same network
and
there is no DHCP server, or you want to use static IP addresses, do the
following:
Connect the Smart 116 IP units one at a time and change the static IP address
of
each unit before connecting the next
unit.
SMART 108 / 116 IP
8. Logging into the Web
interface
Client computer operating system. - Windows 2000 or higher, with Firefox 3
or
Internet Explorer 7.0 or later version. Linux with Firefox
3.
Complete the initial setup via the Web configuration
interface:
1. Open your Web browser and type the Smart 116 IP system IP address
-
https://IP address/ - and press Enter. The login page
appears.
2. In mode select Configuration.
3. Type the default Administrator user name admin and password access
(both
lower
case).
4. Press Enter. The Web interface opens at the Network Configuration page,
see
Figure
4.
Figure 4 Smart 116 IP Web interface
9. The
OSD
To display the
OSD:
1. Ensure there is no remote user connected. To disconnect the remote user
press
the Local button on the Smart 116
IP.
2. Press Shift twice. The OSD Main window appears. See Figure 5. Lines
with
yellow text show active computers. Lines with blue text show
inactive
computers. The Type column indicates a computer “C” is connected to the
port.
4 5
QUICK START GUIDE
Port number
SMART 108 / 116 IP
The screen of the currently selected Target Server with Minicom toolbar
appears
see Figure
6.
appears here C=computer
Instruction
keys
Figure 5 OSD Main window Server name Toolbar
9.1 Navigating the OSD
To navigate up and down use the Up and Down arrow
keys.
To jump from one column to the next (when relevant) use the Tab
key.
To exit the OSD or return to a previous window within the OSD press Esc
.
9.2 Selecting a computer
To select a
computer:
1. Navigate to the desired computer
line.
Or, type the port number of the desired
computer.
2. Press Enter. The selected computer is accessed. A Confirmation label
appears
showing which computer is
accessed.
Note! When the OSD is displayed you cannot select computers using the
keyboard
hotkeys.
10. Starting a remote
session
Figure 6 Remote console window
Locks Toolbar Session
Profile Disconnect
At a Client computer open the web browser and type the Smart 116 IP’s IP
address.
https://IP address. The Login page appears. Type your username and password
and
Video
Settings
Power Control
Settings
Keyboard
Settings
Mouse
Settings
Full
Screen
Mode Session
(Currently not
operational)
Target Switching
Menu
press Enter. By default, the user name is: admin and the password is access,
(both
lower
case).
Note! There is a shortcut to the Configuration pages from the login page. Click
the
arrow to toggle between the option to access a remote session or the
configuration pages.
On first connection install the Minicom certificate and ActiveX control. You
must
login as an Administrator to your computer to install the ActiveX control. Once
the
ActiveX control is installed, all types of users can
login.
When using a Firefox browser, install the Minicom Firefox
add-on.
Figure 7 Toolbar icons
10.1 Switching to a different server/device
To connect to a different
server/device:
1. From the Toolbar, click . A list of connected servers/devices
appears.
2. Click the desired server. The screen of the server
appears.
To complete the initial setup and log into the web interface please see the softcopy
User
Guide on the supplied CD or on our website
www.minicom.com
in the Support
section.
201204199 • 933208_EN
All manuals and user guides at all-guides.com

This manual suits for next models

1

Other Tripp Lite Switch manuals

Tripp Lite NetCommander B070-008-19-IP User manual

Tripp Lite

Tripp Lite NetCommander B070-008-19-IP User manual

Tripp Lite NetDirector B022-U08-IP User manual

Tripp Lite

Tripp Lite NetDirector B022-U08-IP User manual

Tripp Lite B004-VUA2-K-R User manual

Tripp Lite

Tripp Lite B004-VUA2-K-R User manual

Tripp Lite NGI-U08C2 User manual

Tripp Lite

Tripp Lite NGI-U08C2 User manual

Tripp Lite AG-01FD Series User manual

Tripp Lite

Tripp Lite AG-01FD Series User manual

Tripp Lite U215-002 User manual

Tripp Lite

Tripp Lite U215-002 User manual

Tripp Lite U460-ST4-4A-C User manual

Tripp Lite

Tripp Lite U460-ST4-4A-C User manual

Tripp Lite B007-008 User manual

Tripp Lite

Tripp Lite B007-008 User manual

Tripp Lite B310-701-4K User manual

Tripp Lite

Tripp Lite B310-701-4K User manual

Tripp Lite B119-4X1-MV User manual

Tripp Lite

Tripp Lite B119-4X1-MV User manual

Tripp Lite U460-4A3C-IND User manual

Tripp Lite

Tripp Lite U460-4A3C-IND User manual

Tripp Lite U360-004-MINI User manual

Tripp Lite

Tripp Lite U360-004-MINI User manual

Tripp Lite NetDirector B024-DPU08 User manual

Tripp Lite

Tripp Lite NetDirector B024-DPU08 User manual

Tripp Lite NetCommander B070-016-19-IP2 User manual

Tripp Lite

Tripp Lite NetCommander B070-016-19-IP2 User manual

Tripp Lite U359-002 User manual

Tripp Lite

Tripp Lite U359-002 User manual

Tripp Lite NetDirector B060-032 Installation and operating instructions

Tripp Lite

Tripp Lite NetDirector B060-032 Installation and operating instructions

Tripp Lite 108 User manual

Tripp Lite

Tripp Lite 108 User manual

Tripp Lite NetCommander B072-016-IP4 User manual

Tripp Lite

Tripp Lite NetCommander B072-016-IP4 User manual

Tripp Lite B022-002-KT-R User manual

Tripp Lite

Tripp Lite B022-002-KT-R User manual

Tripp Lite NSU-G24C2 User manual

Tripp Lite

Tripp Lite NSU-G24C2 User manual

Tripp Lite B005-008 User manual

Tripp Lite

Tripp Lite B005-008 User manual

Tripp Lite NetCommander B070-016-19 User manual

Tripp Lite

Tripp Lite NetCommander B070-016-19 User manual

Tripp Lite B004-002 Series User manual

Tripp Lite

Tripp Lite B004-002 Series User manual

Tripp Lite B064-008-01-IPG User manual

Tripp Lite

Tripp Lite B064-008-01-IPG User manual

Popular Switch manuals by other brands

Vanco Evolution EVSW4K41 manual

Vanco

Vanco Evolution EVSW4K41 manual

Swedstyle LOGIClink manual

Swedstyle

Swedstyle LOGIClink manual

IBM RedBooks SAN24B-5 Installation, service and user guide

IBM

IBM RedBooks SAN24B-5 Installation, service and user guide

AETEK H70-084-30 Quick installation guide

AETEK

AETEK H70-084-30 Quick installation guide

AFi N-111 user manual

AFi

AFi N-111 user manual

HP A-RPS1600 Compliance and Safety Manual

HP

HP A-RPS1600 Compliance and Safety Manual

Contemporary Controls CTRLink EISK8P-GT installation guide

Contemporary Controls

Contemporary Controls CTRLink EISK8P-GT installation guide

DeviceWell SDI 10-Screen Multiview user manual

DeviceWell

DeviceWell SDI 10-Screen Multiview user manual

IBM 8270 Installation and service guide

IBM

IBM 8270 Installation and service guide

Niveo NGSME48T2H user manual

Niveo

Niveo NGSME48T2H user manual

Tigo TSS-50-US quick start guide

Tigo

Tigo TSS-50-US quick start guide

Sunbather Wireless SunSwitch operating instructions

Sunbather

Sunbather Wireless SunSwitch operating instructions

Barnes UltraGRIND installation manual

Barnes

Barnes UltraGRIND installation manual

TRENDnet TU2-400 Quick installation guide

TRENDnet

TRENDnet TU2-400 Quick installation guide

King Pigeon N80 user manual

King Pigeon

King Pigeon N80 user manual

Extron electronics MediaLink VersaTools MLS 100 A user manual

Extron electronics

Extron electronics MediaLink VersaTools MLS 100 A user manual

Intellinet IPS-16GM02-374W instructions

Intellinet

Intellinet IPS-16GM02-374W instructions

ATEN Altusen KN2116VA user manual

ATEN

ATEN Altusen KN2116VA user manual

manuals.online logo
manuals.online logoBrands
  • About & Mission
  • Contact us
  • Privacy Policy
  • Terms and Conditions

Copyright 2025 Manuals.Online. All Rights Reserved.