Table of Contents
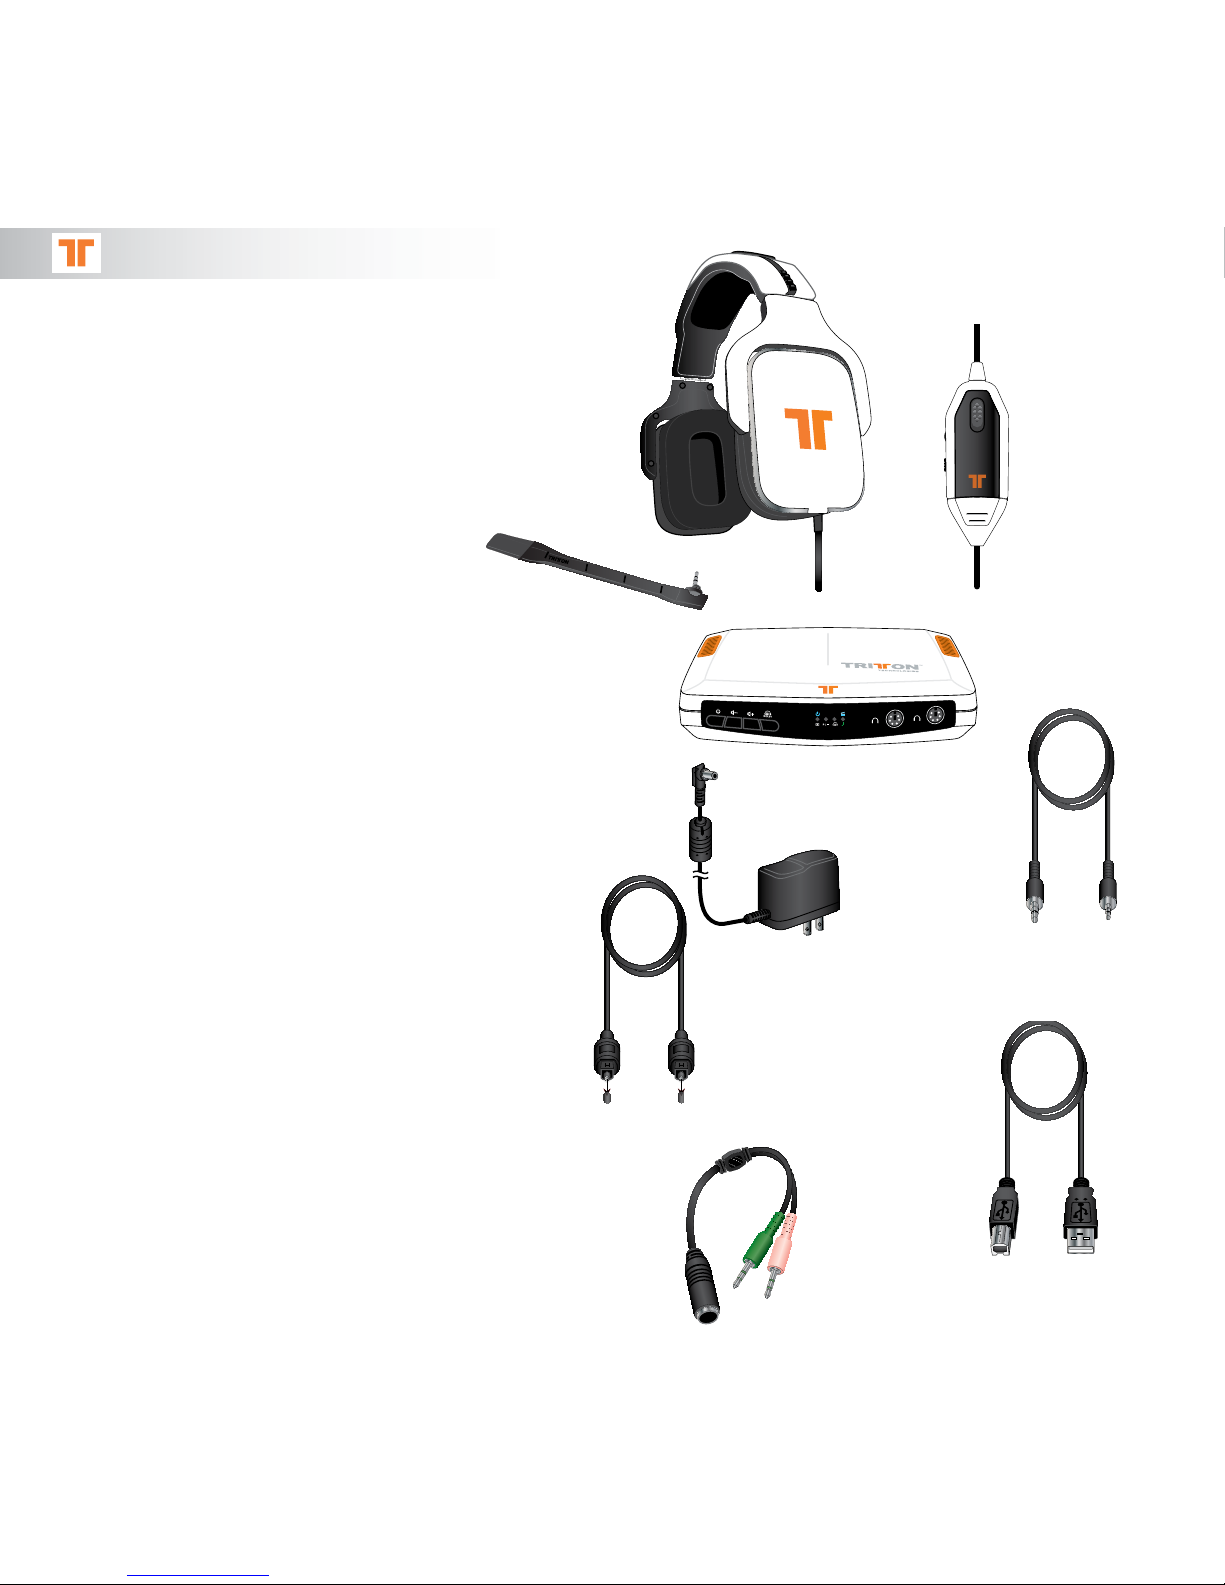
Package Contents . . . . . . . . . . . . . . . . . . . . . . . . . . . . . . . . . . . . . . . 3
Ax 720 Features
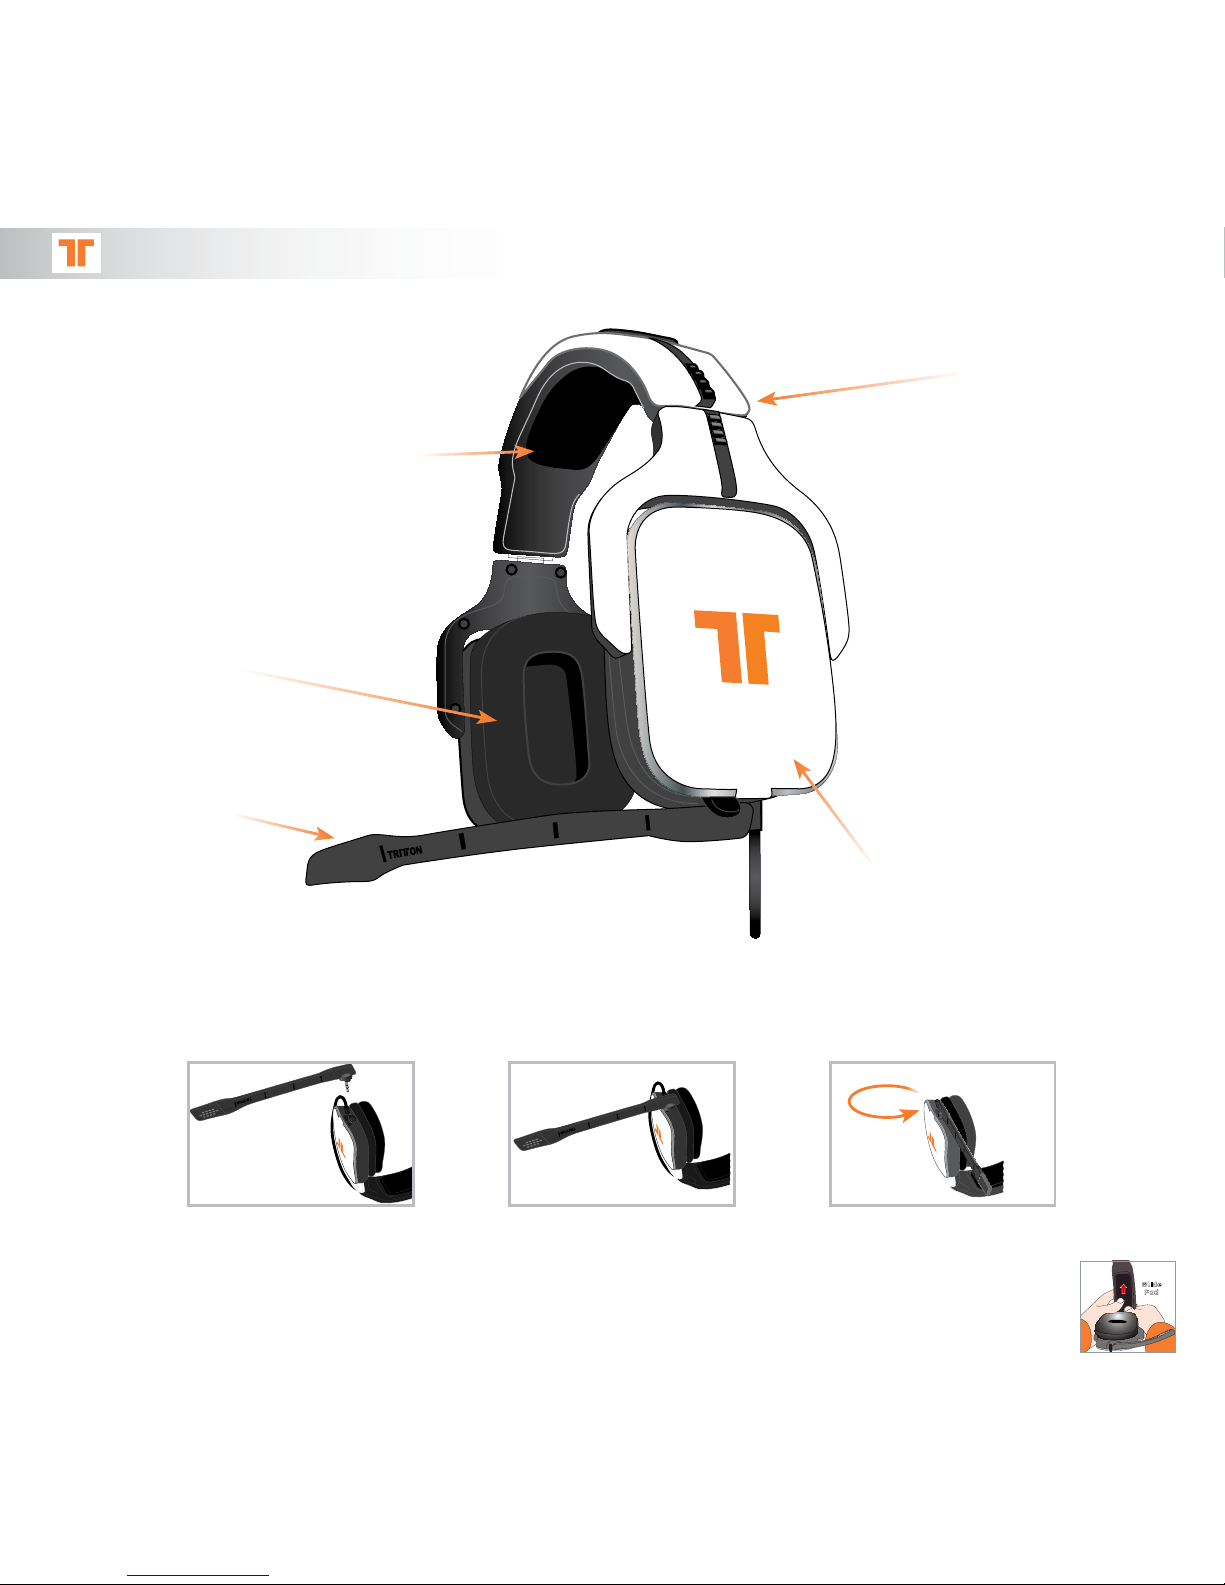
Headset . . . . . . . . . . . . . . . . . . . . . . . . . . . . . . . . . . . . . . . . . . . 4
Inline Controller . . . . . . . . . . . . . . . . . . . . . . . . . . . . . . . . . . . . . . . 5
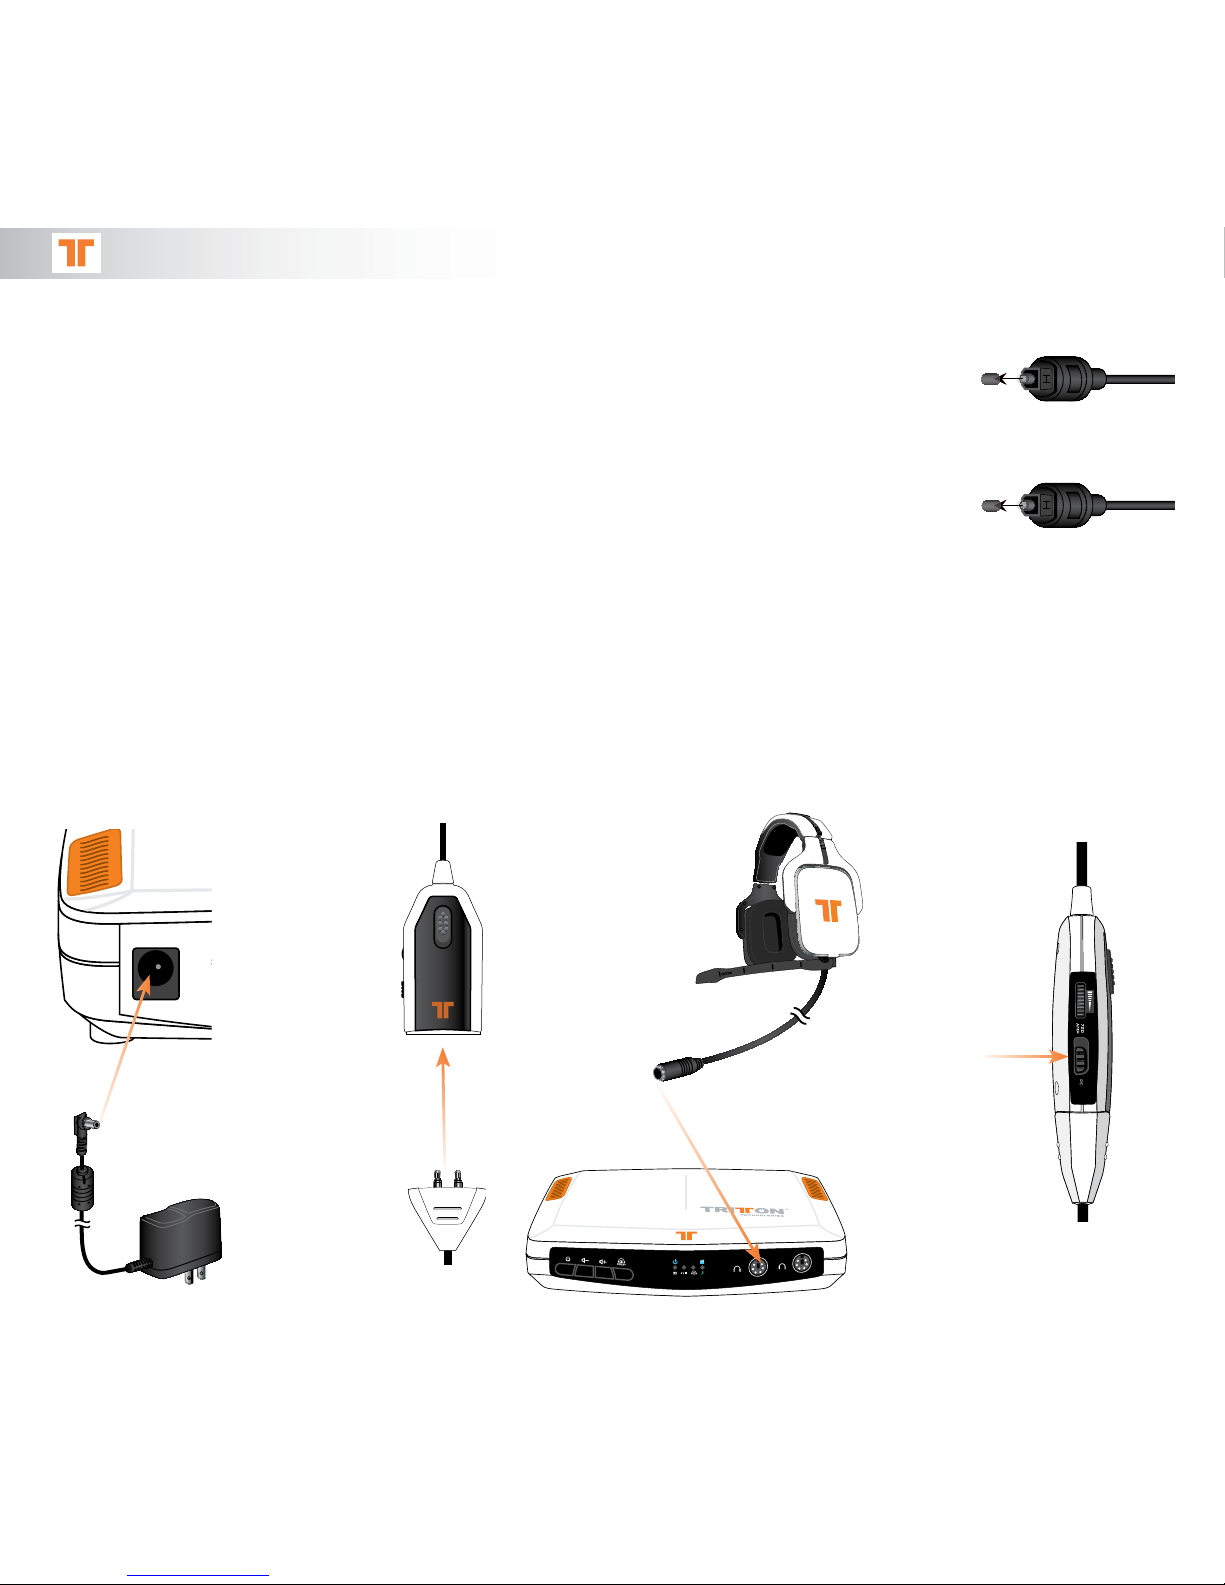
720 Amp . . . . . . . . . . . . . . . . . . . . . . . . . . . . . . . . . . . . . . . . . . . 6
Set Up
AX 720 Assembly . . . . . . . . . . . . . . . . . . . . . . . . . . . . . . . . . . . . . . 7
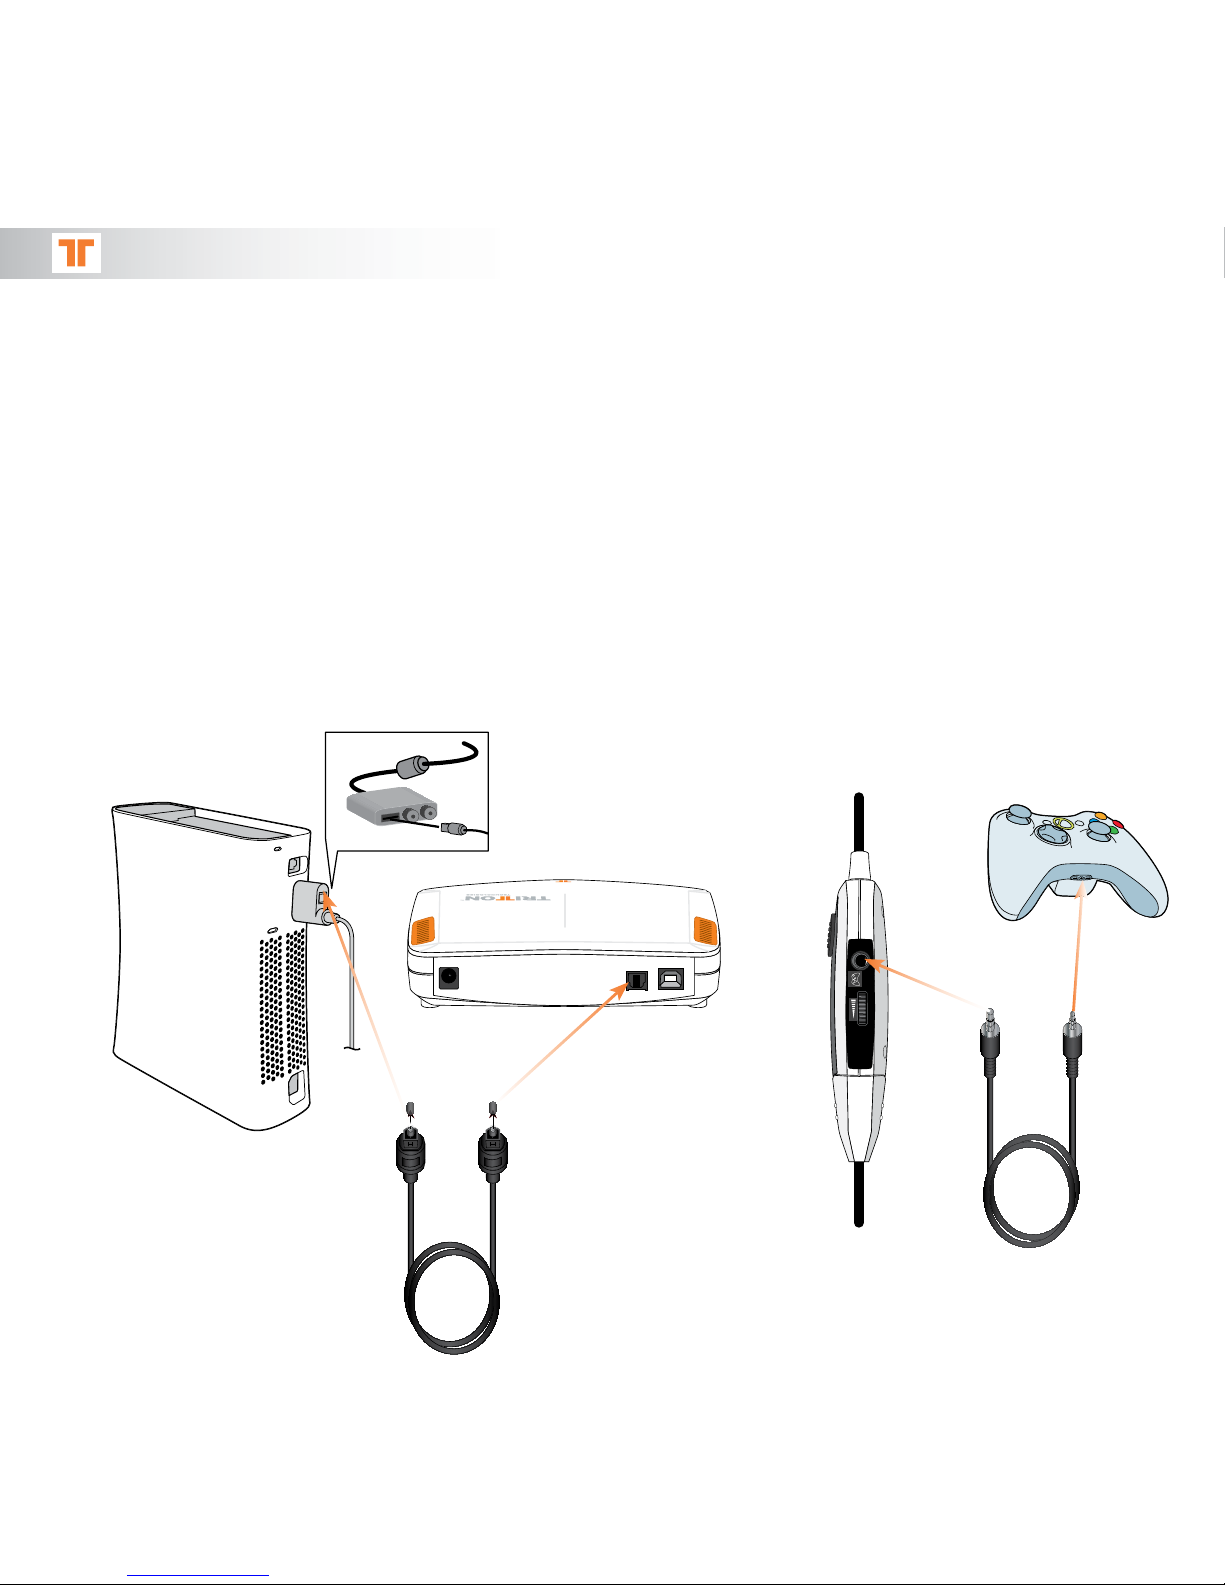
Connect To XBOX 360TM . . . . . . . . . . . . . . . . . . . . . . . . . . . . . . . . . . . 8
Connect To PS3®. . . . . . . . . . . . . . . . . . . . . . . . . . . . . . . . . . . . . . . 9
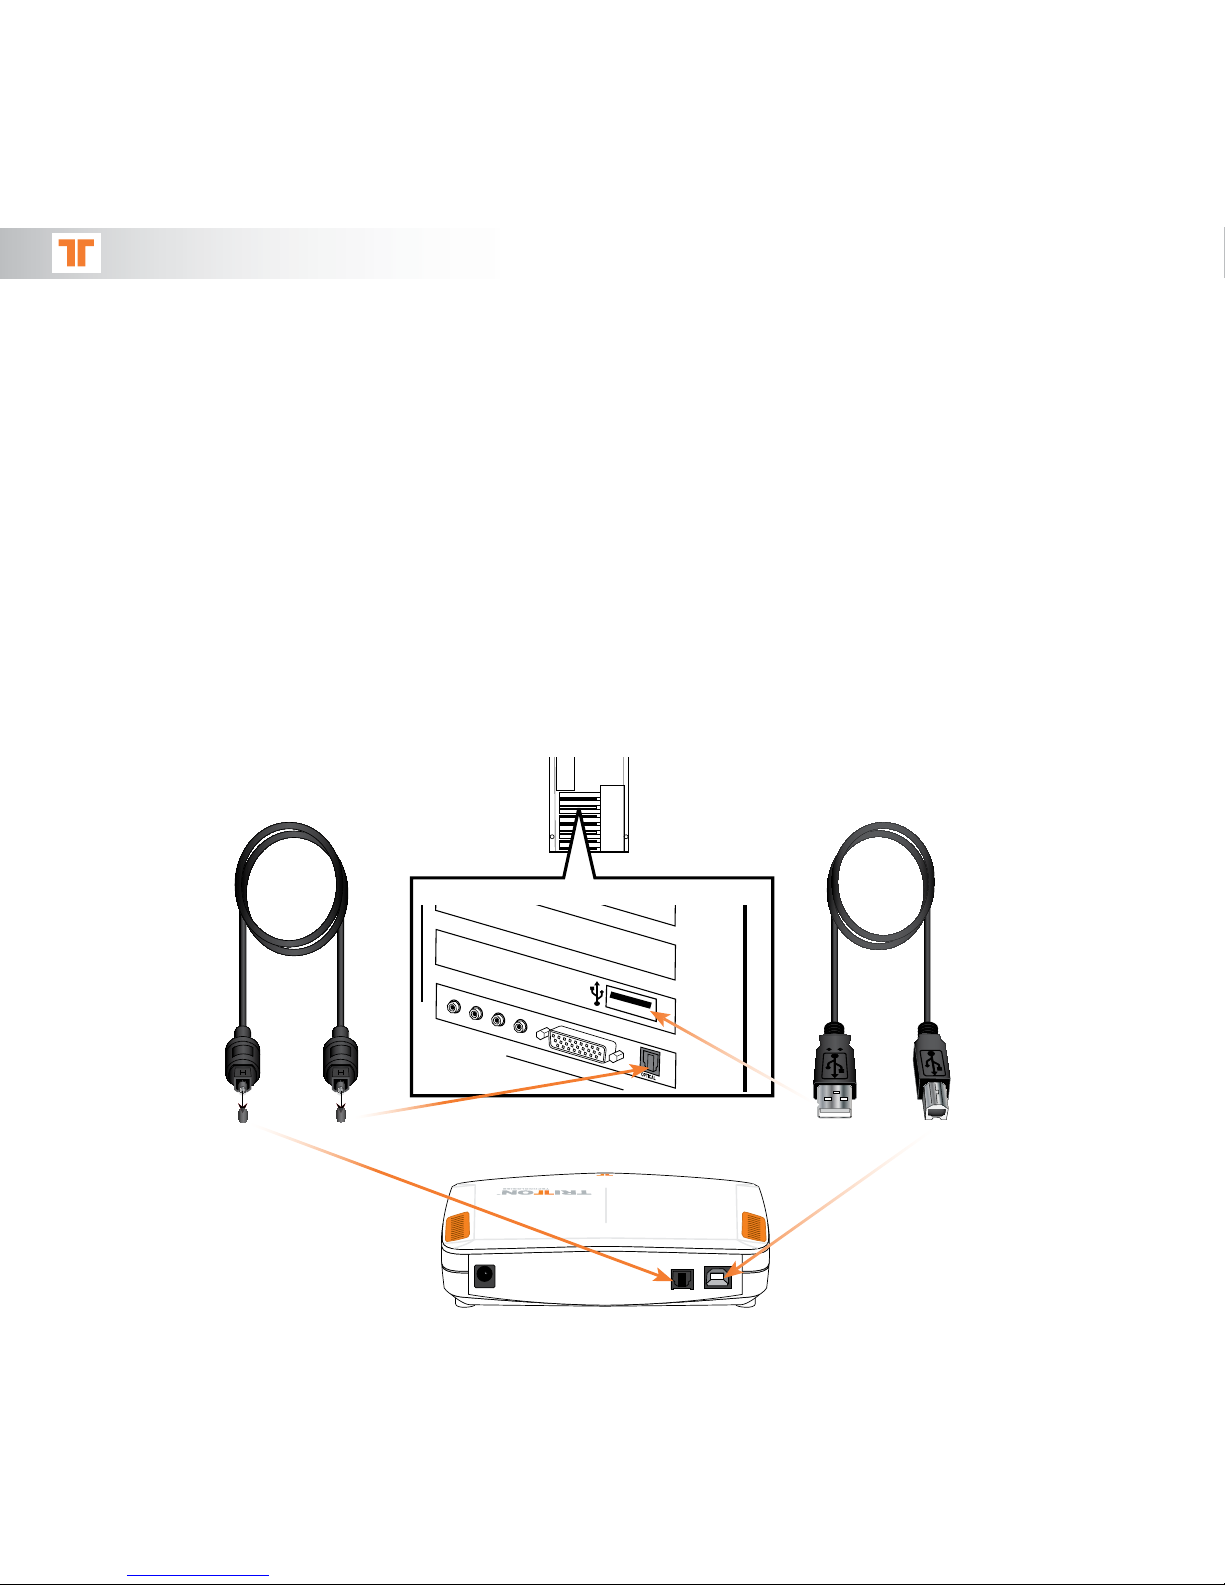
Connect To PC/Mac®With Optical . . . . . . . . . . . . . . . . . . . . . . . . . . . . . 10
Connect To PC With Analog . . . . . . . . . . . . . . . . . . . . . . . . . . . . . . . . 11
Connect To DVD Player . . . . . . . . . . . . . . . . . . . . . . . . . . . . . . . . . . . 11
Warranty . . . . . . . . . . . . . . . . . . . . . . . . . . . . . . . . . . . . . . . . . . . . . . 12
Register your product at Trittonusa.com to receive warranty
coverage, news, events and updates.
If you have any issues using this product,
please try the following before returning this product to the store:
•Be sure to remove the plastic protective caps from the optical cable
•On the PS3, make sure that the DTS box is UNCHECKED in the Sound Settings > Digital
Optical settings
•If using with an XBOX 360, PS3, or PC with optical, make sure that the inline controller
switch is set to AMP
•The User Manual includes a Troubleshooting Section. Many common issues can be easily
resolved by reading this section of the manual
•For immediate support, visit http://www.trittontechnologies.com to find the latest
documentation, Knowledge Base articles, and software for your device. You can also chat
live with a support technician or submit a trouble ticket
•For telephone support, please call us at 800-431-1176 and one of our friendly support
technicians will be happy to assist you
Thank you for choosing TRITTON Technologies.