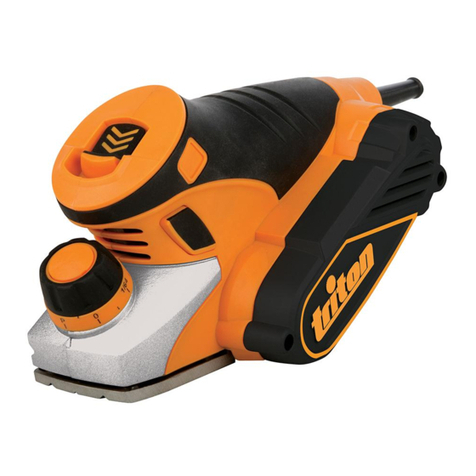
Triton TSPL 152 Assembly instructions

Version date: 13.02.20
tritontools.com
1100W Surface Planer
Operating & Safety Instructions
Bedienings- en
veiligheidsvoorschriften
Instruções de
Operação e Segurança
Instructions d’utilisation
et consignes de sécurité
Instrukcja obsługi
i bezpieczeństwa
Sicherheits- und
Bedienungsanleitung
Инструкции по эксплуатации и
правила техники безопасности
Istruzioni per l’uso
e la sicurezza
Kezelési és
biztonsági utasítások
Instrucciones de
uso y de seguridad
Provozní a
bezpečnostní pokyny
Prevádzkové a
bezpečnostné pokyny
Çalışma ve
Güvenlik Talimatları
TSPL 152
350767/850827_Manual.indd 1 13/02/2020 10:09

2
1 2 3
786584
12 8 1311109
8
350767/850827_Manual.indd 2 13/02/2020 10:09

3
14
15
16
17
18
19
20212223
24
25
26
27
31 32
33
34
35
36
30
29
28
350767/850827_Manual.indd 3 13/02/2020 10:09

4
48 47
46
45
37
38
39
40 41
44 43
42
2
350767/850827_Manual.indd 4 13/02/2020 10:09

5
Image A Image B
Image C Image D
350767/850827_Manual.indd 5 13/02/2020 10:09

6
Fig.III
Fig.IV
Fig.V
Fig.I Fig.II
17 30 20
30 20
350767/850827_Manual.indd 6 13/02/2020 10:09

7
Fig.VI Fig.VII
Fig.VIII
Fig.IX
Fig.X Fig.XI Fig.XII
28
35
33 28 29
350767/850827_Manual.indd 7 13/02/2020 10:09

8
Fig.XVI
0
.
7
5
m
m
-
+
0
.
7
5
m
m
Fig.XVII
Fig.XIII Fig.XIV Fig.XV
Fig.XVIII
123
350767/850827_Manual.indd 8 13/02/2020 10:09

9
350767/850827_Manual.indd 9 13/02/2020 10:09

10
EN
VVolts
~, a.c. Alternating current
A, mA Ampere, milli-Amp
n0 No load speed
Nm Newton metres (torque)
psi Pounds per square inch
°Degrees
Hz Hertz
W, kW Watt, kilowatt
/min or min-1 Operations per minute
rpm Revolutions per minute
dB(A) Decibel sound level (A weighted)
Technical Abbreviations Key
Wear hearing protection
Wear eye protection
Wear breathing protection
Wear head protection
Wear hand protection
Read instruction manual
DO NOT use in rain or damp environments!
Always disconnect from the power supply when adjusting, changing accessories,
cleaning, carrying out maintenance and when not in use!
WARNING: Moving parts can cause crush and cut injuries.
Do not touch the blades before the machine is disconnected from the supply and
the blades have come to complete stop.
Class I construction (protective earth)
Environmental Protection
Waste electrical products should not be disposed of with household waste.
Please recycle where facilities exist. Check with your local authority or retailer
for recycling advice.
Conforms to relevant legislation and safety standards.
Caution!
Be aware of kickback!
For indoor use only!
Dust extraction required or recommended
WARNING
LIFTING HAZARD
Single Person Lift could cause injury
Use assistance when moving or lifting
WARNING: This product is heavy and as a precaution it is advised that two people
assemble the tool.
Description of Symbols
The rating plate on your tool may show symbols. These represent important information about
the product or instructions on its use.
Thank you for purchasing this Triton product. This manual contains information
necessary for safe and effective operation of this product. This product has unique
features and, even if you are familiar with similar products, it is necessary to read this
manual carefully to ensure you fully understand the instructions. Ensure all users of
the product read and fully understand this manual.
Original Instructions
Introduction
Specification
Model: TSPL152
Voltage: 230V~50/60Hz
Power: 1100W
No load speed: 8000min-1
Max planing depth: 0-3.2mm
Planing width: 0-152.4mm
Table size 771 x 260 x 70.7mm
Fence angle range: 45-135°
Protection class:
Ingress protection: IP20 / IP54 switch
Power cord length: 2m
Dimensions (L x W x H): 965 x 505 x 315mm
Weight: 25.4kg
As part of our ongoing product development, specifications of Triton products may
alter without notice.
Sound & vibration information
Sound pressure LPA 94.3dB(A)
Sound power LWA 107.3dB(A)
Uncertainty K 3dB
The sound intensity level for the operator may exceed 85dB(A) and sound protection
measures are necessary.
350767/850827_Manual.indd 10 13/02/2020 10:09

11
EN
WARNING: Always wear ear protection where the sound level exceeds 85dB(A) and limit the
time of exposure if necessary. If sound levels are uncomfortable, even with ear protection, stop
using the tool immediately and check the ear protection is correctly fitted and provides the
correct level of sound attenuation for the level of sound produced by your tool.
WARNING: User exposure to tool vibration can result in loss of sense of touch, numbness,
tingling and reduced ability to grip. Long-term exposure can lead to a chronic condition. If
necessary, limit the length of time exposed to vibration and use anti-vibration gloves. Do not
operate the tool with hands below a normal comfortable temperature, as vibration will have a
greater effect. Use the figures provided in the specification relating to vibration to calculate the
duration and frequency of operating the tool.
Sound and vibration levels in the specification are determined according to international
standards. The figures represent normal use for the tool in normal working conditions. A poorly
maintained, incorrectly assembled, or misused tool, may produce increased levels of noise
and vibration. www.osha.europa.eu provides information on sound and vibration levels in the
workplace that may be useful to domestic users who use tools for long periods of time.
Carefully read and understand this manual and any label attached to the tool before use.
Keep these instructions with the product for future reference. Ensure all persons who use this
product are fully acquainted with this manual.
Even when used as prescribed it is not possible to eliminate all residual risk factors. Use with
caution. If you are at all unsure of the correct and safe manner in which to use this tool, do
not attempt to use it.
General Power Tool Safety Warnings
WARNING! When using electric power tools, basic safety precautions should always be
followed to reduce the risk of fire, electric shock and personal injury including the following
safety information. Read all these instructions before attempting to operate this product and
save these instructions for future use.
WARNING: This appliance is not intended for use by persons (including children) with reduced,
physical or mental capabilities or lack of experience or knowledge unless they have been given
supervision or instruction concerning use of the appliance by a person responsible for their
safety. Children must be supervised to ensure that they do not play with the appliance.
CAUTION: Use the power tool, accessories and tool bits etc. in accordance with these
instructions, taking into account the working conditions and the work to be performed. Use
of the power tool for operations different from those intended could result in a hazardous
situation.
The term “power tool” in the warnings refers to your mains-operated (corded) power tool or
battery-operated (cordless) power tool.
1 - Keep work area clear - Cluttered areas and benches invite injuries
2 - Consider work area environment
- Do not expose tools to rain
- Do not use tools in damp or wet locations
- Keep work area well lit
- Do not use tools in the presence of flammable liquids or gases
3 - Guard against electric shock - Avoid body contact with earthed or grounded surfaces
(e.g. pipes, radiators, ranges, refrigerators)
4 - Keep other persons away - Do not let persons, especially children, not involved in the
work touch the tool or the extension cord and keep them away from the work area
5 - Store idle tools - When not in use, tools should be stored in a dry locked-up place, out of
reach of children
6 - Do not force the tool - It will perform the job better and safer at the rate for which it was
intended
7 - Use the right tool - Do not force small tools to do the job of a heavy duty tool
Do not use tools for purposes for which they are not intended; for example do not use
circular saws to cut tree limbs or logs
8 - Dress appropriately
- Do not wear loose clothing or jewellery, which can be caught in moving parts
- Suitable safety footwear is recommended when working outdoors.
- Wear protective covering to contain long hair
9 - Use protective equipment
-Use safety glasses
-Use face or dust mask if working operations create dust
WARNING: Not using protective equipment or appropriate clothing can cause personal injury or
increase the severity of an injury.
10 - Connect dust extraction equipment - If the tool is provided for the connection of dust
extraction and collecting equipment, ensure these are connected and properly used
11 - Do not abuse the power cable - Never pull the power cable to disconnect it from the
socket. Keep the power cable away from heat, oil and sharp edges. Damaged or entangled
power cables increase the risk of electric shock
12 - Secure work - Where possible use clamps or a vice to hold the work. It is safer than
using your hands
13 - Do not overreach - Keep proper footing and balance at all times
14 - Maintain tools with care
- Keeping cutting tools sharp and clean makes the tool easier to control and less likely to
bind or lock in the workpiece
- Follow instructions for lubricating and changing accessories
- Inspect tool power cables periodically and have them repaired by an authorised service
facility if damaged
- Inspect extension cables periodically and replace if damaged
- Keep handles dry, clean and free from oil and grease
WARNING: Many accidents are caused by poorly maintained power tools.
15 - Disconnect tools - Disconnect tools from the power supply when not in use, before
servicing and when changing accessories such as blades, bits and cutters
WARNING: The use of accessories or attachments not recommended by the manufacturer may
result in a risk of injury to persons.
16 - Remove adjusting keys and wrenches - Form the habit of checking to see that keys
and adjusting wrenches are removed from the tool before switching it on
17 - Avoid unintentional starting - Ensure switch is in “off” position when connecting to a
mains socket, inserting a battery pack, or when picking up or carrying the tool
WARNING: Unintended starting of a tool can cause major injuries.
18 - Use outdoor extension leads - When the tool is used outdoors, use only extension cords
intended for outdoor use and so marked. Use of an extension cable suitable for outdoor
use reduces the risk of electric shock
19 - Stay alert
- Watch what you are doing, use common sense and do not operate the tool when you are
tired
- Do not use a power tool while you are under the influence of drugs, alcohol or
medication
WARNING: A moment of inattention while operating power tools may result in serious personal
injury.
20 - Check damaged parts
- Before further use of tool, it should be carefully checked to determine that it will operate
properly and perform its intended function
- Check for alignment of moving parts, binding of moving parts, breakage of parts,
mounting and any other conditions that may affect its operation
- A guard or other part that is damaged should be properly repaired or replaced by an
authorised service centre unless otherwise indicated in this instruction manual
- Have defective switches replaced by an authorised service centre
WARNING: Do not use the tool if the on/off switch does not switch the tool on and off. The
switch must be repaired before the tool is used.
21 - Have your tool repaired by a qualified person - This electric tool complies with the
relevant safety rules. Repairs should only be carried out by qualified persons, otherwise
this may result in considerable danger to the user
WARNING: When servicing use only identical replacement parts.
WARNING: If the power cable is damaged it must be replaced by the manufacturer or an
authorised service centre.
22 - Power tool mains plugs must match the mains socket - Never modify the plug in any
way. Do not use any adapter plugs with earthed (grounded) power tools. Unmodified plugs
and matching sockets will reduce risk of electric shock
23 - If operating a power tool outside use a residual current device (RCD) - Use of an RCD
reduces the risk of electric shock
NOTE: The term “residual current device (RCD)” may be replaced by the term “ground fault
circuit interrupter (GFCI)” or “earth leakage circuit breaker (ELCB)”.
WARNING: When used in Australia or New Zealand, it is recommended that this tool is ALWAYS
supplied via Residual Current Device (RCD) with a rated residual current of 30mA or less.
WARNING: Before connecting a tool to a power source (mains switch power point receptacle,
outlet, etc.) be sure that the voltage supply is the same as that specified on the nameplate of
the tool. A power source with a voltage greater than that specified for the tool can result in
serious injury to the user, and damage to the tool. If in doubt, do not plug in the tool. Using a
power source with a voltage less than the nameplate rating is harmful to the motor.
Cutting tool safety
WARNING. Before connecting a tool to a power source (mains switch power point receptacle,
outlet, etc.) be sure that the voltage supply is the same as that specified on the nameplate of
the tool. A power source with a voltage greater than that specified for the tool can result in
serious injury to the user, and damage to the tool. If in doubt, do not plug in the tool. Using a
power source with a voltage less than the nameplate rating is harmful to the motor.
Use the correct cutting tool
• Ensure the cutting tool is suitable for the job. Do not assume a tool is suitable without
checking the product literature before use
Protect your eyes
• Always wear appropriate eye protection when using cutting tools
• Spectacles are not designed to offer any protection when using this product; normal
lenses are not impact resistant and could shatter
350767/850827_Manual.indd 11 13/02/2020 10:09

12
EN
Protect your hearing
• Always wear suitable hearing protection when tool noise exceeds 85dB
Protect your breathing
• Ensure that yourself, and others around you, wear suitable dust masks
Protect your hands
• Do not allow hands to get close to the cutting wheel or blades. Use a suitable push stick
for shorter workpieces with appropriate power tools
Be aware of others around you
• It is the responsibility of the user to ensure that other people in the vicinity of the work
area are not exposed to dangerous noise or dust and are also provided with suitable
protective equipment
Hidden objects
• Inspect the workpiece and remove all nails and other embedded objects before cutting
• Do not attempt to cut material that contains embedded objects unless you know that the
cutting tool fitted to your machine is suitable for the job
• Walls may conceal wiring and piping, car body panels may conceal fuel lines, and long
grass may conceal stones and glass. Always check the work area thoroughly before
proceeding
Beware of projected waste
• In some situations, waste material may be projected at speed from the cutting tool. It is
the user’s responsibility to ensure that other people in the work area are protected from
the possibility of projected waste
Fitting cutting tools
• Ensure cutting tools are correctly and securely fitted and check that wrenches / adjusters
are removed prior to use
• Only use cutting tools recommended for your machine
• Do not attempt to modify cutting tools
• Ensure blades are sharp, in good condition and correctly fitted
• Do not attempt to resharpen blades that are not suitable for resharpening, these may
include specially hardened blades or blades made from hardened alloys typically
containing tungsten
• Blades that can be resharpened should be resharpened only according the blade
manufacturer’s instructions. These may include a limited number of times the blade can
be resharpened
• Sharpened blades should be more thoroughly inspected before use and replaced
immediately if there is any doubt about their condition and suitability for use
• In the event blades encounter an embedded object in use that the blades are not suitable
for, blades should be replaced immediately
Direction of feed
• Always feed work into the blade or cutter against the direction of movement of the blade
or cutter
Beware of heat
• Cutting tools and workpieces may become hot in use. Do not attempt to change tools until
they have been allowed to cool completely
Control dust / swarf
• Do not allow dust or swarf to build up. Sawdust is a fire hazard, and some metal swarf
is explosive
• Be especially careful when cutting wood and metal. Sparks from metal cutting are a
common cause of wood dust fires
• Where possible, use a dust extraction system to ensure a safer working environment
Surface Planer Safety
WARNING: Never use the tool without the appropriate guard in place or correctly adjusted.
WARNING: Any portion of the cutter block not being used for planing shall be guarded.
WARNING: When planing narrow workpieces, additional measures such as the use of
horizontal pressure devices, may be necessary to ensure safe working.
WARNING: Planing tools should not be used to cut rebate, recess, tenon or mould.
• Use appropriate respiratory protection: Use of this tool can generate dust containing
chemicals known to cause cancer, birth defects or other reproductive harm. Some wood
contains preservatives such as copper chromium arsenate (CCA) which can be toxic.
When sanding, drilling, or cutting these materials extra care should be taken to avoid
inhalation and minimise skin contact.
• Use only sharp blades. Handle the blades very carefully with cut-proof gloves.
WARNING: Do not use knives that are blunt as this increases the danger of kickback.
• Ensure all cloth, cord, rags, string and similar items are removed from the work
area. To prevent entanglement in the planer mechanism
• Allow the tool to reach full speed before making contact with the workpiece and
starting cutting
• ALWAYS switch OFF and allow the blades to come to a complete standstill before
attempting any adjustments, cleaning or carrying out maintenance
• Replace all blades at the same time, otherwise the resulting imbalance will cause
vibration and shorten the service life of planer and blades
• Do not attempt to perform cutting operations that are not recommended by the
manufacturer. Stopped cuts, recesses, tenons, moulds or planing of severely bowed
wood if not permitted with this tool.
• Do not use the planer if it has not been fixed to a secure work surface. Without sufficient
fixing the surface planer may move abruptly during operation potentially causing severe
injury to the operator.
• Always keep the push-stick next to the infeed table during planing operations. When
planing short work pieces, the push stick should be used. Use the push-stick to feed
the workpiece when in close proximity to the blade and when the workpiece is less than
75mm thick.
• Do not attempt planing of badly bowed material if there is inadequate contact with the
infeed table
• When transporting the surface planer, ensure its transport handles are used (not operating
handle) and that the all locking mechanisms and guards are in securely in place
Kickback Prevention
Note: Kickback occurs when the blade stalls rapidly, as a result of being pinched, bound or
misaligned, and drives the workpiece back towards the operator. It can also pull the operator’s
hand into the blade, resulting in serious injury.
WARNING: Kickback is the result of tool misuse and/or incorrect operating procedures
or conditions, however, if precautions are taken, kickback forces can be controlled by the
operator or avoided altogether:
a) NEVER attempt to cut with a dull or warped blade. ALWAYS ensure the blade is suitable for
the material to be cut.
b) ALWAYS ensure the fence/table is parallel to the blade. If the fence/table tilts inward
towards the blade, the workpiece can come into contact with the back edge of the blade.
c) Use CAUTION when cutting large workpieces. Ensure larger stock is properly supported by
adequate in-feed and out-feed supports.
d) DO NOT cut round stock or workpieces that cannot lay flat on the table. Avoid cutting
twisted, distorted or knotty wood.
e) DO NOT cut wet wood, as it produces higher friction against the blade. Wet sawdust
can accumulate on the blade, further increasing the likelihood of kickback.
f) ALWAYS maintain a firm grip with both hands on the workpiece and position your arms to
resist kickback forces.
g) Stay out of blade path and position your body to either side of the blade, but not in line
with the blade.
h) DO NOT back out of the cut. If you have to interrupt a cut before it is complete, switch
the tool ‘OFF’, and remove the workpiece from the tool, once the blade has stopped
spinning.
ALWAYS use push sticks where appropriate, to guide the workpiece through the blade.
Use feather boards to hold down the workpiece wherever possible
Product Familiarisation
1. Outfeed Table
2. Blade Drum
3. Infeed Table
4. Guard Mounting Holes
5. Belt Cover
6. ON/OFF Switch
7. Cutting Depth Adjustment Knob
8. Bench Mounting Holes
9. Power Cord
10. Push Stick Storage Bracket
11. Fence Bracket Mount
12. Rubber Feet
13. Dust Extraction Port
14. Push Stick
15. Fence
16. Fence Mounting Bracket
17. Fence Locking Plate
18. Fence Sliding Bracket
19. Blade Drum Guard
20. Fence Angle Locking Handle
21. Sliding Fence Locking Handle
22. Push Blocks
23. 6mm Hex Key
24. 5mm Hex Key
25. 4mm Hex Spanner
26. Handles
27. Guard Arm
28. 8mm Spring Washer
350767/850827_Manual.indd 12 13/02/2020 10:09

13
EN
29. 8mm Flat Washer
30. 10mm Spacer
31. 6mm Spring Washer
32. M6 x 10mm Nut
33. M8 x 30mm Hex Screw
34. M8 x 20mm Hex Screw
35. 13 x 20mm Bolt
36. M6 x 25mm Hex Screw
37. Outward Stop Bolt
38. Inward Stop Bolt
39. Sliding Stop Block
40. Sliding Protective Plate
41. Blade Screw
42. Blade Clamp
43. Blade Alignment Adjusting Screw
44. Blade
45. Motor Unit Hex Screws
46. Dust Extraction Unit Hex Screws
47. Auxiliary Belt
48. Drive Belt
Intended Use
Mains-powered bench-mounted 152mm surface planer with adjustable fence for planing stock
up to 152mm wide. For light-duty wood planing tasks only.
Unpacking Your Tool
• Carefully unpack and inspect your new tool. Familiarise yourself with all its features and
functions
• Ensure that all parts of the tool are present and in good condition. If any parts are missing
or damaged, have such parts replaced before attempting to use this tool
Before Use
WARNING: Ensure the tool is disconnected from the power supply before attaching or
changing any accessories, or making any adjustments.
WARNING: ALWAYS wear suitable cut proof gloves (not supplied) when handling this tool.
Important guidance for the safe use of this tool
• Disconnect the tool from power source whenever adjusting or replacing any parts
• Ensure the ON/OFF Switch is in the ‘OFF’ position before connecting the tool to mains
power
• Keep limbs away from all moving parts
• Wear eye protection and a face mask when using this tool
• Make sure all mobile parts move freely and are free from interference
• Keep Blades sharp, aligned and properly secured to the cutter head
• Never turn the machine ‘ON’ with the workpiece in contact with the Blades
• Whenever the planer/thicknesser is not in use, switch ‘OFF’ and disconnect from power
• Keep the planer/thicknesser in good order. Follow the maintenance instructions (see
‘Maintenance’)
• Never use the planer/thicknesser to make partial cuts - allow it to cut the full length of
the workpiece
• Do not use the planer/thicknesser to cut recesses, tenons or moulds
• Note the rotational direction of the cutter indicated on the tool
Bench mounting
• Using the Bench Mounting Holes, secure the surface planer to a sturdy flat work surface
using bolts, hex nuts and lock washers (not supplied).
Fence installation
Attaching the fence mounting bracket
1. Align the Fence Mounting Bracket (16) with the Fence Bracket Mount (11) and secure in
place using 2 x M8 x 20mm Hex Screws (34) and 6mm Hex Key (23) (Fig. I)
2. Insert the Fence Locking Plate (17) into the Fence Mounting Bracket. Position so that the
two pins are against the bottom edge of the Fence Mounting Bracket
3. Lock the Fence Locking Plate in position using the Sliding Fence Locking Handle (21) and
10mm Spacer (30). (Fig. II)
Assembling the fence & sliding bracket
1. Attach the Fence (15) to the Fence Sliding Bracket (18) using the M6 x 25mm Hex Screws
(36), 6mm Spring Washers (31) and 5mm Hex Key (24) (Fig. III)
2. Slide the Fence and Sliding Bracket onto the dovetails on the Fence Mounting Bracket and
Fence Locking Plate (Fig IV)
3. Slide the Fence Angle Locking Handle (20) through a 10mm Spacer (30) then the Fence
assembly and screw clockwise to tighten (Fig.V)
Note: Both the Fence Angle Locking Handle (20) and the Sliding Fence Locking Handle
(21) have independent spring adjustment, which means that the handles can be rotated
independently of the bar. This is done by pulling the handles, rotating then releasing. This
feature can be used when the handles cannot be rotated due to part of the surface planer
assembly interfering.
Attaching the blade drum guard
1. Attach the Blade Drum Guard (19) to the Guard Arm (27) using the two M6 x 10mm Nuts
(32) and two 10mm spanners (not supplied) (Fig. VI)
2. Attach the guard assembly to the surface planer via the Guard Mounting Holes (4) using
the two 13 x 20mm Bolts (35), 2 x 8mm Spring Washers (28) and a 13mm spanner (not
supplied) (Fig. VII)
Attaching the carry handles
1. Attach the Handles (26) using the M8 x 30mm Hex Screws (33), 8mm Spring Washers
(28), 8mm Flat Washers (29) and the 6mm Hex Key (23). (Fig. VIII)
Dust extraction
• Adequate dust extraction is essential for a safe workplace; the fine fibres produced from
planing operations can be hazardous to health. Always wear a dust mask when operating
this machine.
• External dust extraction devices can be attached to the surface planer via the Dust
Extraction Port (13)
Table calibration
1. Place a spirit level (not provided) or similar, flat on the Outfeed Table (1) over the Blade
Drum (2) (Image A)
2. Turn the Cutting Depth Adjustment Knob (7) clockwise to raise the Infeed Table (3) (lower
cutting depth), or anti-clockwise to lower the Table (increase cutting depth), aligning the
Infeed Table with the Outfeed Table for a reading of 0mm
Positioning the fence
WARNING: ALWAYS ensure that the Sliding Protective Plate (40) is covering the Blade
Drum (2) to the rear of the Fence (15) when the Fence protrudes over the Blade Drum while
operating.
1. The Guide Fence (15) angle can be adjusted to accommodate a variety of workpiece
shapes
2. The Fence can be adjusted to angles between 45° inward and 45°outward
3. There are 3 locking positions that use stops 45° inward 45° outward and 90°
4. For precise measurements use a machinist’s square to check the desired angle of the
Fence
Setting fence at 90°
1. Position the Fence assembly on the surface planer and tighten the Sliding Fence Locking
Handle
2. Loosen the Fence Angle Locking Handle (20)
3. Slide the Sliding Stop block into position by lifting the locking knob and sliding the Block
towards the Fence (Fig. IX)
4. Position the Fence so that the Stop Block is in contact with the magnet on the rear of the
Fence
5. Slide the Sliding Protective Plate over the exposed Blade Drum to the rear of the Fence
6. Once in position tighten the Fence Angle Locking Handle
Setting the fence inward 45°
1. Position the Fence assembly on the surface planer and tighten the Sliding Fence Locking
Handle
2. Loosen the Fence Angle Locking Handle (20)
3. Remove the Sliding Stop Block to prevent interference with the fence positioning
4. Tilt the top of the Fence inward until it comes into contact with the Inward Stop Bolts (38)
(Fig. X)
5. Slide the Sliding Protective Plate over the exposed Blade Drum to the rear of the Fence
6. Tighten the Fence Angle Locking Handle to lock the Fence in position
Setting the fence outward 45°
1. Position the Fence assembly on the surface planer and tighten the Sliding Fence Locking
Handle
2. Loosen the Fence Angle Locking Handle (20)
3. Remove the Sliding Stop Block to prevent interference with the fence positioning
350767/850827_Manual.indd 13 13/02/2020 10:09

14
EN
4. Tilt the top of the Fence outward until it comes into contact with the Outward Stop Bolts
(37) (Fig. XI)
5. Slide the Sliding Protective Plate over the exposed Blade Drum to the rear of the Fence
6. Tighten the Fence Angle Locking Handle to lock the Fence in position
Setting the blade alignment
WARNING: Do not touch the cutting edge of the blade at any time it is extremely sharp.
Note: The blades have been adjusted at the factory and should not require any adjustment
prior to first use. However the blades can become misaligned during shipping and handling
and should always be checked prior to use for accurate cutting.
Checking the blades
1. Position a straight edge on the Outfeed Table overhanging the Blade Drum
2. Remove the belt cover screws and Belt cover (5) using the 4mm Hex Spanner (25) (Fig. XII)
3. Rotate the Blade Drum using the exposed belt (Fig. XIII)
4. The Blade (44) should just touch the straight edge as the Drum rotates
5. If the Blade does not come in contact with the straight edge or pulls the straight edge
forward then the blade requires adjustment
6. Check the Blade height at both ends to see if it is level side to side
Aligning the blades
1. Rotate the Blade Drum so that the four Blade Screws (41) are exposed
2. Loosen the four Blade Screws using the 4mm Hex Spanner (25) (Fig. XIV)
3. Rotate the Blade Drum so that the two Blade Alignment Adjustment Screws (43) are
exposed (Fig. XV)
4. With a straight edge in place above the Blade Drum on the Outfeed Table, rotate the Blade
Alignment Adjustment Screw until the blade just comes into contact with the straight edge
when the Drum is rotated (Fig. XVIII)
5. Repeat with the second Adjustment Screw to ensure the Blade is level side to side
6. Once the Blade is aligned, retighten the four Blade Screws and repeat the alignment
process on the second Blade
Transportation
• When transporting or storing the surface planer, ensure the Cutter Guard is positioned
down over the Cutter Head and all bevel and adjustment locks are securely in place
• Only use Handles (26) to lift and transport the surface planer
• If the surface planer is mounted to a bench or support, ensure the fixings are removed and
the surface planer is free to move
• If the surface planer is mounted to a portable board, ensure the board is unclamped from
the workbench or support so the surface planer is free to move
• When moving or transporting the surface planer, always keep it upright
Operation
WARNING: ALWAYS wear eye protection, adequate respiratory and hearing protection as
well as suitable gloves when working with this tool.
WARNING: Ensure the tool is disconnected from the power supply before attaching or
changing any accessories or making any adjustments.
IMPORTANT: Always inspect the surface planer before each use. Before connecting the
surface planer to mains power, inspect the guards and the correct functioning safety features
of the tool.
IMPORTANT: Ensure the operator has adequate training in the operation, adjustment, and
maintenance of the surface planer before connecting the surface planer to mains power and
operating the surface planer.
WARNING: ALWAYS ensure the tool is unplugged from mains power before adjusting or
changing any of the tool’s parts. Observe the rotational direction of the blade and compare to
the correct rotational direction on the tool
Adjusting the Cutting Depth
WARNING: ALWAYS ensure the tool is switched off and disconnected from the power
supply before attempting to adjust the depth of cut. NEVER adjust the depth of cut when the
tool is running.
IMPORTANT: The cutting range of this surface planer is indicated in the specification and
should be strictly adhered to.
1. To adjust the cutting depth turn the Cutting Depth Adjustment Knob (7) anticlockwise to
increase the cutting depth and clockwise to decrease the cutting depth (Fig. XVI)
2. Each full revolution of the Cutting Depth Adjustment Knob will increase or decrease the
depth of the cut by 0.75mm
3. For accurate measurement perform a test cut on a scrap piece of wood and measure
Switching ‘ON’ & ‘OFF’
Ensure the Power Cord (9) is plugged into the mains power supply before attempting to switch
the tool ‘ON’.
• The ON/OFF Switch (6) is located on the front of the surface planer
• To turn the surface planer ‘ON’ press the green ‘I’ switch
• To turn the surface planer ‘OFF’ press the red ‘0’ switch
Surface planer operation
WARNING: when using this tool the operator must always be positioned at the Infeed
Table (3) end of the surface planer, and must not reach over the Blade Drum at any time while
the operating the tool.
WARNING: Keep hands and fingers at least 150mm away from the Blade Drum (2). When
feeding a workpiece in close proximity to the Blade Drum, always use the Push Stick (14) or
Push Blocks (22).
WARNING: If the Blade Drum stops during the cutting process for any reason,
immediately switch ‘OFF’ the power. Do not restart the tool partway through making a cut, and
do not attempt to make partial cuts to the workpiece.
WARNING: Always store the Push Stick (14) in the Push Stick Storage Bracket (10) so
that it is easily accessible when operating the surface planer.
WARNING: this surface planer is only designed for use with dry, natural wood fibre ONLY.
Never use metals, plastics, laminated materials, plywood MDF or other synthetic products with
this machine. Do not attempt planing of badly bowed material if there is inadequate contact
with the infeed table
WARNING: ALWAYS ensure that the Sliding Protective Plate (40) is covering the Blade
Drum (2) to the rear of the Fence (15) when the Fence protrudes over the Blade Drum while
operating.
IMPORTANT: Always consider the type of wood and condition of the workpiece before
commencing work with this machine. Only perform shallow cuts on harder materials or
materials with rougher surfaces.
Surface planing
See Image B.
• Surface planing is done to create a flat surface on a workpiece in preparation for thickness
planing
1. Set infeed table height to desired cutting depth
IMPORTANT: when surface planing only take shallow cuts to prevent kickback.
2. Set the Fence to 90° (see ‘Postioning the Fence’)
3. Start the surface planer
4. Place workpiece firmly against Infeed Table and Fence
5. Feed the workpiece completely across the cutter whilst maintaining firm pressure against
the Fence and Tables during the entire cut
6. Repeat if necessary until desired finish is achieved
Edge jointing
See Image C.
• Edging jointing is done to produce a flat, true surface along the side of a workpiece. It
is essential to do this when creating squared up stock or for preparing a workpiece for
finishing and joinery
1. Set infeed table height to desired cutting depth
IMPORTANT: when edge jointing only take shallow cuts to prevent kickback.
2. Set the Fence to 90° (see ‘Positioning the Fence’)
3. Start the surface planer
4. Place workpiece firmly against Infeed Table and Fence
5. Feed the workpiece completely across the cutter whilst maintaining firm pressure against
the Fence and Tables during the entire cut
6. Repeat until desired finish is achieved
Bevel cutting
See Image D.
• Bevel cuts are angled cuts and can be created by positioning the Fence at the desired
angle and feeding the workpiece along the Fence. This process usually requires several
passes or cuts to produce the desired finish
1. Set infeed table height to desired cutting depth
IMPORTANT: when bevel cutting only take shallow cuts to prevent kickback.
2. Set Fence to desired angle of cut (see ‘Positioning the Fence’)
3. Place the workpiece against the Infeed Table and Fence concave side down
4. Start the surface planer
5. Maintain workpiece pressure against the Fence and Tables with the lead Push Block and
feed the workpiece with the second Push Block
6. Repeat until desired finish is achieved
350767/850827_Manual.indd 14 13/02/2020 10:09

15
EN
Accessories
• A range of accessories and consumables, including face masks, dust extractors and cut
resistant gloves, is available from your Triton stockist
• Spare parts can be obtained from toolsparesonline.com
Maintenance
WARNING: Ensure the tool is disconnected from the power supply before attaching or
changing any accessories, or making any adjustments.
WARNING: ALWAYS wear suitable cut-proof gloves when handling the Blade Drum and
its sub-components.
• This tool is manufactured using class leading components and makes use of the latest
in intelligent circuitry that protects the tool and its components. In normal use it should
provide a long working life
• Parts of this tool that can be replaced by the user include:
I. Blades
II. Drive Belt
III. Auxiliary Belt
Note: Instruction on servicing these items is provided in this section of the manual.
General inspection
• Regularly check that all the fixing screws are tight
• Inspect the supply cord of the tool, prior to each use, for damage or wear. Repairs should
be carried out by an authorised Triton service centre. This advice also applies to extension
cords used with this tool
• If you are uncertain as to how to carry out any of the following maintenance procedures
DO NOT attempt, instead have the maintenance carried out by an authorised Triton
service centre
Cleaning
WARNING: Ensure when cleaning or removing blockages from the tool that the tool
is disconnected from the mains supply and is switched ‘OFF’. Always wear cut proof gloves
while carrying out cleaning and unblocking procedures as the tool contains sharp surfaces
and components.
• Keep your tool clean at all times. Dirt and dust will cause internal parts to wear quickly,
and shorten the machine’s service life. Clean the body of your machine with a soft brush,
or dry cloth. If available, use clean, dry, compressed air to blow through the ventilation
holes
• After use, vacuum the surface planer to remove wood chips, sawdust and debris
• Remove sawdust, wood chips and grease from belt, gears and moving parts
• Clean the tool casing with a soft damp cloth using a mild detergent. Do not use alcohol,
petrol or strong cleaning agents
• Never use caustic agents to clean plastic parts
Blade replacement
WARNING: ALWAYS wear cut-proof gloves when handling the blades.
IMPORTANT: Only use blades that are specifically designed for the machine.
1. Remove the Belt Cover (5) using the 4mm Hex Spanner (25) (Fig. XII)
2. Rotate the Blade Drum so that the four Blade Screws (41) are exposed
3. Remove the four Blade Screws (41) (Fig. XIV)
4. Carefully remove the Blade Clamp (42) and the Blade (44)
5. Replace the Blade locating it on the Blade Alignment Adjusting Screws (43) (Fig. XVII)
6. Insert the Blade Screws and realign the Blade (see ‘Aligning the Blades’)
7. Repeat with second Blade
Belt replacement
Replacing the auxiliary belt
1. Lay the surface planer on the ground or workbench so the base of the tool is accessible
2. Unscrew and remove the bottom cover
3. Slacken but do not remove the two Dust Extraction Unit Hex Screws (46) so that the dust
extraction unit can move from side to side
4. Replace the Auxiliary Belt (47)
5. Tension the Belt and retighten the Hex Screws
6. Refit the bottom cover
Replacing the Drive Belt
1. Lay the surface planer on the ground or workbench so the base of the tool is accessible
2. Unscrew and remove the bottom cover
3. Remove the Auxiliary Belt (see ‘replacing the Auxiliary belt’)
4. Slacken but do not remove the four Motor Unit Hex Screws (45) so that the motor unit can
slide from side to side
5. Remove the Drive Belt (48)
6. Replace the Drive Belt
7. Tension the Belt and retighten the Hex Screws
8. Refit the Auxiliary Belt and bottom cover
Lubrication
• Slightly lubricate all moving parts at regular intervals with a suitable spray lubricant
• The bearings in motor and cutter head units are factory-sealed and should require no
further lubrication
• Components requiring regular lubrication:
• Cutting Depth Adjustment Knob Thread
• Fence Sliding Bracket
• Fence Angle Locking Knob
• Sliding Fence Locking Knob
• Guard adjustment mechanism
• Remove any residues of grease from the other components, using mineral spirits if
necessary, then apply a coat of light grade multi-purpose grease (not included)
• The work tables can be coated with a very thin coat of lubricating wax (not included) to
protect the surface from rust and to facilitate smooth feed during operation
Brushes
• Over time the carbon brushes inside the motor may become worn
• Excessively worn brushes may cause loss of power, intermittent failure, or visible sparking
• If you suspect that the brushes may be worn, have them replaced at an authorised Triton
service centre
Contact
For technical or repair service advice, please contact the helpline on (+44) 1935 382 222
Web: tritontools.com/en-GB/Support
Address:
Toolstream Ltd
Boundary Way
Lufton Trading Estate
Yeovil, Somerset
BA22 8HZ, United Kingdom
Storage
• Store this tool carefully in a secure, dry place out of the reach of children
Disposal
Always adhere to national regulations when disposing of power tools that are no longer
functional and are not viable for repair.
• Do not dispose of power tools, or other waste electrical and electronic equipment (WEEE),
with household waste
• Contact your local waste disposal authority for information on the correct way to dispose
of power tools
350767/850827_Manual.indd 15 13/02/2020 10:09

16
EN
Troubleshooting
Problem Possible cause Solution
No function when ON/OFF Switch (6) is operated
No power Check power supply
Defective ON/OFF Switch Replace the ON/OFF Switch at an authorised Triton service
centre
Motor does not start Carbon brushes worn Brushes need replacing
Poor surface finish after planing
Chosen cutting depth too big Reduce cutting depth and work in several passes instead
Blunt Blades (44) Turn or replace Blades (see ‘Changing blades’)
Wood is damp Switch ‘OFF’ immediately. Evaluate and correct positioning
of Blades (see ‘Blade replacement’)
Barrel not rotating Broken Drive Belt (48) See ‘Replacing the Drive Belt’ and replace Belt
Vibration and abnormal noise STOP using tool immediately
Re-check all user accessible parts are secure and correctly
fitted
Contact an authorised Triton service centre
350767/850827_Manual.indd 16 13/02/2020 10:09

17
EN
Guarantee
To register your guarantee visit our web site at
tritontools.com* and enter your details.
Your details will be included on our mailing list (unless indicated otherwise) for
information on future releases. Details provided will not be made available to any third
party.
Purchase Record
Date of Purchase: ___ / ___ / ____
Model: TSPL152 Retain your receipt as proof of purchase art pr
Triton Precision Power Tools guarantees to the purchaser of this product that if any part
proves to be defective due to faulty materials or workmanship within 3 YEARS from the
date of original purchase,
Triton will repair, or at its discretion replace, the faulty part free of charge.
This guarantee does not apply to commercial use nor does it extend to normal wear and
tear or damage as a result of accident, abuse or misuse.
* Register online within 30 days.
Terms & conditions apply.
This does not affect your statutory rights oves to be defecti
350767/850827_Manual.indd 17 13/02/2020 10:09

18
EN
18
NL
Technische afkortingen
Specificaties
Model: TSPL152
Spanning: 230 V~50/60 Hz
Vermogen: 1100W
Onbelaste snelheid: 8000min-1
Max. schaafdiepte: 0-3,2mm
Schaafbreedte: 0-152,4mm
Tafelafmeting 771 x 260 x 70,7mm
Hoekbereik geleiding: 45-135°
Beschermingsklasse:
Binnendringingsbescherming: IP20 / IP54 schakelaar
Lengte stroomsnoer: 2m
Afmetingen (L x B x H): 965 x 505 x 315mm
Gewicht: 25,4kg
In het kader van onze voortgaande productontwikkeling kunnen de specificaties
van Triton-producten zonder voorafgaande kennisgeving worden gewijzigd.
Geluids- & trillingsgegevens
Geluidsdruk LPA:94,3 dB(A)
Geluidsvermogen LWA:107,3 dB(A)
Onzekerheid K: 3 dB
De geluidsintensiteit voor de bediener kan 85 dB(A) overschrijden en de
gehoorbescherming is noodzakelijk.
Draag gehoorbescherming
Draag een veiligheidsbril
Draag een stofmasker
Draag een veiligheidshelm
Draag handschoenen
Lees de handleiding
Gebruik niet de regen of in vochtige omstandigheden!
Ontkoppel de machine van de stroombron voor het maken van aanpassingen, het
verwisselen van accessoires, het schoonmaken, het uitvoeren van onderhoudt en
wanneer de machine niet in gebruik is!
WAARSCHUWING: Bewegende delen kunnen ernstig letsel veroorzaken.
Ontkoppel de machine van de stroombron en wacht tot de bladen volledig stil
staan voordat u deze aanraakt.
Beschermingsklasse I (aardgeleiding)
Milieubescherming
Elektrische producten mogen niet met het normale huisvuil worden weggegooid.
Indien de mogelijkheid bestaat, dient u het product te recyclen. Vraag de
plaatselijke autoriteiten of winkelier om advies betreffende recyclen.
Voldoet aan de relevante wetgeving en veiligheidsnormen
Voorzichtig!
Let op: terugslaggevaar!
Enkel geschikt voor binnengebruik!
Stofafvoer vereist of aanbevolen
WAARSCHUWING
GEVAAR DOOR ZWARE LASTEN
Hef de last niet alleen, dit resulteert mogelijk in persoonlijk letsel
Hef met meerdere personen
WAARSCHUWING: Dit product is zwaar en als voorzorgsmaatregel moet de
machine met twee personen samengesteld worden.
Beschrijving symbolen
Op het gegevensplaatje van uw gereedschap kunnen zich symbolen bevinden. Deze
vertegenwoordigen belangrijke productinformatie en gebruiksinstructies.
Inleiding
Hartelijk dank voor de aanschaf van dit Triton-gereedschap. Deze instructies bevatten
informatie die u nodig hebt voor een veilige en doeltreffende bediening van dit product.
Dit product heeft een aantal unieke eigenschappen. Lees daarom deze handleiding altijd
door, ook als u al bekend bent met bandschuurmachine, zodat u alle voordelen van dit
unieke ontwerp kunt benutten
Houd deze handleiding bij de hand en zorg ervoor dat alle gebruikers van dit
gereedschap de handleiding hebben gelezen en volledig hebben begrepen.
Vertaling van de originele instructies
VVolt
~, a.c. Wisselspanning
A, mA Ampère, milliampère
n0 Onbelaste snelheid
Nm Newtonmeter (koppel)
psi Pound-force per square inch
°Graden
Hz Hertz
W, kW Watt, kilowatt
/min or min-1 Operaties per minuut
rpm Toeren per minuut
dB(A) Decibel geluidsniveau (A-gewogen)
350767/850827_Manual.indd 18 13/02/2020 10:09

19
EN
19
NL
WAARSCHUWING: Bij een geluidsintensiteit van 85 dB(A) of hoger is het dragen van
gehoorbescherming en het limiteren van de blootstellingstijd vereist. Bij oncomfortabel
hoge geluidsniveaus, zelfs met het dragen van gehoorbescherming, stopt u het gebruik
van de machine onmiddellijk. Controleer de pasvorm en het geluiddempingsniveau van de
bescherming.
WAARSCHUWING: Blootstelling aan trilling resulteert mogelijk in gevoelloosheid, tinteling en
een vermindert gripvermogen. Langdurige blootstelling kan leiden tot chronische condities.
Limiteer de blootstellingsduur en draag anti-vibratie handschoenen. Vibratie heeft een grotere
invloed op handen met een temperatuur lager dan een normale, comfortabele temperatuur.
Maak gebruik van de informatie in de specificaties voor het bereken van de gebruiksduur en
frequentie van de machine.
Geluid- en trillingsniveaus in de specificatie zijn vastgesteld volgens internationale norm.
De waarden gelden voor een normaal gebruik in normale werkomstandigheden. Een slecht
onderhouden, onjuist samengestelde of onjuist gebruikte machine produceert mogelijk
hogere geluids- en trillingsniveaus. www.osha.europa.eu biedt informatie met betrekking tot
geluids- en trillingsniveaus op de werkplek wat mogelijk nuttig is voor regelmatige gebruikers
van machines.
Het in deze handleiding vermelde trillingsniveau is gemeten volgens een standaard
genormeerde meetmethode en kan worden gebruikt om elektrische gereedschappen
met elkaar te vergelijken. Het is ook geschikt voor een voorlopige inschatting van de
trillingsbelasting.
Zelfs indien men dit gereedschap gebruikt zoals voorgeschreven, is het onmogelijk om alle
residuele risicofactoren te elimineren. Wees voorzichtig tijdens het gebruik. Indien u niet zeker
bent van de correcte en veilige wijze waarop dit product gebruikt dient te worden, probeer
dat dan niet.
Algemene veiligheid
WAARSCHUWING: Bij het gebruik van elektrische machines horen basis
veiligheidsvoorzorgmaatregelingen opgevolgd te worden om de kans op brand, elektrische
schokken en persoonlijk letsel te minimaliseren. Lees de instructies voor gebruik volledig door
en bewaar deze bij de machine voor toekomstig gebruik.
WAARSCHUWING: De machine is niet geschikt voor gebruik door personen met een
verminderde mentale of fysieke bekwaamheid of een gebrek aan ervaring, tenzij de persoon
wordt begeleid of geïnstrueerd door een persoon verantwoordelijk voor de veiligheid
LET OP: Het gebruik van de machine voor doeleinden, anders dan waarvoor de machine is
bestemd resulteert mogelijk in gevaarlijke situaties en serieus persoonlijk letsel
De term “elektrisch gereedschap” in alle hieronder vermelde waarschuwingen heeft
betrekking op uw elektrische gereedschap dat op de stroom is aangesloten (met een snoer) of
met een accu wordt gevoed (snoerloos).
1 - Houd de werkruimte zuiver - Rommelige werkplaatsen en werkoppervlakken geven
dikwijls aanleiding tot letsel
2 - Denk aan de omgeving van de werkplaats
- Stel het gereedschap niet bloot aan regen
- Gebruik het gereedschap niet in een vochtige of natte omgeving
- Houd de werkplaats goed verlicht
- Gebruik de gereedschappen niet in de buurt van ontvlambare vloeistoffen of gassen
3 - Bescherming tegen elektrische schokken - Vermijd lichaamscontact met geaarde
oppervlakken (bijvoorbeeld buizen, radiatoren, koelkasten)
4 - Houd andere personen op afstand - Laat geen personen, en dan in het bijzonder kinderen,
die niets te maken hebben met het werk, het gereedschap of het verlengsnoer aanraken,
en houd ze verwijderd van de werkplaats
5 - Berg niet gebruikt gereedschap op - Wanneer ze niet gebruikt worden, dienen
gereedschappen opgeborgen te worden op een droge en afgesloten plek, buiten het
bereik van kinderen
6 - Forceer het gereedschap niet - Het gereedschap functioneert beter en veiliger op de
snelheid waarvoor het ontworpen is
7 - Gebruik het juiste gereedschap - forceer kleine machines niet om het werk uit te voeren
waarvoor een zwaardere machine nodig zou zijn
Gebruik gereedschap niet voor doeleinden waarvoor ze niet bedoeld zijn, bijvoorbeeld:
gebruik geen cirkelzaag om boomtakken of boomstronken te zagen
8 - Draag de juiste kledij
- Draag geen losse kleding en sieraden die door bewegende delen zouden gegrepen
kunnen worden
- Geschikte schoenen zijn aan te bevelen wanneer in de buitenomgeving werkzaamheden
worden uitgevoerd
- Berg lang haar op
9 - Gebruik beschermende uitrusting
- Gebruik een veiligheidsbril
- Gebruik een gezichts- of stofmasker indien de uitgevoerde werkzaamheden aanleiding
geven tot stofvorming
WAARSCHUWING:: Het niet gebruiken van de nodige beschermende uitrusting of het niet
dragen van de gepaste kleding kan aanleiding geven tot persoonlijk letsel of kan de ernst van
eventueel letsel verergeren.
10 - Sluit een stofafvoersysteem aan - Indien het gereedschap is voorzien om een stofafvoer-
en verzamelsysteem aan te sluiten, zorg er dan voor dat dit op de correcte wijze is
aangesloten en gebruikt wordt.
11 - Misbruik het stroomsnoer niet - Trek nooit aan het stroomsnoer om de stekker uit het
stopcontact te trekken. Houd het stroomsnoer verwijderd van hitte, olie, en scherpe
randen. Een beschadigd of in de knoop geraakt snoer verhoogt het risico op elektrische
schokken.
12 - Veilig werken - Indien mogelijk, gebruik klemmen of bankschroeven om het werkstuk te
immobiliseren. Dit is veiliger dan het werkstuk met de handen vast te houden
13 - Reik niet te ver - Blijf altijd stevig en in balans staan
14 - Onderhoud uw gereedschap zorgvuldig
- Indien snijgereedschappen scherp en schoon worden gehouden, is het gereedschap
gemakkelijker onder controle te houden en zal het minder vastlopen in het werkstuk.
- Volg de instructies voor het smeren en het vervangen van accessoires
- Controleer de snoeren van elektrisch gereedschap op periodieke wijze en laat ze
repareren door een geautoriseerd servicecentrum indien ze beschadigd zijn
- Inspecteer verlengsnoeren op periodieke wijze en vervang ze indien ze beschadigd zijn
- Houd de grepen droog, schoon, en vrij van olie en vet
WAARSCHUWING:: Vele ongelukken worden veroorzaakt door slecht onderhouden elektrisch
gereedschap.
15 - Koppel gereedschappen los - Koppel gereedschappen los van de voeding wanneer ze niet
gebruikt worden, alvorens ze gerepareerd worden, en wanneer accessoires vervangen
worden zoals bladen, bits, en messen
WAARSCHUWING:: Het gebruik van accessoires of hulpmiddelen die niet zijn aanbevolen door
de fabrikant kan aanleiding geven tot risico’s op persoonlijk letsel.
16 - Verwijder stel- en moersleutels - Meet uzelf de gewoonte aan om te controleren of
eventuele stelsleutels en moersleutels uit het gereedschap verwijderd zijn alvorens het
gereedschap in te schakelen
17 - Voorkom het per ongeluk inschakelen - Zorg ervoor dat de schakelaar in de uit-positie
staat wanneer de verbinding wordt tot stand gebracht met een stopcontact, wanneer een
accu in het gereedschap wordt aangebracht, of wanneer het gereedschap wordt opgetild
of wordt verplaatst
WAARSCHUWING:: Het onvoorzien starten van een gereedschap kan ernstig letsel
veroorzaken.
18 - Gebruik van verlengsnoeren buitenshuis - Wanneer het gereedschap buiten wordt
gebruikt, maak dan enkel gebruik van verlengsnoeren die specifiek hiervoor voorzien zijn
en als dusdanig gemarkeerd zijn. Het gebruik van een verlengsnoer dat geschikt is voor
gebruik buitenshuis beperkt het risico op elektrische schokken
19 - Blijf alert
- Let op wat u doet, gebruik uw gezond verstand, en gebruik het gereedschap niet
wanneer u vermoeid bent
- Gebruik elektrisch gereedschap nooit wanneer u vermoeid bent of onder de invloed bent
van drugs, alcohol of geneesmiddelen.
WAARSCHUWING:: Onoplettendheid tijdens het gebruik van elektrisch gereedschap kan
aanleiding geven tot ernstig persoonlijk letsel.
20 - Controleer beschadigde onderdelen
- Voorafgaand aan het gebruik van het gereedschap moet het aandachtig gecontroleerd
worden, om er zeker van te zijn dat het correct werkt en de beoogde functie op de juiste
wijze uitvoert
- Controleer de uitlijning van bewegende delen, het eventueel vastzitten van bewegende
delen, eventuele gebroken onderdelen, en welke andere afwijkingen dan ook die de
werking zouden kunnen beïnvloeden.
- Een bescherming of een ander deel dat beschadigd is, dient op de juiste wijze
gerepareerd te worden of vervangen te worden door een geautoriseerd servicecentrum,
tenzij anders aangeduid in deze gebruikshandleiding
- Laat defecte schakelaars vervangen door een geautoriseerd servicecentrum
WAARSCHUWING:: Gebruik het gereedschap niet indien de aan/uit-schakelaar het
gereedschap niet in- en uitschakelt. De schakelaar dient gerepareerd te worden alvorens het
gereedschap wordt gebruikt.
21 - Laat uw gereedschap repareren door een gekwalificeerde persoon - Dit elektrisch
gereedschap voldoet aan de relevante veiligheidsregels. Reparaties mogen enkel
uitgevoerd worden door gekwalificeerd personeel, zoniet kan dat gevaar inhouden voor
de gebruiker
WAARSCHUWING:: Gebruik bij onderhoud of reparaties enkel identieke vervangstukken.
WAARSCHUWING:: Indien het snoer beschadigd is, dient dit door de fabrikant of door een
geautoriseerd servicecentrum vervangen te worden.
22 - De stekkers op elektrisch gereedschap dienen overeen te stemmen met het stopcontact
- Wijzig de stekker nooit op welke wijze dan ook. Gebruik geen adapterstekkers in
combinatie met geaard elektrisch gereedschap. Het gebruik van ongewijzigde stekkers en
passende stopcontacten beperkt het risico op elektrische schokken.
23 - Indien elektrisch gereedschap buiten wordt gebruikt, zorg dan dat er een
aardlekbeveiliging (RCD) voorzien is - het gebruik van een aardlekbeveiliging beperkt het
risico op elektrische schokken
OPMERKING: De term “aardlekbeveiliging” (residual current device -RCD) kan vervangen
worden door de term “aardingsfoutschakelaar” (ground fault circuit interupter - GFCI) of
“aardlekschakelaar” (earth leakage circuit breaker - ELCB).
350767/850827_Manual.indd 19 13/02/2020 10:09

20
EN
20
NL
WAARSCHUWING: Wanneer de machine in Australië of Nieuw-Zeeland wordt gebruikt, is
het aan te bevelen dat het gereedschap STEEDS gevoed wordt via een systeem waarop een
aardlekbeveiliging (RCD) is voorzien met een nominale lekstroom van ten hoogste 30 mA.
WAARSCHUWING: Voordat u elektrisch gereedschap aansluit op een stroombron (stopcontact,
aftakking, enzovoort) dient u zich er van te vergewissen dat de voedingsspanning dezelfde is
als deze die gespecificeerd is op het typeplaatje van het gereedschap. Een voeding met een
spanning die groter is dan deze die gespecificeerd is voor het gereedschap kan aanleiding
geven tot ernstig letsel en kan het gereedschap beschadigen. Indien u twijfelt, steek de
stekker dan niet in het stopcontact. Een voeding met een spanning die lager is dan deze die
gespecificeerd is op het typeplaatje, is schadelijk voor de motor.
Veiligheid Snijgereedschap
WAARSCHUWING. Voordat u elektrisch gereedschap aansluit op een stroombron (stopcontact,
aftakking, enzovoort) dient u zich er van te vergewissen dat de voedingsspanning dezelfde is
als deze die gespecificeerd is op het typeplaatje van het gereedschap. Een voeding met een
spanning die groter is dan deze die gespecificeerd is voor het gereedschap kan aanleiding
geven tot ernstig letsel en kan het gereedschap beschadigen. Indien u twijfelt, steek de
stekker dan niet in het stopcontact. Een voeding met een spanning die lager is dan deze die
gespecificeerd is op het typeplaatje, is schadelijk voor de motor.
Gebruik steeds het juiste snijgereedschap
• Vergewis u ervan dat het snijgereedschap geschikt is voor het uit te voeren werk. Ga er
niet zomaar van uit dat het gereedschap geschikt is, zonder de productdocumentatie
geraadpleegd te hebben.
Bescherm uw ogen
• Draag steeds gepaste oogbescherming wanneer u snijgereedschap gebruikt.
• Een bril is niet geschikt als bescherming tijdens het gebruik van dit gereedschap; normale
brillenglazen zijn niet bestand tegen een eventuele impact, en zouden dan ook kunnen
breken.
Bescherm uw oren
• Draag steeds de gepaste gehoorbescherming in gevallen waarin het gereedschap meer
geluid produceert dan 85 dB.
Bescherm uw ademhaling
• Zorg ervoor dat uzelf en anderen in de omgeving geschikte stofmaskers gebruiken.
Bescherm uw handen
• Breng uw handen niet te dicht in de buurt van snijwielen of -bladen. Gebruik een duwstaaf
voor kortere werkstukken.
Wees attent op personen in de buurt
• Het behoort tot de verantwoordelijkheid van de gebruiker om ervoor te zorgen dat
andere personen die zich in de buurt van de plaats waar gewerkt wordt ophouden, niet
blootgesteld worden aan gevaarlijk lawaai en stof, en dat ze de beschikking hebben over
geschikte beschermende uitrusting.
Verborgen objecten
• Inspecteer het werkstuk en verwijder eventuele spijkers en andere ingebedde voorwerpen
alvorens het werk aan te vatten.
• Probeer geen materiaal te snijden waarin ingebedde voorwerpen aanwezig zijn, tenzij u er
zeker van bent dat het snijgereedschap dat u gebruikt geschikt is voor het werk.
• In muren kunnen bedradingen en buizen verborgen zijn, in panelen van een
autocarrosserie brandstofleidingen, en hoog gras kan stenen en glas verbergen.
Controleer de werkzone steeds grondig alvorens tot actie over te gaan.
Let op weggeslingerd afval
• In bepaalde situaties kan afvalmateriaal door het snijgereedschap weggeslingerd worden
aan hoge snelheid. Het behoort tot de verantwoordelijkheid van de gebruiker om ervoor
te zorgen dat andere personen in de werkzone beschermd zijn tegen de risico´s van
eventueel weggeslingerd afval.
Aanbrengen van snijgereedschap
• Zorg ervoor dat snijgereedschap correct en veilig is aangebracht, en controleer dat
sleutels en dergelijke verwijderd zijn alvorens de werkzaamheden aan te vatten.
• Gebruik enkel snijgereedschap dat is aanbevolen voor uw machine.
• Probeer geen snijgereedschap aan te passen of te wijzigen.
• Zorg ervoor dat bladen scherp zijn, in goede staat verkeren, en correct aangebracht zijn.
• Probeer bladen die niet geschikt zijn om geslepen te worden, te slijpen. Daarbij kan
het gaan om speciaal geharde bladen of om bladen die vervaardigd zijn uit geharde
legeringen, legeringen die typisch wolfraam omvatten.
• Bladen die wel geslepen kunnen worden, mag men enkel slijpen in overeenstemming
met de instructies van de fabrikant. Het kan zijn dat dergelijke bladen slechts een beperkt
aantal maal geslepen kunnen worden.
• Geslepen bladen dienen grondiger geïnspecteerd te worden voorafgaand aan het gebruik,
en dienen onmiddellijk vervangen te worden indien er twijfels bestaan betreffende hun
toestand en de geschiktheid ervan om gebruikt te worden.
• Indien bladen in contact komen met een ingebed object waarvoor de bladen in kwestie
niet geschikt zijn, dienen ze onmiddellijk vervangen te worden.
Aanvoerrichting
• Voer het werkstuk enkel naar het blad of naar de cutter aan tegen de rotatierichting in van
het blad of van de cutter.
Opgepast met ontwikkelde warmte
• Snijgereedschappen en werkstukken kunnen heet worden tijdens het gebruik. Probeer
gereedschappen niet te vervangen zolang ze niet volledig afgekoeld zijn.
Controle van stof/spanen
• Zorg ervoor dat stof en spanen niet kunnen accumuleren. Zaagsel vormt een brandgevaar,
terwijl sommige metaalspanen explosief zijn.
• Wees uitermate voorzichtig wanneer u hout en metaal snijdt. Vonken tijdens het snijden
van metaal zijn een veelvoorkomende oorzaak van houtstofbranden.
• Gebruik indien mogelijk een stofafvoersysteem om een veilige werkomgeving te
garanderen.
Veiligheid vlakschaafmachine
WAARSCHUWING: Gebruik het gereedschap nooit zonder de gepaste bescherming die op de
correcte wijze dient ingesteld te zijn.
WAARSCHUWING: Welk deel dan ook van het snijblok dat niet gebruikt wordt om te schaven,
dient beveiligd te zijn.
WAARSCHUWING: Bij het schaven van smalle werkstukken kan het zijn dat u bijkomende
maatregelen dient te nemen om veilig te kunnen werken, zoals inrichtingen om horizontale
druk uit te oefenen.
WAARSCHUWING: Schaafmachines mogen niet gebruikt worden om groeven en inkepingen
aan te brengen, om pennen te vervaardigen, of om vormen te maken.
• Maak gebruik van de gepaste ademhalingsbescherming. Het gebruik van dit gereedschap
kan aanleiding geven tot het genereren van stof dat chemicaliën omvat waarvan het
geweten is dat ze kanker of aangeboren afwijkingen veroorzaken, dan wel schadelijk
zijn voor de voortplanting. Sommige houtsoorten omvatten bewaarmiddelen zoals koper-
chroomarsenaat (CCA) dat toxisch kan zijn. Bij het schuren van, boren in, of snijden of
zagen van dergelijke materialen dient men extra op te letten om het inademen van of het
in contact komen van de huid met het geproduceerde stof te voorkomen.
• Gebruik enkel scherpe bladen Manipuleer de bladen zeer voorzichtig, en enkel met
veiligheidshandschoenen.
WAARSCHUWING: Gebruik geen botte bladen omdat dat het gevaar op terugslag doet
toenemen.
• Zorg ervoor dat textiel, koord, lompen en vodden, en dergelijke uit de werkzone zijn
verwijderd. Om meesleuren door het schaafmechanisme te voorkomen.
• Laat het gereedschap de volle snelheid bereiken alvorens het in contact wordt gebracht
met het werkstuk en alvorens het snijden te starten.
• Schakel het gereedschap STEEDS UIT en laat de bladen volledig tot stilstand komen
alvorens te trachten aanpassingen door te voeren, het gereedschap schoon te maken, of
onderhoud uit te voeren.
• Vervang alle bladen tegelijkertijd, zoniet kan een onbalans aanleiding geven tot trillingen
en tot een verkorting van de nuttige levensduur van de schaafmachine en van de bladen
• Probeer geen snijbewerkingen uit te voeren die niet aanbevolen zijn door de fabrikant.
Blinde sneden, inkepingen, deuvelpennen, vormen, of het schaven van ernstig verbogen
hout mogen niet uitgevoerd worden met dit gereedschap.
• Gebruik de schaafmachine niet indien ze niet is vastgezet op een veilig werkoppervlak.
Indien de machine niet stevig is vastgemaakt, kan ze plots verschuiven tijdens de werking,
wat aanleiding kan geven tot ernstig letsel voor de gebruiker.
• Houd de duwstaaf steeds in de buurt van het aanvoerplateau tijdens het uitvoeren van
schaafwerkzaamheden. Wanneer u korte werkstuk schaaft, dient de duwstaaf gebruikt te
worden. Gebruik de duwstaaf om het werkstuk voort te duwen in de buurt van het blad en
in gevallen waarin het werkstuk minder dan 75 mm dik is.
• Probeer geen sterk gebogen materiaal te schaven indien er onvoldoende contact is tussen
het plateau en het materiaal.
• Wanneer de schaafmachine wordt verplaatst, dient u ervoor te zorgen dat de
transporthandvaten worden gebruikt (niet het bedieningshandvat), en dat de
vergrendelmechanismen en beveiligingen aangebracht zijn en werken.
Voorkomen terugslag
Opmerking: Er doet zich een terugslag voor wanneer het blad plots tot stilstand komt omdat
het gekneld wordt, vast komt te zitten, of verkeerd is uitgelijnd, waardoor het werkstuk in de
richting van de operator wordt bewogen. Het kan ook zijn dat de handen van de operator tegen
het blad worden getrokken, met ernstig letsel tot gevolg.
WAARSCHUWING: Een terugslag is het gevolg van een verkeerd gebruik van het gereedschap
en/of van verkeerde bediening of omstandigheden. Terugslagkrachten kunnen echter door de
operator onder controle worden gehouden of volledig voorkomen worden:
a) probeer NOOIT te snijden met een bot of verwrongen blad. zorg er STEEDS voor dat het
blad geschikt is voor het te snijden materiaal.
b) zorg er STEEDS voor dat de geleiding/plateau parallel is opgesteld aan het blad. Indien de
geleiding of het plateau een inwaartse helling vertoont in de richting van het blad kan het
zijn dat het werkstuk in contact komt met de rugzijde van het blad.
c) Wees VOORZICHTIG bij het snijden van grote werkstukken. Zorg ervoor dat grotere delen
materiaal op de correcte wijze ondersteund worden door adequate aan- en afvoersteunen
te voorzien.
d) Snijd GEEN rond materiaal, noch materiaal dat niet plat of vlak op het plateau kan gelegd
worden. Vermijd het snijden van verwrongen, gebogen, of hout met knopen.
e) Snijd GEEN vochtig of nat hout omdat dergelijk hout een grotere wrijving tegen het
blad creëert. Nat zaagsel kan accumuleren op het blad, wat op zijn beurt de kans op
terugslag doet toenemen.
350767/850827_Manual.indd 20 13/02/2020 10:09
Table of contents
Languages:
Other Triton Planer manuals

Triton
Triton TRP UL Quick guide

Triton
Triton TCMPL Assembly instructions

Triton
Triton TPT 125 Quick guide

Triton
Triton TPT 125 User manual

Triton
Triton TPL180 Assembly instructions

Triton
Triton TRP UL Quick guide

Triton
Triton TPL180 Quick guide

Triton
Triton TR210143 Quick guide

Triton
Triton TR208537 Assembly instructions

Triton
Triton TPL180 Quick guide

Triton
Triton TPL180B Assembly instructions

Triton
Triton TCMPL Quick guide

Triton
Triton EPA 001 Quick guide

Triton
Triton TCMPL Assembly instructions

Triton
Triton TMNPL Assembly instructions

Triton
Triton TRP UL Quick guide

Triton
Triton TPL180 Assembly instructions

Triton
Triton TPT 125 Quick guide

Triton
Triton TRP UL Quick guide

Triton
Triton TCMPL Quick guide