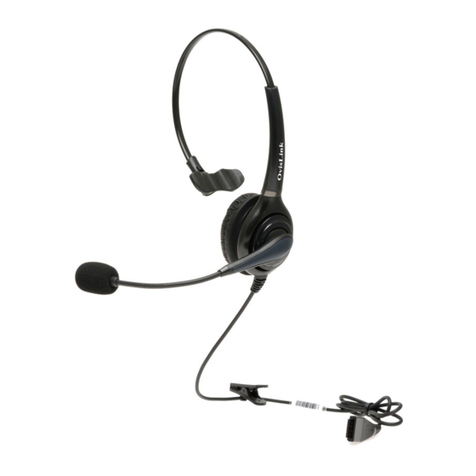
Tritton GW3 47107 User manual

7.1 Surround Sound Headset
User Guide

1
[ENGLISH] [fraNçaIS] [ESPaÑOL] [dEutScH]
Package Contents/Contenu de l’emballage/Contenido del paquete/Packungsinhalt ...................2
Features/Fonctionnalités/Características/Funktionen
Headset/Casque/Auriculares/Kopfhörer ..................................................3
In-line Controller/Contrôleur filaire/Control en línea/Bedienung am Kabel .....................5
Dolby®Digital / Dolby Headphone Decoder Box,
Dolby Digital / Dolby Headphone Boîtier du décodeur,
Dolby Digital / Dolby Headphone Caja Decodificadora,
Dolby Digital / Dolby Headphone Decoder.................................................7
Connect To/Connexion à une/Conexión a /Anschluss an Xbox 360®.................................11
Italiano/Dansk/Svensk/Português .............................................................25
Table of Contents
CASQUE/AURICULARES/KOPFHÖRER

2
[ENGLISH] [fraNçaIS] [ESPaÑOL] [dEutScH]
[EN] Dolby®Surround Sound Gaming Headset
[FR] Casque de jeu avec son surround Dolby
[ES] Auriculares para juegos de Dolby con sonido surround
[DE] Dolby Surroundsound Gaming-Headset
[EN] In-line Volume Control with Breakaway Cable
[FR] Contrôleur de volume filaire détachable
[ES] De volumen en línea de control con cable que separa
[DE] Lautstärkeregler am Kabel
[EN] Removable, Flexible Microphone
[FR] Microphone amovible, Flexible
[ES] Microphone Détachable, Flexible
[DE] Abnezzhmbares, flexibles Mikrofon
[EN] Dolby Digital Decoder Box
[FR] Dolby Digital Boîtier du décodeur
[ES] Dolby Digital Caja Decodificadora
[DE] Dolby Digital Decoder
[EN] Xbox LIVE®Communication Cable
[FR] Câble de communication Xbox LIVE
[ES] Cable de comunicación de Xbox LIVE
[DE] Xbox LIVE-Kommunikationskabel
[EN] Optical Cable
[FR] Câble optique
[ES] Cable óptico
[DE] Optisches Kabel
[EN] Digital Audio Adapter (Xbox 360 Only)
[FR] Adaptateur audio numérique (Xbox 360 Seul)
[ES] Adaptador de audio digital (Xbox 360 sólo)
[DE] Digitaler Audioadapter (Xbox 360 nur)
[EN] PC Adapter
[FR] Adaptateur PC
[ES] Adaptador de PC
[DE] PC-Adapter
PACKAGE CONTENTS
CONTENU DE L’EMBALLAGE/CONTENIDO DEL PAQUETE/PACKUNGSINHALT
[EN] Decoder Stand
[FR] Support de décodeur
[ES] Soporte para el decodificador
[DE] Decoder-Ständer
[EN] USB Cable
[FR] Câble USB
[ES] Cable de USB
[DE] USB-Kabel

3
[ENGLISH] [fraNçaIS] [ESPaÑOL] [dEutScH]
HEADSET
CASQUE/AURICULARES/KOPFHÖRER
[EN] Plush Headrail and Earcup Padding
[FR] Repose-tête et écouteurs coussinets
rembourrés en peluche ajustables
[ES] Arco de soporte y orejeras de
auriculares acolchados
[DE] Weicher Kopfhörerbügel und
Ohrmuschelpolsterung
[EN] Removable, Flexible Microphone
[FR] Microphone Amovible, flexible
[ES] Microphone Détachable, Flexible
[DE] Abnehmbares Flexibles Mikrofon
[EN] Adjustable Headrail
[FR] Arceau réglable
[ES] Arco ajustable
[DE] Anpassbarer Kopfhörerbügel
[EN] Extra earpad and headrail pad set with cap
removal tool available at store.gameshark.com
[FR] Ensemble supplémentaire de coussinets
d’écouteurs et d’arceau avec outil de nettoyage
des obstructions Disponible à store.gameshark.com
[ES] Set de auriculares y arcos acolchados adicionales
con herramienta para quitar las tapas Disponible
en store.gameshark.com
[DE] Zusätzlicher Satz Ohrkissen mit Kopfhörerbügelpolsterung
und Werkzeug zum Entfzernen der Kappe erhältlich
bei store.gameshark.com
http://store.gameshark.com
Pleather
Velour

4
[ENGLISH] [fraNçaIS] [ESPaÑOL] [dEutScH]
[EN] Microphone Insertion Directions
Insert the microphone into the headset by lining up the small dot on the microphone with the
small dot on the headset.
Firmly press the microphone into place.
Rotate the microphone in a counterclockwise direction 90 degrees.
[FR] Sens d’insertion du microphone
Insérez le microphone dans le casque en alignant le petit point du microphone avec le petit
point du casque.
Appuyez fermement sur le microphone pour le mettre en place.
Faites pivoter le microphone à 90 degrés dans le sens antihoraire.
[ES] Instrucciones de montaje del micrófono
Para insertar el micrófono en los auriculares, alinee el pequeño punto señalado en el
micrófono con el punto de los auriculares.
Empuje con firmeza y presione hasta que el micrófono esté en su alojamiento.
Gire el micrófono 90º de rotación sinistrórsum.
[DE] Mikrofonanschlussrichtungen
Stecken Sie das Mikrofon in das Headset und achten Sie darauf, dass der kleine Punkt des
Mikrofons mit dem kleinen Punkt des Headsets ausgerichtet ist.
Lassen Sie das Mikrofon einrasten.
Drehen Sie das Mikrofon um 90 Grad gegen den Uhrzeigersinn.
90°

5
[ENGLISH] [fraNçaIS] [ESPaÑOL] [dEutScH]
[EN] Mic Mute: Slide the mic mute switch down to mute the microphone so others cannot hear you.
[FR] Sourdine de micro: Que les autres personnes ne puissent pas vous entendre.
[ES] Silenciador de micrófono: Deslice el interruptor del silenciador del micrófono hacia abajo para
eliminar el sonido del mismo, así los demás no podrán oírle.
[DE] Mikrofon-Stummtaste: Schieben Sie die Mikrofon-Stummtaste nach unten, um das Mikrofon
stumm zu schalten, damit andere Sie nicht hören können.
[EN] Master Volume and Mute: Use to adjust the master volume of game audio. Push in to mute all
game sound.
[FR] Volume principal et sourdine: Utilisez ce bouton pour régler le volume principal du jeu. Appuyez
dessus pour désactiver tous les sons du jeu.
[ES] Volumen y Silencio (mute) principales: Utilícelos para ajustar el volumen principal del sonido del
juego. Presione para silenciar todo el sonido del juego.
[DE] Master-Lautstärke und -Stummschaltung: Einstellen der Spiellautstärke Stummschalten des
gesamten Spielsounds.
INLINE CONTROLLER
CONTRÔLEUR FILAIRE/CONTROL EN LÍNEA/BEDIENUNG AM KABE

6
[ENGLISH] [fraNçaIS] [ESPaÑOL] [dEutScH]
[EN] Breakaway In-line Connector
[FR] Contrôleur en ligne détachable
[ES] Control de volumen en línea con ruptura
[DE] Lautstärkeregler am Kabel (mit Flechtkabel)
[EN] Xbox LIVE Port: Use to connnect to Xbox LIVE.
[FR] Port Xbox LIVE: Utilisez ce bouton pour vous connecter au Xbox LIVE.
[ES] Puerto de Xbox LIVE: Utilícelo para la conexión a Xbox LIVE.
[DE] Xbox LIVE-Port: Herstellen einer Verbindung zu Xbox LIVE.
[EN] Voice Communication Volume and SVM Control: Use to adjust the volume of the voices of other
players. SVM = Selectable Voice Monitoring. SVM allows the user to hear his or her own
voice through the headset. Push in to turn SVM ON/OFF.
[FR] Communication Voix Commandes et SVM de volume: Utilisez ce bouton pour régler le volume
des voix des autres joueurs. SVM = Selectable Voice Monitoring, contrôle vocal sélectionnable.
SVM permet à l’utilisateur d’entendre sa voix dans le casque. Appuyez pour activer ou
désactiver la fonction SVM.
[ES] Control de comunicación por voz y SVM: Utilícelo para ajustar el volumen de las voces de los
demás jugadores. SVM = Monitoreo de Voz Seleccionable. SVM permite al usuario oír su propia
voz a través de los auriculares. Pulse para encender/apagar SVN.
[DE] Stimmkommunikationsregelung -und SVM: Einstellen der Lautstärke der Stimmen anderer
Spieler. SVM = Selectable Voice Monitoring (auswählbare Sprachüberwachung). Dank der
SVM-Funktion kann der Benutzer seine eigene Stimme über das Headset hören. Drücken Sie
hier, um die SVM-Funktion ein- bzw. auszuschalten.

7
[ENGLISH] [fraNçaIS] [ESPaÑOL] [dEutScH]
DOLBY® DIGITAL / DOLBY HEADPHONE DECODER BOX/
BOÎTIER DU DÉCODEUR/CAJA DECODIFICADORA/ DECODER
[EN] ON = Dolby Digital 5.1 signal is
being received
[FR] ON = Signal Dolby Digital
[ES] ON = Se está recibiendo la señal
Dolby Digital 5.1
[DE] EIN = Dolby Digital 5.1 -Signal wird
empfangen
[EN] Power Button
[FR] Bouton Power [Alimentation]
[ES] Botón Power (encendido)
[DE] Ein/Aus-Taste
[EN] Press to cycle through Dolby/
Stereo modes
[FR] Appuyez pour passer d’un mode
Dolby/Stereo à l’autre
[ES] Pulsa para alternar entre los modos
Dolby y Estéreo
[DE] Zum Schalten durch die Dolby-/
Stereo-Modi drücken
[EN] Gaming Volume Control
[FR] Contrôle du volume du jeu
[ES] Control de volumen del juego
[DE] Spiellautstärkeregler
[EN] ON = Pro Logic IIx mode
OFF = Dolby Digital or Stereo mode
[FR] ON = Mode Pro Logic IIx
DÉSACTIVÉ = Dolby Digital ou mode stéréo
[ES] ON = Modo Pro Logic IIx
OFF = la señal Dolby Digital está presente o
cuando está en modo estéreo
[DE] EIN = Pro Logic IIx-Modus
AUS = Dolby Digital oder im Stereo-Modus

8
[ENGLISH] [fraNçaIS] [ESPaÑOL] [dEutScH]
[EN] ON = Dolby Headphone mode
OFF = Stereo Only Mode
[FR] ON = Casque Dolby : BLANC = mode
Casque Dolby
DÉSACTIVÉ = mode Stéréo uniquement
[ES] ON = Auriculares Dolby: BLANCO=modo
auriculares Dolby
OFF = Modo sólo Stereo
[DE] EIN = Dolby-Kopfhörer: WEISS = Dolby-
Kopfhörer-Modus
AUS = Nur-Stereo-Modus
[EN] EQ Indicator:
GREEN = Music Mode
BLUE = Movie Mode
OFF = Stereo Mode
[FR] Témoin EQ
VERT = Mode Musique
BLEU = Mode Film
DÉSACTIVÉ = Mode Stéréo
[ES] Indicador EQ
VERDE = Modo Música
AZUL = Película o Juego
OFF = Modo Estéreo
[DE] Equalizer-Anzeige
GRÜN = Musik-Modus
BLAU = Film -Modus
AUS = Stereo-Modus
[EN] Headset Output
[FR] Sorties casque
[ES] Salida (output) para los auriculares
[DE] Headset-Ausgänge
[EN] Optical Port
[FR] Port optique
[ES] Puerto óptico
[DE] Optischer Anschluss
[EN] USB Port
[FR] Port USB
[ES] Puerto USB
[DE] USB Anschluss

9
[ENGLISH] [fraNçaIS] [ESPaÑOL] [dEutScH]
AUDIO INPUT FORMAT / FORMAT D’ENTRÉE AUDIO
STEREO / STÉRÉO / ESTÉREO / STEREO
Stereo Audio
[EN] GREEN = Music Mode
[FR] VERT = Mode Musique
[ES] VERDE = Modo Música
[DE] GRÜN = Musik-Modus
[EN] BLUE = Movie Mode
[FR] BLEU = Mode Film
[ES] AZUL = Película o Juego
[DE] BLAU = Film -Modus
7.1 Audio
7.1 Audio
PRO LOGIC IIX
MUSIC/MUSIQUE/MÚSICA/ MUSIK
PRO LOGIC IIX
MOVIE/FILM/ PELÍCULA/ FILM
STEREO / STÉRÉO /
ESTÉREO / STEREO
DOLBY/STEREO MODE
|
MODE DOLBY/STEREO
|
MODOS DOLBY Y ESTÉREO
|
DOLBY-/STEREO-MODI

10
[ENGLISH] [fraNçaIS] [ESPaÑOL] [dEutScH]
FORMATO DE ENTRADA DE AUDIO / AUDIO-EINGABEFORMAT
DOLBY DIGITAL / EX
Stereo Audio
[EN] GREEN = Music Mode
[FR] VERT = Mode Musique
[ES] VERDE = Modo Música
[DE] GRÜN = Musik-Modus
[EN] BLUE = Movie Mode
[FR] BLEU = Mode Film
[ES] AZUL = Película o Juego
[DE] BLAU = Film -Modus
7.1 Audio
7.1 Audio

11
[ENGLISH] [fraNçaIS] [ESPaÑOL] [dEutScH]
[EN] Remove protective caps from the optical cable.
[FR] Retirez les capuchons de protection du câble optique.
[ES] Retire las fundas protectoras del cable óptico
[DE] Entfernen Sie die Schutzkappen von den optischen Kabeln
[EN] Plug one end of the optical cable into the rear of the gaming console. Plug the other end of the
optical cable into the Decoder Box.
[FR] Branchez une extrémité du câble optique à l’arrière de la console de jeu. Branchez l’autre
extrémité du câble optique sur le Boîtier du décodeur.
[ES] Conecte el extremo del cable óptico a la parte trasera de la consola. Conecte el otro extremo
del cable óptico a la caja decodificadora.
[DE] Schließen Sie ein Ende des optischen Kabels an der Rückseite der Spielkonsole an. Schließen
Sie das andere Ende des optischen Kabels an die Decoder Box an.
[EN] Plug one end of the USB Cable to a USB port on the console. Plug the other end of the USB
Cable into the Decoder Box.
[FR] Branchez une extrémité du câble USB sur un port USB de la console. Branchez l’autre
extrémité du câble USB sur le Boîtier du décodeur.
[ES] Conecte un extremo del cable USB al puerto USB de la consola. Conecte el otro extremo del
cable óptico a la caja decodificadora.
[DE] Schließen Sie ein Ende des USB-Kabels an einen USB-Anschluss an der Konsole an. Schließen
Sie das andere Ende des USB-Kabels an die Decoder Box an.
[EN] Plug the headset connector into the Decoder Box.
[FR] Brancher le connecteur de casque sur le boîtier du décodeur.
[ES] Conecte el conector de auriculares a la caja decodificadora.
[DE] Schließen Sie den headset-anschluss an die decoder box an.
CONNECT TO/CONNEXION À UNE/CONEXIÓN A /ANSCHLUSS AN
XBOX 360

12
[ENGLISH] [fraNçaIS] [ESPaÑOL] [dEutScH]
[EN] Plug the headset into the in-line controller.
[FR] Branchez le casque sur le contrôleur filaire.
[ES] Enchufe los auriculares al controlador en línea.
[DE] Schließen Sie das Headset an die Bedienung am Kabel an.
[EN] Be sure to connect the Xbox LIVE communication cable in the proper order:
A. Connect Xbox LIVE cable into Xbox LIVE port on the in-line controller.
B. Connect puck side of Xbox LIVE cable into Xbox 360-compatible controller.
[FR] Assurez-vous de brancher le câble de communication Xbox LIVE dans l’ordre suivant :
A. Branchez le câble Xbox LIVE dans le port Xbox LIVE du contrôleur filaire.
B. Connectez le bout avec une fiche en forme de palet du cable Xbox LIVE sur une manette
Xbox 360 compatible.
[ES] Asegúrese de conectar el cable de comunicación de Xbox LIVE en el orden adecuado:
A. Conecte el cable de Xbox LIVE en el puerto Xbox LIVE del controlador en línea.
B. Conecte el disco lateral del cable de la Xbox LIVE al controlador compatible de la Xbox 360.
[DE] Das Xbox LIVE-Kommunikationskabel muss in der richtigen Reihenfolge angeschlossen werden:
A. Das Xbox LIVE-Kabel mit dem Xbox LIVE-Anschluss am In-Line-Regler verbinden.
B. Schließen Sie die Adapterseite des Xbox LIVE-Kabels an die Xbox 360-kompatible
Bedienung an.
[EN] Power on the gaming console and the Decoder Box.
[FR] Mettez en marche la console de jeu et le Boîtier du décodeur.
[ES] Encienda la consola y la caja codificadora.
[DE] Schalten Sie die Spielkonsole und die Decoder Box ein.

13
[ENGLISH] [fraNçaIS] [ESPaÑOL] [dEutScH]
[EN] Attention! Step-by-step setup video available at trittonusa.com
[FR] Attention ! Vidéo d’installation pas à pas disponible sur trittonusa.com
[ES] ¡Atención! Vídeo de configuración detallada disponible en trittonusa.com
[DE] Achtung! Video mit schritt-für-schritt-konfigurationsanleitung verfügbar unter trittonusa.com
[EN] New Xbox 360 – HDMI, Component or VGA setup can be used here.
[FR] Nouvelle Xbox 360 – Il est possible d’utiliser ici la configuration HDMI, composante ou VGA.
[ES] Nueva Xbox 360 – Aquí se puede utilizar instalación por HDMI, componentes o VGA.
[DE] Neue Xbox 360 – HDMI-, Komponenten- oder VGA-setup kann verwendet werden.

14
[ENGLISH] [fraNçaIS] [ESPaÑOL] [dEutScH]
[EN] Attention! Step-by-step setup video available at trittonusa.com
[FR] Attention ! Vidéo d’installation pas à pas disponible sur trittonusa.com
[ES] ¡Atención! Vídeo de configuración detallada disponible en trittonusa.com
[DE] Achtung! Video mit schritt-für-schritt-konfigurationsanleitung verfügbar unter trittonusa.com
[EN] Legacy HDMI
[FR] Classique HDMI
[ES] Heredado HDMI
[DE] Legacy HDMI

15
[ENGLISH] [fraNçaIS] [ESPaÑOL] [dEutScH]
[EN] Legacy Component/VGA/Composite
[FR] Classique Composante/VGA/composite
[ES] Heredado Cable de componentes/VGA/compuestos
[DE] Legacy Komponenten-/VGA-/Composite-Anschluss
[EN] Attention! Step-by-step setup video available at trittonusa.com
[FR] Attention ! Vidéo d’installation pas à pas disponible sur trittonusa.com
[ES] ¡Atención! Vídeo de configuración detallada disponible en trittonusa.com
[DE] Achtung! Video mit schritt-für-schritt-konfigurationsanleitung verfügbar unter trittonusa.com

16
[ENGLISH] [fraNçaIS] [ESPaÑOL] [dEutScH]
[EN] In the Xbox dashboard, select System Settings > Console Settings > Audio > Digital Output and
select “Dolby Digital 5.1” Watch to ensure that the “Dolby Digital” light on audio controller
illuminates as a game or movie starts.To confirm Xbox LIVE settings, press the “Xbox Guide
Button” when a game is loaded, and go to Personal Settings > Voice. Ensure that “Headset
Only” is selected.
[FR] Sur la tableau de bord de la Xbox, sélectionnez Paramètres système > Paramètres de la
console > Audio > Sortie numérique et sélectionnez « Dolby Digital 5.1 ». Vérifiez que le
témoin « Dolby Digital » est bien allumé lorsque le jeu ou le film commence. Pour confirmer
des paramètres Xbox LIVE, appuyez sur le bouton « Xbox Guide » lorsqu’un jeu est chargé et
rendez-vous dans Paramètres personnels > Voix. Assurez-vous que « Casque seulement » est
sélectionné.
[ES] En el panel de control de la Xbox, seleccione System Settings (coniguración del sistema)>
Console Settings (configuración de la consola)> Audio > Digital Output (salida digital) y
seleccione “Dolby Digital 5.1” Asegúrese de que la luz “Dolby Digital” del controlador del
audio se ilumina cuando empiece el juego o la película. Para confirmar la configuración de
Xbox LIVE, pulse el botón “Xbox Guide Button” cuando se cargue un juego y vaya a Personal
Settings (configuración personal) > Voice (voz). Compruebe que la opción “Headset Only (sólo
auricular)” esté seleccionada.
[DE] Wählen Sie auf dem Xbox-Dashboard „Systemeinstellungen“ > „Konsoleneinstellungen“ >
„Audio“ > Digitalausgang“ und dann „Dolby Digital 5.1“. Achten Sie darauf, dass beim Beginn
eines Spiels oder Films die „Dolby Digital“-LED am Lautstärkeregler aufleuchtet. Um die Xbox
LIVE-Einstellungen zu bestätigen, drücken Sie die Xbox Guide-Taste, wenn ein Spiel geladen
wird, und gehen Sie zu „Persönliche Einstellungen“ > „Sprache“. Stellen Sie sicher, dass „Nur
Headset“ ausgewählt ist.

17
[ENGLISH] [fraNçaIS] [ESPaÑOL] [dEutScH]
[ENGLISH]
Register your product at TRITTONUSA.COM to receive warranty coverage, news, events and updates.
IF YOU HAVE ANY ISSUES USING THIS PRODUCT, please try the following before returning this product to the store:
If people cannot hear you talk, make sure that the mute switch is not enabled and that the mic is fully inserted into the headset.
To confirm Xbox LIVE settings, press the Xbox Guide Button when a game is loaded, and go to Personal Settings > Voice. Ensure that
“Headset only” is selected.
For immediate support, visit http://www.trittontechnologies.com to find the latest documentation, Knowledge Base articles, and software
for your device. You can also chat live with a support technician or submit a trouble ticket.
90-DAY LIMITED WARRANTY (NORTH AMERICA ONLY)
Mad Catz warrants this product to be free from defects in materials and workmanship for the warranty period. This non-transferable, ninety
(90) day limited warranty is only to you, the first end-user purchaser. If a defect covered by this warranty occurs AND you have registered
your product with Mad Catz AND you provide proof of purchase, Mad Catz, at its option, will repair or replace the product at no charge.
The Mad Catz ninety (90) day limited warranty is available to North American customers. Your sole and exclusive remedy is repair or
replacement of your Mad Catz product. In no event shall Mad Catz liability exceed the original purchase price of the product. This warranty
does not apply to: (a) normal wear and tear or abusive use; (b) industrial, professional or commercial use; (c) if the product has been
tampered with or modified.
2-YEAR LIMITED WARRANTY (EUROPE ONLY)
Mad Catz warrants this product to be free from defects in materials and workmanship for the warranty period. This non-transferable, two
(2) year limited warranty is only valid for the original purchaser. If a defect covered by this warranty occurs AND you have registered your
product with Mad Catz AND you provide proof of purchase, Mad Catz, at its option, will repair or replace the product at no charge.
The Mad Catz two (2) year limited warranty is available to European customers. Your sole and exclusive remedy is repair or replacement of
your Mad Catz product. In no event shall Mad Catz liability exceed the original purchase price of the product. This warranty does not apply to:
(a) normal wear and tear or abusive use; (b) industrial, professional or commercial use; (c) if the product has been tampered with or modified.
To receive warranty service you must:
- North America: call Mad Catz Technical Support at 1.800.659.2287 or 1.619.683.2815
- Europe: call Mad Catz Technical Support at +44 (0) 8450-508418
- Obtain a Return Authorization Number from Mad Catz Technical Support
- Ship the product to Mad Catz at your expense for service
- Enclose a copy of the original sales receipt showing a purchase date
- Enclose a full return address with daytime and evening phone numbers
TECHNICAL SUPPORT
Online Support and User Guides: www.madcatz.com
E-mail: [email protected]
North American telephone: Available 8 A.M. to 12 P.M., 1 - 4 P.M. Pacific Standard Time, Monday through Friday (excluding holidays) at
1.800.659.2287 (US only) or 1.619.683.2815 (outside US).

18
[ENGLISH] [fraNçaIS] [ESPaÑOL] [dEutScH]
European telephone: Available 9 A.M. to 5 P.M. Greenwich Mean Time, Monday through Friday (excluding bank holidays) at +44 (0) 8450-508418
CAUTIONS
• Long-termexposuretoloudmusicorothersoundsinheadphonesmaycausehearingdamage.Itisbesttoavoidextremevolumelevels
when using headphones, especially for extended periods.
• Usethisunitonlyasintended.
• Topreventreorshockhazard,donotexposethisunittorainormoisture.Donotusewithin30’ofanywatersuchasswimmingpools,
bathtubs, or sinks.
• Toavoidelectricalshock,donotdisassemble.Referservicingtoqualiedpersonnelonly.
• Neverinsertobjectsofanykind,otherthanauthorizeditems,intotheproductastheymaytouchdangerousvoltagepointsorshortout
parts that could result in fire or electrical shock.
• Stopusingthisunitimmediatelyifyoubegintofeeltiredorifyouexperiencediscomfortorpaininyourhandsand/orarmswhileoperat-
ing the unit. If the condition persists, consult a doctor.
• Avoidprolongeduseofthisunit.Takebreaksevery30minutes.
• Routeallcordssothattheyarenotlikelytobewalkedonortrippedover.Makesurethatcordsarenotplacedinapositionorareas
where they may become pinched or damaged.
• Donotwrapcordsaroundanypartofanyone’sbody.
• Donotallowchildrentoplaywithcords.
United States and Canada:
As required, certain of these class B digital devices have been tested by Mad Catz, Inc., 7480 Mission Valley Road, Suite 101, San Diego, CA
92108, and found to comply with part 15 of the FCC rules and the Canadian RSS-210 which sets forth limits designed to provide reasonable
protection against harmful interference in a residential installation. These device(s) use, generate and can radiate radio frequency energy
and, if not assembled, installed and used in accordance with the instructions, may cause harmful interference to radio communications. There
is no guarantee that interference will not occur in any particular location or use. Operation is subject to the following two conditions: (1) this
device may not cause harmful interference and (2) this device must accept any interference received, including interference that may cause
undesired operation.
Exposure to Radio Frequency Radiation:
The radiated output power of the controller is well within FCC radio frequency exposure limits for this type of device when unaltered and used
as described in our instructions and the controller operates within guidelines found in radio frequency safety standards, which reflect the
consensus of the scientific community and therefore, the manufacturer believes the device’s internal wireless radio is safe for use by consum-
ers. The level of energy emitted is far less than the electromagnetic energy emitted by wireless devices such as mobile phones. However, the
use of wireless radios may be restricted in some situations (e.g., on airplanes). If you are unsure of restrictions that may apply in any situation,
you must ask for authorization before turning on, connecting or using the controller.
EU DECLARATION OF CONFORMITY:
As required, certain of these products have been tested and conform to the requirements of the European Union Directives 2002/95/EC, 2002/96/
EC, and 2004/108/EC. Authorized signatory of the manufacturer is Mad Catz, Inc., 7480 Mission Valley Road, Suite 101, San Diego, CA 92108.
©2011 Mad Catz, Inc. 7480 Mission Valley Road, Suite 101, San Diego, CA 92108 U.S.A. Mad Catz, TRITTON, the Mad Catz logo and the TRIT-
TON logo are trademarks or registered trademarks of Mad Catz, Inc., its subsidiaries and affiliates. The shape and design of this product are
a trade dress of Mad Catz. Microsoft, Kinect, Xbox, Xbox LIVE, Xbox 360, and the Xbox logos are trademarks of the Microsoft group of com-
panies. This product is not sponsored, endorsed or approved by Microsoft. All other product names and images are trademarks or registered
trademarks of their respective owners. Made in China. All rights reserved. Product features, appearance and specifications may be subject to
change without notice. Please retain this information for future reference.

19
[ENGLISH] [fraNçaIS] [ESPaÑOL] [dEutScH]
© 2011, Epic Games, Inc. All Rights Reserved. Epic, Epic Games, the Epic Games logo, Gears of War, Gears of War 3 and the Crimson Omen
logo are trademarks or registered trademarks of Epic Games, Inc. in the United States and elsewhere.
Mad Catz is a publicly traded company on the TSX/AMEX, symbol MCZ.
[FRANÇAIS]
Enregistrez votre produit sur TRITTONUSA.COM pour bénéficier de la couverture de la garantie, de nouveautés, d’évènements et de mises à jour.
SI VOUS RENCONTREZ DES PROBLÈMES LORSQUE VOUS UTILISEZ CE PRODUIT, veuillez essayer d’appliquer les méthodes suivantes avant de
renvoyer ce produit au magasin:
Si des personnes ne vous entendent pas parler, assurez-vous que l’interrupteur de sourdine n’est pas activé et que le micro est complète-
ment inséré dans le casque.
Pour confirmer des paramètres Xbox LIVE, appuyez sur le bouton Xbox Guide lorsqu’un jeu est chargé et rendez-vous dans paramètres
personnels > Voix. Assurez-vous que « Casque seulement » est sélectionné.
Pour une assistance immédiate, veuillez consulter http://www.trittontechnologies.com pour trouver la documentation la plus récente,
des articles de la Base de connaissances et des logiciels pour votre périphérique. Vous pouvez également discuter en direct avec un
technicien du service d’assistance ou soumettre une fiche d’incidence.
GARANTIE LIMITÉE DE 90 JOUR (CLIENTS NORD-AMÉRICAINS SEULEMENT)
Mad Catz garantit ce produit contre tout vice de matériau ou de fabrication pendant la période de garantie. Cette garantie limitée de quatre
vingt dix (90) jours non transférable s’applique à vous uniquement en tant qu’acheteur et premier utilisateur final. Si un vice couvert par cette
garantie est décelé ET que vous avez enregistré votre produit auprès de Mad Catz ET que vous fournissez une preuve d’achat, Mad Catz, à sa
seule discrétion, réparera ou remplacera le produit gratuitement.
La garantie limitée par Mad Catz à 90 jours est à la disposition des clients Nord-américains uniquement, y compris le Canada, Mexique et les
États-Unis. Votre recours exclusif est la réparation ou le remplacement de votre produit Mad Catz. En aucun cas la responsabilité de Mad Catz
ne pourra dépasser le prix d’achat d’origine du produit. Cette garantie ne s’applique pas à : (a) une usure normale ou un mauvais usage ; (b)
une utilisation industrielle, professionnelle ou commerciale ; (c) un produit ayant fait l’objet de modifications.
GARANTIE LIMITÉE À 2 AN (CLIENTS EUROPÉENS SEULEMENT)
Mad Catz garantit ce produit contre tout vice de matériau ou de fabrication pendant la période de garantie. Cette garantie est limitée à deux
(2) ans non transférable s’applique à vous uniquement en tant qu’acheteur et premier utilisateur final. Si un vice couvert par cette garantie est
décelé ET que vous avez enregistré votre produit auprès de Mad Catz ET que vous fournissez une preuve d’achat, Mad Catz, à sa seule discré-
tion, réparera ou remplacera le produit gratuitement.
La garantie limitée par Mad Catz à deux (2) ans est à la disposition des clients Européens uniquement. Votre recours exclusif est la réparation
ou le remplacement de votre produit Mad Catz. En aucun cas la responsabilité de Mad Catz ne pourra dépasser le prix d’achat d’origine du
produit. Cette garantie ne s’applique pas à : (a) une usure normale ou un mauvais usage ; (b) une utilisation industrielle, professionnelle ou
commerciale ; (c) un produit ayant fait l’objet de modifications.
Pour bénéficier de la garantie, vous devez :
- Pour l’Amérique du Nord: Appeler le service d’assistance technique de Mad Catz au +1.800.659.2287 ou au +1.619.683.2815
- Pour l’Europe: Appeler le service d’assistance technique de Mad Catz au +44 (0) 8450-508418
- Obtenir un numéro d’autorisation de retour auprès du service d’assistance technique de Mad Catz
- Expédier le produit à Mad Catz à vos frais
Table of contents
Other Tritton Headset manuals
Tritton
Tritton AX180 User manual
Tritton
Tritton AX180 User manual

Tritton
Tritton AX Micro TRI-BH200 User manual

Tritton
Tritton Kunai User manual
Tritton
Tritton AX180 User manual

Tritton
Tritton Ark100 User manual

Tritton
Tritton AX720 User manual

Tritton
Tritton GW3 47109 User manual

Tritton
Tritton Kunai User manual

Tritton
Tritton PC 510 HDA User manual
