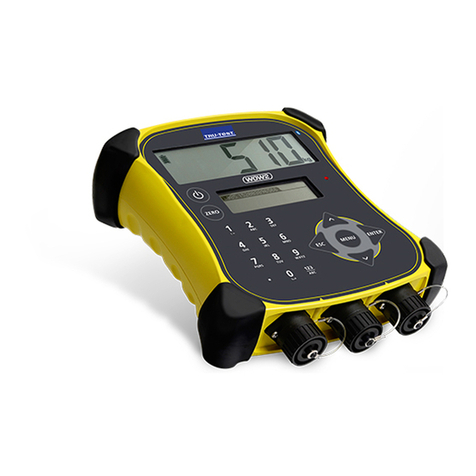
Tru-Test EziWeigh5i User manual

Issue 2, 7/20171
EziWeigh5i, EziWeigh6i, EziWeigh7i,
WOW2 and
Dairy Automation Systems (DAS)
WOW2
Scale Indicator
LEVEL 1 SERVICE MANUAL

EziWeigh5i, EziWeigh6i, EziWeigh7i, WOW2, DAS WOW2
Issue 2, 7/2017 2
Contents
Service centre requirements................................................................................................................3
Product feedback...........................................................................................................................3
Technical bulletins..........................................................................................................................3
Returning a product........................................................................................................................3
Fault report card.............................................................................................................................4
Service equipment .........................................................................................................................5
Parts diagrams....................................................................................................................................6
Parts list............................................................................................................................................10
Troubleshooting................................................................................................................................12
Error messages ................................................................................................................................16
Testing the indicator..........................................................................................................................18
Checking for stable weights..........................................................................................................18
Checking the calibration...............................................................................................................18
Checking the load cell codes........................................................................................................18
Checking the power connection....................................................................................................19
Checking the USB connection (EziWeigh6i, EziWeigh7i, WOW2 and DAS WOW2 only)...............19
Checking the RS232 serial connection (EziWeigh6i, EziWeigh7i, WOW2 and DAS WOW2 only)..19
Checking the Bluetooth®wireless connection (EziWeigh7i, WOW2 and DAS WOW2 only) ...........19
Checking the LCDs......................................................................................................................19
Testing the keypad.......................................................................................................................19
Checking the battery....................................................................................................................21
Repair procedures ............................................................................................................................22
LCD handling and storage precautions.........................................................................................22
Using flexible printed circuits (FPCs)............................................................................................22
Protecting the case front ..............................................................................................................23
Removing and refitting the case back...........................................................................................24
Replacing the case seal ...............................................................................................................26
Replacing the case front...............................................................................................................27
Replacing the bezel, keypad and overlay......................................................................................28
Replacing the battery...................................................................................................................29
Replacing the load bar and power/communication connectors......................................................29
Replacing the piezo speaker ........................................................................................................30
Removing and refitting thePCA...................................................................................................31
Replacing the LCD.......................................................................................................................33
Updating the firmware..................................................................................................................33
Accessing the hidden menus.............................................................................................................34
EziWeigh5i ESC+MENU hidden menu .........................................................................................34
EziWeigh6i, EziWeigh7i, WOW2 and DAS WOW2 ESC+MENU hidden menu..............................36
Factory Calibration screen............................................................................................................37
Bluetooth®settings (EziWeigh7i, WOW2 and DAS WOW2 only)........................................................38
MAC Address...............................................................................................................................38
Bluetooth PIN...............................................................................................................................38
Bluetooth factory reset .................................................................................................................38

EziWeigh5i, EziWeigh6i, EziWeigh7i, WOW2, DAS WOW2
Issue 2, 7/2017 3
Service centre requirements
Product feedback
Receiving feedback from Service Centres about the type of field problems encountered is an important
part of product development. To assist us with improving the product, we ask that a Service Report be
returned to us each month. With this information, we can accurately identify trends in the field and
offer appropriate technical support.
We also encourage you to provide us with your comments about the product. We value your feedback.
Only qualified Service Centres are authorised to carry out service work on the scales products.
Warning! Static discharge can damage some components on the indicator. Such damage may
degrade an electronic component and may result in faults developing within that component over
time. When working on an indicator, ensure that correct anti-static procedures are used.
1. Use a wrist band and earth strap.
2. Work only on a grounded bench top.
3. Use a suitable lead-free anti-static soldering iron and solder sucker.
4. Store PCAs and LCDs in anti-static bags.
Technical bulletins
Technical bulletins are prepared as needed. They should be read in conjunction with the service
manual. Technical bulletins are available on the Tru-Test service agent portal
www.service.tru-test.com.
The current Technical Bulletins cover;
•Span calibration
•Updating the firmware
•Cell codes
Returning aproduct
Before a product or assembly is returned to Tru-Test for service or analysis, please advise us
beforehand so that a Return Authorisation (RA) number can be allocated. The RA number will ensure
that we are ready for the product when it is received and assist us in providing efficient and prompt
service. Please mark all packaging with the RA number.

EziWeigh5i, EziWeigh6i, EziWeigh7i, WOW2, DAS WOW2
Issue 2, 7/2017 4
Fault report card
Email to:
Service Department
Tru-Test Ltd
service@trutest.co.nz
From:
(Distributor)
(Tru-Test Ltd representative)
Date
Return authority (RA) number
Warranty
Yes
No
Product returned:
Indicator
Model:
Serial number
Configuration
kg
lb
Load bar/Load cells
Serial number(s) of the
load bars
Serial number(s) of the load
cells
Load bars/Load cells
model Load cell code
Distributor
Date installed
Zero offset
Insulation test
Bridge resistances
red/black
green/white
red/white
red/green
black/white
black/green
Fault description
(include visual impression and display messages)
Fault report (Service centre)

EziWeigh5i, EziWeigh6i, EziWeigh7i, WOW2, DAS WOW2
Issue 2, 7/2017 5
Service equipment
To service Tru-Test indicators, you will require the following equipment:
Item
Description
Multi-meter Good quality digital type with 300 mA and 300 mV range.
Screwdrivers Pozi-drive, size 1 (for connectors, PCA and LCDs – torque setting
0.5 Nm (4 lb-in.)).
Pozi-drive, size 2 (for case back screws – torque setting 0.9 Nm
(8 lb-in)).
A driver with adjustable torque setting is strongly recommended.
DO NOT use a variable speed electric drill!
Pliers
Long-nose, side cutting.
Rubber mat
Suitable for placing the indicator on while servicing.
Soft cloth
For cleaning the LCDs.
Indicator 0 mV/V calibration
plug
Part no. WIA70020. For field service technicians.
Indicator 2 mV/V calibration
plug Part no. WIA70022. For field service technicians.
Computer Windows XP or later with Data Link installed.

EziWeigh5i, EziWeigh6i, EziWeigh7i, WOW2, DAS WOW2
Issue 2, 7/2017 6
Parts diagrams
Figure 1a: EziWeigh5i Parts

EziWeigh5i, EziWeigh6i, EziWeigh7i, WOW2, DAS WOW2
Issue 2, 7/2017 7
Figure 1b: EziWeigh6i Parts

EziWeigh5i, EziWeigh6i, EziWeigh7i, WOW2, DAS WOW2
Issue 2, 7/2017 8
816752P
828690P
816753P
828686P
816749P
816748P
815787P
830037P
828688P
830459P
830036P
EKZ31070P
816604P
SSS20416P
828687P
816747P
816753P
829036P
816597P
819797P
Figure 1c: EziWeigh7i Parts

EziWeigh5i, EziWeigh6i, EziWeigh7i, WOW2, DAS WOW2
Issue 2, 7/2017 9
816752P
828690P
816753P
829037P
or 830504P
816749P
815787P
830037P
828688P
830459P
830036P
EKZ31070P
816604P
SSS20416P
828687P
816747P
816753P
829038P
816597P
816748P
Figure 1d: WOW2 and DAS WOW2 Parts

EziWeigh5i, EziWeigh6i, EziWeigh7i, WOW2, DAS WOW2
Issue 2, 7/2017 10
Parts list
Description
Contents
Quantity
per indicator
Part number
LCD 7 segment All models 1 828687P
LCD dot matrix EziWeigh6i, EziWeigh7i, WOW2 and DAS
WOW2 1 815787P
Load bar connector and
FPC
Male connector. All models
2
830037P
Power/communication
connector and FPC Female. All models 1 830036P
Battery All models 1 828688P
PCA (printed circuit
assembly)
EziWeigh5i
EziWeigh6i
EziWeigh7i
WOW2
DAS WOW2
1
1
1
1
1
828684P
828685P
828686P
829037P
830504P
Case front (clear) All models 1 816748P
Case bezel (yellow)
All models
1
816747P
Case rear (yellow)
All models.
1
828690P
O-ring All models 1 816749P
Sound hole label kit
EziWeigh5i
Kit of 10 x 20 mm round labels used to cover the
sound hole in the case front.
1
828692P
Foam block kit EziWeigh5i
5 x foam blocks 80x30x14 for packing between
the case front and the PCA.
1 829778P
Piezo speaker
EziWeigh6i, EziWeigh7i, WOW2 and DAS
WOW2
Includes the round, double-sided label used to
affix the speaker to the case front.
1
830459P
Screw kit case All models
Kit of 50 screws used for securing the case
components
11 816752P
Screw kit C16 All models
Kit of 50 screws used for securing
power/communication and load bar connectors
6 SSS20416P
Screw kit LCD/PCA All models
Kit of 50 screws used for securing the LCD and
PCA.
8 (EziWeigh5i)
or
10 (EziWeigh6i,
EziWeigh7i,
WOW2 and DAS
WOW2)
816753P
Overlay
EziWeigh5i
EziWeigh6i
EziWeigh7i
WOW2 and DAS WOW2
1
1
1
1
829034P
829035P
829036P
829038P
Keypad All models 1 816597P

EziWeigh5i, EziWeigh6i, EziWeigh7i, WOW2, DAS WOW2
Issue 2, 7/2017 11
Description Contents
Quantity
per indicator Part number
Rubber bumper kit
(protective corners)
EziWeigh6i and EziWeigh7i
Kit of 4 rubber bumpers
4
819797P
Load bar connector
dust cap All models 2 EKZ31070P
Power/communication
connector dust cap All models 1 816604P
Power adaptor with
USB cable EziWeigh5i, Eziweigh6i, EziWeigh7i 1 818348P
Power adaptor WOW2 1 826639
Serial adaptors (2) and
power cable
WOW2 and DAS WOW2
1
826638
USB-DB9 adaptor WOW2 1 824429P
Serial cable WOW2 1 813610
Power/Communication
cable DAS WOW2 1 829970P

EziWeigh5i, EziWeigh6i, EziWeigh7i, WOW2, DAS WOW2
Issue 2, 7/2017 12
Troubleshooting
Symptom
Possible Fault
Action
Indicator does not
switch on. Battery fault. Check battery voltage – if < 2.7 V, try recharging for at least
ten hours. If the battery voltage has not risen above 3.3 V
then replace battery.
Faulty power
adaptor. Check using a known good power adaptor. Replace if faulty.
Faulty
power/communic
ation connector
and FPC
Check that the power/communication FPC is correctly
inserted into the PCA.
Plug a known good power/communication connector and
FPC into the PCA and check if the indicator switches on.
Poor keypad
connections. Check if keypad FPCs are inserted correctly and locked into
place.
Keypad fault.
Unplug existing keypad FPCs and try plugging in a known
good keypad to verify any fault. Replace keypad if faulty.
See page 28.
Faulty PCA.
Replace PCA. See page 31.
Indicator switches
on but does not
stay on.
Firmware fault.
If possible, update the firmware. Refer to the Technical
Bulletin Updating the firmware.
Low battery. Check battery voltage – if < 2.7 V, try recharging for at least
ten hours. If the battery voltage has not risen above 3.3 V
then replace battery.
Battery not
charging.
Battery fault.
Check battery voltage – if < 2.7 V, try recharging for at least
ten hours. If the battery voltage has not risen above 3.3 V
then replace battery.
Faulty
power/communic
ation connector
and FPC
Check that the power/communication FPC is correctly
inserted into the PCA.
Plug a known good power/communication connector and
FPC into the PCA and check if the indicator charges.
Faulty power
adaptor. Check using a known good power adaptor. Replace if faulty.
Faulty PCA.
Replace PCA. See page 31.
Short battery run
time. Battery not fully
charged. Try recharging for at least ten hours. Check that the
charging indicator on the 7 segment LCD is cycling.
Faulty battery.
Measure open circuit voltage on battery. Replace if < 2.5 V.
Faulty PCA.
Replace PCA. See page 31.
Sections or all of
LCD not working
OR
Very dark or very
light LCD screen.
LCD FPCs not
connected
properly.
Try reconnecting the two LCD FPCs. See page 22.
Faulty LCD Replace LCD. See page 33.
Faulty PCA. Replace PCA. See page 31.
Black / Blue / Grey
area on LCD. Cracked or
damaged LCD. Replace LCD. See page 33.

EziWeigh5i, EziWeigh6i, EziWeigh7i, WOW2, DAS WOW2
Issue 2, 7/2017 13
Symptom
Possible Fault
Action
Back light very
dim or not
working.
LCD FPC or
backlight loom
not connected
properly.
Try reconnecting the LCD FPCs. See page 22. Reconnect
the LCD backlight loom. See page ?
Faulty LCD
Replace LCD. See page 33.
Faulty PCA.
Replace PCA. See page 31.
Displayed weights
unstable and / or
will not zero,
“UNDERLOAD” or
“OVERLOAD”
displayed, or
indicator displays
incorrect weight.
Span calibrated
on cell code 99
(no code).
This behavior is normal when no load bars are connected.
Caution! Scan calibration settings can be important to the
customer so check before changing.
If the customer no longer requires this span calibration,
clear the settings. See the technical bulletin Span
Calibration Guide.
Load cell
settings may
have been
modified.
If the customer no longer requires these settings, reinstate
the default settings. See the technical bulletin Span
Calibration Guide.
Caution! These settings can be important to the customer so
check before changing!
Load bars are
faulty.
Test the load bars to see if they are functioning correctly.
See load bars service manual.
Faulty load bar
connector and
FPC.
Check that the load bar connector FPC is correctly inserted
into the PCA.
Plug a know good load bar connector and FPC into the PCA
and check if weights are stable.
PCA is faulty. Replace PCA. See page 31.
bAd.c, ER 05 or
Bad code
displayed
Note:See
diagnostics menu
and compare cell
code with the
technical bulletin
Cell Codes.
Non Tru-Test
load cell
Probably needs span calibration. See the technical bulletin
Span Calibration Guide.
Cell code in load
bar connector
incorrect
Check load bar cell code with a known good indicator.
Repair the cell code resistors in the load bar connector. If
necessary, replace the load bar connector. Instructions for
these repairs are in the service manual for the load bars.
Firmware does
not support load
bars
Update firmware. See page 33.
See diagnostics menu and compare cell code and firmware
version with technical bulletin Cell Codes.
Faulty load bar
connector and
FPC
Check that the load bar FPC is correctly inserted into the
PCA.
Plug a known good load bar connector and FPC into the
PCA and check if correct cell code is displayed. See
diagnostics menu to check measured cell code. See
Accessing the hidden menus on page 34.
PCA is faulty. Replace PCA. See page 31.

EziWeigh5i, EziWeigh6i, EziWeigh7i, WOW2, DAS WOW2
Issue 2, 7/2017 14
Symptom
Possible Fault
Action
Stable LED not
working. Weight never
stabilizes. Check indicator settings for Damp System and Resolution:
Damp System - set to SuperDamp III (Cattle) or SuperDamp
III (Sheep)
Resolution may be set to too small. Set to a coarser
resolution. See the technical bulletin Span Calibration
Guide.
Load bars faulty. Test the load bars to see if they are functioning correctly.
Test the indicator using calibration plugs.
Faulty load bar
connector and
FPC
Check that the load bar FPC is correctly inserted into the
PCA.
Plug a known good load bar connector and FPC into the
PCA and check if weights are stable.
LED damaged.
Replace PCA. See page 31.
Stable LED on,
but nothing works. Firmware error. If possible, update the firmware. See the technical bulletin
Updating the firmware.
PCA is faulty. Replace PCA. See page 31.
Some or all keys
not working. Poor keypad
connections. Check if keypad FPCs are correctly inserted into the PCA.
See page 22.
Keypad fault.
Unplug existing keypad FPCs and try plugging in anew
known good keypad. Replace keypad if faulty. See page
28.
User data lost.
EziWeigh6i,
EziWeigh7i,
WOW2 and DAS
WOW2 only
PCA is faulty.
Replace PCA. See page 31.
No accessory
power output from
power/communica
tion connector.
EziWeigh6i,
EziWeigh7i,
WOW2 and DAS
WOW2 only
Power/communit
cation connector
and FPC faulty
Replace power/communication connector and FPC. See
page 29.
PCA is faulty.
Replace PCA. See page 31.
RS232 (serial)
connection not
working.
EziWeigh6i,
EziWeigh7,
WOW2 and DAS
WOW2 only
Faulty cable
between
indicator and
serial connector.
Check/replace faulty cable.
Power/communi
cation connector
and FPC faulty
Replace power/communication connector and FPC. See
page 29.
Wrong bit rates The handshaking settings for the EziWeigh6i, EziWeigh7i,
WOW2 and DAS WOW2 are: 8 data bits, 1 stop bit, no
parity, with 9600 bps.
Ensure the other device has matching settings.
PC fault
Try another PC.
PCA is faulty. Replace PCA. See page 31.

EziWeigh5i, EziWeigh6i, EziWeigh7i, WOW2, DAS WOW2
Issue 2, 7/2017 15
Symptom
Possible Fault
Action
Bluetooth
®
wireless
connection not
working.
EziWeigh7i,
WOW2 and DAS
WOW2 only
Bluetooth
wireless
connection not
established.
Check that the indicator is on.
Check Bluetooth wireless connection (see page 19).
Problem with
master device.
When connected to another
Bluetooth
enabled device, the
indicator is always the slave and the other device is always
the master.
When troubleshooting the master device, refer to the
documentation supplied with that device. During
troubleshooting, you may need some information about the
indicator, see Bluetooth® settings (EziWeigh7i, WOW2 and
DAS WOW2 only) on page 38.
On the master device, ensure that the Bluetooth setting is
enabled.
Check that the master device is connected to the indicator
and not to another device.
The Bluetooth functionality on the master device may be
faulty.
Power/communi
cation connector
and FPC is faulty
Replace power/communication connector and FPC. See
page 29.
PCA is faulty.
Replace PCA. See page 31.
USB not working Faulty cable
between
indicator and
USB connector.
Check/replace faulty cable.
USB Drivers did
not install
properly on the
PC.
Re-install the Data Link software.
Power/communi
cation connector
and FPC is faulty
Replace power/communication connector and FPC. See
page 29.
PC fault Try another PC.
Firmware fault
Update the firmware. See the technical bulletin
Updating the
firmware.
PCA is faulty. Replace PCA. See page 31.

EziWeigh5i, EziWeigh6i, EziWeigh7i, WOW2, DAS WOW2
Issue 2, 7/2017 16
Error messages
EziWeigh5i
Error code
EziWeigh6i, EziWeigh7i,
WOW2,
DASWOW2
Error message
Meaning
Solution
Er 01
Factory calibration
lost
Calibration data lost.
Perform factory calibration procedure.
See page 37.
Er 02
Model number lost
Model number lost.
Replace PCA. See page 31.
Er 03
Flash checksum error
Program memory corruption.
Update the firmware. See page 33.
Er 04
About info lost
ABOUT data lost
Replace PCA. See page 31.
bAd.c or
Er 05
bAd.c or Er 05 (on 7
segment display)
Bad cell code.
Check the cell code in the
Diagnostics menu with known
good loadbar connected to one
indicator connector and then
the other.
Check the cell code in the Diagnostics
menu for each load bar on its own and
with both. See Accessing the hidden
menus on page 34. Compare with valid
cell codes for standard Tru-Test and
competitor load bars and cell codes
that need span calibration. Refer to
the technical bulletin Cell Codes.
See Troubleshooting on page 13.
Er 06
Test Weight >
Capacity!
The test weight is larger than
the capacity.
Was the entered Capacity incorrect?
Otherwise, use a smaller test weight.
Er 07
Test Weight < 1/3
Capacity!
The test weight is less than 1/3
of the Capacity. For maximum
accuracy, use a larger test
weight.
This is only a warning message. If a
larger test weight cannot be used, the
span calibration can still be completed,
but with reduced accuracy.
Er 08
Test Weight too small.
The test weight is too small for
an accurate calibration.
A larger test weight must to be used.
We recommend using a test weight
that weighs approximately the same as
a typical animal being weighed.
Er 09
Can't get good
reading.
Can't get good reading.
Use a static weight.
Er 10
The Test Weight is
overloading the scale.
The load bar output signal is
overloading the input of the
scale indicator.
Use a much smaller test weight.
Er 11
The load cell output
signal is
reversed.
The load cell wiring may be
reversed or the load cell may
be mounted upside-down.
Correct any load cell mounting or
wiring issue. If this doesn’t work, return
the indicator to Tru-Test Limited.
Er 12
No test load placed
on the platform.
No test load placed on the
platform.
Check mV/V response to loads in the
Diagnostic menu. See Accessing the
hidden menus on page 34. Correct any
shorted wiring.
Er 13
The load cell has a
large no load negative
offset.
The load cell has a large no
load negative offset.
Replace load bars.
Er 14
Reset caused by
watchdog.
The processor crashed due to
electrical supply trauma or
brown-out or software fault.
If problem persists, return to Tru-Test
Limited for analysis.

EziWeigh5i, EziWeigh6i, EziWeigh7i, WOW2, DAS WOW2
Issue 2, 7/2017 17
EziWeigh5i
Error code
EziWeigh6i, EziWeigh7i,
WOW2,
DASWOW2
Error message
Meaning
Solution
Er 15
Possible capacity
ove
rload!
A load equal to the capacity
would cause an output signal
from the load bars that would
be greater than the input signal
range of the indicator
(assuming the scale is zeroed
at the maximum platform
allowance i.e. with a heavy
crate or crush).
Check the entered test weight was
correct. Reduce the capacity.
Er 16
Capacity overload!
A load equal to the capacity
would cause an output signal
from the load bars that would
be greater than the input signal
range of the indicator
(assuming the scale is zeroed
at the no load point used
during the span calibration).
Check the entered test weight was
correct. Reduce the capacity.
Er 18
Number of d > 65535!
The number of divisions
cannot exceed 65535.
Use a larger resolution during span
calibration.
Er 19
Resolution out of
range!
Resolution out of range!
Perform span calibration again.
Er 20
Can’t record Wts >
32767 d!
Caution! Weights of more than
32767 divisions cannot be
recorded.
Turn "Fine Resol valid" off during Span
Cal. Use a larger resolution during
span calibration.
Er 21
Can’t record Wts >
8192 d!
Caution! Weights of more than
8192 divisions cannot be
recorded.
Use a larger resolution during span
calibration.
Er 22
Greater than 5000 d!
Caution! The number of
divisions is greater than 5000.
Use a larger resolution during span
calibration.
Er 27
Requires zero weight
The 'no load' measurement
needs to be done before the
Test Weight measurement.
Do the previous menu item: "Ensure
no load on platform. Press ENTER"
first.
Er 28
Possible load cell fault
(reading full scale
signal)
The signal from the load bars
is outside the indicator's ADC
input signal range.
Check for faulty load bars, wiring or
moisture.
Er 29
Possible load cell fault
(reading
negative
voltage)
Possible load cell fault
(reading zero voltage)
Check for faulty load bars, wiring or
moisture.
Er 30
Zero was unstable or
drifting
The load cell signal is
continuously moving so the
scale can't zero.
If the indicator is normally used with
load bars with cell code 99, this can be
normal when the load bars are
unplugged. Otherwise clear the span
cal or sensitivity cal from cell code 99.
If load bars are connected, check for
moisture. See load bars service
manual.
Er 99
Er 99
[
Note: Filename & line
number
appears on
the
other LCD
display]
.
Software internal error.
Record the details of the internal error.
If possible, clone the indicator for
analysis or send a {PE} command via
a terminal emulator and capture the
response. Contact Tru-Test Limited for
assistance with performing these
procedures.

EziWeigh5i, EziWeigh6i, EziWeigh7i, WOW2, DAS WOW2
Issue 2, 7/2017 18
Testing the indicator
Checking for stable weights
A stable weight is defined as a reading that does not move more than one division (resolution step) in
either direction. Testing the indicator for stable weights requires the use of a calibrator or a set of
calibration plugs. Known good load bars can be used.
Auto zero track may hide any small movements. Disable auto zero before testing for stable weights.
To disable auto zero on an EziWeigh5i indicator, press until ‘Off’ displays on the screen.
To disable auto zero on an EziWeigh6i, EziWeigh7i, WOW2 or DAS WOW2 indicator:
1 Press .
2 Press repeatedly to display Setups.
3 Press .
4 Press repeatedly to display Auto Zero.
5 Press to disable Auto Zero.
To test for stable weights
1 Connect the 0 mV/V calibration plug to a load bar connector on the indicator.
2 Press to turn on the indicator.
3 Press to zero the indicator.
Checking the calibration
1 Test that the weights are stable, as described in Checking for stable weights above.
2 Connect the 2 mV/V calibration plug to the other load bar connector and remove the 0 mV/V
calibration plug.
The weight displayed should be2000 kg (4410 lb) within ±1 kg (2 lb).
Checking the load cellcodes
Load bars have a unique cell code. Plug in known good load bars. The LCD should display the
expected weight when a test weight is put on the load bars.
If not:
•Check that the indicator is not span calibrated. Go to the Diagnostics screen within the hidden
menus (see Accessing the hidden menus on page 34).
Caution! These settings can be important to the customer so check before changing.
The easiest way around a span calibrated cell code is to check the weighing performance
using load bars of another type (e.g. single load bar instead of both load bars plugged in).
•Check both load bar connectors and FPCs. Check the PCA. See Troubleshooting on page
12.
•To view cell code number of the connected load bars, go to the Diagnostics screen within the
hidden menus (see Accessing the hidden menus on page 34).
•The latest firmware may include some new load cell codes for new models of load bars.If in
doubt, update firmware to the latest version from the Tru-Test website. See technical bulletin
Upgrading firmware.
For more information about load cells, refer to the technical bulletin Cell Codes.

EziWeigh5i, EziWeigh6i, EziWeigh7i, WOW2, DAS WOW2
Issue 2, 7/2017 19
Checking the power connection
Connect the power adaptor and check that the battery-charging symbol on the LCD is cycling during
charging. When the battery is fully charged, the battery-charging symbol will stop cycling, but may
restart periodically to apply a top-up charge.
Checking the USB connection (EziWeigh6i, EziWeigh7i, WOW2 and DAS WOW2 only)
Run Data Link (supplied with the indicator, or available for downloading from the Tru-Test Livestock
website www.livestock.tru-test.com).
Communication with Data Link indicates that the USB interface is functioning correctly.
Checking the RS232 serial connection (EziWeigh6i,EziWeigh7i, WOW2 and DAS WOW2 only)
Check that the indicator receives EIDs from a known good EID reader with serial connection.
Checking the Bluetooth®wireless connection (EziWeigh7i, WOW2 and DAS WOW2 only)
1 Establish a Bluetooth wireless connection between the indicator and a known good EID Reader
with Bluetooth wireless connectivity (see the EziWeigh7i or WOW2 Quickstart Guide for details).
2 Check that the Bluetooth wireless connection status indicator is displayed on the Weight screen.
When the indicator is connected to a device via Bluetooth wireless connection, a small triangle is
displayed on the top right-hand corner of the indicator’s LCD (►):
3 Check that the indicator receives EIDs from the EID Reader.
Checking the LCDs
Try various functions to check that the LCDs are operating correctly. Watch for missing or faded
segments, rows or columns of dots.
To test the backlight operation (EziWeigh5i):
Press repeatedly to scroll through the backlight levels.
To test the backlight operation (EziWeigh6i, EziWeigh7i, WOW2 or DAS WOW2):
1 Press .
2 Press repeatedly to display Setups.
3 Press .
4 Press repeatedly to display Backlight.
5 Press repeatedly to scroll through the backlight levels.
Testing thekeypad
Test the keypad in the order specified below. Every key on the keypad should produce a display
response (EziWeigh6i, EziWeigh7i, WOW2 and DAS WOW2 also produce an audible beep).

EziWeigh5i, EziWeigh6i, EziWeigh7i, WOW2, DAS WOW2
Issue 2, 7/2017 20
EziWeigh5i
Power
Zero
Backlight
Auto zero
Resolution
EziWeigh6i, EziWeigh7i, WOW2 and DAS WOW2
Power
Zero
Record
Keypad (all
numbers)
Escape
Menu
Enter
Up arrow
Down arrow
The keypad may fail due to an internal short circuit.
To test the keypad for short circuits
1 Disconnect the keypad FPCs from the PCA.
2 Test the resistance between the keypad FPCs for all contacts. All contacts can be tested at the
same time.
Figure
2
:Measuring keypad
contact resistance.
Other manuals for EziWeigh5i
1
This manual suits for next models
4
Table of contents
Other Tru-Test Accessories manuals
Tru-Test
Tru-Test 5000 Series User manual
Tru-Test
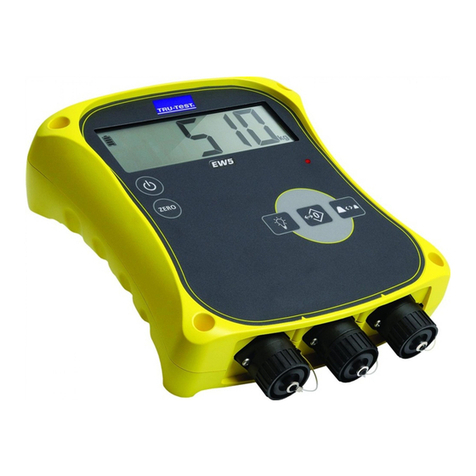
Tru-Test EziWeigh5i User manual
Tru-Test
Tru-Test S1 User manual
Tru-Test
Tru-Test HD Series User manual
Tru-Test
Tru-Test MP600 User manual

Tru-Test
Tru-Test Series 2000 User manual

Tru-Test
Tru-Test S1 User manual
Tru-Test
Tru-Test ID5000 User manual

Tru-Test
Tru-Test S2 User manual
Tru-Test
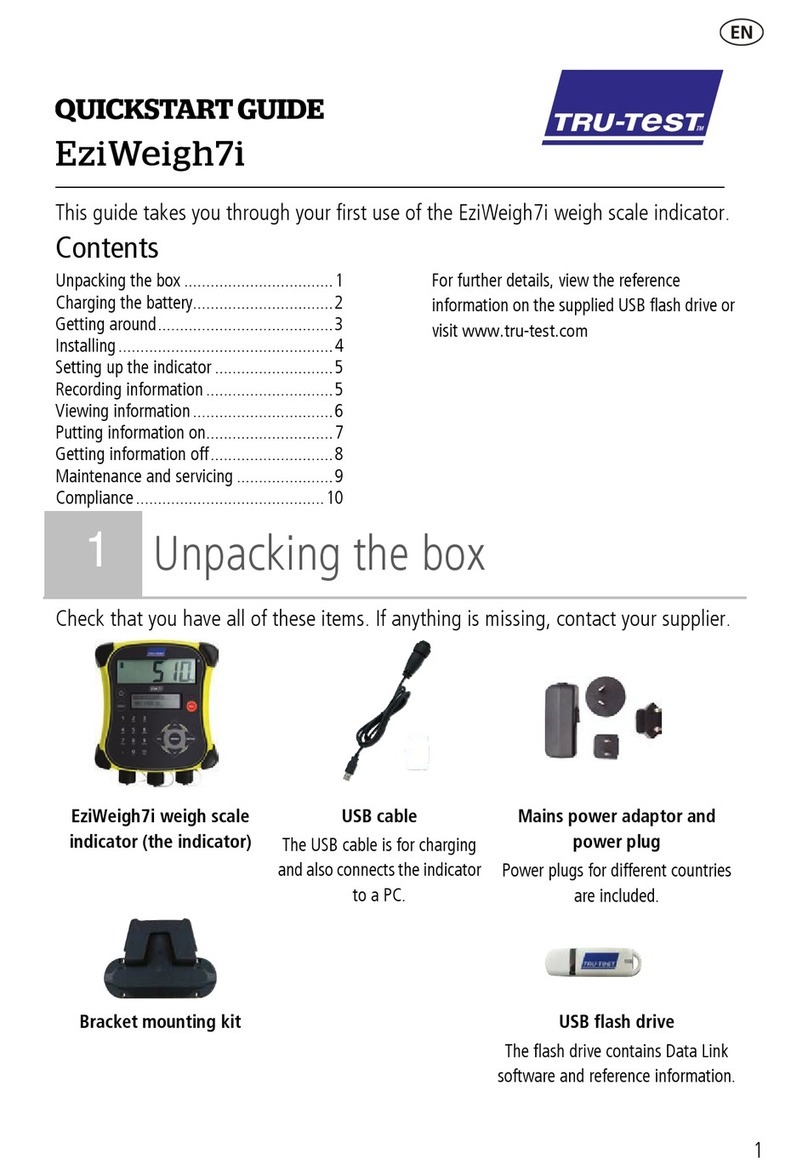
Tru-Test EziWeigh7i User manual
