True Manufacturing Company TCGDZ-50 User manual

............ www.truemfg.com ............
INSTALLATION MANUAL FOR
TCGDZ DISPLAY CASES (DUAL ZONE) MODELS
CURVED GLASS DISPLAY CASES
- DUAL ZONE MODELS -
CONGRATULATIONS!
You have just purchased the finest commercial
refrigeration available. You can expect many years
of trouble-free operation.
TRUE FOOD SERVICE EQUIPMENT, INC.
2001 East Terra Lane • O’Fallon, Missouri 63366-4434
(636)-240-2400 • FAX (636)272-2408 • INT’L FAX (636)272-7546 • (800)325-6152
Parts Department (800)424-TRUE • Parts Department FAX# (636)272-9471
TABLE OF CONTENTS
Safety Information
Safety Precautions ––––––––––––––––––––––––– 1
Proper Disposal –––––––––––––––––––––––––––– 2
Connecting Electricity ––––––––––––––––––––––– 3
Adapter Plugs ––––––––––––––––––––––––––––– 3
Installation / Operation Instructions
Ownership ––––––––––––––––––––––––––––––– 4
Required Tools –––––––––––––––––––––––––––– 4
Uncrating –––––––––––––––––––––––––––––––– 4
Locating ––––––––––––––––––––––––––––––––– 5
Leveling Cabinet ––––––––––––––––––––––––––– 5
Electrical Instructions ––––––––––––––––––––––– 6
Wire Gauge Chart –––––––––––––––––––––––––– 7
Start-up ––––––––––––––––––––––––––––––––– 8
Shelving Installation –––––––––––––––––––––––– 9
Installing Optional Castors ––––––––––––––––––– 10
Installing Optional Formica Kit –––––––––––––––– 11
Maintenance, Care & Cleaning
Optional Sealing Cabinet To Floor –––––––––––––– 12
Cabinet Cleaning ––––––––––––––––––––––––– 12
Light Bulb Replacement –––––––––––––––––––– 13
Temperature Control Adjustment –––––––––––––– 14
Cleaning The Condenser –––––––––––––––––––– 15
Important Warranty Information ––––––––––––––– 16
Stainless Steel Equipment Care ––––––––––––– 17-18
Warranty (U.S.A. and Canada ONLY!) ––––––––––– 19
5/3/10 -300 SB #912626
*Spanish and Dutch version included.
TCGDZ-50

NOTICE TO
CUSTOMER:
Loss Or Spoilage Of Products In Your
Refrigerator/Freezer Is NOT Covered
By Warranty. In Addition To Following
Recommended Installation Procedures
You Must Run The Refrigerator/Freezer
24 Hours Prior To Usage.
True Manufacturing Company, Inc.

............ www.truemfg.com ............
True Food Service Equipment, Inc.
11
SAFETY INFORMATION
• Thisdisplaycasemustbeproperlyinstalled
and located in accordance with the Installation
Instructionsbeforeitisused.
• Donotallowchildrentoclimb,standorhangonthe
shelvesinthedisplaycase.Theycoulddamagethe
refrigeratorandseriouslyinjurethemselves.
• Donottouchthecoldsurfacesintherefrigerated
compartmentwhenhandsaredamporwet.Skin
maysticktotheseextremelycoldsurfaces.
• Donotstoreorusegasolineorotherflammable
vaporsandliquidsinthevicinityofthisoranyother
appliance.
• Keepfingersoutofthe“pinchpoint”areas;clear-
ancesbetweenthedoorsandbetweenthedoorsand
cabinetarenecessarilysmall;becarefulclosingdoors
when children are in the area.
NOTE
We strongly recommend that any servicing be preformed by
a qualified individual.
• Unplugtherefrigeratorbeforecleaningand
makingrepairs(switchpoweroffatbreakerforhard
wiredmodels).
• Settingtemperaturecontrolstothe0positiondoes
notremovepowertothelightcircuit,perimeterheat-
ers,orevaporatorfans.
WARNING!
Use this appliance for its intended purpose as described in this Owner Manual.
This cabinet contains fluorinated greenhouse gas covered by the Kyoto Protocol
(please refer to cabinet’s inner label for type and volume,
GWP of 134a= 1,300. R404a= 3,800).
SAFETY PRECAUTIONS
When using electrical appliances, basic safety precautions should be followed, including the following:
How to Maintain Your Unit
to Receive the Most Efficient and
Successful Operation
You have selected one of the finest display cases made. It is manufactured under strict qual-
ity controls with only the best quality materials available. Your TRUE cooler, when properly
maintained, will give you many years of trouble-free service.

............ www.truemfg.com ............
True Food Service Equipment, Inc.
22
SAFETY INFORMATION
PROPER DISPOSAL OF THE DISPLAY CASE
DANGER!
RISK OF CHILD ENTRAPMENT
USE OF EXTENSION CORDS
TRUE will not warranty any display case that has been connected to an extension cord.
Childentrapmentandsuffocationarenotproblemsof
thepast.Junkedorabandoneddisplaycasesarestilldan-
gerous…eveniftheywillsitfor“justafewdays.”Ifyou
aregettingridofyourolddisplaycase,pleasefollowthe
instructionsbelowtohelppreventaccidents.
Before You Throw Away Your Old Display Case:
• Takeoffthedoors.
• Leavetheshelvesinplacesothatchildrenmaynot
easilyclimbinside.
CFC Disposal
Youroldrefrigeratormayhaveacoolingsystem
thatuses“OzoneDepleting”chemicals.Ifyouare
throwingawayyouroldrefrigerator,makesurethe
refrigerantisremovedforproperdisposalbya
qualifiedservicetechnician.Ifyouintentionally
releaseanyrefrigerantsyoucanbesubjectto
finesandimprisonmentunderprovisionsofthe
environmentalregulations.

............ www.truemfg.com ............
True Food Service Equipment, Inc.
33
Beforeyournewdisplaycaseisconnectedtoapower
supply,checktheincomingvoltagewithavoltmeter.If
anythinglessthan100%oftheratedvoltageforopera-
tionisnoted,correctimmediately.
Havethecircuitcheckedbyaqualifiedelectricianto
makesureitisproperlygrounded.
Thedisplaycaseshouldalwaysbeuseit’sownindividual
electricalcircuit,whichhasavoltageratingthatmatches
theratingplate.
Thisprovidesthebestperformanceandalsoprevents
overloadingbuildingwiringcircuitswhichcouldcausea
firehazardfromoverheatedwires.
For models with standard power cord.
Thepowercordofthisapplianceisequippedwitha
groundingplugwhichmateswithastandardgrounding
walloutlettominimizethepossibilityofelectricshock
hazardfromthisappliance.
Havethecircuitcheckedbyaqualifiedelectricianto
makesureitisproperlygrounded.
Iftheoutletisastandard2-prongoutlet,itisyourper-
sonalresponsibilityandobligationtohaveitreplaced
withtheproperlygroundedwalloutlet.
Thedisplaycaseshouldalwaysbepluggedintoit’sown
individualelectricalcircuit,whichhasavoltagerating
thatmatchestheratingplate.
Thisprovidesthebestperformanceandalsoprevents
overloadingbuildingwiringcircuitswhichcouldcausea
firehazardfromoverheatedwires.
Neverunplugyourdisplaycasebypullingonthepower
cord.Alwaysgripplugfirmlyandpullstraightoutfrom
the outlet.
Repairorreplaceimmediatelyallpowercordsthathave
becomefrayedorotherwisedamaged.Donotuseacord
thatshowscracksorabrasiondamagealongitslengthor
at either end.
Whenremovingthedisplaycaseawayfromthewall,be
carefulnottorolloverordamagethepowercord.
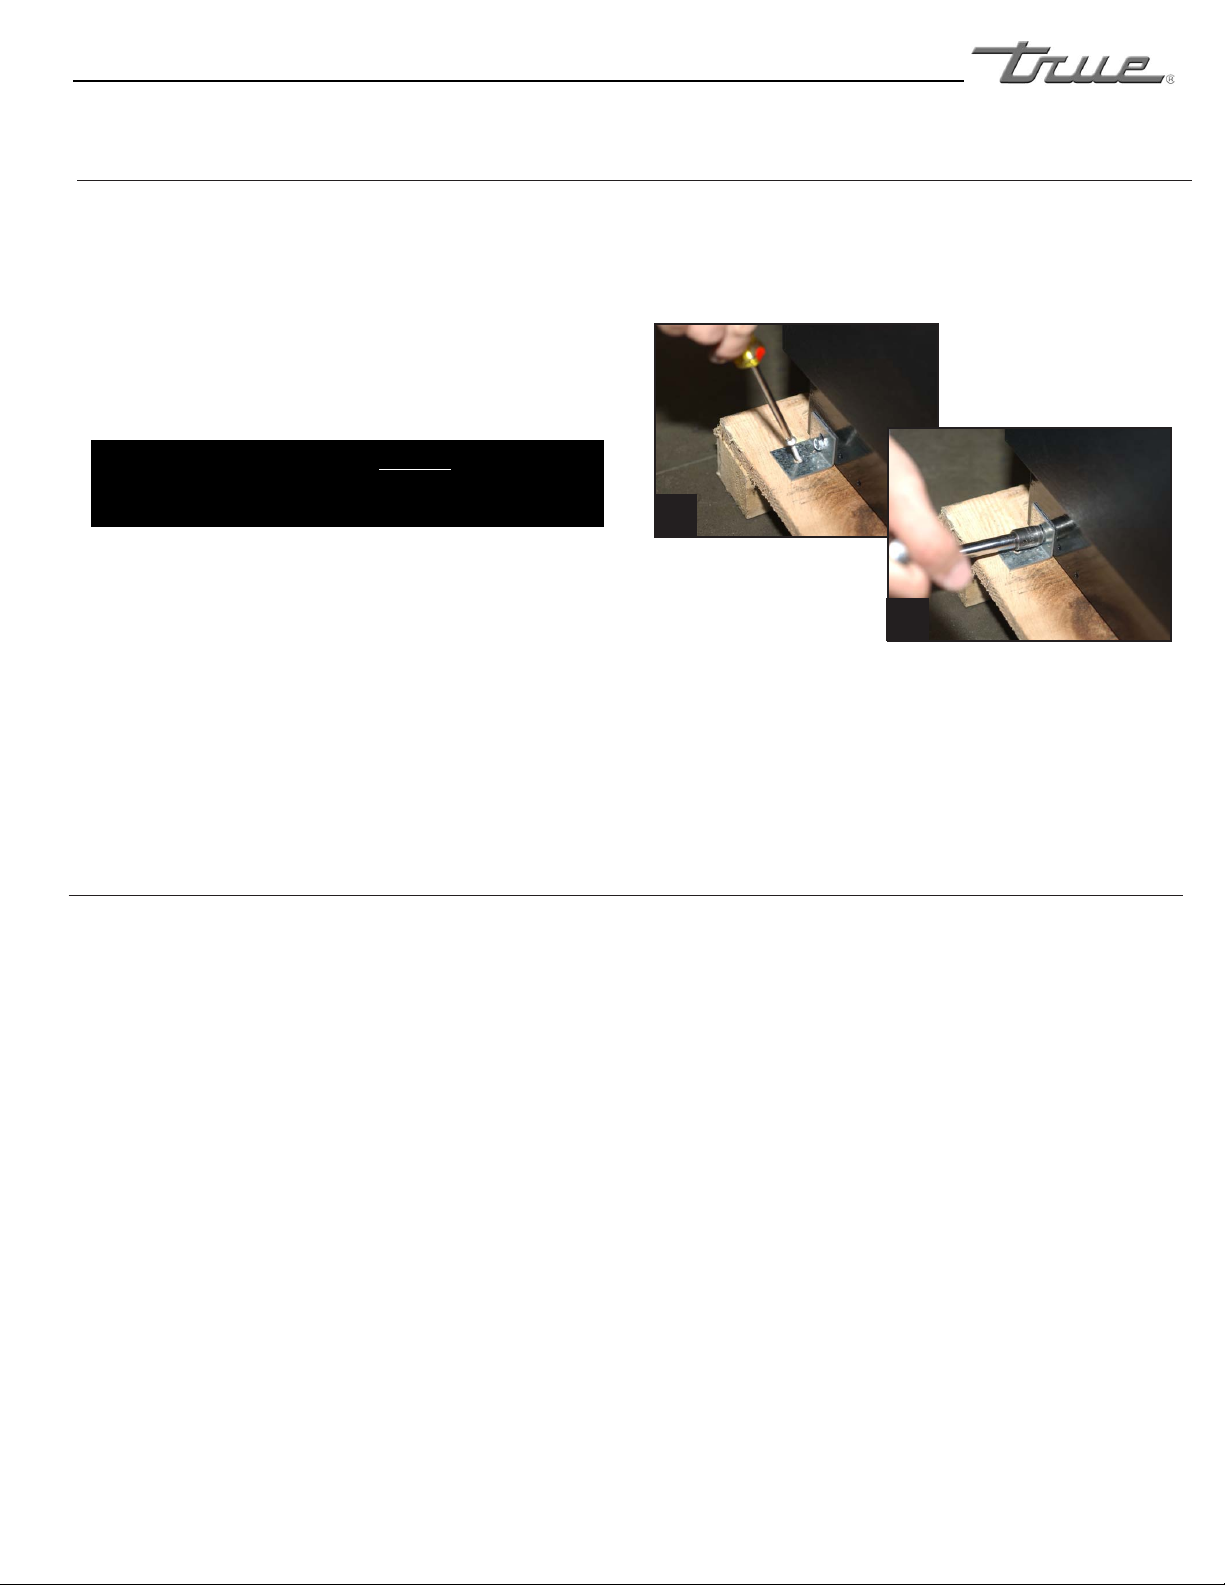
HOW TO CONNECT ELECTRICITY
Hard wiring is required on specific Display Cases.
Models standard with power cords: Do not, under any circumstances, cut or remove the ground prong from the
power cord.
For personal safety, this appliance must be properly grounded.
WARNING!
USE OF ADAPTER PLUGS
NEVER USE AN ADAPTER PLUG!
SAFETY INFORMATION
NEMAplugs
TRUEusesthesetypesofplugs.If
youdonothavetherightoutlethave
acertifiedelectricianinstallthecorrect
power source.
115/60/1
NEMA-5-20R

............ www.truemfg.com ............
True Food Service Equipment, Inc.
44
INSTALLATION / OPERATION INSTRUCTIONS
Toensurethatyourunitworksproperlyfromthefirst
day,itmustbeinstalledproperly.Wehighlyrecommend
atrainedmechanicandelectricianinstallyourTRUE
equipment.Thecostofaprofessionalinstallationis
moneywellspent.
BeforeyoustarttoinstallyourTRUEunit,carefully
inspectitforfreightdamage.Ifdamageisdiscovered,
immediatelyfileaclaimwiththedeliveryfreightcarrier.
TRUE is not responsible for damage incurred during
shipment.
OWNERSHIP
• TinSnips/BandCutters
• ClawHammer
• HexHeadDriver
• AdjustableWrench
• 3/4"(19mm)Open-EndWrench
• PhillipsHeadScrewdriver
• Level
REQUIRED TOOLS
Thefollowingprocedureisrecommendedforuncrating
the unit:
A. Cutmetalretainingstrapssecuringprotectivetop
skid.Removetheouterpackagingbypullingtri-wall
nailsfromskid.Remove(4)cardboardcornerpads
and dust cover.
B. Inspectforconcealeddamage.Again,immediately
fileaclaimwiththefreightcarrierifthereisdamage.
C. Moveyourdisplaycaseasclosetothefinallocation
aspossiblebeforeremovingthewoodenskid.
UNCRATING
INSTALLATION / OPERATION INSTRUCTIONS
• Remotecabinetsmustbeorderedasremote.Wedo
notrecommendconvertingastandardselfcontained
toremotesystem.
• Allremotecabinetsmustbehardwired.
• Remotecabinetsarenotavailablewithcastors.
• Allremotecabinetscomestandardusing404A
refrigerant.
• Allremoteunitscomestandardwithexpansionvalve,
liquidlinesolenoid,heatedcondensatepan,and
defrosttimerwhenapplicable.
• ContactTRUETechnicalServiceforBTU
requirements.
• Nowiringnecessarybetweencabinetandcondensing
unit.
• AllremotecondensingunitspurchasedfromTRUE
are208/230voltssinglephase.
Ifyouhaveanyquestionsregardingthissection,pleasecall
TRUEat1(800)325-6152.
REMOTE UNITS
(This section applies to remotes only!)

............ www.truemfg.com ............
True Food Service Equipment, Inc.
55
INSTALLATION / OPERATION INSTRUCTIONS
TOOLS REQUIRED:
•Phillipsscrewdriver
•3/8”(9.5mm)socketor3/8”(9.5mm)wrench
A. UseaPhillipsscrewdiverandremovefourscrews
fromtheL-bracketconnectedtheunittothewood
skid(image1).Thenusea3/8”(9.5mm)socket
orwrenchandremovetheL-bracketfromtheunit
(image2).
To avoid damage to glass DO NOT lay cabinet
on its side or back when removing skid,
installing leg levelers, cleaning, etc.
B. Liftupfromthebaseandwalkunitofftheskidand
setinfinallocation.
C. Unblockdoors,freeplasticwedges,bluefoamand
tape.Removefiberglasstapesecuringglass.
Removecomponents:(shelves,brackets,etc.)from
insidecabinet.
WARNING
For proper performance of refrigerated cabinet an ambient
temperature no greater than 75°F (24°C) with a relative
humidity of 55% is required.
LOCATING
A. Setunitinitsfinallocation.Besurethereisadequate
ventilationinyourroom.Underextremeheat
conditions,(100°F+,38°C+),youmaywanttoinstall
anexhaustfan.
WARNING
Warranty is void if ventilation is insufficient.
B. ProperlevelingofyourTRUEunitiscriticalto
operatingsuccess(fornon-mobilemodels).Effective
condensateremovalanddooroperationwillbe
effectedbyleveling.
WARNING
Display case must be leveled accurately to ensure front
glass door seals properly.
C. Theunitshouldbeleveledfronttobackandsideto
sidewithalevel.Placethelevelintheinteriorfloor
oftheunitandcheckallfoursides.
D. Ifthecabinetisnotleveladjustleglevelersbyfirst
relievingweighttolevelerandadjustingbyeither
handorwrench.Repeatwithallleglevelersuntil
cabinetislevelinalldirections.
E. Ensure that the drain hose or hoses are positioned in
the pan.
F.Models with power cord: Freeplugandcordfrom
insidethelowerrearofthecooler(donotplugin).
G. Models with power cord: Theunitshouldbeplaced
closeenoughtotheelectricalsupplysothatextension
cords are never used.
WARNING
Cabinet warranties are void if OEM power cord is tampered
with. TRUE will not warranty any units that are connected to
an extension cord.
LEVELING
Removingbracket
fromskid.
Removingbracketfromcabinet.
1
2

............ www.truemfg.com ............
True Food Service Equipment, Inc.
66
INSTALLATION / OPERATION INSTRUCTIONS
NOTE
Hard wiring for a 30 amp circuit is required on specific
Bakery Cases.
A. Beforeyournewunitisconnectedtoapowersupply,
checktheincomingvoltagewithavoltmeter.If
anythinglessthan100%oftheratedvoltagefor
operationisnoted,correctimmediately.
B. Modelsequippedwithapowercordmustbe
poweredatproperoperatingvoltageatalltimes.
Refertocabinetdataplateforvoltage.
TRUErequiresthatasoleusecircuitbededicatedfor
the unit.
WARNING
Compressor warranties are void if compressor burns out
due to low voltage.
WARNING
Power supply cord ground should not be removed!
NOTE
To reference wiring diagram - Remove lower rear grill.
Wiring diagram is positioned on the ballast box inside lower
rear of the cabinet.
ELECTRICAL INSTRUCTIONS

............ www.truemfg.com ............
True Food Service Equipment, Inc.
77
INSTALLATION / OPERATION INSTRUCTIONS
CONDUCTORS AND CIRCUITS
Wire Gauge for 2% Voltage Drop in Supply Circuits.
115 Volt Distance In Feet To Center of Load
Amps 20 30 40 50 60 70 80 90 100 120 140 160
2 14 14 14 14 14 14 14 14 14 14 14 14
3 14 14 14 14 14 14 14 14 14 14 14 12
4 14 14 14 14 14 14 14 14 14 12 12 12
5 14 14 14 14 14 14 14 12 12 12 10 10
6 14 14 14 14 14 14 12 12 12 10 10 10
7 14 14 14 14 14 12 12 12 10 10 10 8
8 14 14 14 14 12 12 12 10 10 10 8 8
9 14 14 14 12 12 12 10 10 10 8 8 8
10 14 14 14 12 12 10 10 10 10 8 8 8
12 14 14 12 12 10 10 10 8 8 8 8 6
14 14 14 12 10 10 10 8 8 8 6 6 6
16 14 12 12 10 10 8 8 8 8 6 6 6
18 14 12 10 10 8 8 8 8 8 8 8 5
20 14 12 10 10 8 8 8 6 6 6 5 5
25 12 10 10 8 8 6 6 6 6 5 4 4
30 12 10 8 8 6 6 6 6 5 4 4 3
35 10 10 8 6 6 6 5 5 4 4 3 2
40 10 8 8 6 6 5 5 4 4 3 2 2
45 10 8 6 6 6 5 4 4 3 3 2 1
50 10 8 6 6 5 4 4 3 3 2 1 1
Wire Gauge for 2% Voltage Drop in Supply Circuits.
230 Volt Distance In Feet To Center of Load
Amps 20 30 40 50 60 70 80 90 100 120 140 160
5 14 14 14 14 14 14 14 14 14 14 14 14
6 14 14 14 14 14 14 14 14 14 14 14 12
7 14 14 14 14 14 14 14 14 14 14 12 12
8 14 14 14 14 14 14 14 14 14 12 12 12
9 14 14 14 14 14 14 14 14 12 12 12 10
10 14 14 14 14 14 14 14 12 12 12 10 10
12 14 14 14 14 14 14 12 12 12 10 10 10
14 14 14 14 14 14 12 12 12 10 10 10 8
16 14 14 14 14 12 12 12 10 10 10 8 8
18 14 14 14 12 12 12 10 10 10 8 8 8
20 14 14 14 12 10 10 10 10 10 8 8 8
25 14 14 12 12 10 10 10 10 8 8 6 6
30 14 12 12 10 10 10 8 8 8 6 6 6
35 14 12 10 10 10 8 8 8 8 6 6 5
40 14 12 10 10 8 8 8 6 6 6 5 5
50 12 10 10 8 6 6 6 6 6 5 4 4
60 12 10 8 6 6 6 6 6 5 4 4 3
70 10 10 8 6 6 6 5 5 4 4 2 2
80 10 8 8 6 6 5 5 4 4 3 2 2
90 10 8 6 6 5 5 4 4 3 3 1 1
100 10 8 6 6 5 4 4 3 3 2 1 1

............ www.truemfg.com ............
True Food Service Equipment, Inc.
88
A. Thecompressorisreadytooperate.Pluginthe
displaycase.
B. Checkthetemperaturecontrolsettinginthelower
rightofthecabinetbackside.Thesettingshould
beatNo.3positiontomaintainanapproximate
temperatureof38°F(3.3°C).Setdefrosttimeclock
tothecorrecttimeofday.Allowunittofunction
severalhours,completelycoolingcabinetbefore
changingthecontrolsetting.
C. Excessivetamperingwiththecontrolcouldleadto
servicedifficulties.Shoulditeverbecomenecessary
toreplacetemperaturecontrol,besureitisordered
fromyourTRUEdealerorrecommendedservice
agent.
D. GoodairflowinyourTRUEunitiscritical.Be
carefulnottooverstockproductorblockairvents.
E.Verifythatthecabinetlightsareworking.Bakery
casesareshippedwithlightswitchesinthe"on"
position.Thetoggleswitchislocatedlowerright
corer at the rear.
NOTE
If the unit is disconnected or shut off, wait five minutes
before starting again.
RECOMMENDATION
Before loading product we recommend you run your TRUE
unit empty for two to three days. This allows you to be sure
electrical wiring and installation are correct and no shipping
damage has occurred. Remember, our factory warranty
does not cover product loss!
REPLACEMENT PARTS
TRUE maintains a record of the cabinet serial number for
your unit. If at any time during the life of your display case,
a part is needed, you may obtain this part by furnishing
the model number and serial number to the company from
whom you purchased the cabinet. Call Toll-Free: (800)-424-
TRUE (Direct to Parts Department). (800)-325-6152 (U.S.A.
& Canada only) or call: (636)-240-2400.
STARTUP
INSTALLATION / OPERATION INSTRUCTIONS
REFRIGERATED CURVED GLASS
DISPLAY CASES
WhenapplicableDisplayCasesareequipped
withaservicereceptacle(foundontheupper
rightcabinetbackside).Noelectricalloadgreater
than5.0ampsshouldbeconnectedtoit.

............ www.truemfg.com ............
True Food Service Equipment, Inc.
99
INSTALLATION / OPERATION INSTRUCTIONS
TEMPERATURE CONTROL ADJUSTMENT FOR
HIGH ALTITUDE ONLY!
TERMS:
•Cut-out-Temperaturesensedbythecontrollerthat
shutsthecompressoroff.
•Cut-in-Temperaturesensedbythecontrollerthat
turnsthecompressoron.
TOOLS REQUIRED:
•Phillipsheadscrewdriver
•5/64"or2mmAllenwrench
•T-7Torxwrench
A. Unplugordisconnectpowertothecabinet.
B. Removethescrewsthatsecurethetemperature
controltotheinsetbox,lowerright,
rearofcabinet.
C. Pulloutgentlyfromcabinet.
NOTE
Mechanical temperature controllers are affected when
functioning at high altitude. The Cut-in and cut-out tem-
peratures will be colder than when the controller func-
tions closer to sea level.
D. Forhighelevationinstallations,itmaybenecessary
to"warm-up"thesetpoints.Tomaketheadjust-
ment,inserttheappropriatetoolineachadjust-
mentscrewandturn1/4ofarevolutionclockwise
(totheright).Thisprocedurewilladjustboththe
cut-inandcut-outabout2°Fwarmer.
E. Makesuretoreconnectthepinkwiretoproper
spadeterminalwhenreinstalling.
DANFOSS TEMPERATURE CONTROL
4
3
Cut-outAdjustmentScrew
Allen(5/64"or2mm)(clock-
wiseforwarmer)
Cut-inAdjustmentScrew
Torx(T-7)
(clockwiseforwarmer)
CompressorConnection
(pink)
(doubleterminal)
Compressor
Connection(pink)
Towiretemperaturecontrol:
connectonepinkwire(eitherone)toterminal3andtheotherpinkwiretoterminal4.

............ www.truemfg.com ............
True Food Service Equipment, Inc.
10 10
INSTALLATION / OPERATION INSTRUCTIONS
SHELVING INSTALLATION (REFRIGERATED BAKERY)
SHELF INSTALLATION:
A. Lifteachdoorupandoutoftrack(donotdisconnect
elastictubing).Stretchelasticsurgicaltubingandset
doorsoneachsideofunit.
B. Locatebrackets,lights,shelves,etc.fromcabinet
interior.
C. Locateshelfsupportswrappedinmicrofoamand
install teeth end into stainless pilasters located on
interiorwalls.Adjusttodesiredheightmatchingright
andleftpairs.(images1&2).
D. Locatethreehorizontallightswrappedinmicrofoam
andinstall(lightsidedown).Electricalcordsshould
beontherighttoplugintosidereceptacles.
Hangendhooksoflightassemblyontwoshelfsup-
ports(leftandright)slideassemblyforwarduntilit
seatsinfrontnotchofshelfsupport.(image3).
E. Installrearbracketsbyslidingendhooksoverrear
notchofshelfsupport.(image4).
F. Locateshelves,installtopshelffirst.Withthefront
lip(traystop)upandtowardscabinetfront,placeon
topoffrontlightassemblyandsnapshelfinto(2)
clipsontopofrearbracket(image5).
G. Plugtoplightassemblyintotopreceptacleofcabinet
interiorsidewall(image5).
H. Repeatproceduresforremainingtwoshelves(image
6).
I. Replacedoorsintrack.
➟
Install shelf supports.
teeth end into stainless
pilasters.
Adjust to desired height matching right
and left pairs.
Hang end hooks of light
assembly on front notch of
shelf supports.
Install rear brackets.
Snap shelf into position.
Completed assembly.
WARNING
Shelf mounted lighting requires a
closed circuit. All plugs must be
plugged into side wall receptacles for
lights to work. If less than three shelves
are installed be sure attached caps are
plugged into receptacle(s) (image 7).
Shelf plug.
Receptacle
cap.
1
2
3
5
6
7
4

............ www.truemfg.com ............
True Food Service Equipment, Inc.
11 11
INSTALLATION / OPERATION INSTRUCTIONS
OPTIONAL (INSTALLING OPTIONAL CASTORS)
CASTOR INSTALLATION:
TOOLS REQUIRED:
•Castorwrench(ifnotincludedcontactTRUE)
•Adjustablewrench
NOTE
Castors not available for hard wired or remote models.
WARNING
Make sure unit is empty of all its contents (shelving,
shelving lighting). Make sure power supply has been
disconnected.
A. Curvedglasscanbedamagedifyoulayuniton
itsback,side,orfront.Usea6"x6"(15.2cm
x15.2cm)blockofwoodorequivalent.Slide
theblockunderthecabinetframerail.Thiswill
supporttheunitwhileinstallingcastors.
B. Leglevelerscanbebackedoutbyhand
(image1).
C. Taketwothreadedcastorsandthreadtheminto
theexistingleglevelerholes.(image2).Shims
canbeusedbetweencastorandcabinetframerail
forleveling(image3).Usethetoolprovidedto
tightenthethreadedcastors(image4).
D. Repeatprocessfortheothersideofthecabinet.
WARNING
Display case must be leveled accurately to ensure front
glass door seals properly.
E. Theunitshouldbeleveledfronttobackandside
to side with a level.
Placethelevelinthe
interiorfloorofthe
unitandcheckall
foursides.
Back out leg levelers by hand, or with
adjustable wrench.
Thread castors into existing leg leveler
holes.
Tighten castor in position with castor
wrench.
Use shims as necessary to level cabinet.
1
2
3
4

............ www.truemfg.com ............
True Food Service Equipment, Inc.
12 12
INSTALLATION / OPERATION INSTRUCTIONS
FORMICA KIT INSTALLATION:
FORMICA KIT COMPONENTS:
(2) FormicaTopEndPanels103/4"wx33"h
(27.3cmx83.8cm).
(2) BottomEndPanels
(1)leftside,(1)rightside(Formicagluedto
blackplasticpanelwith4keyholeslots).
(1) FormicaFrontPanel
widthwillvaryx75/8"h(19.4cm)
NOTE
Please use care when installing the Formica. Formica can
chip, crack, or break.
NOTE
Refer to image 1 for placement of Formica panels.
A. InstallthefrontFormicapanel.
Besurebottomendpanelsareoffinorderto
installfrontpanel.Slidefrontpanelintotopand
bottomtracksonthefrontofthecabinet.Make
surepanelisevenonbothleftandrightendofthe
cabinet(images1&2).
B. InstallthetopendFormicapanels(oneoneach
side.Besurebottomendpanelsareoffinorderto
installtopendFormicapanel.Bothtopendpanels
are the same size so they each can be used
forleftorrightofthecabinet.Slide
panelupintoblackplastictracks
onthetopsidepanelofeachendof
cabinet(images1&3).
NOTE
After installing the bottom end pieces the top end panel
will stay in place.
C. InstallthebottomendFormicapanels(oneon
each side.
(Formicaispre-gluedtoblackplasticpanel).
Lineupthefourkeyholeslotsineachbottomend
piecetothe(4)screwsonthesideofthecabinet.
Slipthe(4)largekeyholesfromthebottomend
pieceoverthe(4)screws.Thenpushdownto
fastenthebottomendpieceontothecabinet
(images1&3).
NOTE
The bottom left and right pieces are not the same. The
taller part of the bottom end piece goes to the rear of the
cabinet as shown in image 3.
OPTIONAL (INSTALLING OPTIONAL FORMICA KIT)
1
2
3
Four key-
holes on
backside.
Formica top
end panel
will slide up
into plastic
tracks.
Formica top
end panel
will rest on
screw.
Formica bottom
end panel will lock
through keyholes on
backside of bottom
end piece.
STEP A
Side view of Formica sliding into
place for front panel and top end
panel.
STEP C
STEP B
STEP A
Tracks to hold
Formica.
Formica.

............ www.truemfg.com ............
True Food Service Equipment, Inc.
13 13
MAINTENANCE, CARE & CLEANING
• Theexteriormaybewipedcleanwithmildsoapand
water.Useagoodstainlesscleaneroncountertop.
CAUTION
Do not use any steel wool, abrasive or chlorine based
products to clean stainless steel surfaces.
• Theinteriorofthedisplaycaseshouldbecleaned
periodicallyandwerecommendamildsolutionof
dilutedbakingsodaandwaterwhichwillhelpreduce
anyinherentodors.Donotuseharshcleanersonany
surfaceoftheinterior.
CABINET CLEANING
Itmaybenecessarytosealthebakerycasetothefloorfor
localsanitarycodesorifthecustomersodesires.TRUE
recommendseitherofthefollowingmethods.
A. Usingavinylcovebasetrimasproducedby
Armstrong,Johnson,orKentile(availableatfloor
coveringsuppliers)or
Usingmasticsavailableathardwarestores.
B. Whenapplyingthecovebasetrim,thoroughlyclean
boththecabinetandfloorofdirtandgrease.Applya
recommendedcontactcementtothecovebasetrim.
Aftercovebasetrimhasdried,fillincracksandjoints
withacaulkingmaterial.
C. Whenapplyingamastic,thoroughlycleanboththe
cabinetandfloorofdirtandgrease.Drawanoutline
ofthecabinetonthefloor.Raiseandblockthefront
sideofthecabinet.Applyabeadofmastictothefloor
1/2"(1.3cm)insidetheoutlinedrawn.Lowerthe
cabinet.Raiseandblocktherearsideofthecabinet.
Applythebeadofmastic,lowerthecabinet.
OPTIONAL (SEALING CABINET TO FLOOR)

............ www.truemfg.com ............
True Food Service Equipment, Inc.
14 14
MAINTENANCE, CARE & CLEANING
LIGHT BULB REPLACEMENT
SHELF MOUNTED BULB REPLACEMENT:
WARNING
When replacing a light bulb make sure power to the unit
is either turned off or unplugged.
A. Unplugthelightassemblyfromthereceptacle
ontheinteriorsidewall.Removeshelfandlight
assemblyfromcabinet.
B. Removethelampshieldbygentlysqueezingthe
sidestogetherandrotatingout(image1).
C. Removebulbfromthecordedendofassembly
byholdingthebulbandgentlypullingupon
springloadedlampholderwhichwillallowenough
clearancetoremovebulb(image2).
NOTE
All spring loaded lampholders are located on the left side
of the cabinet as you face the front.
NOTE
Please be aware of your local ordinances for disposal of
old florescent bulbs. These bulbs should be disposed of in
a safe and proper manner.
D. Installnewbulbusingspringloadedlampholder.
E. Reinstalllightassemblyandshelf.Plugcordinto
side wall receptacle.
INTERIOR TOP BULB REPLACEMENT:
WARNING
When replacing a light bulb make sure power to the unit
is either turned off or unplugged.
A. Removethelampshieldbygentlysqueezingthe
sidestogetherandrotatingout(image3).
B. Removebulbbygentlypushingbulbbackinto
springloadedlampholderwhichwillallowenough
clearancetoremovebulb(image4).
C. Installnewbulbusingspringloadedlampholder.
D. Reinstalllightlampshieldbyslidingrear"U"
channeloflampshieldovermetalbracketand
gentlysqueezinglampshieldtofitfront"U"
channeloverfrontmetalbracket(images5-6).
E. Image7showsassemblyproperlyinstalled.
➟
➟
➟
➟
Squeeze lampshield and
rotate out.
Remove bulb by gen-
tly pulling up on spring
loaded lampholder.
Squeeze lampshield and
rotate out. Remove bulb by gently pushing
bulb into spring loaded lam-
pholder.
Squeeze lampshield "U"
channel into position over
metal bracket.
lampshield "U" channel
in position over metal
bracket.
Interior top light assembly
properly installed.
➟
12
3
5 6
7
4

............ www.truemfg.com ............
True Food Service Equipment, Inc.
15 15
CLEANING THE CONDENSER COIL
When using electrical appliances, basic safety precautions should be followed, including the following
CONDENSER CLEANING:
TOOLS REQUIRED:
• Phillipsscrewdriver
• Stiffbristlebrush
• Adjustablewrench
• Vacuum
A. Disconnect power to unit.
B. Takeoffrearlowergrillassemblybyremovingtwo
(2)bottomscrews.
Ifnecessary,loosenscrewsholdingthetoppivot
pins. Swinggrillupandremoveframehooksfrom
pivotpinsattopoflouver.
C. Removeboltsanchoringcompressorassemblyto
framerailsandcarefullyslideout(tubeconnections
areflexible).
D. Cleanoffaccumulateddirtfromcondensingcoil
withastiffbristlebrush.
E. Afterbrushingcondensercoilvacuumdirtfrom
coilandinteriorfloor.
F. Carefullyslidecompressorassemblybackintoposi-
tionandreplacebolts.
G. Connectunittopowerandchecktoseeifcon-
denserisrunning.
H. Reinstalllouverassemblyontounit,
tightenallscrews.
MAINTENANCE, CARE & CLEANING
STEP D STEP E

............ www.truemfg.com ............
True Food Service Equipment, Inc.
16 16
Condensers accumulate dirt and require cleaning every 30 days. Dirty condensers result in com-
pressor failure, product loss, and lost sales... which are not covered by warranty.
If you keep the Condenser clean you will minimize your service expense and lower your electrical costs. The
Condenser requires scheduled cleaning every thirty days or as needed.
Air is pulled through the Condenser continuously, along with dust, lint, grease, etc.
A dirty Condenser can result in NON-WARRANTEED part & Compressor Failures, Product Loss, and Lost Sales.
Proper cleaning involves removing dust from the Condenser. By using a soft brush, or vacuuming the Condenser
with a shop vac, or using CO2, nitrogen, or pressurized air.
If you cannot remove the dirt adequately, please call your refrigeration service company.
The Condenser looks like a group of vertical fins. You need to be able to see through the condenser for the unit to
function at maximum capacity.
THE CLEANING OF THE CONDENSER IS NOT
COVERED BY THE WARRANTY!
HOW TO CLEAN THE CONDENSER:
1. Disconnect the electrical power to the unit.
2. Remove the louvered grill.
3. Vacuum or brush the dirt, lint, or debris from the finned condenser coil.
4. If you have a significant dirt build up you can blow out the condenser with compressed air.
(CAUTION MUST BE USED to avoid eye injury. Eye protection is recommended.)
5. When finished be sure to replace the louvered grill. The grill protects the condenser.
6. Reconnect the electrical power to the unit.
If you have any questions, please call TRUE Manufacturing at 636-240-2400 or 800-325-6152 and ask for the
Service Department.
Service Department Availability Monday-Friday 7:30 a.m. to 5:30 p.m.
and Saturday 8:00 a.m. to 12:00 p.m. CST.
MAINTENANCE, CARE & CLEANING
Condensing Unit
Airflow
Condenser
IMPORTANT WARRANTY INFORMATION

............ www.truemfg.com ............
True Food Service Equipment, Inc.
17 17
CAUTION: Do not use any steel wool, abrasive or chlorine based products to clean stainless steel surfaces.
• StainlessSteelOpponents
Therearethreebasicthingswhichcanbreakdownyourstainlesssteel’spassivitylayerandallowcorrosiontorear
itsuglyhead.
1) Scratchesfromwirebrushes,scrapers,andsteelpadsarejustafewexamplesofitemsthatcanbeabrasivetostain-
lesssteel’ssurface.
2) Depositsleftonyourstainlesssteelcanleavespots.Youmayhavehardorsoftwaterdependingonwhatpartofthe
countryyoulivein.Hardwatercanleavespots.Hardwaterthatisheatedcanleavedepositsiflefttosittoolong.
Thesedepositscancausethepassivelayertobreakdownandrustyourstainlesssteel.Alldepositsleftfromfood
preporserviceshouldberemovedassoonaspossible.
3) Chloridesarepresentintablesalt,food,andwater.Householdandindustrialcleanersaretheworsttypeofchlo-
rides to use.
• 8stepsthatcanhelppreventrustonstainlesssteel:
1. Usingthecorrectcleaningtools
Usenon-abrasivetoolswhencleaningyourstainlesssteelproducts.Thestainlesssteel’spassivelayerwillnotbe
harmedbysoftclothsandplasticscouringpads.Step2tellsyouhowtofindthepolishingmarks.
2. Cleaningalongthepolishlines
Polishinglinesor“grain”arevisibleonsomestainlesssteels.Alwaysscrubparalleltovisiblelinesonsomestainless
steels.Useaplasticscouringpadorsoftclothwhenyoucannotseethegrain.
3. Usealkaline,alkalinechlorinatedornon-chloridecontainingcleaners
Whilemanytraditionalcleanersareloadedwithchlorides,theindustryisprovidinganeverincreasingchoiceof
non-chloridecleaners.Ifyouarenotsureofyourcleaner’schloridecontentcontactyourcleanersupplier.Ifthey
tellyouthatyourpresentcleanercontainschlorides,askiftheyhaveanalternative.Avoidcleanerscontainingqua-
ternarysaltsastheycanattackstainlesssteel,causingpittingandrusting.
4. WaterTreatment
Toreducedeposits,softenthehardwaterwhenpossible.Installationofcertainfilterscanremovecorrosiveand
distastefulelements.Saltsinaproperlymaintainedwatersoftenercanbetoyouradvantage.Contactatreatment
specialistifyouarenotsureoftheproperwatertreatment.
5. Maintainingthecleanlinessofyourfoodequipment
Usecleanersatrecommendedstrength(alkaline,alkalinechlorinatedornon-chloride).Avoid build-upofhard
stainsbycleaningfrequently.Whenboilingwaterwithyourstainlesssteelequipment,thesinglemostlikelycause
ofdamageischloridesinthewater.Heatinganycleanerscontainingchlorideswillhavethesamedamagingeffects.
6. Rinse
Whenusingchlorinatedcleanersyoumustrinseandwipedryimmediately.Itisbettertowipestandingcleaning
agentsandwaterassoonaspossible.Allowthestainlesssteelequipmenttoairdry.Oxygenhelpsmaintainthepas-
sivityfilmonstainlesssteel.
7. Hydrochloricacid(muriaticacid)shouldneverbeusedonstainlesssteel
8. Regularlyrestore/passivatestainlesssteel
Stainless Steel Equipment Care and Cleaning

............ www.truemfg.com ............
True Food Service Equipment, Inc.
18 18
Recommended cleaners for certain situations / environments of stainless steel
A)Soap,ammoniaanddetergentmedallionappliedwithaclothorspongecanbeusedforroutinecleaning.
B)Arcal20,Lac-O-NuEcoshineappliedprovidesbarrierfilmforfingerprintsandsmears.
C)Cameo,Talc,ZudFirstImpressionisappliedbyrubbinginthedirectionofthepolishedlinesforstubbornstains
anddiscoloring.
D)Easy-offandDe-GreaseItovenaidareexcellentforremovalsonallfinishesforgrease-fattyacids,bloodand
burnt-onfoods.
E)Anygoodcommercialdetergentcanbeappliedwithaspongeorclothtoremovegreaseandoil.
F)Benefit,SuperSheen,SheilaShinearegoodforrestoration/passivation.
NOTE:
The use of stainless steel cleaners or other such solvents is not
recommended on plastic parts. Warm soap and water will suffice.
Stainless Steel Equipment Care and Cleaning
Table of contents
Other True Manufacturing Company Display Case manuals
Popular Display Case manuals by other brands

Choice
Choice 176BDC3 Assembly instructions

Goldmedal
Goldmedal 5580BV4 instruction manual

Alto-Shaam
Alto-Shaam HALO HEAT ED2-60 Installation operation & maintenance

Tecnodom
Tecnodom VULCANO User and maintenance manual

Oscartielle
Oscartielle MARTE Series instruction manual

SEGUE
SEGUE VK-1314 Setup instructions