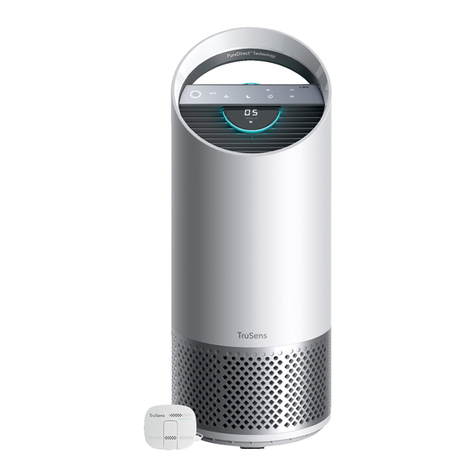
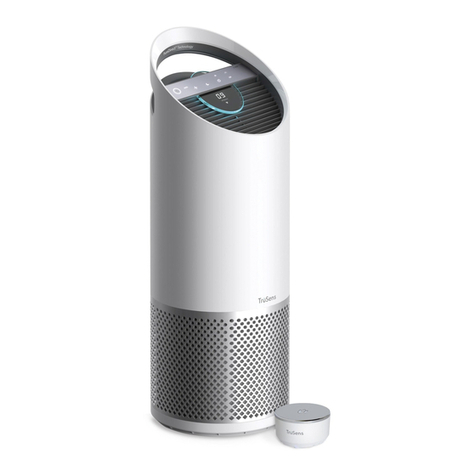
TruSens Z-2000 User manual

Owner Guide
Air Purifier with SensorPod™ and filtration
Z-2000
Z-3000

General Safety Information
PLEASE READ AND SAVE THESE INSTRUCTIONS
This appliancehasa polarized plug(one blade is wider thantheother). Toreduce the risk ofelectric shock, thisplugis intended tofit in a
polarized outletonlyone way. Ifthe plugdoes notfit fullyinthe outlet, reverse the plug.If itstill does notfit, contact aqualified
electrician. Do not attempt to defeatthis safetyfeature.
Unplugor disconnect theappliancefrom thepower supplybefore replacing filters or UV lamp,orwhen applianceis not in use.
WARNING: To reduce the risk of fire orelectric shock, donot usethis fanwith any solid-statespeed control device.
Do notoperateany purifier with a damagedcord or plug, or if the wall socket is loose.
Do notruncord undercarpeting, throw rugs, runners, or similar coverings. Do notrun cord underfurnitureor appliances. Arrange cord
away from trafficarea andwhere it will not betripped over.
•Remove allpackaging, includingthefilter bag,before use.
•Appliances thatare obviously damaged mustnot be operated.
•This appliance must only be connected to a wall socket outlet matching the supplyplug typeandrating stated on the rating plate.
•Locateair purifier neartheoutlet wall socket anddo notuse extension cords.
•This appliancecanbeused bychildren aged from 8 years andaboveandpersons with reduced physical, sensory or mental
capabilities orlack of experience and knowledge if they have been givensupervision or instruction concerning use oftheappliance
in a safe way andunderstand the hazards involved.
•Children shallnot play with the appliance.
•Skin or eye damagemay result from directly viewing thelight produced bythe UV lampin thisappliance. Do not operatethe UV-C
emitter outsidetheapplianceor with thefilter removed.
•Replace theUV lamp with themodels specified within thismanual.
•Do notattemptto service or repair this productyourself.
•Only usethe purifier and SensorPod™ with the power cable provided.
•Only clean this machine with a dampcloth, do not usesolventsor bleach.
•Ensure applianceis alwaysplaced onfirm level surface before operation.
•Do not block orobstruct theair intakeor outlet vents.
•Do not insert fingers or other items intothe air intakeor outlet vents.
FCC ID:
Z-2000: GV3-18Z2000Z-3000: GV3-18Z3000 Sensor: GV3-18SP001
IC:
Z-2000: 6128A-18Z2000 Z-3000: 6128A-18Z3000 Sensor: 6128A-18SP001
This device complies with part15 of the FCCRules. Operation is subject tothe following two conditions:
(1)This device may not cause harmfulinterference, and
(2)this device must accept anyinterference received, including interference thatmaycause undesired operation.
Any Changesor modificationsnot expressly approved bythe party responsible for compliance could void theuser's authorityto operate
the equipment.
This equipment hasbeen tested andfoundtocomply with the limits for a Class B digital device, pursuantto Part 15 of the FCC Rules. These
limits are designed toprovide reasonable protection againstharmfulinterference in aresidential installation.This equipmentgenerates,
uses andcan radiateradio frequency energy and,if not installed and used in accordance with the instructions, may causeharmful
interference to radio communications.
However, there is no guaranteethatinterference will notoccur in aparticular installation.If thisequipment does causeharmful
interference to radio or television reception, which canbedetermined by turning theequipmentoffand on,the user is encouraged to try
to correct the interference byone or more of the following measures:
Reorient or relocate the receiving antenna.
Increase theseparation between the equipmentandreceiver.
Connect theequipmentintoanoutlet on a circuit different from thattowhich thereceiver is connected.
Consult the dealer or an experienced radio/TV technician for help.
FCCRF Radiation Exposure Statement:This equipment should beinstalled and operated with minimumdistance of20cm between the
radiator andall persons.
This device complies with Innovation,Science andEconomic Development 7Canada(ISED) license-exempt RSS standard(s). Operation is
subject to thefollowing twoconditions:
(1) This device may not cause interference, and
(2)This device must accept any interference, including interference thatmaycause undesired operation ofthedevice. 2
ENG

3
ISED Compliance
This device contains licence-exempt transmitter(s)/receiver(s) that
comply with Innovation, Science and Economic Development Canada’s
licence-exempt RSS(s). Operation is subject to the following two
conditions:
1. This device may not cause interference.
2. This device must accept any interference, including interference that
may cause undesired operation of the device.
L’émetteur/récepteur exempt de licence contenu dans le présent appareil
est conforme aux CNR d’Innovation, Sciences et Développement
économique Canada applicables aux appareils radio exempts de licence.
L’exploitation est autorisée aux deux conditions suivantes :
1. L’appareil ne doit pas produire de brouillage;
2. L’appareil doit accepter tout brouillage radioélectrique subi, même si le
brouillage est susceptible d’en compromettre le fonctionnement.
ISED 20cm RF Exposure
EN:The device should be installed and operated with
a minimum distance of 20 cm between the radiator and
your body.
FR :L'appareil doit être installé et utilisé avec une
distance minimale de 20 cm entre le radiateur et votre
corps.

4
ENG
ManualContents
GettingStarted 4
Product Overview 5
Real-time quality display 7
Control panel 7
Specifications 8
Care and Maintenance
ReplacingHEPA drumfilter 9
ReplacingCarbonfilter 10
Washing the Prefilter 10
Replacing the UV lamp 11
SensorPod 11
Frequently Asked Questions 13
Support 14
Registration andWarranty 14
SensorPod™
Remoteairqualitymonitorthat
ensurescleaner air, right where
you need it
Informs and adapts
Illumination colorring and
numeric displaycommunicate air
quality in real-time
360°Purification
Surroundingair is drawninfrom
all directions through a 3-stage
filter and sterilizing UV lamp
PureDirect™ technology
Proprietarybi-directionalairflow
distributes clean air comfortably
andefficiently
Thoughtful execution
Exceptionalfunctionalitywrapped
in a contemporary design thatfits
any environment
Experience the difference

5
ENG
Getting started
Step 2. Plug-in and turn on the purifier
Simplypress the PowerButton and the purifierwill begincleaning your air!
Step 1. Placement of the purifier and SensorPod
Place the purifier on a flatsurface along aside wall, free from obstructions:
where air can flowfreely into the purifier from all sides
avoiding furnishings like bedding and curtains, as wellas sources of heator moisture.
Place SensorPodon a counter or table away from the purifier to increase coverageacross the room.
Step 3. Plug-in SensorPod
Air qualityreadings will immediatelybegin transmitting to the purifier.
Start livingwith cleaner air!
The purifierwill automaticallyadjust fan speeds based on the air quality readings from SensorPod,
and proprietary PureDirect™ technology will deliver purified air throughout the room!
Sample Bedroom Sample Living Room

6
ENG
Get to know your air purifier
1. Easy-carry handle
2. Soft-touch control panel
3. Air qualityindicator ring
4. 360° air intake
5. Filterchamber cover & knob (underneath)
3
2
4
5
Introducing your remote air quality monitor, SensorPod™
1. Power and Signal Indicator
2. Air outlet
3. Air inlet
4. Easy-access door, for cleaning sensor
1
The separate air qualitysensorcan more
accurately represent the air quality in your room
bymonitoringthe air away fromthe purifier,
ensuring greater coverage of cleaner air.
4
2
3
1

7
ENG
PureDirect™ cleans comfortably and efficiently
Washable Pre-Filter
Captures larger particulates, like dust
and pet hair
filtration and UV sterilization
Activated Carbon Filter
Removes certain gases and odors
HEPA Filter
Captures particulates down to 0.3 microns
Ultraviolet Sterilization
Reduces the uncontrolled growth of
dangerous microbes captured on the
surface ofthe filter
By splitting the purified air into two
distinct and directed streams,
PureDirectprovidesauniqueand
proprietary airflow that cleans the
roomup to 24% faster.

ControlPanel
PowerButton
Fan Speed Settings
Select fan speed or AUTO mode.
In AUTO mode, purifier automatically adjusts fan speed based on air quality readings from SensorPod.
(AUTO mode only available when purifier is paired with SensorPod and receiving signal.)
DimmerMode
Display illumination turns off – foruse while sleeping.
Simply press the button again to bring back all display features.
(Purifier will continue operating at fan speed or AUTO mode as selected by user.)
TimerMode
Purifier will automatically turn off after 2, 4, 8, or 12 hours.
To cancel this countdown, simply cycle by pressing button until no timer setting is displayed.
UV Mode
UV lamp within the purifier’s filter chamber is on when symbol is white.
symbol will glow red when it istime to replace the UV lamp. See pages 7-8 for instructions.
Filter and UV Indicator Reset
HEPA, Carbon, and UV indicators glow red when it is time for each to be replaced. See pages 7-8 for instructions.
When 1 indicator is on, simply hold Reset button for 3 seconds to reset that indicator.
When 2+ indicators are on, press the Reset button to select the correct indicator (selected indicator will blink)
before holding 3 seconds to reset that indicator.
8
ENG
The revolutionary remote SensorPod evaluates the condition ofyour airby measuringboth small (PM2.5) and
larger (PM10) particulate matter. It calculates the overall air qualityusinga proprietary algorithm that is
reactive to genuine increases in pollutants withoutoverreacting to someoneentering the room or settling into
the couch.
An illuminated ring on the purifier’s control panel communicatesyour airquality levels with color, whilea
numericvalue providesgreater detail.
Good AirQuality
0 - 50 Moderate Air Quality
51 - 100 Poor Air Quality
101 - 500
Real-time air quality feedback
TruSens utilizes theAir QualityIndex (1-500)created bythe U.S. EnvironmentalProtection Agency
(EPA).

9
ENG
Specifications
Z-2000
Medium Room Purifier Z-3000
Large Room Purifier
Area changed every 15 minutes 188 ft² (17 m²) 375 ft² (35 m²)
Area changed every 30 minutes 375 ft² (35 m²) 750 ft² (70 m²)
SensorPod™ Included
Works up to 49 ft (15 m) across a room from the purifier.
PureDirect™ technology Included
Fan Speed Settings Whisper, 1, 2, Turbo Whisper, 1, 2, 3, Turbo
Purification Levels
Washable Prefilter
Carbon
HEPA Type
UV
Washable Prefilter
Carbon
True HEPA
UV
Timer Settings 2, 4, 8, 12 hour
Replacement Indicators Carbon, HEPA, UV
Noise ## dB ## dB
Dimensions LL x WW x HH in.
LL x WW x HH mm. LL x WW x HH in.
LL x WW x HH mm.
Weight ## lbs (## kg) ## lbs (## kg)
Power Requirements 120 V / 60 Hz 120 V / 60 Hz
Power Consumption ## W ## W
Warranty 2 years
Replacement Filters and UV Lamps
360° filter (Prefilter, HEPA, Carbon) HAF-Z2000-01 HAF-Z3000-01
Carbon filter (3-pack) CAF-Z2000-01 CAF-Z3000-01
Ultraviolet Lamp UVL-Z2000-01 UVL-Z3000-01

10
ENG
Specifications
SensorPod
Medium & Large
Rated operational voltage 9V DC
Rated operational current 0.15A DC ±10%
Adapter input voltage range 90 ~ 240V AC 60±3Hz/50±3Hz
Adapter output power DC 9V 0.15
Rated power 1.3±0.3W
Signal frequency 2462MHz
Channel bandwidth 1MHz
Wireless transmit power 0dBm
Receive Sensitivity -94dBm@250kbps
Radio frequency modulation mode GFSK
Onboard antenna gain 2 ~ 3dBm
Sending and receiving distance open space≥15m
Product dimensions 80*45.5*68mm
Warranty 2 years
Function
Button Binding button
Signal indicator Blue Light Indicator

Accessing the filterchamber
-Always power off the purifier by pressing the PowerButton and unplugging the power
cord.
-Gently place the unit on its side so that the filter chamber cover and knobare exposed.
-Turn the knob counter-clockwise and remove (Fig A).
-Gentlyremove the filter chambercover andthe 360° HEPA filter drum that isattached (Fig. B).
11
ENG
Filter Change and Maintenance
Replacing the 360° HEPA filter drum
1. The indicatorwill glowred when it is timeto change the entire HEPA drum filter.
2. Gentlypull the HEPA drum filter awayfrom its placesecured to the filter chamber cover (Fig.C).
3. Your replacement HEPA filter will include all layers:Washable Prefilter, Carbon, and HEPA.
4. Use the directional arrows to align the replacementHEPA drum andsecure it onto the filter chamber
cover (Fig. D).
5. Gently replace the filter drum and filter cover into the filter chamber and onto the threading (Fig. E).
6. Turn the knob clockwise until the knob and filter chamber cover are securely tightened (Fig. F).
7. After plugging-in and powering-on the purifier, hold the button until the red indicator
turns off.(If the indicator is also Red, you’llneed to reset that aswell).
Fig. A Fig. B
Fig. C Fig. D

12
ENG
Filter Change and Maintenance
Fig. E
Replacing the Carbon filter
1. The indicator will glow red when it istime to replace only the Carbonlayer.
2. Gentlypeel awaythe Prefilter from its fastener strips.
3. Gentlypeel awaythe old Carbonlayerfrom its fastener strips.
4. Your replacement3-pack of Carbonfilters (on page 7) willcover each of the three Carbon changesbetween
changes of the entire HEPA drum filter assembly(see above).
5. Wrap a new Carbon layer around the filter drum and attach using the same fastener strips.
6. Replacethe Prefilter by wrappingit around the Carbonlayerand attach usingits fastener strips.
7. Once the purifieris powered-on, holdthe button until the indicator turns off.
Washing the Prefilter (Please Note: HEPA& Carbon filters are not washable)
1. We recommend that youvisually inspect the Prefilter every month, and clean as needed. At a minimum,
you should wash the prefilter every time youchange the Carbon of HEPA filters.
2. Gentlypeel awaythe Washable Prefilter from its fastener strips.
3. Gentlyrinse with running water – allowPrefilter to dry before re-installing.
4. Replace the Prefilter by wrapping it around the filter drum and attach using its fastener strips.

13
ENG
Replacing theUV lamp
1. The indicator will glow red when it is time to replace the UV lamp.
2. Once the filter drumis removed (Fig.A, Fig B),use a screwdriver to remove the 4 screws securing
the UV housing (Fig. G).
3. Gentlyremove the UV housing (Fig.H).
4. Disconnect the plug of the UV lamp from the socket within the purifier (Fig. I).
5. Your replacement UV lamp will plug directly into the same socket (Fig. J).
6. Replace the UV housing and use a screwdriver to tighten the fastening screws.
7. Once the purifieris powered-on, holdthe button until the indicator turns white.
Fig. G Fig. H
Fig. G Fig. H
Cleaning the air quality sensor within the SensorPod
The SensorPoduses an infrared light to detect particulate matter, so it is important that youclean the
viewing chamberevery 1-2 months to remove anydust or particles that mayaffect the accuracy of the
sensor’s readings.
1. Turn-off the SensorPod by unplugging the power cord.
2. Open the cover on the frontside by sliding the door downward and rotating outward at a 90° angle.
3. Use a dampcotton swab to wipe the lens and intake area of the dust sensor.
4. Use a dry cotton swab to wipe away any remaining moisture.
5. Closethe cover by rotating the door back downandsliding it backinto placeuntil you hear a click.

14
ENG
Pairing SensorPod and Purifier
The SensorPod communicateswith the purifier using radio frequency signals, and will be paired on the
production line and ready for use when you open the box. In the rare event that the signal is interrupted,
you canrepair the connection injust a feweasy steps. You’ll knowthat the signal is lost because:
a) SensorPod’s LED will blink if the purifier is unplugged or out of range; OR
b) The Purifier’s sensor indicator light andair quality color/numberindicators will blink for 1
minute and turn off if the SensorPod is unplugged or out of range.
1. Unplug the SensorPod.
2. HOLD the Power Button on the purifier for 3 seconds, when you should hear two chimes.
3. Plug-in the SensorPod anduse an item with asmall point (paperclip) to press and HOLD the pairing
button underneath the SensorPod for3 seconds.
4. The connection should be established. You’ll know because the LED on the SensorPod should light
solid and the purifier’s sensor indicator light and air quality color/number indicators should be
on.
Note: thepurifier’sair qualitycolor/numberindicators will cyclefor6-8 secondsas theydoeach time
thepurifieris poweredon.

15
ENG
Troubleshooting and FAQ
Where do I place the SensorPod? Anywhere you want to measure the air quality within the room!
For optimal performance, place the SensorPod away from the air purifier
on a counter or table. In Auto Mode, the purifier will work to distribute
clean air until the SensorPod reads an acceptable level of air quality.
See specification table on page 7 for appropriate room sizes for each model.
How often do I need to change the
filters? The purifier is equipped with replacement indicators that will notify you
when itis time to replace the Carbon or HEPA filter, or the UV lamp.Plan
on replacing the Carbon every 3-4 months, HEPA every 12-15 months,
and UV lamp every 24 months.
How often do I need to wash the
prefilter? The prefilter captures larger particles and preserves the efficiency of the
other filters, so we recommend that you visually inspect the prefilter
every month and wash as needed. Another good habit is to wash the
prefilter every time you replace a filter or the UV lamp.
How often do I need to clean the dust
sensor within SensorPod? For the most accurate measurement of your air quality, we’d recommend
you clean the surface of the dust sensor every 1-2 months.
Purifier won’t turn on. Check that the power cord is connected securely to both the wall outlet
and the purifier. Check if there is a power outage in the outlet by trying a
nearby light or device or by trying a working device in the same outlet.
Check that the HEPA filter is fitted properly into filter chamber.
Please contact us if you’re still having a problem (page ##)!
Purifier won’t go into Auto Mode.
or
AQI indicator disc is off.
Auto Mode is only available when the purifier can react to air quality
readings from the SensorPod, so check that the SensorPod is plugged-in
and that its light issolid.
See page 9 for instructions.
SensorPod lightis blinking. Check that the purifier is in the same room and powered-on. If it is, you’ll
need to follow the pairing procedures on page 9 to repair the
connection.
I’ve lost my SensorPod! Don’t worry! Please contact our customer support team and you can
order a replacement SensorPod. Follow the easy pairing process on page
9 for pairing your replacement SensorPod with your existing air purifier!

16
ENG
Support
THANK YOU for allowing TruSens to join you on your journeytowards wellness.
If you have any questions that are notanswered in this productmanual,pleasereach out!
And visit us and share your experience with us on social media!
TruSensWellness @Tru_Sens
tru_sens TruSens
Warranty
TruSens warrants that the machine will be perform to the specifications stated and be free from defects in
materials and workmanship for a period of 2 years from dateof purchase, subject to normal use. Within the
guarantee period, TruSens willat its owndiscretion either repair orreplace the defective machinefree of
charge. Defects due to shipping, misuse, improper maintenance or the use of any parts from another
manufacturer are not covered under this guarantee. Proof of date of purchase will be required. Repairs or
alternations made bypersons not authorized byTruSens will invalidate the guarantee. Thisguarantee does not
affect the legal rights which consumers have under applicablenational legislation governing the sale of goods.
Register this product online at www.trusens.com
Call the TruSens helpline at 1-833-TRU-SENS
(1-833-878-7367)

Experience the difference
www.trusens.com
Version 0, November 2018
Other manuals for Z-2000
3
This manual suits for next models
1
Table of contents
Other TruSens Air Cleaner manuals

TruSens
TruSens Z-2000 User manual

TruSens
TruSens Z-2000 User manual

TruSens
TruSens Z-1000 User manual

TruSens
TruSens Z-6000 User manual

TruSens
TruSens Z-1000 User manual

TruSens
TruSens Z-3500 User manual

TruSens
TruSens Z-2500 User manual

TruSens
TruSens Z-3000 User manual

TruSens
TruSens Z-6000 User manual

TruSens
TruSens Z-2000 User manual