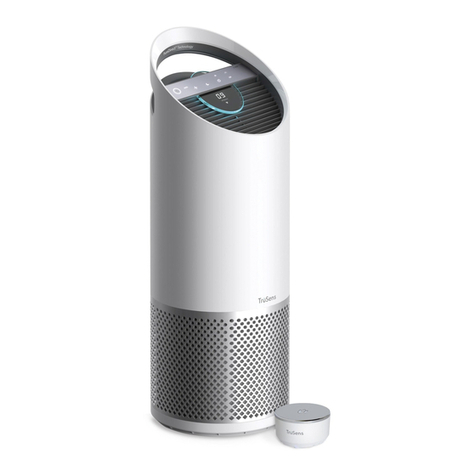
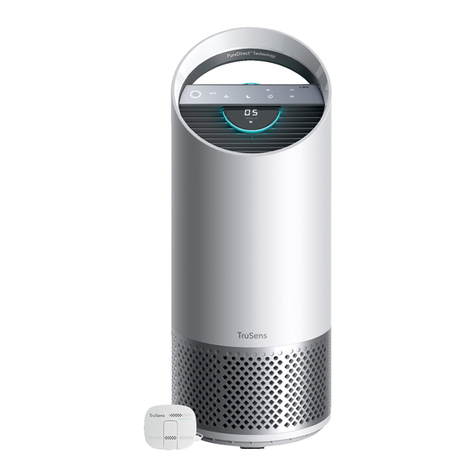
TruSens Z-1000 User manual

OWNER’S MANUAL
Z-1000

CONTENTS
SAFETY INFORMATION
FEATURE HIGHLIGHTS
CONTROL PANEL
PRODUCT OVERVIEW
GETTING STARTED
SPECIFICATIONS
CARE & MAINTENANCE
Replacing HEPA Filter
Replacing Carbon Filter
Replacing UV Bulb
FAQ & TROUBLESHOOTING
WARRANTY & SUPPORT
4
5
6
7
8
10
11
11
12
13
14
15
Welcome to clean air with TruSens. Thank you for allowing
us to join you on your journey towards wellness.
Enjoy cleaner air in your home with PureDirect™
Technology & DuPont™ Filtration that ensure the whole
room benefits from cleaner air.

54
SAFETY INFORMATION
PLEASE READ AND SAVE THESE INSTRUCTIONS
This appliance has a polarised plug (one blade is wider
than the other). To reduce the risk of electric shock,
this plug is intended to fit in a polarised outlet only one
way. If it does not fit, contact a qualified electrician. Do
not attempt to defeat this safety feature.
Unplug or disconnect the appliance from the power
supply before replacing filters or UV bulb, or when
appliance is not in use.
WARNING: To reduce the risk of fire or electric shock,
do not use this fan with any solid-state speed control
device.
Do not operate any purifier with a damaged cord or
plug, or if the wall socket is loose.
Do not run cord under carpeting, throw rugs, runners,
or similar coverings. Do not run cord under furniture
or appliances. Arrange cord away from traffic area and
where it will not be tripped over.
WARNING: Skin or eye damage may result from
directly viewing the light produced by the bulb in this
apparatus. Always disconnect power before replacing
or servicing. Replace bulb with UVLZ100001AU,
Manufactured by ACCO Brands.
• Remove all packaging, including the filter bag,
before use.
• Appliances that are obviously damaged must not be
operated.
• This appliance must only be connected to a wall
socket outlet matching the supply plug type and
rating stated on the rating plate.
• Locate air purifier near the outlet wall socket and do
not use extension cords.
• This appliance can be used by children aged from 8
years and above and persons with reduced physical,
sensory or mental capabilities or lack of experience
and knowledge if they have been given supervision
or instruction concerning use of the appliance in a
safe way and understand the hazards involved.
• Children shall not play with the appliance.
• Replace the UV bulb with the models specified within
this manual.
• Do not attempt to service or repair this product
yourself.
• Only use the purifier with the power cable provided.
• Only clean this machine with a damp cloth, do not
use solvents or bleach.
• Ensure appliance is always placed on firm level
surface before operation.
• Do not block or obstruct the air intake or outlet vents.
• Do not insert fingers or other items into the air intake
or outlet vents.
FEATURE HIGHLIGHTS
PureDirect™ Technology
Independent lab testing confirms that two airflow streams are
better than one, moving air effectively and more comfortably
throughout the room.
360° Purification
DuPont™HEPA filter captures pollutants and VOC
gases/odours from all directions. UV light kills germs
and bacteria that can get trapped in the filter.
Thoughtful Execution
Exceptional functionality wrapped in a contemporary
design that fits any environment.

76
PRODUCT OVERVIEW
Air Purifier Easy-carry handle
Simple touch control panel
360° air intake
Filter cover & knob (underneath)
Carbon Prefilter
HEPA Filter
UV Sterilisation
Filter & Ultraviolet Sterilisation
CONTROL PANEL
Fan Speed Settings
Select fan speed: 1, 2, or Turbo.
UV Mode
UV bulb within the purifier’s filter chamber is on when
the symbol is white. The symbol will glow red
when it is time to replace the UV bulb.
Filter and UV Indicator Reset
HEPA, Carbon and UV indicators glow red when it is
time for each to be replaced.
When 1 indicator is on, simply hold Reset button for 3
seconds to reset that indicator. When 2+ indicators are
on, tap the Reset button to select the correct indicator
(selected indicator will blink) before holding 3 seconds
to reset that indicator.
Power Button
(See page 13 for replacement instructions)
(See pages 11-13 for replacement instructions. Follow above Reset
button instructions aer replacing filter.)

98
GETTING STARTED
1. Remove plastic bag from filter
Unscrew the bottom cover and remove the plastic bag from the filter.
2. Re-attach filter
Secure filter on the bottom cover and replace inside the purifier.
3. Set up
Plug-in your air purifier unit and power on.
Place the purifier on a flat surface, free from obstructions:
- where air can flow freely into the purifier from all sides
- avoiding furnishings like bedding and curtains, as well as sources of
heat or moisture
4. Start living with cleaner air!
Select your preferred fan speed and proprietary PureDirect™ technology will
deliver purified air throughout the room!

1110
Air Inlet 360°
Air changed 2 times per hr 250 ² (23 m²)
Air Delivery Type PureDirect™
Fan Speed Settings 1, 2, Turbo
Purification Levels Carbon Prefilter, HEPA, UV
Filter Change Indicators Carbon, HEPA, UV
Noise 39 - 65 dB
Dimensions 7.7" x 7.7" x 17.9" (195 x 195 x 451 mm)
Weight 7.7 lbs (3.5 kg)
Motor Type AC motor
Power Requirements 220-240v 50/60Hz 0.3A
Power Consumption 72 W
Warranty 2 years
Replacement Filters & UV Bulb
2-in-1 HEPA drum filter AFHZ100001AU
Carbon filter (3-pack) AFCZ100001AU
UV Bulb UVLZ100001AU
SPECIFICATIONS CARE & MAINTENANCE
REPLACING HEPA FILTER
Accessing the filter chamber
1. Always power off the purifier by pressing the Power
Button and unplugging the power cord.
2. Gently place the unit on its side on the floor so that
the filter chamber cover and knob are exposed.
3. Turn the knob counter-clockwise and remove the
filter cover and 360° HEPA filter drum (Fig. A).
1. The HEPA indicator will glow red when it is time to
change the entire HEPA drum filter.
2. Gently pull the HEPA drum filter away from its place
secured to the filter cover (Fig. B).
3. Secure the replacement HEPA filter onto the filter
cover (Fig. C).
4. Gently replace the filter cover with filter drum into
the filter chamber and onto the threading, and turn
the knob clockwise until the knob and filter chamber
cover are securely tightened (Fig. D).
5. Plug-in and power on your purifier, and hold the
Reset button until the red HEPA indicator turns off.
Note: HEPA drum filter (on page 10) will include 2 layers: Carbon
Prefilter and HEPA
Fig. A
Fig. B
Fig. C
Fig. D

1312
1. The Carbon indicator will glow red when it is time to replace
the Carbon layer.
2. Gently peel away the used Carbon layer from the fastener
strips (Fig. E).
3. Wrap a new Carbon layer around the filter drum and attach
to the same fastener strips (Fig. F).
4. Once the purifier is powered-on, hold the Reset button until
the red Carbon indicator turns off.
Note: Carbon filter 3-pack (on page 10) will cover 3 Carbon changes
between replacing the entire HEPA drum filter assemly (on page 11).
Fig. E
Fig. F
REPLACING CARBON PREFILTER REPLACING UV BULB
1. The indicator will glow red when it is time to
replace the UV bulb.
2. Remove HEPA filter drum (Fig. A), and use a
screwdriver to remove the screw securing the UV
housing (Fig. G).
3. Gently remove the UV housing (Fig. H) and
disconnect the UV bulb from the socket (Fig. I).
4. Release carriage from the UV bulb (Fig. J).
5. Secure carriage to new UV bulb (on page 10)
(Fig. K) and connect UV bulb into purifier (Fig L).
6. Replace the UV housing and use a screwdriver to
tighten the fastening screw.
7. Once the purifier is powered-on, hold the Reset
button until the indicator turns white.
Fig. G
Fig. J
Fig. H Fig. I
Fig. K Fig. L

1514
How oen do I need to change the
filters?
That’s easy! The purifier’s replacement indicators will notify you when it is
time to replace the Carbon or HEPA filters, or the UV bulb.
Plan on replacing the Carbon every 3-4 months, HEPA every 12-15 months,
and UV bulb every 1-3 years.
Purifier won’t turn on. Check that the power cord is connected securely to both the wall outlet and
the purifier. Check if there is a power outage in the outlet by trying a nearby
light or device, or by trying a working device in the same outlet.
Check that the HEPA filter is fitted properly into filter chamber.
Please contact us if you’re still having a problem! (page 15)
FAQ & TROUBLESHOOTING WARRANTY
SUPPORT
Thank you for welcoming TruSens into your home. Our
customers are at the heart of what we do, and we strive
to design products that fit your lifestyle. If you have any
questions or feedback, please reach out!
Visit our website at www.trusens.com
Email us at trusens.au@acco.com
Call us at 1300 278 546
What this Warranty Does Not Cover
If ACCO Brands reasonably considers that any of the following situations are present, this warranty does not apply:
• any cosmetic damage;
• where the product’s serial number is no longer present or visible;
• loss or damage caused by factors beyond the control of ACCO Brands including, but not limited to, damage or failure due to power fluctuations, overload, excessive heat or
humidity;
• where the product has not been installed, operated, used, stored and/or maintained in accordance with any instructions provided with the product;
• where damage or defects are due to unusual, abnormal, non-recommended or negligent use, handling or maintenance of the product;
• any alterations or repairs to the product not authorised in writing or performed by ACCO Brands;
• liability based on any service or other agreement or arrangement entered with any third party; or
• normal wear and tear including deterioration of any wearable components or consumables in any product, including but not limited to base boards, blades, cutters, cutting
disks, cutting sticks, drill bits, feed wheels, fuses, light bulbs, manual punches, separators, slitters and staple inserts.
Statutory Guarantees and Your Other Rights and Remedies
This warranty is provided in addition to other rights or remedies that you, as a consumer, may have under Australian or New Zealand consumer law, or any other applicable law.
For Australia: Our goods come with guarantees that cannot be excluded under the Australian Consumer Law. You are entitled to a replacement or refund for a major failure and
compensation for any other reasonably foreseeable loss or damage. You are also entitled to have the goods repaired or replaced if the goods fail to be of acceptable quality and
the failure does not amount to a major failure.
For New Zealand: Our Goods come with guarantees that cannot be excluded under the Consumer Guarantees Act 1993. This guarantee applies in addition to the conditions
and guarantees implied by that legislation.
Warranty Against Defects
This product is provided with a 2 year warranty limited to defects in material and workmanship from the date of original purchase (you must retain proof of purchase) (Warranty
Period). This warranty is offered by ACCO Brands Australia Pty Ltd (ABN 16 000 265 047) if the product was purchased in Australia or ACCO Brands New Zealand Limited (26589)
if the product was purchased in New Zealand (each referred to individually, as ACCO Brands). ACCO Brands will, at its own discretion, either repair or replace this product (with a
new or refurbished product) if the defect is deemed by ACCO Brands to be the result of faulty materials or workmanship but subject to the conditions set out in this warranty.
Any other representation contained on this product’s packaging or provided with this product which constitutes or appears to constitute a warranty is hereby excluded and is not
given by ACCO Brands (except for the statutory warranties as indicated below).
You may claim on this warranty only within the Warranty Period in the manner set out below and provided that you have complied with all the other conditions of this warranty. This
warranty can only be exercised by the original purchaser of the product and is not transferrable to any other person or entity under any circumstances.
How to Make a Claim
To make a claim under this warranty please contact your place of purchase within the Warranty Period (from the date of purchase). Proof of your purchase of this product, such
as your receipt or invoice, must be provided in addition to a detailed description of the defect in the product. Your claim will be assessed under the terms and conditions of this
warranty and the laws applicable to your place of purchase.
Distributor Contact Details Australian Customers New Zealand Customers
ACCO Brands Australia Pty Ltd ACCO Brands New Zealand Limited
Locked Bag 50, Blacktown BC, NSW 2148 PO Box 11-677, Ellerslie, Auckland 1542
Phone: 1300 278 546 Phone: 0800 800 526
©2019 ACCO Brands. All rights reserved. TruSens™, U™ & Design and
PureDirect™ are trademarks of ACCO Brands. DuPont™ & the Oval logo
are trademarks or registered trademarks of E.I. du Pont de Nemours and
Company used under license.
21973P003
ACCO Brands Australia
2 Coronation Avenue
Kings Park, NSW, 2148
Tel: 1300 278 546
www.trusens.com
& Follow us @TruSensANZ
Subscribe to our YouTube channel TruSens
Other manuals for Z-1000
1
Table of contents
Other TruSens Air Cleaner manuals

TruSens
TruSens Z-1000 User manual

TruSens
TruSens Z-2000 User manual

TruSens
TruSens Z-6000 User manual

TruSens
TruSens Z-2000 User manual

TruSens
TruSens Z-2000 User manual

TruSens
TruSens Z-2500 User manual

TruSens
TruSens Z-3500 User manual

TruSens
TruSens Z-6000 User manual

TruSens
TruSens Z-3000 User manual

TruSens
TruSens Z-2000 User manual