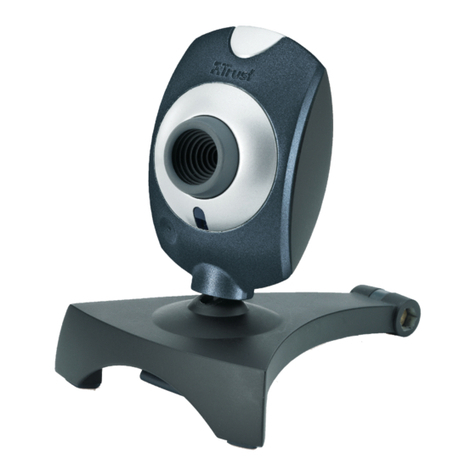
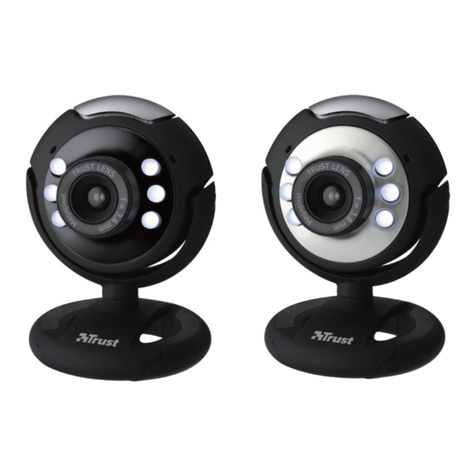
Trust SpaceCam 380 User manual

TRUST 380 USB 2.0 SPACEC@M
1
UK
Method when using for the first time Chapter
1. Uninstalling old drivers and devices (4.1)
2. Installation in Windows 98/ME/2000/XP (4.2)
3. Connecting (4.3)
4. Checking after the installation (4.4)
5. Using the camera (4.5)
1 Introduction
This instruction manual is for users of the TRUST 380 USB 2.0 SPACEC@M. The
TRUST 380 USB 2.0 SPACEC@M is intended to be used in combination with a USB
2.0 USB port. The Trust 380 USB 2.0 SPACEC@M can be used to make short films,
take photographs (snapshots) or as a webcam during video conferencing.
2 Safety
Read the following instructions carefully before use.
-The TRUST 380 USB 2.0 SPACEC@M does not require any special
maintenance. Use a slightly damp, soft cloth to clean the camera.
-Do not use aggressive substances, such as benzene or white spirit, to clean the
device. These may harm the material.
-Do not submerge the device in liquid. This may be dangerous and will damage
the device. Do not use this device near water.
-Make sure nothing is placed on the cable. Do not use this device in an area
where the cable can become worn or damaged as a result of people walking over
it.
-Do not repair this device yourself.
3 Approval
-This device meets the essential requirements and other relevant conditions of the
applicable European directives. The Declaration of Conformity (DoC) is available
at www.trust.com/13497/ce.
4 Installation
4.1 Uninstalling old drivers and devices
The most common cause of faults during installation is the presence of a driver for a
similar, old device. The best solution is to first remove all drivers related to old
devices before installing the new driver.
1. Enter the Windows ‘Safe Mode’ (press F8 when starting Windows and then
select ‘Safe Mode’ from the menu which will be displayed).
2. Click on ‘Start – Settings – Control Panel’ and double-click on the
‘Add/Remove Programs’ icon.
3. Find all the programs for similar, old devices and remove these by clicking on
the ‘Add/Remove’ button. When in the ‘Safe Mode’, it is possible for some
programs to appear twice. In that case, remove the duplicates as well.
4. Restart the computer.
!

TRUST 380 USB 2.0 SPACEC@M
2
4.2 Installation in Windows 98 / Windows ME / Windows
2000 / Windows XP
Note: The latest driver can be downloaded from
www.trust.com/13497/download. Check whether a new driver is available
and if so, use this for the installation.
Note: Make sure all other programs are closed during the installation.
Note: During installation in Windows XP, you may receive a message saying
that the driver has not been signed. This does not cause a problem for
the functionality.
Note: For some versions of Windows, you may be requested to insert your
Windows CD-ROM into your CD-ROM drive.
Note: In the example, ‘D:\’ is used to indicate the CD-ROM drive. This may be
different for your computer.
1. Insert the CD-ROM into your computer’s CD-ROM drive. The installation
program will start automatically. If it does not start automatically, do the
following:
a) Select 'Run' from the Windows ‘Start’ menu.
b) Type [D:\SETUP.EXE] and click on 'OK' to start the Trust Software
Installer.
2. The Trust installation window will appear. See figure 1.
3. Select the language you want to use during the installation.
4. Click on ‘Install driver‘ to start the installation of the camera.
5. Follow the on-screen instructions.
6. Click on “Finish” to complete the installation.
4.3 Connecting
Note: If you do not have a USB 2.0 port on your computer, then there is no
problem with connecting it to your USB 1.0 port. What you will then get is
a message saying that you have connected a high-speed device to a
low-speed USB port. This has no effect on the correct functioning of the
device, but you will however not benefit from the advantages of USB 2.0.
1. Make sure your computer is turned on.
2. Connect the camera to your USB 2.0 port or USB 1.0 port. You can tell
whether it is USB 2.0 by the USB symbol, which has a “+” above it.
3. Windows will detect the camera.Follow the on-screen instructions.
4.4 Checks after installation
After installing the device and the driver, the following are installed on your computer
and can be checked:
‘Start – Settings – Control Panel’. Double-click on the ‘System’ icon and select the
‘Device Manager’ tab.
- Imaging Device – TRUST 380 USB2 SPACEC@M
‘Start – Settings – Control Panel’ and then double-click on the ‘Add/Remove
Programs icon.
- TRUST 380 USB2 SPACEC@M
Note: The information given above will vary if the installation has been altered
by the user (for example, not everything has been installed or locations
other than the default locations have been selected).
Note: Differences may also occur as a result of using new drivers available on
the Internet.
Note: The location or name of the ‘Control Panel’ may vary for different
operating systems.

TRUST 380 USB 2.0 SPACEC@M
3
UK
5 Installing the application software
Note: Make sure all other programs are closed during the installation.
Note: In the example, ‘D:\’ is used to indicate the CD-ROM drive. This may be
different for your computer.
5.1 TeVeo Vidio Suite
1. Insert the CD-ROM into your CD-ROM drive. The installation program will
start automatically. If it does not start automatically, do the following:
a). Select 'Run' from the Start menu.
b). Type [D:\SETUP.EXE] and click on 'OK' to start the Trust Software
Installer.
2. Figure 1 will appear.
3. Choose the language that you want the Trust installation screen to be
displayed in.
4. Click on “TeVeo Vidio Suite”.
5. Follow the on-screen instructions. Click on ‘Finish’ to complete the
installation.
5.2 Honestech Camera Plus
1. Follow steps 1 through 3 from chapter 5.1.
2. Select ‘Camera Plus’.
3. Follow the on-screen instructions.
4. Click on ‘Finish’ to complete the installation.
5.3 Installing Microsoft ® NetMeeting (Windows 98/
Windows ME/ Windows 2000)
NetMeeting is a program that is supplied with Windows 98 / Windows ME / Windows
2000. With this program, you can use the Trust 380 USB 2.0 SPACEC@M Portable
as a webcam.
NetMeeting is installed as follows:
1. Click on the ‘Start’ button in the bottom left-hand corner of your desktop.
Point to Programs -> Accessories -> Internet Tools (select ‘Communications’
in Windows 2000) and left click on NetMeeting.
2. Click “Next” to continue.
3. Fill in your details, such as your first name, your surname, your e-mail
address, your country and a comment that you would like to be displayed in
the list. Click on ‘Next’
4. If you do not want to be displayed in the NetMeeting list, select 'Do not list my
name in the directory'. Click on ‘Next’ to continue with the installation. Follow
the on-screen instructions.
5. You must select a camera during the installation. Select the Trust 380 USB
2.0 SPACEC@M Portable as the camera you wish to use for NetMeeting and
click on “Next” to continue.
6. Select “Put a shortcut to NetMeeting on my desktop” if you want to have a
shortcut to NetMeeting on your desktop.
Select “Put a shortcut to NetMeeting on My Quick Launch bar” if you wish to
have a shortcut to NetMeeting on your Windows taskbar. You do not have to
select either option if you do not wish to.
7. Click on ‘Next’ to continue with the installation. Follow the on-screen
instructions to configure the audio and image settings.
8. At the end of the installation process, click on ‘Finish’ to complete the
installation of NetMeeting. NetMeeting will now start automatically.
If you are not able to test or configure your audio settings properly, check whether
the sound card and the devices satisfy the system requirements for NetMeeting
and/or whether these have been correctly connected and installed.

TRUST 380 USB 2.0 SPACEC@M
4
5.4 Installing Microsoft ® NetMeeting (Windows XP)
NetMeeting is installed as follows in Windows XP.
1. Click on the 'Start' button in the bottom left-hand corner of your taskbar.
2. Select 'Run'.
3. Type in: conf
4. The NetMeeting Wizard will appear after approximately 30 seconds.
5. Follow the on-screen instructions to install the program.
5.5 Installing Windows Messenger (Windows XP)
Windows Messenger is already installed in the Windows XP operating system. You
can select Windows Messenger from the ‘Start’ menu to start the program. Follow
the instructions to input your personal settings.
Once the program has been installed, you can connect the Trust 380 USB 2.0
SPACEC@M to your computer and download recordings.
6 Using the camera
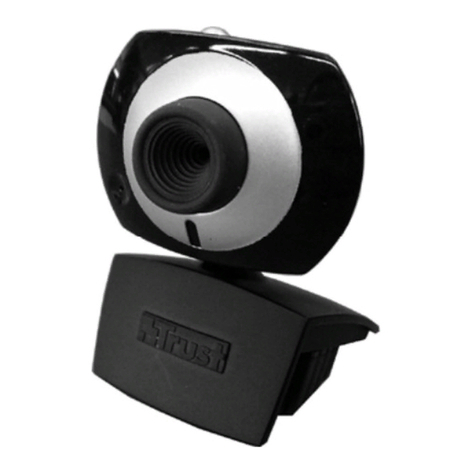
The camera has a button, an indicator and a rubber foot. This chapter explains what
these components are for.
6.1 USB 2.0 WEBCAM
Because this camera is a USB 2.0 camera, it can provide 30 video frames per
second at the highest resolution of 640 x 480. The USB 2.0 connection ensures the
best possible USB performance without slowing other USB devices down.
Note: The webcam will also run on a USB 1.0 port, but then without the
advantages of USB 2.0.
6.2 Focus
Focusing is done manually by twisting the lens (A) to get a sharp picture. See
figure 2.
6.3 Snapshot button
A photograph can be taken using the snapshot button (B, figure 2).
Click once on this button to take a photograph of the image.
6.4 Indicator
The indicator next to the focus (C, figure 2) lights up when the camera is in use.
6.5 Rubber foot
The rubber foot (D, figure 2) at the front of the camera is not only for cosmetic
purposes but also helps provide a steadier placement of the camera.
7 Using the Application Software
This chapter explains the principal components of the application software provided.
For more information, refer to the Help functions of the application software.
7.1 AMCAP
There is a simple PC camera program on the Trust installation CD-ROM. This lets
you make and store a video clip easily. To make and store a video, proceed as
follows:
1. Insert the CD-ROM into your CD-ROM drive. The installation program will
start automatically. If it does not start automatically, carry out the following:
a). Select 'Run' from the Start menu.
b). Type [D:\SETUP.EXE] and click on 'OK' to start the Trust Software
Installer.
2. Figure 1 will appear.
3. Choose the language that you want the Trust installation screen to be
displayed in.
4. Click on “Start AMCAP”.
5. A new window will appear.
6. Open the ‘Options’ window from the menu bar. Select the ‘Preview’ option.

TRUST 380 USB 2.0 SPACEC@M
5
UK
7. The image being seen by the webcam appears in the window.
8. Now choose the option ‘Set capture file’ from the ‘File’ menu.
9. Give a location and a name for the video you are going to make. You must
always put a ‘.AVI’ after the name, otherwise the video clip won’t work.
10. Give a maximum size for the video clip in MB. Click on 'OK'.
11. Select ‘Capture’ from the menu bar. Select ‘Start capture’.
12. Click on 'OK'. Recording will start. Go to ‘Capture’ again to stop the recording,
using ‘Stop capture’.
13. Now that the recording has been stopped, you can close ‘AMCAP’.
14. Go to the location where you have saved the video clip and double click on
the file to play it through using your standard media player.
7.2 Teveo Vidio Suite
Teveo Vidio Suite is a program that you can use to make and store videos easily and
publish them on the Internet. Teveo Vidio Suite consists of three components:
Clipstore, Jukebox and Live, all three of which are discussed below. The Teveo
software also gives you the possibility of registering. After you have registered, you
can use your username and password, giving you more possibilities with the Teveo
Clipstore and Live software. You can also log in on the Teveo site and make use of
Teveo’s services. For a description of the services, the reader is referred to Teveo’s
site and the help functions of the Teveo software.
Note: If you do not have an Internet connection and do not register on the
Teveo Internet site, then you cannot make full use of the Teveo
software and services on the Teveo site.
Note: If you want to know more about the Teveo software than is covered in
this chapter, then please consult the extensive help functionality of the
Teveo software. The help functionality is available in all three of the
components. Click on the question mark in the top right of the window
concerned.
7.2.1 Registering with Teveo for the first time
When you register using the Teveo software, you can put clips on line on the Teveo
Internet site and send out live video on the Teveo site. If you do not register, you
cannot make use of the Clipstore and Live software.
1. Make sure your Internet connection is running.
2. Activate: “ Start – Programs – Teveo “. Here you should select “Teveo Vidio
Suite”. A window will appear as in figure 3.
3. Click on the button (C, figure 3) that has ‘Live’ written after it. A window will
appear as in figure 9.
4. After several minutes, a registration field will appear in the window in figure 9.
See figure 4.
5. Click on ‘NOW’ (A, figure 4) to register. If you do not want to register, click on
‘LATER’ (B, figure 4). However, you can then not make use of Teveo
Clipstore and Teveo Live. If you do want to register, then continue with the
following step.
6. When you click on ‘NOW’ (A, figure 4), a connection will be made with the
Teveo Internet registration site. This can take several minutes.
7. Fill in the information requested beneath the line “Are you new to Teveo?
Please register with the site.”.
8. You can input the following information here:
•Login name*; here you should enter the name which you can then log in
when using the Teveo software and other services.
Note: The username must contain at least 4 and at most 32
characters. It may also not contain any spaces; use an
underscore instead.

TRUST 380 USB 2.0 SPACEC@M
6
•First name*; give your first name here.
•Last name*; give your last name / surname here.
•E-mail address*; enter your e-mail address here (it will then be needed a
second time for confirmation).
Note: For it to work properly, you must enter a valid e-mail
address. Your password will be supplied to you at this
e-mail address after you have filled in this screen
completely. The password will also be re-sent to this
address if you forget it at a later date.
•Nickname; here you can also specify a name by which you want to be
known.
•Zip code / postcode; enter your postcode here.
•Gender; fill in your gender here.
•Age Group; fill in your age here.
•Income level; here you can state your income level.
Note: The required fields are marked with an asterisk.
9. To register the information that you have filled in, click on the button
‘REGISTER’ in the top right. This can take several minutes. Once you have
clicked on this button, your password will be sent to the e-mail address you
gave. A new window will appear.
10. You can enter a name for your TRUST 380 USB 2.0 SPACEC@M in the new
window that has appeared. At least 4 and at most 32 characters. Spaces are
not allowed here either.
11. Indicate whether you want to receive e-mail from people who are looking at
what your webcam is showing, with a ‘yes’ or ‘no’.
12. Say whether you want to use it as a public or a private camera.
•If you choose ‘Public’, anybody will be able to see what your webcam is
recording.
•If you choose ‘Private’, then a password that you define must be given
before someone can watch your webcam. If you have chosen ‘Private’,
you can think up a password (the Guest Password) and set it. This has to
be confirmed by entering a second time.
13. After you have made one of these choices, a new window appears. This
window is a notification of your registration. Your username and password will
be sent by e-mail to the address you gave. You can give this username and
password when using the Teveo Clipstore and Live software.
14. Click on the “here” link in the new window to go to the login page and test
your username and password.
Note: Have a look at the Teveo website www.teveo.com or the help
functionality of the software if you want more information or support
concerning the Teveo software.
7.2.2 Teveo Clipstore – putting a video clip on line
1. Activate: “ Start – Programs – Teveo “. Here you should select “Teveo Vidio
Suite”. A window will appear as in figure 3.
2. Select ‘Clipstore’ (A, figure 3).
3. The wizard for placing a video clip on line on the Internet will be started up. A
window will appear as in figure 5.
4. Select the source “Capture from a webcam connected to your PC” (A,
figure 5).

TRUST 380 USB 2.0 SPACEC@M
7
UK
5. Now you can set the desired resolution using the configuration button (c,
figure 5). Click on ‘Apply’ and then on ‘OK’ to confirm the setting you have
made. You will then be returned to the window in figure 5.
6. If the picture being observed by the webcam flickers, then you should click on
the Properties button (D, figure 5). A window will appear containing a button
named ‘Cancel Flicker’.
7. Click once on this button. After that, click on ‘Apply’ and then on 'OK'. You will
then return to the window in figure 5.
8. Now click on the record button (B, figure 5). A recording will be started.
9. Click on the same button again (B, figure 5) to stop the recording.
10. Now click on the ‘Next’ button (E, figure 5). A window will appear as in
figure 6.
11. The video clip that you have made can be edited in this window. Use the
slider bar (C, figure 6) to select where you want the video clip to begin.
12. Now click on the ‘Set-in’ button (B, figure 6).
13. Then use the slider bar (C, figure 6) to select where you want the video clip to
finish.
14. Now click on the ‘Set-out’ button.
15. Then select a point in the slider bar that you would like to use as the sample
picture for the video clip (also known as the ‘Thumbnail’).
16. Now click on the ‘Set thumbnail’ button (E, figure 6).
17. The ‘Save as’ button (F, figure 6) can be used if necessary to store the video
clip.
18. Now click on the ‘Next’ button (G, figure 6). A window will appear as in
figure 7.
19. Indicate which Internet connection speed you would like the video clip to be
made available at on the Teveo site.
20. Fill in your Teveo username and password.
21. Click on the ‘Start upload’ button (E, figure 7).
7.2.3 Jukebox – video clip recording and playback
1. Activate: “ Start – Programs – Teveo “. Here you should select “Teveo Vidio
Suite”. A window will appear as in figure 3.
2. Select ‘Juke Box’ (B, figure 3).
3. The first time you use it, when no video clips have been added to the
Jukebox play list, the following message appears: ‘Nothing currently in the
Jukebox. Click the ‘Add’ button to put in a clip or a picture’.
4. Click on ‘OK’ to remove the message.
5. Two windows will appear, as in figures 8 and 9.
6. Click on the ‘Switch to live view’ button (A, figure 8) in the window in figure 7.
The image being registered by the webcam appears in the window in figure
9 (A).
7. Now click on the record button (B, figure 9) to start recording the video clip.
8. Click on the ‘Stop’ button (C, figure 9) to stop recording.
9. A standard Windows ‘Save As…” window will then appear. Enter a name for
the video clip and click on ‘Save’ or ‘Save As…’.
10. Then go back to the window in figure 8.
11. Click on the ‘+’ button (C, figure 8) to add the video clip to the Jukebox play
list.
12. Double-click on the desired video clip. The video clip will be added to the
Jukebox play list (B, figure 8).
13. To play a video clip back, click once on the video clip in the Jukebox play list
(B, figure 8).
14. Now click on the playback button (D, figure 9). The video clip will be played
back in the window (A, figure 9).

TRUST 380 USB 2.0 SPACEC@M
8
7.2.4 Live – live video transmission on the Internet
1. Activate: “ Start – Programs – Teveo “. Here you should select “Teveo Vidio
Suite”. A window will appear as in figure 3.
2. Select ‘Live’ (C, figure 3). Figure 9.2 will appear as a new window.
3. Click on the ‘Camera controls’ button (A, figure 10). A window will appear.
Click on the fourth button from the right in the bottom right of this window.
4. Your Internet browser program will be started up, showing the camera’s view
and an Internet address.
5. Copy this Internet address down exactly on a piece of paper.
6. It is now possible to use another computer to see what the webcam is
registering by accessing via this address, as long as the computer with the
Trust camera is switched on and connected to the Internet.
7. Switch any such computer on, make sure that it is connected to the Internet
and open the Internet browser.
8. Now give the address that you wrote down and press ‘Enter’ or ‘Return’ on
your keyboard.
9. The image that is being registered by the camera will now be displayed via
the Internet.
7.3 Honestech Camera Plus
You can use Camera Plus to edit video, send it via e-mail and use your computer for
security purposes. These actions will be explained later on in this chapter.
Note: If you want to know more about the Honestech software than is
covered in this chapter, then please consult the extensive help
functionality of the Honestech software. Start the help feature using
‘Start – Programs – Trust – 380 USB 2.0 SPACEC@M’. Here you can
click on the ‘Help Function for Camera Plus’ to open the help feature.
7.3.1 Making, editing and storing video clips
1. Activate: ‘Start – Programs – Trust – 380 USB 2.0 SPACEC@M – Camera
Plus’. A window will appear as in figure 11.
2. Click on the ‘Capture’ button (A, figure 11). A window will appear as in figure
12.
3. Click on the ‘Record’ button (A, figure 12). A standard Windows ‘Save’
window will appear. Enter the name you want to use for your video clip. Then
click on 'Save'.
4. You will then return to the window in figure 12. Recording has started. The
‘Record’ button (A, figure 12) has now changed into the ‘Stop’ button. You
can use this button to stop your recording at the desired moment.
5. When you stop the recording, a new window appears at the bottom of the
window from figure 12. See figure 13.
6. The video clip will then be displayed at the bottom of the window. The video
clip can now be played back, edited and sent via e-mail.
7. Click on the ‘Play’ button (A, figure 13) to play the video clip back unedited in
your standard Windows media player.
8. You can then close your media player and return to the window from
figure 12.
9. Click on the ‘Edit’ button (B, figure 13) to start editing the video clip. A window
will appear as in figure 14.
10. Use the slider bar (C, figure 14) to indicate the point where you want the
video clip to begin.
11. Confirm the starting point by clicking the ‘Mark in’ button (B, figure 14).
12. If you want to change the chosen starting point, then you should press the
‘Clear mark’ button (D, Figure 14) to delete the starting point. Repeat points
10 and 11.

TRUST 380 USB 2.0 SPACEC@M
9
UK
13. Use the slider bar (A, figure 14) to indicate the point where you want the
video clip to stop.
14. Confirm the chosen end point by clicking the ‘Mark out’ button (C, figure 14).
15. Click on the ‘Save’ button (E, figure 14) to store the changes.
16. The stored video clip has now been added to the bottom lists in the window
in figure 13.
17. You can change the appearance of the list using the ‘View’ button (D,
figure 13).
7.3.2 Sending a video clip by e-mail
Note: If you do not have an e-mail program and Internet connection, you
cannot send a video clip by e-mail.
1. Select the video clip that you want to send by e-mail from the bottom list in
the window from figure 13.
2. Now click on the ‘E-mail’ button (C, figure 13).
3. You standard e-mail program as defined in Windows will now be started up
and the video clip will be linked to it.
4. Enter the addressee information and click on ‘Send ‘.
5. You e-mail with the video clip will be sent.
8 Using the camera with NetMeeting
Note: It is recommended that you connect a separate microphone to your
sound card so that you can make optimal use of NetMeeting’s audio
and video functions.
1. Make sure you have an Internet account installed and your speakers and
microphone are connected to your sound card before starting NetMeeting.
2. Start NetMeeting (Start -> Programs -> Accessories -> Internet Tools ->
NetMeeting).
3. Two windows will be opened, namely NetMeeting and your Dial-up
connection.
Note: The ‘Dial-up Connection’ window will NOT appear if you are already
connected to the Internet or if you connect to the Internet via an ADSL
or cable connection.
4. Fill in your user name and password and click on 'Connect' to connect to the
Internet.
5. Once a connection has been made with the Internet, only the NetMeeting
window will remain visible. The ‘Dial-up Connection’ window will disappear.
6. A number of settings need to be made just once.
Go to ‘Tools -> Options…’ and click on the ‘Video’ tab.
7. To prevent a mirror image of your camera, do not select
‘Show mirror image in preview video window’. Image settings, such as the
image size and quality, can also be changed in this window. Click on 'OK' to
save the new settings and return to the start window of NetMeeting. The
once-only settings have now been completed.
8. Click on 'View' in the NetMeeting window and select 'My Video (New
Window)'. An extra window ('My Video') will now be opened.
9. Click on the ‘Play’ button ( ) to turn on your current video image. The
person you make a NetMeeting connection with will also see this image.
10. You are now ready to make a NetMeeting connection. Click on NetMeeting’s
telephone book icon. A new window will appear.
11. Type an “ils server name” in the address bar. (For example: ils.worldonline.nl)
and click on the Enter button.
12. Double-click on a person in the list. A NetMeeting connection will be made.
The person may not want to make a connection with you, because this person may
be communicating with somebody else. If this is the case, select somebody else
from the list.

TRUST 380 USB 2.0 SPACEC@M
10
You can find other ILS server addresses on the Internet.
For more information or solutions to problems, click on ‘Help’ in NetMeeting’s start
window. This contains a description of all the functions available with NetMeeting.
A number of example informational sites about webcams include:
http://www.cameradas.com.
http://www.teveo.com.
From these sites, you can download software that you can use to send live video
images over the Internet.
Please refer to the sites concerned for information on how to install and use the
software.
9 Removing the camera driver
The camera driver can be removed as follows:
1. Activate: ‘Start – Settings – Control Panel’ and then double-clicking on the
‘Add/Remove Programs’ icon.
2. Here you should select the “TRUST 380 USB 2.0 SPACEC@M“.
3. Now click on the ‘Delete’ button.
4. Follow the steps that appear on your screen to remove the camera correctly.
10 Troubleshooting
Method
1. Read the solutions given below.
2. Check for up-to-date FAQs, drivers and instruction
manuals on the Internet www.trust.com/13497
Problem Cause Possible solution
The computer
locks up when
using the USB
connection.
The USB port has
shared an IRQ with
another device.
Remove cards from your computer
or allocate them differently. See
your Windows and/or PC
instruction manual for more
information.
The camera has not
been connected to
the USB port.
Connect the camera to a USB port
The camera has
been connected to a
USB hub that does
not have its own
power supply.
Connect the camera to a USB hub
that has its own power supply or to
a USB port on your computer.
Error message
‘Capture device
was not detected’
is displayed.
Camera has not
been selected in the
application.
Select a camera in the application
concerned.
Another application
is open and is using
the camera image.
Close the other application first
before starting the test program.
The camera does
not give an image
in the application.
The camera has not
been correctly
connected to the
USB port.
Connect the camera correctly to
the USB port.
Windows does not
detect a new
The computer's USB
port is not working.
Use the following Internet site to
check the USB port:
!

TRUST 380 USB 2.0 SPACEC@M
11
UK
device after
connecting the
camera.
www.trust.com/customercare/help/
usb
Image moves
slowly (refresh rate
is too low)
Refresh rate is not
set to its maximum.
Check the webcam settings for the
application concerned.
Picture is fuzzy. Focus is not set
correctly.
Adjust the focus by twisting the
lens round.
Use the software to define the
lighting as being 220V / 50 Hz.
Picture is unstable
– there is a wavy
pattern moving
through it.
The lighting is
affecting the
recording. Reduce the camera’s refresh rate.
An old version of
DirectX is installed.
Download the latest version of
DirectX from www.microsoft.com.
Set your VGA card to a lower
resolution and colour depth. For
example: 800 x 600 / 16-bit colour.
A live recording
gives a displaced
image and the
wrong colours. It is also possible
that there is not
enough memory for
the video overlay if
too high a VGA
resolution is used
(e.g. 1600x1200).
Updating your VGA driver may also
solve the problem.
Are drivers
available for
Windows 95 and
Windows NT?
No, these are not
available.
Windows 95 and Windows NT do
not fully support USB.
What program
should be used for
video
conferencing?
Use NetMeeting
from Microsoft.
Go to
www.microsoft.com/netmeeting
and download the program.
How do you install
the camera in
Windows XP?
The driver for
Windows XP is
included on the CD-
ROM.
The driver on the CD-ROM is
suitable for installing the camera in
Windows 98, Windows ME,
Windows 2000 and Windows XP
(see chapter 4.2).
Check out our website for the latest
driver (www.trust.com/13497).
The problem is not
listed here.
Check the Internet
for the latest update
of the camera
Troubleshooter.
Go to:
www.trust.com/customercare/help/
camera or www.trust.com/13497
If you still have problems after trying these solutions, please contact one of the Trust
Customer Care Centers. You can find more information on the back of this
instruction manual. Please have the following information available:
•The item number. This is 13497;
•A good description of what does not work;
•A good description of when the problem occurs.

TRUST 380 USB 2.0 SPACEC@M
12
11 Warranty conditions
-Our products have a two-year manufacturer's warranty, which is effective from the
date of purchase.
-If there is a fault, return the product to your dealer and include an explanation of
the fault, the proof of purchase and all the accessories.
-During the warranty period, you will receive a similar model from the dealer, if one
is available. If no similar product is available, your product will be repaired.
-Please contact our help desk for missing components, such as the instruction
manual, software or other components.
-The warranty becomes invalid if the product is opened, if there is mechanical
damage, if the product has been misused, if alterations have been made to the
product, if the product has been repaired by a third party, in the case of
negligence or if the product has been used for a purpose other than that originally
intended.
-Excluded from the warranty:
•Damage caused by accidents or disasters, such as fire, flood, earthquakes,
war, vandalism or theft.
•Incompatibility with other hardware/software which is not stated in the minimum
system requirements.
•Accessories such as batteries and fuses (where applicable).
-Under no circumstances will the manufacturer be held responsible for any
incidental or consequential damage, including the loss of income or other
commercial losses resulting from the use of this product.
This manual suits for next models
1
Table of contents
Other Trust Webcam manuals

Trust
Trust 16175 User manual

Trust
Trust WB-6300R User manual

Trust
Trust 15562 User manual

Trust
Trust Webcam User manual

Trust
Trust WB-5600R User manual

Trust
Trust 31029 User manual

Trust
Trust WB-1200P User manual

Trust
Trust 15227 User manual

Trust
Trust WB-1400T User manual

Trust
Trust SPEEDLINK 485A User manual
Popular Webcam manuals by other brands

GE
GE UltraCamTM HQ98073 user manual

Logitech
Logitech 960-000247 - Quickcam Communicate Deluxe Web... Installation

Cyber Acoustics
Cyber Acoustics Essential 1080HD-AF quick start guide

Rocket Fish
Rocket Fish RF-WEB2C Setup guide

Tripp Lite
Tripp Lite AWC-002 quick start guide

Rocket Fish
Rocket Fish RF-NBCAM Guía del usuario