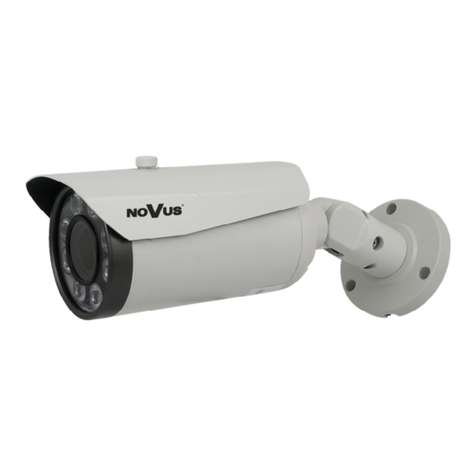
TruVision TVB-5412 Instruction sheet

TruVision ANPR IP
Camera Configuration
Manual
P/N 1073573-EN • REV B • ISS 01JUN21

Copyright
©
2021 Carrier. All rights reserved.
Specifications subject to change without
prior notice
.
This document may not be copied in whole or in part or otherwise
reproduced without prior written consent from
Carrier, except where
specifically permitted under US and international copyright law.
Trademarks and
patents
TruVision
names and logos are a product brand of Aritech, a part of Carrier
.
Other trade names used in this document may be trademarks or registered
trademarks of the manufacturers or vendors of the respective products.
Contact i
nformation
EMEA:
https://firesecurityproducts.com
Australian/New Zealand:
https://firesecurityproducts.com.au/
Product
documentation
Please consult the following web link to retrieve the electronic version of the
product documentation.
The manuals are available in several languages.

TruVision ANPR IP Camera Configuration Manual i
Content
Important information iii
Limitation of liability iii
Product Warnings iii
Warranty Disclaimers iv
Intended Use v
Advisory messages v
Introduction 7
Network access 8
Check your web browser security level 8
Activating the camera 9
Overview of the camera web browser 11
Configuration overview 13
Configuration menu overview 13
Local configuration 16
System settings 18
Basic information 18
Time settings 19
RS-485 settings 20
Maintenance and firmware upgrade 21
About 24
Security settings 25
RTSP authentication 25
IP address filter 25
MAC address filter 26
Security service 27
User settings 28
Network settings 32
TCP/IP parameters 32
DDNS parameters 33
PPPoE parameters 34
Port parameters 34
NAT parameters 35
SNMP parameters 35
FTP parameters 36
Email parameters 36
HTTP parameters 38
QoS parameters 39
802.1x parameters 39

ii TruVision ANPR IP Camera Configuration Manual
Integration protocol 40
Video and audio parameters 41
Image settings 46
Display settings 46
OSD (On Screen Display) 51
Privacy masks 53
Picture overlay 54
Alarm/event settings 56
Video tampering 61
Alarm inputs and outputs 62
Exception alarms 63
Storage settings 65
Recording schedule 65
Snapshots67
HDD management 69
NAS settings 70
Road traffic settings 71
Detection configuration 71
Picture overlay 73
Camera 74
Black and white lists 75
Real-time LPR results 77
Wiegand 78
Camera operation 79
Log on and off 79
Live view mode 79
Play back recorded video 80
Search snapshots and video clips 82
Search event logs 83
Index 86

TruVision ANPR IP Camera Configuration Manual iii
Important information
Limitation of liability
To the maximum extent permitted by applicable law, in no event will Carrier be liable for
any lost profits or business opportunities, loss of use, business interruption, loss of
data, or any other indirect, special, incidental, or consequential damages under any
theory of liability, whether based in contract, tort, negligence, product liability, or
otherwise. Because some jurisdictions do not allow the exclusion or limitation of liability
for consequential or incidental damages the preceding limitation may not apply to you.
In any event the total liability of Carrier shall not exceed the purchase price of the
product. The foregoing limitation will apply to the maximum extent permitted by
applicable law, regardless of whether Carrier has been advised of the possibility of such
damages and regardless of whether any remedy fails of its essential purpose.
Installation in accordance with this manual, applicable codes, and the instructions of the
authority having jurisdiction is mandatory.
While every precaution has been taken during the preparation of this manual to ensure
the accuracy of its contents, Carrier assumes no responsibility for errors or omissions.
Product Warnings
YOU UNDERSTAND THAT A PROPERLY INSTALLED AND MAINTAINED
ALARM/SECURITY SYSTEM MAY ONLY REDUCE THE RISK OF EVENTS SUCH AS
BURGLARY, ROBBERY, FIRE, OR SIMILAR EVENTS WITHOUT WARNING, BUT IT
IS NOT INSURANCE OR A GUARANTEE THAT SUCH EVENTS WILL NOT OCCUR
OR THAT THERE WILL BE NO DEATH, PERSONAL INJURY, AND/OR PROPERTY
DAMAGE AS A RESULT.
THE ABILITY OF CARRIER PRODUCTS, SOFTWARE OR SERVICES TO WORK
PROPERLY DEPENDS ON A NUMBER OF PRODUCTS AND SERVICES MADE
AVAILABLE BY THIRD PARTIES OVER WHICH CARRIER HAS NO CONTROL AND
FOR WHICH CARRIER SHALL NOT BE RESPONSIBLE INCLUDING, BUT NOT
LIMITED TO, INTERNET, CELLULAR AND LANDLINE CONNECTIVITY; MOBILE
DEVICE AND OPERATING SYSTEM COMPATIBILITY; MONITORING SERVICES;
ELECTROMAGNETIC OR OTHER INTERFERENCE, AND PROPER INSTALLATION
AND MAINTENANCE OF AUTHORIZED PRODUCTS (INCLUDING ALARM OR
OTHER CONTROL PANEL AND SENSORS).
ANY PRODUCT, SOFTWARE, SERVICE OR OTHER OFFERING MANUFACTURED,
SOLD OR LICENSED BY CARRIER, MAY BE HACKED, COMPROMISED AND/OR
CIRCUMVENTED AND CARRIER MAKES NO REPRESENTATION, WARRANTY,
COVENANT OR PROMISE THAT ITS PRODUCTS (INCLUDING SECURITY
PRODUCTS), SOFTWARE, SERVICES OR OTHER OFFERINGS WILL NOT BE
HACKED, COMPROMISED AND/OR CIRCUMVENTED.
CARRIER DOES NOT ENCRYPT COMMUNICATIONS BETWEEN ITS ALARM OR
OTHER CONTROL PANELS AND THEIR WIRELESS OUTPUTS/INPUTS INCLUDING
BUT NOT LIMITED TO, SENSORS OR DETECTORS UNLESS REQUIRED BY

iv TruVision ANPR IP Camera Configuration Manual
APPLICABLE LAW. AS A RESULT THESE COMMUNICATIONS MAY BE
INTERCEPTED AND COULD BE USED TO CIRCUMVENT YOUR ALARM/SECURITY
SYSTEM.
THE EQUIPMENT SHOULD ONLY BE OPERATED WITH AN APPROVED POWER
ADAPTER WITH INSULATED LIVE PINS.
DO NOT CONNECT TO A RECEPTACLE CONTROLLED BY A SWITCH.
THIS UNIT INCLUDES AN ALARM VERIFICATION FEATURE THAT WILL RESULT
IN A DELAY OF THE SYSTEM ALARM SIGNAL FROM THE INDICATED CIRCUITS.
THE TOTAL DELAY (CONTROL UNIT PLUS SMOKE DETECTORS) SHALL NOT
EXCEED 60 SECONDS. NO OTHER SMOKE DETECTOR SHALL BE CONNECTED
TO THESE CIRCUITS UNLESS APPROVED BY THE LOCAL AUTHORITY HAVING
JURISDICTION.
WARNING! The equipment should only be operated with an approved power adapter
with insulated live pins.
Caution: Risk of explosion if battery is replaced by an incorrect type. Dispose of
batteries according to the instructions. Contact your supplier for replacement batteries.
Warranty Disclaimers
CARRIER HEREBY DISCLAIMS ALL WARRANTIES AND REPRESENTATIONS,
WHETHER EXPRESS, IMPLIED, STATUTORY OR OTHERWISE, INCLUDING ANY
IMPLIED WARRANTIES, THE WARRANTIES OF MERCHANTABILITY OR FITNESS
FOR A PARTICULAR PURPOSE.
(USA only) SOME STATES DO NOT ALLOW THE EXCLUSION OF IMPLIED
WARRANTIES, SO THE ABOVE EXCLUSION MAY NOT APPLY TO YOU. YOU MAY
ALSO HAVE OTHER LEGAL RIGHTS THAT VARY FROM STATE TO STATE.
CARRIER DOES NOT MAKE ANY CLAIMS OR WARRANTIES TO YOU OF ANY
KIND REGARDING ANY PRODUCT, SOFTWARE OR SERVICE’S POTENTIAL,
ABILITY, OR EFFECTIVENESS TO DETECT, MINIMIZE, OR IN ANYWAY PREVENT
DEATH, PERSONAL INJURY, PROPERTY DAMAGE, OR LOSS OF ANY KIND
WHATSOEVER.
CARRIER DOES NOT REPRESENT TO YOU THAT ANY PRODUCT (INCLUDING
SECURITY PRODUCTS), SOFTWARE, SERVICE OR OTHER OFFERING MAY NOT
BE HACKED, COMPROMISED AND/OR CIRCUMVENTED.
CARRIER DOES NOT WARRANT THAT ANY PRODUCT (INCLUDING SECURITY
PRODUCTS), SOFTWARE OR SERVICE MANUFACTURED, SOLD OR LICENSED
BY CARRIER WILL PREVENT, OR IN ALL CASES PROVIDE ADEQUATE WARNING
OF OR PROTECTION FROM, BREAK-INS, BURGLARY, ROBBERY, FIRE, OR
OTHERWISE.

TruVision ANPR IP Camera Configuration Manual v
CARRIER DOES NOT WARRANT TO YOU THAT ITS SOFTWARE OR PRODUCTS
WILL WORK PROPERLY IN ALL ENVIRONMENTS AND APPLICATIONS AND DOES
NOT WARRANT ANY PRODUCTS AGAINST HARMFUL ELECTROMAGNETIC
INTERFERENCE INDUCTION OR RADIATION (EMI, RFI, ETC.) EMITTED FROM
EXTERNAL SOURCES
CARRIER DOES NOT PROVIDE MONITORING SERVICES FOR YOUR
ALARM/SECURITY SYSTEM (“MONITORING SERVICES”). IF YOU ELECT TO HAVE
MONITORING SERVICES YOU MUST OBTAIN SUCH SERVICE FROM A THIRD
PARTY AND CARRIER MAKES NO REPRESENTATION OR WARRANTY WITH
RESPECT TO SUCH SERVICES INCLUDING WHETHER OR NOT THEY WILL BE
COMPATIBLE WITH THE PRODUCTS, SOFTWARE OR SERVICES
MANUFACTURED, SOLD OR LICENSED BY CARRIER.
Intended Use
Use this product only for the purpose it was designed for; refer to the data sheet and
user documentation. For the latest product information, contact your local supplier or
visit us online at firesecurityproducts.com.
The system should be checked by a qualified technician at least every 3 years and the
backup battery replaced as required.
Advisory messages
Advisory messages alert you to conditions or practices that can cause unwanted
results. The advisory messages used in this document are shown and described below.
WARNING: Warning messages advise you of hazards that could result in injury or loss
of life. They tell you which actions to take or to avoid in order to prevent the injury or
loss of life.
Caution: Caution messages advise you of possible equipment damage. They tell you
which actions to take or to avoid in order to prevent the damage.
Note: Note messages advise you of the possible loss of time or effort. They describe
how to avoid the loss. Notes are also used to point out important information that you
should read.


TruVision ANPR IP Camera Configuration Manual 7
Introduction
This is the configuration manual for the following TruVision IP camera models:
TVB-5412 (2 MP ANPR IP camera, 2.8 to 12 mm)
TVB-5413 (2 MP ANPR IP camera, 8 to 32 mm)

8 TruVision ANPR IP Camera Configuration Manual
Network access
This manual explains how to configure the camera over the network with a web
browser.
TruVision IP cameras can be configured and controlled using Microsoft Internet
Explorer (IE) and other browsers. The procedures described use Microsoft Internet
Explorer (IE) web browser.
Check your web browser security level
When using the web browser interface, you can install ActiveX controls to connect and
view video using Internet Explorer. However, you cannot download data, such as video
and images due to the increased security measure. Consequently, you should check
the security level of your PC so that you are able to interact with the cameras over the
web and, if necessary, modify the Active X settings.
Configure IE ActiveX controls
You should confirm the ActiveX settings of your web browser.
To change the web browser’s security level:
1. In Internet Explorer, click Internet Options on the Tools menu.
2. On the Security tab, click the zone to which you want to assign a web site under
“Select a web content zone to specify its security settings”.
3. Click Custom Level.
4. Change the ActiveX controls and plug-ins options that are signed or marked as
safe to enable. Change the ActiveX controls and plug-ins options that are
unsigned to Prompt or Disable. Click OK.
- Or -
Under Reset Custom Settings, click the security level for the whole zone in the
Reset To box, and select Medium. Click Reset.
Then click OK to the Internet Options Security tab window.
5. Click Apply in the Internet Options Security tab window.
Windows users
Internet Explorer operating systems have increased security measures to protect your
PC from any malicious software being installed.
To have complete functionality of the web browser interface with Windows 7, 8 and 10,
do the following:
• Run the browser interface as an administrator in your workstation
• Add the camera’s IP address to your browser’s list of trusted sites

TruVision ANPR IP Camera Configuration Manual 9
To add the camera’s IP address to Internet Explorer’s list of trusted sites:
1. Open Internet Explorer.
2. Click Tools, and then Internet Options.
3. Click the Security tab and then select the trusted sites icon.
4. Click the Sites button.
5. Clear the “Require server verification (https:) for all sites in this zone box”.
6. Enter the IP address in the “Add this website to the zone” field.
7. Click Add, and then click Close.
8. Click OK in the Internet Options dialog window.
9. Connect to the camera for full browser functionality.
Activating the camera
When you first start up the camera, the Activation window appears. You must define a
high-security admin password before you can access the camera. There is no default
password provided.
You can activate a password via a web browser and via TruVision Device Manager
(included on the CD to find the IP address of the camera).
Activation via the web browser:
1. Power on the camera and connect the camera to the network.
2. Input the IP address into the address bar of the web browser and click Enter to
enter the Activation window.
Note:
The default IP address of the camera is 192.168.1.70.
For the camera to enable DHCP by default, you must activate the camera via
TruVision Device Manager. Please refer to the following section, “Activation via
TruVision Device Manager”, below.
3. Enter the password in the password field. The default user name is admin.
Note: A valid password range must be between 8 and 16 characters. You can use a
combination of numbers, lower- and upper-case letters, and special characters : _ - ,
. * & @ / $ ? Space. The password must contain characters from at least two of
these groups. We also recommend that you reset your password regularly. For high
security systems, it is particularly recommended to reset the password monthly or
weekly for better protection.
4. Confirm the password.
5. Click OK to save the password and enter the live view window.

10 TruVision ANPR IP Camera Configuration Manual
Activation via TruVision Device Manager:
1. Run the TruVision Device Manager to search for online devices.
2. Select the device status from the device list, and then select the inactive device.
3. Enter the password in the password field and confirm it.
Note: A valid password range must be between 8 and 16 characters. You can use a
combination of numbers, lower- and upper-case letters, and special characters : _ - ,
. * & @ / $ ? Space. The password must contain characters from at least two of
these groups. We also recommend that you reset your password regularly. For high
security systems, it is particularly recommended to reset the password monthly or
weekly for better protection.
4. Click OK to save the password.
A pop-up window appears to confirm activation. If activation fails, confirm that the
password meets the requirements and try again.
5. Change the device IP address to the same subnet with your computer by either
modifying the IP address manually or selecting the check box of Enable DHCP.
6. Input the password and click the Save button to activate your IP address
modification.

TruVision ANPR IP Camera Configuration Manual 11
Overview of the camera web browser
The camera web browser lets you view, record, and play back recorded videos as well
as manage the camera from any PC with Internet access. The browser’s easy-to-use
controls give you quick access to all camera functions. See Figure 1 below.
If there is more than one camera connected over the network, open a separate web
browser window for each individual camera.
Figure 1: Overview of the browser windows
Name
Description
1. Menu toolbar Live view: Click to view live video. See “Live view mode” on
page 79 for further information.
Playback: Click to play back video. See “Play back recorded
video” on page 80 for further information.
Picture: Click to search for snapshot and video clip files to
download for archiving. See “Search snapshots and video
clips” on page 82 for further information.
Log: Click to search for event logs. There are three main
types: Alarm, Exception, and Operation. See “Search event
logs” on page 83 for further information.
Configuration: Click to display the configuration window for
setting up the camera.

12 TruVision ANPR IP Camera Configuration Manual
Name
Description
Admin: Displays the current user logged on.
Help: Click to access the camera’s built-in help.
Logout: Click to log out from the system. This can be done at
any time.
2. Search panel Enter date and time of files to search.
3. Viewer View live or playback video depending on the menu chosen.
Time, date and camera name are displayed here.
4. Live View/Playback toolbar Click the buttons to control the live view or play back. See
“Camera operation” on page 79 for more information.
5. Configuration panel Click to select a camera menu to configure. See
“Configuration” on page 13 for further information.
6. Configuration parameters
setup Enter the camera parameters.

TruVision ANPR IP Camera Configuration Manual 13
Configuration overview
This chapter explains how to configure the cameras through a web browser.
Once the camera hardware has been installed, configure the camera’s settings through
the web browser. You must have administrator rights in order to configure the cameras
over the internet.
The camera web browser lets you configure the camera remotely using your PC. Web
browser options may vary depending on camera model.
There are two main menus in the configuration panel:
Local configuration
Configuration
Configuration menu overview
Use the Configuration panel to configure the network, camera settings, alarms, users,
road traffic, and other parameters such as upgrading the firmware. See Figure 2 below
for descriptions of the configuration menus available.

14 TruVision ANPR IP Camera Configuration Manual
Figure 2: Structure of the Configuration menu
video
Configuration menus Description
1. Local configuration Defines the protocol type, live view performance and local
storage paths for your web browser. See “Local configuration”
ono page 16 for further information on the setup.
2. Camera configuration Defines the camera parameters. See below for further
information on the different groups of parameters that can be
defined.
3.
System
Defines device basic information including SN and the current
firmware version, time settings, maintenance, and serial port
parameters. See “System settings” on page 18 for further
information.
4.
Security
Defines who can use the camera, their passwords and access
privileges, RTSP authentication
, IP address filter, and preventing
illegal logins. See “Security settings”on page 25 for further
information.
5.
Network
Defines the network parameters required to access the camera
over the network. See “Network settings” on page 32 for further
information.

TruVision ANPR IP Camera Configuration Manual 15
Configuration menus Description
6.
Video/Audio
Defines the video and audio recording parameters
as well as the
RoI. See “Video/audio settings” on page 41 for further
information.
7.
Image
Defines the image parameters, OSD settings, overlay text, and
privacy mask. See “Image settings” on page 46 for further
information.
8.
Alarm/
Event Defines motion detection, video tampering, alarm input/output,
and exception. See “Alarm /event settings” on page 56 for
further information.
9.
Storage
Defines recording schedule, storage management, NAS
configuration, and snapshot parameters. See “Storage settings”
on page 65 for further information.
10.
Road Traffic
Defines vehicle license plate detection, black and white lists,
real-time LPR results, and Wiegand. Wiegand is a serial data
communication for access control. See “Road traffic settings” on
page 71 for further information.

16 TruVision ANPR IP Camera Configuration Manual
Local configuration
Use the Local Configuration menu to manage the protocol type, live view performance
and local storage paths for your web browser. In the Configuration panel, click Browser
Configuration to display the local configuration window. See Figure 3 below for
descriptions of the different menu parameters.
Figure 3: Example of the Local configuration window
Live View Parameters
1.
Protocol
Specifies the network protocol used.
Options include: TCP, UDP, MULTICAST and HTTP.
2.
Latency
Specifies the transmission speed.
Options include: Shortest Delay, Auto or Fluent.
3.
Enable Meta Data
Overlay It refers to the rules on your local browser. Specify whether to
display the colored marks when motion detection, face
detection, and intrusion detection are triggered. For example,
when the rules option is enabled and a face is detected, the
face will be marked with a green rectangle in live view.
4.
Snapshot
Image Format Choose the image format for a snapshot: JPEG or BMP.
Record File Settings
5.
Video File Size
Specifies the maximum file size.
Options include: 256 MB, 512 MB and 1G.
6.
Save Videos in Live View to
Specifies the directory for recorded files.
7.
Save
Downloaded Files to Specifies the directory for downloaded files.
Picture and Clip Settings
8.
Save
Snapshots In Live View
To
Specifies the directory for saving snapshots in live view mode.

TruVision ANPR IP Camera Configuration Manual 17
9.
Save
Snapshots during
Playback To
Specifies the directory for saving snapshots in playback mode.
10.
Save Clips
during Playback to Specifies the directory for saving video clips in playback mode.

18 TruVision ANPR IP Camera Configuration Manual
System settings
Under the camera configuration menu, system configuration allows you to configure
system-wide settings like date and time and perform maintenance operations such as
firmware upgrade, configuration import/export, and rebooting the camera.
Basic information
This section displays the following information:
Device name Plugin version
Device number Number of channels
Camera model Number of HDDs
Serial number Number of alarm inputs
Firmware version Number of alarm outputs
Encoding version Firmware version property
Web version
Only the device name and device number can be changed (see Figure 4 on page 19).
All other information is read-only.
Note: The device number can also be changed under Road Traffic > Camera. See
page 74.
Other manuals for TVB-5412
1
This manual suits for next models
1
Table of contents
Other TruVision Security Camera manuals
TruVision
TruVision M Series User manual
TruVision
TruVision 7 Series User manual
TruVision
TruVision TVD-5711 User manual

TruVision
TruVision M Series User manual
TruVision
TruVision TVD-6102 User manual
TruVision
TruVision 6 IP Series User manual
TruVision
TruVision TVB-BB1 User manual
TruVision
TruVision TVB-5412 User manual
TruVision
TruVision TVS-5101 Instruction sheet
TruVision
TruVision M Series User manual


