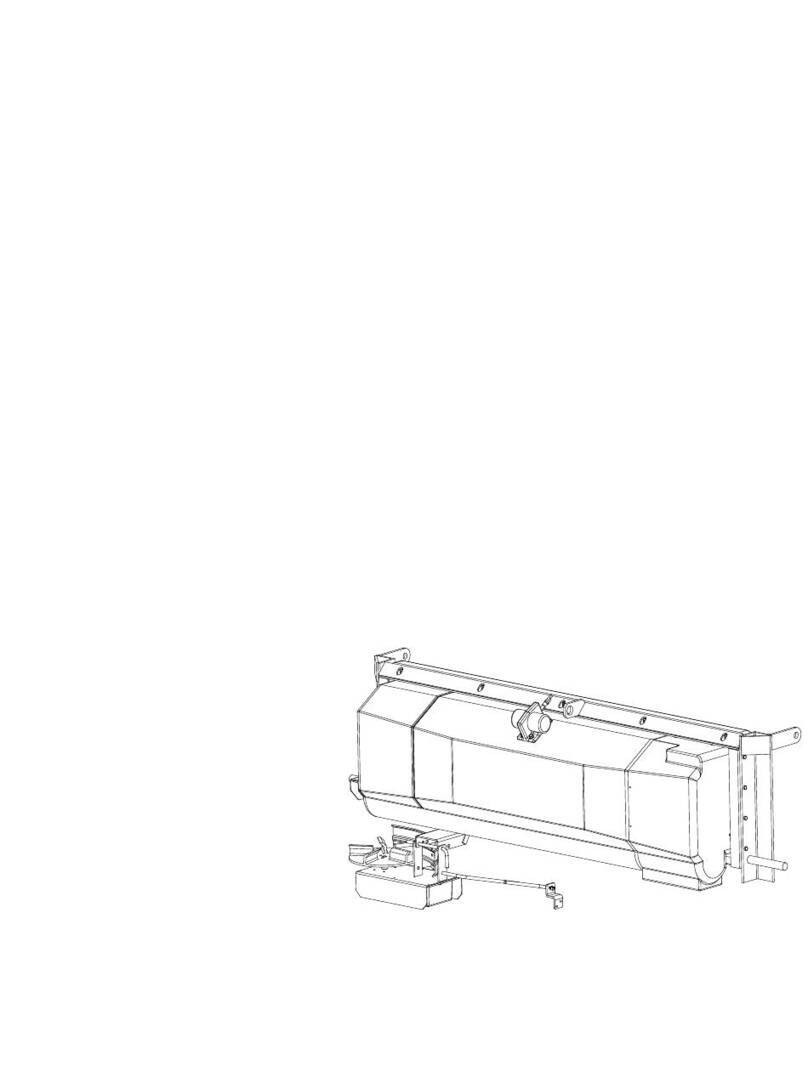
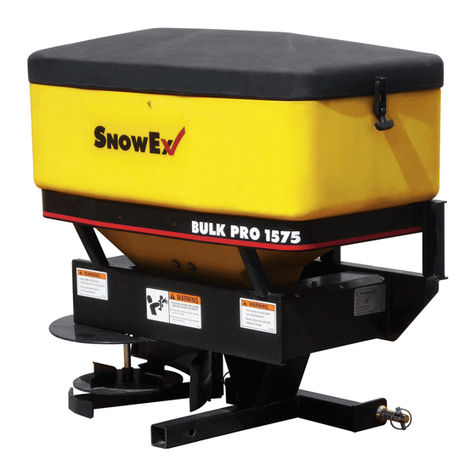
Trynex SnowEx PWX-200 User manual

1© TrynEx International 2013
(REV C) F50766
Madison Heights, Michigan 48071
800-SALTERS
www.snowexproducts.com
CUSTOMER COPY
This Manual Must Be Read Before Operating The Equipment
Owner / Operator’s Manual
PWX-200
Serial # 200959 and higher
PWX-250
Serial # 200959 and higher

© TrynEx International 2013 (REV C) F507662
Table of Contents
General Information ..................................................................................................................................................................................... 3
Introduction ................................................................................................................................................................................................. 4
Safety .......................................................................................................................................................................................................... 5
Wiring Installation Instructions .................................................................................................................................................................. 6-9
Tank and Pump Installation Instructions ................................................................................................................................................ 10-15
Operating and Maintaining the PWX ........................................................................................................................................................... 15
Harness Diagram ....................................................................................................................................................................................... 16
Troubleshooting ......................................................................................................................................................................................... 17
Warranty .................................................................................................................................................................................................... 18
Key to Parts ............................................................................................................................................................................................... 19
Tank Assembly Parts Breakdown
Model # PWX-200................................................................................................................................................................... 20-21
Model # PWX-250................................................................................................................................................................... 22-23
Pump Assembly Parts Breakdown
Model # PWX-200/PWX-250 .................................................................................................................................................. 24-25
Notes .................................................................................................................................................................................................... 26-27
Have a question or need assistance?
SnowEx Customer Care
(800) SALTERS
or (248) 586-3500
Monday through Friday 8:00 AM to 4:30 PM EST
Fax: (248) 691-8378
E-mail: customercare@trynexfactory.com
Website: www.snowexproducts.com

3© TrynEx International 2013 (REV C) F50766
General Information
CONGRATULATIONS!
The Pre-Wet System you have purchased is an example of snow and ice control technology at its nest! Your Pre-Wet System’s self-contained
design is a trademark of all SnowEx products. Here’s why…
SIMPLICITY: Fewer moving parts manufactured of higher quality means minimal maintenance for your SnowEx spreading system.
RELIABILITY: High impact linear low density polyethelyne tank. State-of-the-art electronic control, custom engineered powder coated frame;
found only on SnowEx products.
WARRANTY: Best in the industry, hands down! 2 years standard and now 5 year extended (optional).
The benets you are about to recognize are that of time, money and effort.
We welcome you to the world of SnowEx Performance.
Registration
Record the following information in this manual for quick reference.
Model Number
Serial Number
Date of Purchase
Dealer Where Purchased
200959
Serial No.
When ordering Parts, the above information is necessary. This will help to
see that you receive the correct parts.
Please register your system for warranty at your local SnowEx Dealer. This
will also give us a record so that any safety or service information can be
communicated to you.
The Serial Number can be found on the Tank Mounting Tube.

© TrynEx International 2013 (REV C) F507664
Introduction
This manual has been designed for your help. It will assist you and instruct you on the proper set-up, installation and use of this spreader.
Refer to the table of contents for an outline of this manual.
We require that you read and understand the contents of this manual completely (especially all safety information) before attempting any
procedure contained herein.
THIS SIGN SHOULD ALERT YOU:
The Society of Automotive Engineers has adopted this SAFETY ALERT SYMBOL to pinpoint characteristics
that, if NOT carefully followed, can create a safety hazard. When you see this symbol in this manual or on the
machine itself, BE ALERT! Your personal safety and the safety of others is involved.
Dened below are the SAFETY ALERT messages and how they will appear in this manual:
(RED)
Information that, if not carefully followed,
can cause death!
(ORANGE)
Information that, if not carefully followed,
can cause serious personal injury or death!
(YELLOW)
Information that, if not carefully followed,
can cause minor injury or damage to equipment

5© TrynEx International 2013 (REV C) F50766
Safety
Before attempting any procedure in this book, these safety instructions must be read and understood by all workers who have any part in the
preparation or use of this equipment.
For your safety warning and information decals have been placed on this product to remind the operator of safety precautions . If anything
happens to mark or destroy the decals, please request new ones from SnowEx.
Never exceed the Gross Vehicle Weight Rating of vehicle. Failure to do so may limit a vehicles handling
characteristics.
Never attempt to take a unit off a truck with material in it.
Always keep hands, feet, and clothing away from power driven parts.
Unit must be pinned and locked into position before operating vehicle.
Always shut off vehicle and power source before attempting to attach or detach or service unit Be sure
vehicle/power source is properly braked or chocked.
Remember, most accidents are preventable and caused by human error. Exercising of care and precautions
must be observed to prevent the possibility of injury to operator or others!
Never operate equipment when under the inuence of alcohol, drugs, or medications that might alter your
judgment and/or reaction time.
Before working with the equipment, secure all loose tting clothing and unrestrained hair.
Always wear safety glasses with side shields when servicing equipment. Failure to do this could result in
serious injury to the eyes.
Never allow children to operate or climb on equipment.
Always check areas to be spread to be sure no hazardous conditions or substances are in the area.
Always inspect unit for defects: broken, worn or bent parts, weakened areas on spreader.
Remember it is the owner’s responsibility to communicate information on safe usage and proper
maintenance of all equipment.
Always make sure personnel are clear of areas of danger when using equipment.
Never weld or grind on equipment without having a re extinguisher available.
Inspect the unit periodically for defects. Parts that are broken, missing or worn out must be replaced
immediately. The unit or any part of it can not be altered without prior written permission from the
manufacturer.
Always inspect pins and latches whenever attaching or detaching spreader, and before operation of spreader.
Never exceed 45 m.p.h. when loaded spreader/sprayer is attached to vehicle. Braking distances may be
increased and handling characteristics may be impaired at speeds above 45 m.p.h.
Never use materials with foreign debris with any sprayer These units are designed to handle clean, free
owing material.
Never leave material in hopper for long periods of time.


© TrynEx International 2013 (REV C) F507666
Installation Instructions
Connecting to the Spreader’s Control Module
It is recommended that this kit be installed by your SnowEx Dealer.
STEP 5
Remove the Cover of the Power Box.
STEP 1
Unplug the Spreader from all of the plugs on the Bumper.
STEP 2
Remove Spinner Drive Latch Pin.
STEP 3
Put Spinner Drive into ‘Down’ position.
STEP 4
Remove the Auger Extension Cover.
STEP 6
Push out the lower Plug in the rearward-side of the Control Box.

7© TrynEx International 2013 (REV C) F50766
Installation Instructions
Connecting to the Spreader’s Control Module
Note: it is optional to remove the
Spinner Harness for the installation. It
only makes it easier to tighten the PWX
Harness Cord Restraint.
STEP 7
Cut the Zip Tie holding the Orange and Green Wires.
STEP 8
Remove the Cord that connects to the Spinner Drive:
Detach the wires to the Spinner Power Cord from the studs on the Control Board.
Remove the Harness.
STEP 9
Insert PWX Harness [F50679] through the hole from which the plug was removed. Install Restraint Nut [D6781]on inside. Tighten Restraint Nut. Do
not tighten the Cord Restraint yet.
Cord Restraint
Restraint Nut

© TrynEx International 2013 (REV C) F507668
Installation Instructions
Connecting to the Spreader’s Control Module
Orange Wire
from Control Board
Red Wire
from F50679
Pump Harness
F50681
Prewet Battery Wire
Green Wire
from Control Board
STEP 10
Remove the Nut and Serrated Washer from the “GND -” Terminal. Place the Black Wire of the PWX Harness onto the “GND -” Terminal. Reinstall
the Nut and Washer. Tighten.
STEP 11
Reinstall the Spinner Harness. The White Wire belongs on the “Spinner +” Terminal; the Black Wire belongs on the “Spinner -” Terminal. Place Nut
and Washer on Stud. Tighten both nuts and the Cord Restraint.
7/16” Nutdriver... 15/16” Wrench... Adjustable Wrench...
STEP 12
Install the round Terminal End of the Relay Wire [F50681] onto the “BAT +” stud. Replace Nut and Washer. Tighten.
STEP 13
Wire the Relay [D6083] as shown. Use Dielectric Grease.

9© TrynEx International 2013 (REV C) F50766
Installation Instructions
Connecting to the Spreader’s Control Module
Put Power Box Cover back on. Leave Auger Extension Cover off.
STEP 14
Coil the Wires to the Relay back around and tie to the one of the large wires with Zip Tie [F50202].
THE ELECTRICAL INSTALLATION IS COMPLETE.
Diagram of Finished Installation.

© TrynEx International 2013 (REV C) F5076610
Installation Instructions
Installing on the Spreader
STEP 1
Check that Spinner Drive is in “Down” position.
It is recommended that this kit be installed by your SnowEx Dealer.
STEP 2
Remove the Passenger-Side Tank Assembly[F50261 / F50251] from the pallet. The back of the Tank has two raised areas. Push these between
the rails of the Sideframe. The Tank should ‘click’ into place. The tank is in position when centered between the Corner Posts of the Sideframe and
stays ‘clicked’ into the Sideframe. Bolt Mounting Rail in place using the “Tank Mounting Hardware Kit.”
STEP 3
Remove the Driver-Side Tank [F50261] from the pallet. Repeat the procedure of the previous step to install this Tank.
STEP 4
Use parts from the Tank Mounting Kit. Install a Rubber Grommet [D5602] into each of the two holes in the front of the Frame. The holes are on the
side and in line with the ends of the Tanks.

11© TrynEx International 2013 (REV C) F50766
Installation Instructions
Installing on the Spreader
STEP 5
Slide the 3/4” ID Hose [D6990] through the Grommet on the driver’s side of the vehicle (use warm soapy water to make it easy). Slide onto the
Hose Barb on the end of the driver’s side tank (at the bottom). Put a Large Plastic Clamp [F50577] over the hose and hose barb. Tighten. Repeat
for Passenger Side tank.
STEP 6
Secure the Hose to the Lower Frame Rail using the four metal Clamps [D7220] and the Driller Bolts [D6447]. Space the Clamps evenly.
STEP 7
Install the remaining Hose Grommet [D5602] into the hole in the frame by the Passenger-Side Tank. Slide the Hose [D6989] through the Grommet
and onto the Hose Barb already installed on the Tank. Tighten with a 1/2” Plastic Hose Clamp [F50146] from the Tank Connection Hardware Kit.

© TrynEx International 2013 (REV C) F5076612
Installation Instructions
Installing on the Spreader
STEP 8
Push hose through the hole (oval-shaped) in the Rear Auger Extension [where the pump will be mounted]. Install the Filter [D5267] onto the end of
this Hose. The Hose ts onto the Hose Barb coming off the end on the Filter. Clamp with the remaining 1/2” Plastic Hose Clamp [F50146].
STEP 9
Mount Pump [D5265] to the Rear Auger Extension. Use the Pump Mounting Hardware Kit. The Pump should be mounted so the head of the Pump
faces rearward. The Washers [D5292] and the Bolts [D5948] should be on the “Pump-Side” and the Nut [D5948] should be on the other side of the
metal. Tighten until the Rubber Pump Feet are slightly squished.
STEP 10
Connect the Filter to the Inlet of the Pump. This should be on the upward side. Secure the connection by pushing the Tab on the Pump until it clicks
into position.

13© TrynEx International 2013 (REV C) F50766
Installation Instructions
Installing on the Spreader
STEP 11
Plug the pump into the Pre-Wet Harness (installed in “Electrical Installation”). Use Dielectric Grease on the connection. Route the Harness over the
Auger Tube.
STEP 12
Mark a line 1-5/8” from the edge of the Trough Cover. Make a mark 1-1/2” from the edge along this line, one on each side. Drill an 11/16” hole at
both of the locations.

© TrynEx International 2013 (REV C) F5076614
Installation Instructions
Installing on the Spreader
STEP 13
Put Nozzles in the holes. Thread nut on and tighten. Align the barb parallel with the angle of the Trough Cover.
STEP 14
Slide the Hose Assembly onto the Barbs just installed. The 9” Hose should go to the Barb closer to the Hopper. Use the Small Plastic Hose Clamps
[F50145] to tighten.
STEP 15
Connect the Hose Assembly to the Pump on the outlet side. Clamp with clip on the pump.

15© TrynEx International 2013 (REV C) F50766
Installation Instructions
Installing on the Spreader
STEP 16
Re-Install the Auger Extension Cover and the Spinner Drive Latch Pin.
THE INSTALLATION IS COMPLETE.
Operating the PWX
Enabling the Pre-Wet Function
Maintenance
Fill the Tanks with the pre-wet solution of your preference.
Turn Control Pendant on.
Push the “Pre-Wet Enable” button; the button will light when pre-wet is enabled.
Begin spreading by pushing the “Start” button. The Pump will turn on with the with the Auger and Spinner. The ow rate will adjust automatically.
The pre-wet solution and the spreading material will mix in the Auger Discharge Tube.
To stop Pre-Wetting the spreading material push the “Pre-Wet Enable” button; the light will turn off. Otherwise the PWX is integrated with the
spreader controls and the pump will stop operating when you push “Start-Stop.”
To adjust the ow rate of the PWX system, adjust the valve in the hose.
Paint or Oil scratches in the paint/metal.
Do not clean tanks with petroleum products. This will damage the tanks.
Periodically apply Dielectric Grease to electrical connections to prevent corrosion.
Empty Tanks and Spreader’s Hopper after each use to prevent freezing.
To drain tanks; remove the cap from the driver’s side tank.
Store system indoors or run RV Antifreeze through pump and store with RV Antifreeze in Pump.

© TrynEx International 2013 (REV C) F5076616
F50681 PWX Relay Wire
F50679 PWX Pump Harness
8.00
Harness Diagram

17© TrynEx International 2013 (REV C) F50766
Troubleshooting
Model # PWX-200 / PWX-250
Warning: First read all warning instructions and safety messages before servicing the Sprayer.
Preliminary checks
• Be sure all electrical connections are tight and clean.
• Be sure nothing is obstructing the nozzles.
PROBLEM POSSIBLE CAUSE SOLUTION
Pump doesn’t run. Loose electrical connections.
Blown fuse.
Pump seized.
Check all connections.
Replace fuse.
Replace pump.
Controller shut down. Poor electrical connections.
Electrical short.
Controller failure.
Clean or replace connectors.
Use dielectric grease.
Check electrical connections.
Check for bare wires.
Replace controller.
Liquid not spraying. Empty tank.
Full Strainer.
Pump not running.
Obstructed nozzle.
Fill tank.
Clean or replace lter element.
Refer to Problem 1.
Remove and clean.

© TrynEx International 2013 (REV C) F5076618
Warranty
Limited Warranty
SnowEx products are warranted for a period of two years from the date of purchase against
defects in material or workmanship under normal use and service, subject to limitations detailed
below. Warranty period of two years begins on the date of purchase by the original retail user.
The WARRANTY REGISTRATION must be submitted to the SnowEx for this warranty
to become effective. This warranty applies to the original retail purchaser only. This warranty does
not cover damages caused by improper installation, misuse, lack of proper maintenance, alterations
or repairs made by anyone other than authorized SnowEx dealers or SnowEx personnel. Due to the
corrosive properties of the materials dispensed by spreaders, Trynex does not warrant against
damage caused by corrosion. Warranty claims by the user must be made to the dealer from where
the product was purchased, unless otherwise authorized by SnowEx. SnowEx reserves the right to
determine if any part is defective and to repair or replace such parts as it elects. This warranty does
not cover shipping costs of defective parts to or from the dealer.
LIMITATION OF LIABILITY
Neither SnowEx, nor any company affiliated with it, makes any warranties, representations for
promise as to the performance or quality other than what is herein contained. The liability of SnowEx
to the purchaser for damages arising out of the manufacture, sale, delivery, use or resale of this
spreader shall be limited to and shall not exceed the costs of repair or replacement of defective
parts. SnowEx shall not be liable for loss of use, inconvenience or any other incidental, indirect or
consequential damages, so the above limitations on incidental or consequential damages may not
apply to you.
NO DEALER HAS AUTHORITY TO MAKE ANY REPRESENTATION OR PROMISE ON BEHALF OF
SnowEx, OR TO ALTER OR MODIFY THE TERMS OR LIMITATIONS OF THIS
WARRANTY IN ANY WAY.

19© TrynEx International 2013 (REV C) F50766
Key to Parts
D5255 Hose Barb | 3/4” Male Thread X 1/2”
D5265 Pump | 2.0 GPM Diaphragm
D5267 Line Strainer | Quick Attach Black Bowl
D5269 Hose Barb | 5/8” Quick Attach X 3/8” 90°
D5292 Washer | #10 Flat Stainless
D5294 Bolt | #10-32 X 1-1/4” Hex Head MS Stainless
D5357 Garden Hose - 1/2 NPT Adapter
D5535 Nut 1/2”-13 Serrated Flange Zinc
D5602 Hose Grommet
D5948 Nut | #10-32 Nylox Stainless
D6083 Relay | 20 Amp
D6447 5/16” X 1” Driller Zinc
D6528 Bolt | 1/2”-13 X 1” Serr. Flange Hex Zinc
D6781 Nut | 1/2” NPT Black Nylon
D6908 Pipe Plug | 3/4” NPT
D6925 3/4 NPT x 1/2 NPT Reducer
D6928 Hose Barb | 3/4 Male Barb | 3/4 Male Thread
D6951 Nozzle Body | 11/16”-16 UNM X 3/8” HB 90°
D6988-9 Hose | 3/8” X 9” PVC Clear
D6988-8 Hose | 3/8” X 1” X 8” PVC Clear
D6988-12 Hose | 3/8” X 1” X 12” PVC Clear
D6989-42 Hose | 1/2” X 42” PVC Clear
D6989-45 Hose | 1/2” X 45” PVC Clear
D6990-60 Hose | 3/4” X 1” X 60” PVC Clear
D6990-80 Hose | 3/4” X 80” PVC Clear
D7220 Clamp | 1” Rubber Coated
F50145 Hose Clamp | 3/8” Double Tooth Poly
F50146 Hose Clamp | Double Tooth Poly 3/8”
F50148 Hose Barb Tee | 3/8”
F50202 Cable Tie | 6” 30lb
F50251 Tank | 100 Gallon Yellow Saddle
F50261 Tank | 125 Gallon Yellow Saddle
F50447 Tank Mount Bracket
F50487 Vented Lid
F50577 Hose Clamp | 3/4” Double Tooth Poly
F50672 Valve | 3/8” Hose Barb X 3/8” Hose Barb
F50679 Prewet Harness
F50681 Relay Jumper
F50766 Manual
F50845 Bolt | 3/8”-16 x 1/2” Serr. Flange Hex
T20131 Garden Hose Cap | 3/4” Plastic
T20136 Washer | Garden Hose

© TrynEx International 2013 (REV C) F5076620
Tank Assembly Parts Breakdown
Model # PWX-200
18
19
1
8
20
12
3
9
15
13
13
6
14
6
16
3
10
15
14
11
4
3
16
2
17
5
7
17
This manual suits for next models
1
Table of contents
Other Trynex Spreader manuals

Trynex
Trynex SnowEx V-MAXX SP-2400 H Owner's manual

Trynex
Trynex SnowEx RTG-2400 User manual

Trynex
Trynex SnowEx SP-9500 Owner's manual

Trynex
Trynex SnowEx SP-1575 User manual

Trynex
Trynex SnowEx SP-7550 Owner's manual

Trynex
Trynex SnowEx SP-65 Owner's manual

Trynex
Trynex SnowEx SP-8550 Owner's manual

Trynex
Trynex SnowEx Vee Pro 3000 Owner's manual

Trynex
Trynex SnowEx SD-600 User manual

Trynex
Trynex TurfEx TS85SS Owner's manual